RocketMQwiki It is a distributed message and stream data platform with low latency, high performance, high reliability, trillions of capacity and flexible scalability. RocketMQ is the third generation distributed messaging middleware that Alibaba opened source in 2012. On November 21, 2016, Alibaba donated RocketMQ to Apache Software Foundation; On February 20 the next year, the Apache Software Foundation announced that Apache RocketMQ became a top-level project.
The reason for the emergence of RocketMQ is that the old ActiveMQ can not meet the business requirements, so a message middleware that can meet the business requirements is developed. RocketMQ has many advantages, such as high performance and high reliability, but for some reasons, RocketMQ may not be as friendly to developers as other MQS
install
First, download the corresponding source code file or binary file on the official website: https://dlcdn.apache.org/rocketmq/ , it is recommended to download the binary file directly. If there is a special need, you can also download the corresponding source file and use it Maven can build it.
According to my personal usage, downloading the source file may not be a wise choice. Although the official document provides that only JDK 1.8 or above can be used, I found that RocketMQ heavily depends on the unique API of JDK 1.8 during the construction process. Therefore, I personally suggest downloading the built jar directly
After downloading or building, you should see the following folders:
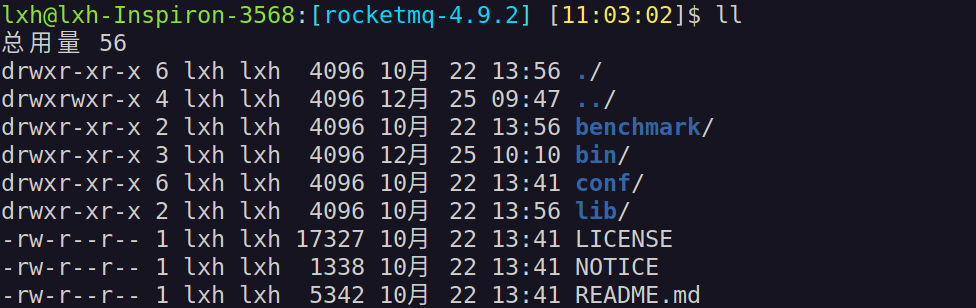
The benchmark folder includes performance test scripts for RocketMQ; The bin directory contains some scripts for starting RocketMQ and configuring it; conf directory contains all configuration files; The lib directory contains all the built jar files
Start NameServer
If no configuration file is specified, the default is the local port 9876. If you need to customize the relevant attributes, you can create a namesrv in the conf directory Properties file to define the required contents:
# Change the listening port of namesrv to 8848
listenPort=8848
Then run the script to start NamerServer, as follows:
# The current working directory is located in the basic working directory of RocketMQ, and the - c option means to load the corresponding configuration file
./bin/mqnamesrv -c conf/namesrv.properties
There may be a problem starting NameServer at this time. This may be because the JDK version is too high. However, since RocketMQ is started by default through a unique method of JDK 1.8, problems like the following may occur:

This is because since JDK 9, - DJava The ext.dirs option has been deprecated, so this problem occurs
Solution:
Manually edit bin / runserver SH file, put - DJava The start option of ext.dirs is removed, but this will lead to a new problem. Because the class loading level of ext is higher than that of the general application level and the class loader level is higher, there is no way to load it into the actual running main class. At this time, add the corresponding jar to the class at JVM startup to solve this problem.
Final bin / runserver SH modified as follows:
# Omit some less important content

[ ! -e "$JAVA_HOME/bin/java" ] && JAVA_HOME=$HOME/jdk/java
[ ! -e "$JAVA_HOME/bin/java" ] && JAVA_HOME=/usr/java
[ ! -e "$JAVA_HOME/bin/java" ] && error_exit "Please set the JAVA_HOME variable in your environment, We need java(x64)!"

export JAVA_HOME
export JAVA="$JAVA_HOME/bin/java"
export BASE_DIR=$(dirname $0)/..

# This is to put all the jar s required under the lib / directory in RocketMQ into the JVM at one time, so that the corresponding startup main class can be found successfully
export CLASSPATH=.:${BASE_DIR}/lib/*:${BASE_DIR}/conf:${CLASSPATH}

# The middle section does not need to be modified

choose_gc_log_directory
choose_gc_options
JAVA_OPT="${JAVA_OPT} -XX:-OmitStackTraceInFastThrow"
JAVA_OPT="${JAVA_OPT} -XX:-UseLargePages"

# -Djava. The ext.dirs option needs to be abolished and commented out here
#JAVA_OPT="${JAVA_OPT} -Djava.ext.dirs=${JAVA_HOME}/jre/lib/ext:${BASE_DIR}/lib:${JAVA_HOME}/lib/ext"
#JAVA_OPT="${JAVA_OPT} -Xdebug -Xrunjdwp:transport=dt_socket,address=9555,server=y,suspend=n"
JAVA_OPT="${JAVA_OPT} ${JAVA_OPT_EXT}"
JAVA_OPT="${JAVA_OPT} -cp ${CLASSPATH}" # Add -- classpath

# This is where the JVM really starts
$JAVA ${JAVA_OPT} $@
Now, execute the startup option again to successfully run the RocketMQ NameServer. When starting, it looks like the following:

Create Broker
First, create your own Broker configuration file, as shown below:
# Listening port corresponding to Broker
listenPort=12345
# The node name of the Broker
brokerClusterName = DefaultCluster
# Broker's name
brokerName = broker-a
# The id of the Broker. 0 indicates the master node, and non-0 indicates the slave node
brokerId = 0
# It is not a particularly important attribute. It indicates when to delete. Here 04 means 4 a.m
deleteWhen = 04
# The retention time of the file is defined here as 48 hours
fileReservedTime = 48
# Broker type, SYNC_MASTER refers to the synchronization master node, ASYNC_MASTER represents asynchronous master node and SLAVE represents SLAVE node
brokerRole = SYNC_MASTER
# There are only two disk brushing strategies: SYNC_FLUSH synchronous brush disc and ASYNC_FLUSH asynchronous disk brushing (possible data loss)
flushDiskType = SYNC_FLUSH
Then start the Broker and execute the corresponding script in the installation directory of RocketMQ, as shown below:
# -c means to load the corresponding configuration file, - n means the NameServer address of the broker connection. The port has been changed to 8848 before
./bin/mqbroker -n 127.0.0.1:8848 -c conf/master-broker.properties
If you use a high version of JDK, then the content will still be in trouble if you don't have an accident. (Tucao: the script content is still to be improved). Make complaints about the following steps in./bin/runserver.sh:
- First, put - DJava The ext.dir option is removed
- Then remove some GC options that have been abolished. Such as: + XX:PrintAdaptiveSizePolicy, - XX:+PrintGCDateStamps, etc
- Modify log printing options for GC
- Modify loaded CLASSPATH
On my computer, the installed JDK version is openJDK-11.02, which is finally modified/ bin/runserver. The contents of SH are as follows:
# Omit some less important content

export JAVA_HOME
export JAVA="$JAVA_HOME/bin/java"
export BASE_DIR=$(dirname $0)/..
# Modify CLASSPTH so that the corresponding main class can be loaded
export CLASSPATH=.:${BASE_DIR}/lib/*:${BASE_DIR}/conf:${CLASSPATH}

# Omit a less important paragraph...

# By default, the maximum heap size will be set to 8 GB. If you are on your own computer, it is recommended to set these two values lower, otherwise the machine may crash
JAVA_OPT="${JAVA_OPT} -server -Xms2g -Xmx2g"
# For a bunch of GC related attribute configurations, G1 collector (if available) is a good choice
JAVA_OPT="${JAVA_OPT} -XX:+UseG1GC -XX:G1HeapRegionSize=16m -XX:G1ReservePercent=25 -XX:InitiatingHeapOccupancyPercent=30 -XX:SoftRefLRUPolicyMSPerMB=0"

# This part needs to be modified. Change - Xloggc: to - Xlog:gc: (this is the case on JDK 11), and then delete some obsolete options, as shown below
# JAVA_OPT="${JAVA_OPT} -verbose:gc -Xloggc:${GC_LOG_DIR}/rmq_broker_gc_%p_%t.log -XX:+PrintGCDetails -XX:+PrintGCDateStamps -XX:+PrintGCApplicationStoppedTime -XX:+PrintAdaptiveSizePolicy"
JAVA_OPT="${JAVA_OPT} -verbose:gc -Xlog:gc:${GC_LOG_DIR}/rmq_broker_gc_%p_%t.log"

# The entire startup option in this line has been discarded
# JAVA_OPT="${JAVA_OPT} -XX:+UseGCLogFileRotation -XX:NumberOfGCLogFiles=5 -XX:GCLogFileSize=30m"

#JAVA_OPT="${JAVA_OPT} -XX:GCLogFileSize=30m"
JAVA_OPT="${JAVA_OPT} -XX:-OmitStackTraceInFastThrow"
JAVA_OPT="${JAVA_OPT} -XX:+AlwaysPreTouch"
JAVA_OPT="${JAVA_OPT} -XX:MaxDirectMemorySize=15g"
JAVA_OPT="${JAVA_OPT} -XX:-UseLargePages -XX:-UseBiasedLocking"

# Note that - DJava The ext.dirs startup option is removed
#JAVA_OPT="${JAVA_OPT} -Djava.ext.dirs=${JAVA_HOME}/jre/lib/ext:${BASE_DIR}/lib:${JAVA_HOME}/lib/ext"
#JAVA_OPT="${JAVA_OPT} -Xdebug -Xrunjdwp:transport=dt_socket,address=9555,server=y,suspend=n"
JAVA_OPT="${JAVA_OPT} ${JAVA_OPT_EXT}"
JAVA_OPT="${JAVA_OPT} -cp ${CLASSPATH}"

# Omit some less important content
Now, start the customized Broker again, and the result of successful startup will be similar to the following figure:

Producer sends message
Before sending and receiving messages, you need to add client dependencies corresponding to RocketMQ:
<dependency>
    <groupId>org.apache.rocketmq</groupId>
    <artifactId>rocketmq-client</artifactId>
    <version>4.9.2</version> <!-- Corresponding to specific RocketMQ Version of -->
</dependency>
-
Send messages in synchronous blocking mode
mport org.apache.rocketmq.client.producer.DefaultMQProducer; import org.apache.rocketmq.client.producer.SendResult; import org.apache.rocketmq.common.message.Message; import java.nio.charset.StandardCharsets; import java.util.Scanner; public class SyncProducer { public static void main(String[] args) throws Throwable { // The production group is lxh_producer DefaultMQProducer producer = new DefaultMQProducer("lxh_producer"); // Set NameServer producer.setNamesrvAddr("127.0.0.1:9876"); producer.start(); Scanner sc = new Scanner(System.in); String line; // Read the client input line before sending while ((line = sc.nextLine()).length() > 0) { // Aggregated messages Message msg = new Message( "TopicTest", // The destination Topic to which the message is sent. The consumer can receive the message according to this Topic "TagA", // The Tag of the message, which can be filtered by the client line.getBytes(StandardCharsets.UTF_8) // Encode content into a byte stream ); // Messages are sent synchronously. Subsequent actions can be performed only after the message is sent SendResult result = producer.send(msg); System.out.println(result); } producer.shutdown(); } } -
Send messages asynchronously
package org.xhliu.rocketmqexample.producer; import org.apache.rocketmq.client.producer.DefaultMQProducer; import org.apache.rocketmq.client.producer.SendCallback; import org.apache.rocketmq.client.producer.SendResult; import org.apache.rocketmq.common.message.Message; import org.slf4j.Logger; import org.slf4j.LoggerFactory; import java.nio.charset.StandardCharsets; import java.util.Scanner; public class AsyncProducer { static final Logger log = LoggerFactory.getLogger(AsyncProducer.class); public static void main(String[] args) throws Throwable { DefaultMQProducer producer = new DefaultMQProducer("lxh_producer"); producer.setNamesrvAddr("127.0.0.1:8848"); producer.start(); Scanner sc = new Scanner(System.in); String line; while ((line = sc.nextLine()).length() > 0) { Message msg = new Message( "TopicTest", "TagA", line.getBytes(StandardCharsets.UTF_8) ); // Send messages asynchronously and process the returned results by registering callback functions producer.send(msg, new SendCallback() { @Override public void onSuccess(SendResult sendResult) { log.info("send result: " + sendResult.toString()); } @Override public void onException(Throwable throwable) { log.error(throwable.getMessage()); throwable.printStackTrace(); } }); } producer.shutdown(); } } -
One way send message
import org.apache.rocketmq.client.producer.DefaultMQProducer;
import org.apache.rocketmq.common.message.Message;
import org.slf4j.Logger;
import org.slf4j.LoggerFactory;

import java.nio.charset.StandardCharsets;

public class OneWayProducer {
    private final static Logger log = LoggerFactory.getLogger(OneWayProducer.class);

    public static void main(String[] args)  throws Throwable{
        DefaultMQProducer producer = new DefaultMQProducer("lxh_producer");
        producer.setNamesrvAddr("127.0.0.1:8848");
        producer.start();

        for (int i = 0; i < 10; i++) {
            // Create a message and specify Topic, Tag and message body
            Message msg = new Message(
                "TopicTest" /* Topic */,
                "TagA" /* Tag */,
                ("Hello RocketMQ " + i).getBytes(StandardCharsets.UTF_8) /* Message body */
            );
            // Send a one-way message without returning any results
            producer.sendOneway(msg);

        }
        producer.shutdown();
    }
}
Consumer News
Message consumption can only be blocked. The specific example code is as follows:
import org.apache.rocketmq.client.consumer.DefaultMQPushConsumer;
import org.apache.rocketmq.client.consumer.listener.ConsumeConcurrentlyContext;
import org.apache.rocketmq.client.consumer.listener.ConsumeConcurrentlyStatus;
import org.apache.rocketmq.client.consumer.listener.MessageListenerConcurrently;
import org.apache.rocketmq.common.message.MessageExt;

import java.nio.charset.StandardCharsets;
import java.util.List;

public class SyncConsumer {
    public static void main(String[] args) throws Throwable {
        DefaultMQPushConsumer consumer = new DefaultMQPushConsumer("lxh_consumer");
        consumer.setNamesrvAddr("127.0.0.1:8848");
        consumer.subscribe(
            "TopicTest",
            "*"
        );

        consumer.registerMessageListener(new MessageListenerConcurrently() {
            @Override
            public ConsumeConcurrentlyStatus consumeMessage(
                List<MessageExt> list,
                ConsumeConcurrentlyContext context
            ) {
                for (MessageExt ext : list) {
                    System.out.println("Get Body: " + new String(ext.getBody(), StandardCharsets.UTF_8));
                }
                System.out.printf("%s Receive New Messages: %s %n", Thread.currentThread().getName(), list);
                return ConsumeConcurrentlyStatus.CONSUME_SUCCESS;
            }
        });

        consumer.start();
        System.out.println("Consumer Start.....");
    }
}
reference resources:
[1] https://github.com/apache/rocketmq/blob/master/docs/cn/RocketMQ_Example.md