Portal: basic use of Scss (variable, nested)
Portal: Sass Chinese network
Portal: Sass tutorial | rookie tutorial
1. Inheritance (@ extend)
@The extend instruction tells Sass that the style of one selector is inherited from another selector.
Using @ extend is useful if one style is almost the same as another with only a few differences.
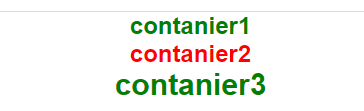
<style lang="scss">
.contanier1{
  font-size: 24px;
  font-weight: bold;
  color: green;
}
.contanier2{
  @extend .contanier1;
  color: red;
}
.contanier3{
  @extend .contanier1;
  font-size: 30px;
}
</style>
Convert the above code into CSS code as follows:
<style lang="scss">
.contanier1, .contanier2, .contanier3{
  font-size: 24px;
  font-weight: bold;
  color: green;
}
.contanier2{
  color: red;
}
.contanier3{
  font-size: 30px;
}
</style>
After using @ extend, you don't need to specify multiple classes class = "container1" and class = "container2" in the HTML tag. You just need to set the class = "container2" class.
Placeholder% placeholder
It can replace the code redundancy caused by the base class in CSS.
Because the code declared by% placeholder will not generate any code if it is not called by @ extend.
Here's a demo:
%fz20{
  font-size: 20px;
}
%red{
  color: red;
}
This code is not called by @ extend. It does not generate any code blocks, but lies quietly in one of your SCSS files.
Code can only be generated through @ extend call:
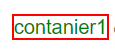
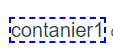
<div class="wrap">
  <div class="contanier1">
    <span class="content">contanier1</span>
  </div>
</div>

<style lang="scss">
%fz20{
  font-size: 20px;
}
%red{
  color: red;
}
.wrap{
  @extend %fz20;
  @extend %red;
}
.contanier1{
  @extend %fz20;
  .content{
    @extend %red;
  }
}
</style>
Compiled CSS
.wrap, .contanier1{
  font-size: 20px;
}
.wrap, .contanier1 .content{
  color: red;
}
It can be seen from the compiled CSS code that the compiled code will merge the same code through the placeholder called @ extend. This is also the effect we want to see and make your code cleaner.
2. Mix in (@ mixin)
Mixin is defined by the @ mixin instruction.
Syntax: @ mixin name {property: value; property: value;...}
Define the blending of "basis text"
@mixin basis-text{
  font-size: 24px;
  font-weight: bold;
  color: green;
}
Note: the connecting symbol of Scss - and the underscore symbol_ It is the same, that is, @ mixin basis text {} and @ mixin basis text {} are mixed in the same way.
Use the @ include command to call this mixin
Syntax: selector {@ include mixin name;}
Mixing of calling "basis text"
<style lang="scss">
@mixin basis-text{
  font-size: 24px;
  font-weight: bold;
  color: green;
}
.contanier1{
  @include basis-text;
}
</style>

The above code is converted into CSS code as follows:
.contanier1{
  font-size: 24px;
  font-weight: bold;
  color: green;
}
Mixing can also be included in mixing, as shown below:
@mixin contanier1 {
  @include basis-text;
  @include link;
  @include special-border;
}
Pass variables to blend
Define the mixing of acceptable parameters:
<style lang="scss">
@mixin basis-text($width,$color){
  font-size: 20px;
  color: green;
  border: $width solid $color;
}

.contanier1{
  @include basis-text(2px,red);
}
.contanier2{
  @include basis-text(5px,blue);
}
</style>

The blending parameter of the above example is to set the properties (color and width) of the border.
Convert the above code into CSS code as follows:
.contanier1{
  font-size: 20px;
  color: green;
  border: 2px solid red;
}

.contanier2{
  font-size: 20px;
  color: green;
  border: 5px solid blue;
}
The mixed parameters can also define default values. The syntax format is as follows:
<style lang="scss">
@mixin basis-text($width:2px,$color:red){
  font-size: 20px;
  color: green;
  border: $width solid $color;
}
.contanier1{
  @include basis-text;
}
</style>
When mixing is included, you only need to pass the required variable name and its value:
<style lang="scss">
@mixin basis-text($width,$color){
  font-size: 20px;
  border: {
    color: $color;
    width: $width;
    style: dashed;
  }
}
.contanier1{
  @include basis-text(2px,blue);
}
</style>
Convert the above code into CSS code as follows:
.contanier1{
  font-size: 20px;
  border-color: blue;
  border-width: 2px;
  border-style:dashed;
}
Variable parameter
Sometimes, when you can't determine how many parameters a mixin or a function uses, you can use... To set variable parameters.
For example, creating a mix of box shadows can take any number of box shadows as parameters.
@mixin box-shadow($shadows...) {
   -moz-box-shadow: $shadows;
   -webkit-box-shadow: $shadows;
   box-shadow: $shadows;
}

.shadows {
  @include box-shadow(0px 4px 5px #666, 2px 6px 10px #999);
}
Browser prefix usage mix in
<style lang="scss">
@mixin transform($property) {
  -webkit-transform: $property;
  -ms-transform: $property;
  transform: $property;
}
.contanier1{
  @include transform(rotate(20deg));
}
</style>

The above code is converted into CSS code as follows:
.contanier1 {
  -webkit-transform: rotate(20deg);
  -ms-transform: rotate(20deg);
  transform: rotate(20deg);
}
3. Import file (@ import)
Similar to CSS, Scss supports the @ import instruction@ The import instruction allows us to import other files and other contents.
The CSS @import instruction creates an additional HTTP request each time it is called. However, the Sass @import instruction includes the file in CSS without additional HTTP requests.
The syntax of Scss @import instruction is as follows:
@import filename;
Note: there is no need to specify a file suffix when including files. scss will automatically add a suffix scss. In addition, you can import CSS files.
After import, you can use variables such as import file in the main file.
For the following example, import variables scss,colors.scss and reset SCSS file.
@import "variables";
@import "colors";
@import "reset";
Create a reset SCSS file:
html,
body,
ul,
ol {
  margin: 0;
  padding: 0;
}
Then at standard Use the @ Import command in the SCSS file to import reset SCSS file:
@import "reset";
body {
  font-family: Helvetica, sans-serif;
  font-size: 18px;
  color: red;
}
The above code is converted into CSS code as follows:
html, body, ul, ol {
  margin: 0;
  padding: 0;
}
body {
  font-family: Helvetica, sans-serif;
  font-size: 18px;
  color: red;
}
Scss Partials
If you do not want to compile a Scss code file into a CSS file, you can add an underscore at the beginning of the file name.
This will tell Scss not to compile it into CSS files. However, you do not need to add an underscore in the import statement.
Scss Partials syntax format:
_filename;
Create one below_ colors.scss file, but it will not be compiled into_ colors.css file:
$myPink: #EE82EE;
$myBlue: #4169E1;
$myGreen: #8FBC8F;
If you are importing this file, you do not need to use underscores:
@import "colors";
body {
  font-family: Helvetica, sans-serif;
  font-size: 18px;
  color: $myBlue;
}
Note: do not place underlined and non underlined files with the same name in the same directory. For example:_ colors.scss and colors SCSS cannot exist in the same directory at the same time, otherwise underlined files will be ignored.
4. Control command
4.1 conditional statement (@ if)
When the return value of the @ if expression is not false or null, the condition holds and the code in {} is output:
p {
  @if 1 + 1 == 2 { border: 1px solid; }
  @if 5 < 3 { border: 2px dotted; }
  @if null  { border: 3px double; }
}
Compile as
p {
  border: 1px solid;
}
@An if declaration can be followed by multiple @ else if declarations or one @ else declaration.
If the @ if declaration fails, Sass will execute the @ else if declaration one by one. If all fail, Sass will finally execute the @ else declaration. For example:
@mixin txt($weight) {
  color: white;
  @if $weight == bold {
    font-weight: bold;
  }
  @else if $weight == light {
    font-weight: 100;
  }
  @else {
    font-weight: normal;
  }
}

.txt1 {
  @include txt(bold);
}
Compile as
.txt1 {
  color: white;
  font-weight: bold;
}
4.2 circular statements
@for
@for The instruction can repeat the output format within the limited range and change the output result as required (the value of the variable) each time.
There are two formats:@for $var from <start> through <end>,or @for $var from <start> to <end>;
difference: through And to Meaning of use: when through When, the condition range includes <start> And <end> The value of,
And use to The condition range only contains <start> The value of does not contain <end> Value of.
In addition, $var Can be any variable, such as $i;<start> and <end> Must be an integer value.
@for $i from 1 through 3 {
  .item-#{$i} { width: 2em * $i; }
}
Compile as
.item-1 {
  width: 2em;
}
.item-2 {
  width: 4em;
}
.item-3 {
  width: 6em;
}
@while
@while Instruction repeats the output format until the expression returns false. In this way, the ratio can be achieved @for More complex loops, but rarely used.
$i: 6;
@while $i > 0 {
  .item-#{$i} { width: 2em * $i; }
  $i: $i - 2;
}
Compile as
.item-6 {
  width: 12em;
}
.item-4 {
  width: 8em;
}
.item-2 {
  width: 4em;
}
@each
@each The format of the instruction is $var in <list>, $var Can be any variable name. as $length or $name,and <list> Is a series of values, that is, a list of values.
@each Will variable $var Act on each item in the value list, and then output the result.
@each $animal in puma, sea-slug, egret, salamander {
  .#{$animal}-icon {
    background-image: url('/images/#{$animal}.png');
  }
}
Compile as
.puma-icon {
  background-image: url('/images/puma.png');
}
.sea-slug-icon {
  background-image: url('/images/sea-slug.png');
}
.egret-icon {
  background-image: url('/images/egret.png');
}
.salamander-icon {
  background-image: url('/images/salamander.png');
}