Summary
Spring MVC not only provides Xml configuration, but also provides annotations to declare a Controller. This article is an entry-level content of Spring MVC. It is only for learning and sharing. If there are any shortcomings, please correct it.
Advantages of Spring MVC Annotation
- XML is sometimes lengthy to configure, and annotations may be a better choice.
- The greatest advantage of annotations is that they simplify the XML configuration; in fact, most annotations are seldom changed after they are determined, and the use of annotations in some small and medium-sized projects provides development efficiency instead.
- Another advantage of annotations over XML is type-safe, and XML can only detect problems at runtime.
- With annotations, a class can have multiple actions.
Spring MVC supports annotation steps
1. Configure dispatcher-servlet.xml file
As shown below, we mainly configure the scanning of annotations and support MVC annotations.
 1 <?xml version="1.0" encoding="UTF-8"?>
 2 <beans xmlns="http://www.springframework.org/schema/beans"
 3 xmlns:xsi="http://www.w3.org/2001/XMLSchema-instance"
 4 xmlns:context="http://www.springframework.org/schema/context"
 5 xmlns:mvc="http://www.springframework.org/schema/mvc"
 6 xsi:schemaLocation="http://www.springframework.org/schema/beans
 7  http://www.springframework.org/schema/beans/spring-beans.xsd
 8  http://www.springframework.org/schema/context
 9  http://www.springframework.org/schema/context/spring-context.xsd
10  http://www.springframework.org/schema/mvc
11  http://www.springframework.org/schema/mvc/spring-mvc.xsd">
12       <!-- Scanning of configuration annotations -->
13      <context:component-scan base-package="com.hex.second"></context:component-scan>
14      <!-- Support MVC Annotations -->
15      <mvc:annotation-driven ></mvc:annotation-driven>
16      <!-- Support for static resources -->
17      <mvc:default-servlet-handler/>
18 </beans>
2. Create a new class addition method and add annotations to the method
As shown below, a class is represented by @Controller, and an access request processing method is identified by @RequestMapping("/Hello").
 1 @Controller
 2 //@RequestMapping("/HC")
 3 public class HelloController {
 4
 5     /**
 6      * Declare Controller by annotation, without parameters
 7      * @return
 8      */
 9     @RequestMapping("/Hello")
10     public ModelAndView HelloMvc(){
11         ModelAndView mav=new ModelAndView();
12         mav.addObject("msg", "HelloWorld,HelloSpringMVC!!!");
13         mav.setViewName("WEB-INF/jsps/HelloWorld.jsp");
14         return mav;
15     }
16 }
3. Add a Jsp page to receive and display content
Here's how to receive parameters passed in the background through ${msg}
 1 <%@ page language="java" contentType="text/html; charset=UTF-8"
 2     pageEncoding="UTF-8"%>
 3 <!DOCTYPE html PUBLIC "-//W3C//DTD HTML 4.01 Transitional//EN" "http://www.w3.org/TR/html4/loose.dtd">
 4 <html>
 5 <head>
 6 <meta http-equiv="Content-Type" content="text/html; charset=UTF-8">
 7 <title>First contact SpringMVC</title>
 8 </head>
 9 <body>
10     <h1>Welcome Information</h1>
11     <h1>${msg}</h1>
12 </body>
13 </html>
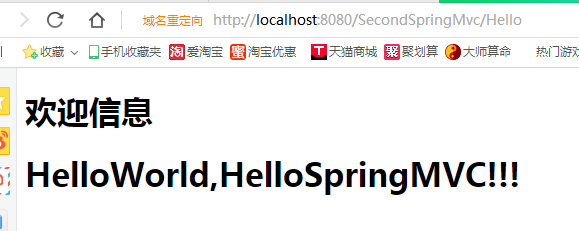
4. Visits
Open the browser and enter the web address to access it, as follows:
How Spring MVC receives data from pages (front-end - > back-end)
1. How to pass the parameters of the method
As follows: Spring MVC can automatically match the data passed by the page with the parameters of the function.
If it's data in date format, it needs to be formatted
 1     /**
 2      * Pass in parameters to get the value passed by the page
 3      * @param name
 4      * @param age
 5      * @param date Date format, when parameters are passed from client to server, date formatting is needed, otherwise errors will be reported.
 6      * The annotation is as follows: @DateTimeFormat(pattern="yyyy-MM-dd")
 7      * @return
 8      */
 9     @RequestMapping("/Hello2")
10     public ModelAndView HelloMvc2(String name,int age,@DateTimeFormat(pattern="yyyy-MM-dd")Date date){
11         System.out.println("name:"+name);
12         System.out.println("age:"+age);
13         System.out.println("date"+date);
14         ModelAndView mav=new ModelAndView();
15         mav.addObject("name", name);
16         mav.addObject("age", age);
17         mav.addObject("date", date);
18         mav.setViewName("WEB-INF/jsps/HelloWorld2.jsp");
19         return mav;
20     }
2. Transfer data by means of objects
As shown below, a User class is defined to receive the data passed by the page. Spring MVC can match automatically.
 1     /**
 2      * By receiving parameters in the way of objects, Spring MVC can automatically match parameters to the attributes of objects.
 3      * Easy to expand
 4      * @param user
 5      * @return
 6      */
 7     @RequestMapping("/Hello3")
 8     public ModelAndView HelloMvc3(User user){
 9         System.out.println("name:"+user.getName());
10         System.out.println("age:"+user.getAge());
11         System.out.println("date"+user.getDate());
12         ModelAndView mav=new ModelAndView();
13         mav.addObject("name", user.getName());
14         mav.addObject("age", user.getAge());
15         mav.addObject("date", user.getDate());
16         mav.setViewName("WEB-INF/jsps/HelloWorld2.jsp");
17         return mav;
18     }
The Jsp page receives the following: get the content in key.property
 1 <%@ page language="java" contentType="text/html; charset=UTF-8"
 2     pageEncoding="UTF-8"%>
 3 <!DOCTYPE html PUBLIC "-//W3C//DTD HTML 4.01 Transitional//EN" "http://www.w3.org/TR/html4/loose.dtd">
 4 <html>
 5 <head>
 6 <meta http-equiv="Content-Type" content="text/html; charset=UTF-8">
 7 <title>Hello world</title>
 8 </head>
 9 <body>
10 <h1>Welcome Information</h1>
11     <h1>ID:${user.id}</h1>
12     <h1>Full name: ${user.name}</h1>
13     <h1>Age: ${user.age}</h1>
14     <h1>Time: ${user.date}</h1>
15 </body>
16 </html>
3. Data transmission by means of built-in objects
 1     /**
 2      * Getting parameters through the built-in object HttpServletRequest
 3      * @param req
 4      * @param resp
 5      * @return
 6      */
 7     @RequestMapping("/Hello4")
 8     public ModelAndView HelloMvc4(HttpServletRequest req,HttpServletResponse resp){
 9         System.out.println("name:"+req.getParameter("name"));
10         System.out.println("age:"+req.getParameter("age"));
11         System.out.println("date"+req.getParameter("date"));
12         //One of the parameters passed to the page
13         ModelAndView mav=new ModelAndView();
14         mav.addObject("name", req.getParameter("name"));
15         mav.addObject("age", req.getParameter("age"));
16         mav.addObject("date", req.getParameter("date"));
17         mav.setViewName("WEB-INF/jsps/HelloWorld2.jsp");
18         return mav;
19     }
How Spring MVC Pages Receive Parameters (Backend - > Front End)
1. Using ModelAndView to Pass Values
As shown below, parameters can be added in the form of key-value pairs
 1 /**
 2      * Pass parameters to the page
 3      * @return
 4      */
 5     @RequestMapping("/Hello5")
 6     public ModelAndView HelloMvc5(){
 7         //One of the parameters passed to the page
 8         ModelAndView mav=new ModelAndView();
 9         mav.addObject("name", "Zhang San");
10         mav.addObject("age", 20);
11         mav.addObject("date",new Date());
12         mav.setViewName("WEB-INF/jsps/HelloWorld2.jsp");
13         return mav;
14     }
2. Passing parameters through Model
As follows: Model as a parameter can directly add new key-value pairs, return a string to represent the path of the page
 1     /**
 2      * Jump from the back to the front and use Model to pass parameters
 3      * @return
 4      */
 5     @RequestMapping("/Hello6")
 6     public String HelloMvc6(Model model){
 7         //One of the parameters passed to the page
 8         model.addAttribute("name", "Zhang San");
 9         model.addAttribute("age", 16);
10         model.addAttribute("date", new Date());
11         return "WEB-INF/jsps/HelloWorld2.jsp";
12     }
3. Transfer parameters by means of objects
As shown below: Objects are passed through attributes, and a key value is required as an identifier
 1     /**
 2      * Reference to the Front Desk by Object
 3      * @param model
 4      * @return
 5      */
 6     @RequestMapping("/Hello7")
 7     public String HelloMvc7(Model model){
 8         //One of the parameters passed to the page
 9         User user=new User(1L,"Li Si",20,new Date());
10         model.addAttribute("user", user);
11         //model.addAttribute(user);//If this is not recommended, there will be a default key,It's lowercase for the class name, and it's not related to the object name.
12         return "WEB-INF/jsps/HelloWorld3.jsp";
13     }
4. Passing parameters through built-in objects
The built-in object HttpServletRequest passes parameters and jumps as follows
 1     /**
 2      * It's not often used to refer to pages and jump through built-in objects.
 3      * @param req
 4      * @param resp
 5      * @throws ServletException
 6      * @throws IOException
 7      */
 8     @RequestMapping("/Hello8")
 9     public void HelloMvc8(HttpServletRequest req,HttpServletResponse resp) throws ServletException, IOException{
10         //One of the parameters passed to the page
11         req.setAttribute("name", "Liu Ling");
12         req.setAttribute("age", 22);
13         req.getRequestDispatcher("WEB-INF/jsps/HelloWorld2.jsp").forward(req, resp);
14     }
Remarks
I thought I was a flower on the edge of the cliff, but later I learned that it was only a grain of sand in the sea of men.