1. Install Centos system
The software list is as follows:
WMware Workstation 12
CentOS-7-x86_64-DVD-1810.iso
jdk-8u181-linux-x64.tar.gz
hadoop-2.7.3.tar.gz
hbase-1.2.7-bin.tar.gz
apache-hive-2.1.1-bin.tar.gz
kafka_2.11-1.1.0.tgz
spark-2.3.2-bin-hadoop2.7.tgz
apache-flume-1.8.0-bin.tar.gz
Note: since three hosts need to be simulated on the virtual machine, the client memory is required to be at least 8g, and 16g is recommended.
1.1 installing VMware 12 virtual machine
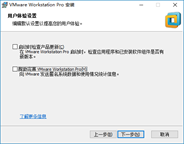
Download the virtual machine installation package, do not install it on Disk c, but always install it by default. In the following steps, the option can be removed
1.2 installing centos7 6 operating system
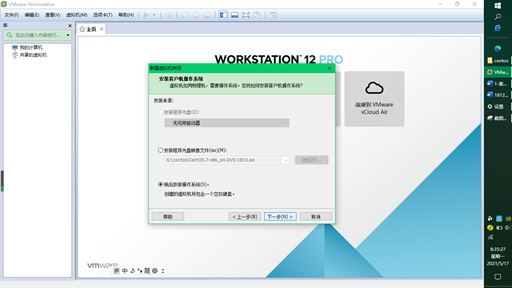
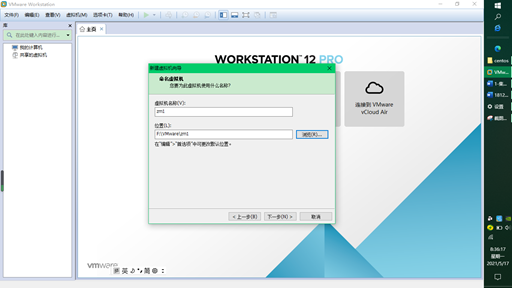
- Create a new virtual machine and select workstation 12 x. next, select the operating system to be installed later. next, select the Linux system, CentOS 64 bit
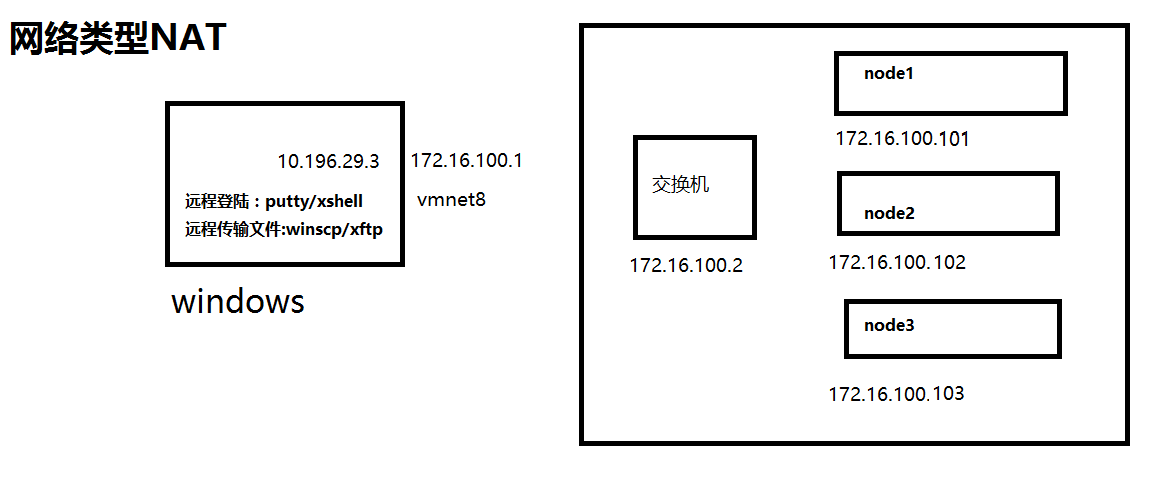
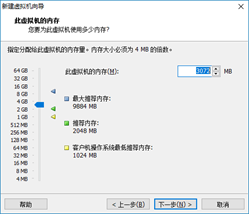
- I have 8 gigabytes of memory, so zm1 is 3G,zm2 and zm3 are 1G. The memory can be modified later. The network type is NAT mode. Others are recommended
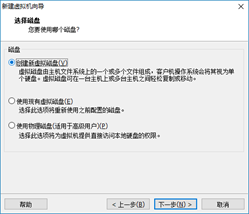
- Select to create a new virtual disk with a size of 20G. If there is no problem, click finish
- Next, add the IOS image file to the installed operating system, click Edit virtual machine settings, and then use the custom mapping file in CD/DVD (if you want to modify memory, click memory to modify it, and the memory is a multiple of 4)
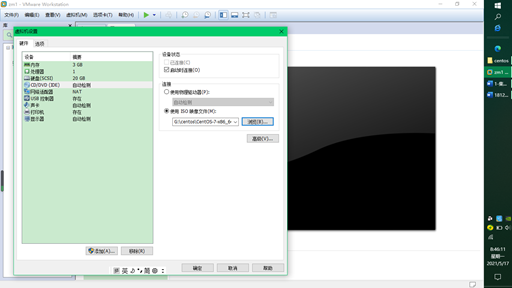
- Click OK to start the virtual machine and install the Linux system
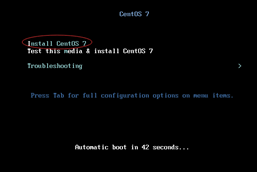
Use the up and down keys on the keyboard to select the first install centos, and then press enter. After entering, select the language as simplified Chinese, and select GNOME desktop for the software,
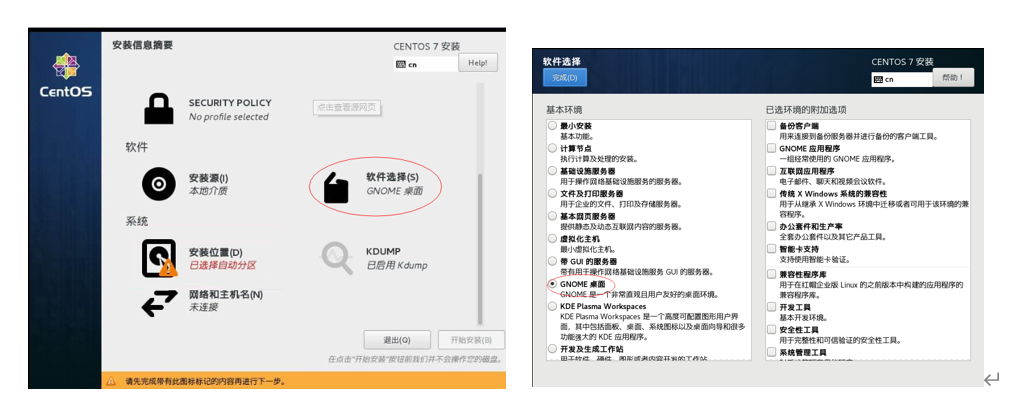
- Click finish. The system will detect the dependency of the software and wait.
"Installation location" has an exclamation mark. Click it without modification, and then click "finish". (if you need to set your own partition, please carefully set /, / home,/boot and swap). Click Start installation.

- Next, create the password 123456 for the administrator root, and click twice to complete.
- Click create user, create the user name test and password 123456, and take this user as the administrator. Click twice to complete.
- The license has a red exclamation mark. Click tick, I agree to the license agreement, and click finish. The system will restart, select "not listed", enter "root" for user name and "123456" for password, then enter the configuration page, and click forward (next step) for all.
2. Configure Centos operating system
2.1 turn off firewall and Selinux
After the CentOS7 version, firewall is used by default instead of iptables
Turn off firewall
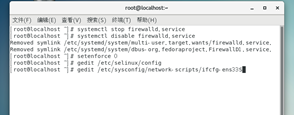
#systemctl stop firewalld.service #Turn off firewall
#systemctl disable firewalld.service #Disable firewall startup
Close selinux
setenforce 0
vim /etc/selinux/config modify SELINUX=disabled,If not vim,use gedit
In addition, after linux is installed, the screen will often be locked automatically. You can enter the following operations:
Click application in the upper left corner = > select system tools = > select settings = > select privacy = > set the lock screen status to off.
2.2 configure host name and IP address
1. Configure Linux network card
vim /etc/sysconfig/network-scripts/ifcfg-ens33
TYPE=Ethernet
PROXY_METHOD=none
BROWSER_ONLY=no
BOOTPROTO=static
DEEROUTE=yes
IPV4_FAILURE_FATAL=no
IPV6INIT=yes
IPV6_AUTOCONF=yes
IPV6_DEFROUTE=yes
IPV6_FAILURE_FATAL=no
IPV6_ADDR_GEN_MODE=stable-privacy
NAME=ens33
#Delete the UUID to prevent cloning. The unique IDs of the two machines are the same
DEVICE=ens33
ONBOOT=yes
#ip
IPADDR=172.16.100.101
#Gateway
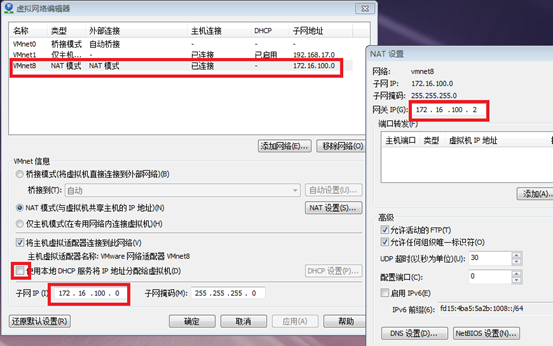
GATEWAY=172.16.100.2
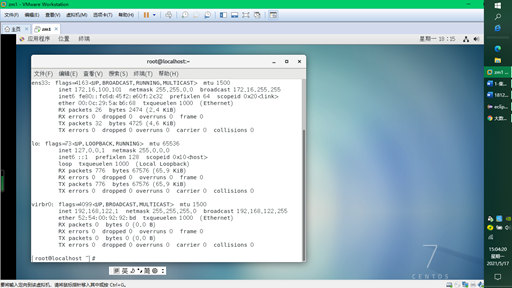
service network restart
$ systemctl restart network.service
 see IP address
$ ifconfig	 #172.16.100.101 was found
2. Configure vmare network card
3. Set host name
#hostnamectl set-hostname zm1
Note: zm1 It can be modified by itself, systemd Provided hostnamectl The command changes the name, which can take effect temporarily and permanently/etc/hostname file
4. Set domain name resolution
#vim /etc/resolv.conf
nameserver 8.8.8.8
nameserver 8.8.4.4
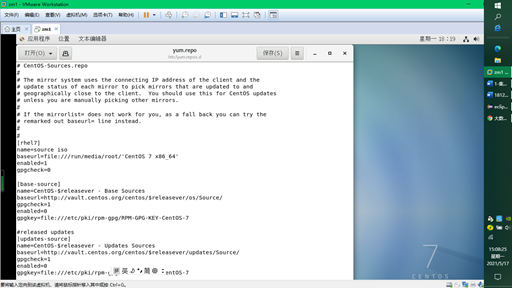
2.3 configuration
The purpose of configuring the yum warehouse is to install the software later and find it from the local CD. You can also set the address to alicloud.
#cd /etc/yum.repos.d/
#cp CentOS-Sources.repo yum.repo
#mv CentOS-Base.repo CentOS-Base.repo.bak #This sentence should be added, otherwise an error will be reported, which will affect the operation of yum list.
#vim yum.repo
[rhel7]
name=source iso
baseurl=file:///run/media/root/'CentOS 7 x86_64'
enabled=1
gpgcheck=0
Supplement: #yum clean all clean cache
#List all installation packages for the installation source using yum list
#yum install xxx to install xxx software, etc
3. Install and configure JDK and Hadoop
3.1 create user hduser and group hadoop
#groupadd hadoop
#useradd –g hadoop hduser
#passwd hduser #Change the password to 123456
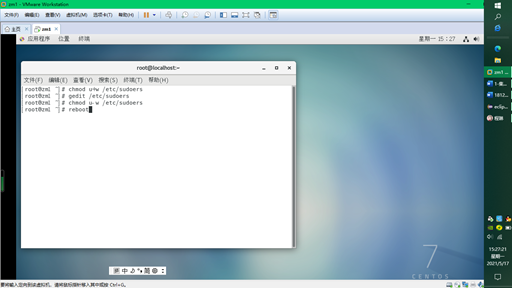
Next, add sudo permission for hduser
#chmod u+w /etc/sudoers 	// First, modify the read permission of the file to the write permission of the current user
#vim /etc/sudoers / / then add sudo permission for hduse
 	hduser  ALL=(ALL)       ALL			//Add this line
#chmod u-w /etc/sudoers 	 // Restore the newly modified write permission to read permission
#reboot / / restart
Switch to hduser login and create two directories / home/hduser/software and / home/hduser/app. The former is the directory of the software and the latter is the directory of the installer
$mkdir /home/hduser/software
$mkdir /home/hduser/app
3.2 installing and configuring JDK
1. Uninstall the old jdk
[hduser@zm1 ~]# rpm -qa | grep jdk
java-1.7.0-openjdk-1.7.0.191-2.6.15.5.el7.x86_64
java-1.7.0-openjdk-headless-1.7.0.191-2.6.15.5.el7.x86_64
java-1.8.0-openjdk-headless-1.8.0.181-7.b13.el7.x86_64
java-1.8.0-openjdk-1.8.0.181-7.b13.el7.x86_64

#sudo rpm -e --nodeps java-1.7.0-openjdk-1.7.0.191-2.6.15.5.el7.x86_64
#sudo rpm -e --nodeps java-1.7.0-openjdk-headless-1.7.0.191-2.6.15.5.el7.x86_64
#sudo rpm -e --nodeps java-1.8.0-openjdk-headless-1.8.0.181-7.b13.el7.x86_64
#sudo rpm -e --nodeps java-1.8.0-openjdk-1.8.0.181-7.b13.el7.x86_64
2. Install a new jdk1 eight
1) take JDK Compressed package jdk-8u181-linux-x64.tar.gz copy to CentOS 7 in~/software/lower
2) Enter into/home/hduser/software/Directory:
   $ cd ~/software/
3) decompression  jdk Compressed package:
   $ tar xvzf jdk-8u181-linux-x64.tar.gz
4) Move the directory to the installation directory
   $ mv jdk1.8.0_181 ~/app
3. Configuring jdk environment variables
#sudo vim /etc/profile is added at the end

export JAVA_HOME=/home/hduser/app/jdk1.8.0_181
export CLASSPATH=.:$CLASSPATH:$JAVA_HOME/lib:$JAVA_HOME/jre/lib
export PATH=.:$JAVA_HOME/bin:$JAVA_HOME/jre/bin:$PATH
Enter the terminal and enter source /etc/profile to make the environment variable just modified effective.
4. Test successful:
#java –version //1.8
#javac –version //1.8
3.3 installing and configuring Hadoop
1. Unzip hadoop
cd ~/software
tar xvzf hadoop-2.7.3.tar.gz -C ~/app/
2. Disposition
sudo vim /etc/profile
export HADOOP_HOME=/home/hduser/app/hadoop-2.7.3
export HADOOP_COMMON_LIB_NATIVE_DIR=$HADOOP_HOME/lib/native
export CLASSPATH=$($HADOOP_HOME/bin/hadoop classpath):$CLASSPATH
export PATH=.:$HADOOP_HOME/bin:$HADOOP_HOME/sbin:$PATH #Modify PATH
Enter the terminal and enter source /etc/profile to make the newly modified environment variable take effect
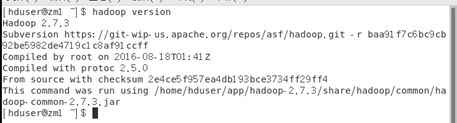
3. Test whether the environment variables are configured correctly:
$ hadoop version
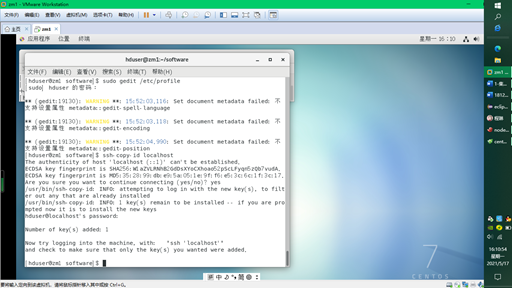
4. Set SSH password free login to this machine
Now set ssh password free login to this machine
1) Generate public and private keys
ssh-keygen -t rsa //At / home / hduser / SSH / directory has two keys, including suffix pub is public
2) Password free login on this machine
ssh-copy-id	localhost	 //Copy the private key to another computer, which is currently this computer
//After cloning the other two machines, you need to use this command again.
5 configure Hadoop cluster mode
5.1 configuring hosts mapping file
modify sudo vim /etc/hosts File, do ip Host name mapping
172.16.100.101 zm1
172.16.100.102 zm2
172.16.100.103 zm3
5.2 clone two virtual machines and modify the host name and ip address
1. Clone 2 virtual machines, zm2 and zm3 respectively. Select "full clone"
2. When starting up, the options of "moved" and "copied" appear, and select "moved"
3. Modify host name
hostnamectl set-hostname name
4. Modify ip
$sudo vim /etc/sysconfig/network-scripts/ifcfg-ens33
IPADDR = the last two bits of modification are 102103 respectively

Restart: $systemctl restart network service
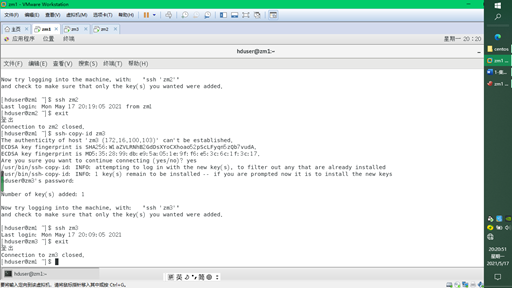
5.3 set ssh password free login to other hosts
Copy the public key of zm1 to other hosts to realize login free
$ssh-copy-id	zm2
$ssh-copy-id	zm3
5.4 modify the configuration file and copy it to other hosts
Configure Hadoop_ Seven configuration files under home / etc / Hadoop /
hadoop-env. Configure JDK environment
export JAVA_HOME=/home/hduser/app/jdk1.8.0_181
export HADOOP_HOME=/home/hduser/app/hadoop-2.7.3
export HADOOP_COMMON_LIB_NATIVE_DIR=$HADOOP_HOME/lib/native
export HADOOP_OPTS="-Djava.library.path=$HADOOP_HOME/lib:$HADOOP_COMMON_LIB_NATIVE_DIR"
yarn-env. For the shyarn framework environment configuration, you should also specify the JDK path.
export JAVA_HOME=/home/hduser/app/jdk1.8.0_181
slaves adds a slave node, that is, a DateNode node, with a custom name
zm2
zm3
core-site. Global configuration of xmlhadoop
<configuration>
	   <property>
		<name>fs.defaultFS</name>
		<value>hdfs://zm1:9000</value>
	   </property>
	   <property>
		<name>hadoop.tmp.dir</name>
		<value>/home/hduser/app/hadoop-2.7.3/tmp</value>
	   </property>
	   <property>
		<name>io.file.buffer.size</name>
		<value>131702</value>
	   </property>
       <property>
		<name>hadoop.proxyuser.hduser.hosts</name>
		<value>*</value>
       </property>
       <property>
		<name>hadoop.proxyuser.hduser.groups</name>
		<value>*</value>
       </property>
</configuration>
hdfs-site.xml HDFS configuration
<configuration>
	<property>
		<name>dfs.namenode.name.dir</name>
		<value>/home/hduser/app/hadoop-2.7.3/dfs/name</value>
	</property>
	<property>
		<name>dfs.datanode.data.dir</name>
		<value>/home/hduser/app/hadoop-2.7.3/dfs/data</value>
	</property>
	<property>
		<name>dfs.replication</name>
		<value>3</value>
	</property>
	<property>
		<name>dfs.namenode.secondary.http-address</name>
		<value>zm1:50071</value>
	</property>
</configuration>
mapred-site.xm Mapreduce configuration
<configuration>
	<property>
	     <name>mapreduce.framework.name</name>
	     <value>yarn</value>
	</property>
<property>
		<name>mapreduce.map.memory.mb</name>
		<value>512</value>
	</property>
	<property>
		<name>mapreduce.reduce.memory.mb</name>
		<value>1024</value>
	</property>
	  <property>
		<name>mapreduce.jobhistory.address</name>
		<value>zm1:10020</value>
    	  </property>
        <property>
		<name>mapreduce.jobhistory.webapp.address</name>
		<value>zm1:19888</value>
        </property>
</configuration>
yarn-site. Configuration and Hadoop cluster test of XML yarn framework
<configuration>
		<property>
			<name>yarn.resourcemanager.hostname</name>
			<value>zm1</value>
		</property>

		<property>
			<name>yarn.nodemanager.aux-services</name>
			<value>mapreduce_shuffle</value>
		</property>
		<property>
			<name>yarn.nodemanager.aux-services.mapreduce_shuffle.class</name>
			<value>org.apache.hadoop.mapred.ShuffleHandler</value>
		</property>
</configuration>
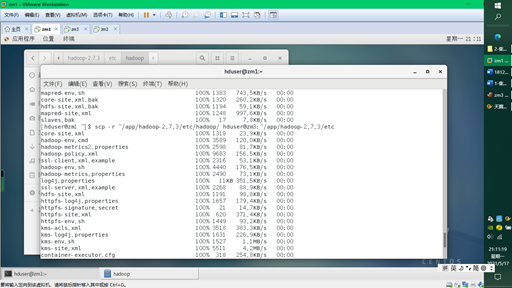
Finally, copy 7 files to zm2 and zm3
scp -r ~/app/hadoop-2.7.3/etc/hadoop/ hduser@zm2:~/app/hadoop-2.7.3/etc
scp -r ~/app/hadoop-2.7.3/etc/hadoop/ hduser@zm3:~/app/hadoop-2.7.3/etc
5.5 start monitoring Hadoop
1. Format the file system of the master(namenode) (the second execution, only once)
$ hdfs namenode -format  #Note that this is a horizontal line
 If prompted whether to reformat, you need to delete it first DataNode(102 And 103)Directory of node:/home/hduser/app/hadoop-2.7.3/dfs/data
2. Start dfs
$ start-dfs.sh
 If present WARN util.NativeCodeLoader: Unable to load native-hadoop library....
Solution: in/home/hduser/app/hadoop-2.7.3/etc/hadoop/log4j.properties Add last in file
log4j.logger.org.apache.hadoop.util.NativeCodeLoader=ERROR

3. View started processes
$jps //On zm1, there is a namenode process. On zm2, there is a datenode process

4. Use the following command to get the HDFS status report
$hdfs dfsadmin -report or hadoop dfsadmin -report
5. HDFS comes with a monitoring web console to verify the installation and monitor the HDFS cluster
http://zm1:50070 / / open the browser on the zm1 server. If you use ip172.0 on windows, you can 16.100.101

6. Start yarn
$ start-yarn.sh
7. Start the MapReduce history server (check the previous tasks, and the web address is configured in mapred-site.xml)
$ mr-jobhistory-daemon.sh start historyserver # Enable history service
8. View started processes
$jps
9. PI program to run the test
$ hadoop jar ~/app/hadoop-2.7.3/share/hadoop/mapreduce/hadoop-mapreduce-examples-2.7.3.jar pi 10 20
 Explanation: This is done in the way of Mongolian tekalo pi Do not care about the specific details, where pi Represents the main class, 10 represents map Quantity, 20 for each map The more the sample quantity, the more precise it is. If there is no error in the result, it is 3.12 Left and right means that the operation is normal
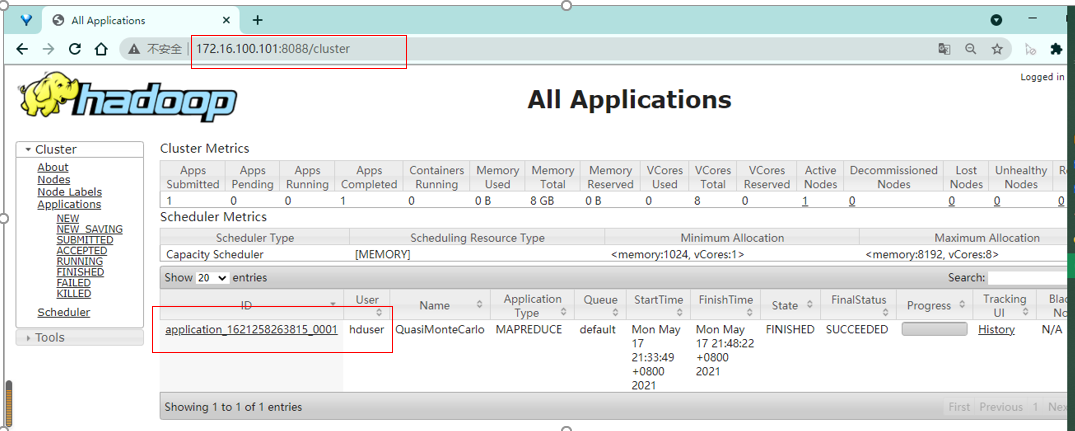
10. Visit the 8088 port web-based console page. View running programs
http://zm1:8088/ #You can view one more job
http://zm1:8088/ #View cluster
11. Close history service, YARN service and HDFS service
$ mr-jobhistory-daemon.sh stop historyserver		# Turn off history service
$ stop-yarn.sh		# Close yarn
$ stop-dfs.sh		# Turn off hdfs
12. View results with jps