[BlockChain] go realize BlockChain 7: Network
introduction
So far, the prototype we have built has all the key features of blockchain: anonymous, secure and randomly generated addresses; Blockchain data storage; Workload proof system; Store transactions reliably. Although these features are indispensable, there are still deficiencies. It is the network that can make these features really shine and make cryptocurrency possible. What is the use of such a blockchain if it only runs on a single node? If there is only one user, what is the use of these cryptographic based features? It is because of the network that the whole mechanism can operate and emit light and heat.
You can think of these blockchain features as rules, which are similar to the rules established by human beings living and reproducing together, a kind of social arrangement. Blockchain network is a program community, in which each program follows the same rules. It is precisely because it follows the same rules that the network can last forever. Similarly, when people have the same idea, they can hold their fists together and build a better life. If someone follows different rules, they will live in a divided community (state, commune, etc.). Similarly, if blockchain nodes follow different rules, a split network will also be formed.
The point is: if there is no network, or most nodes do not follow the same rules, then the rules will be useless!
Statement: Unfortunately, I don't have enough time to implement a real P2P network prototype. In this article, I will show one of the most common scenarios involving different types of nodes. It is a good challenge and Practice for you to continue to improve this scenario and realize it as a P2P network! In addition to the scenarios in this article, I can't guarantee that it will work properly in other scenarios. i 'm sorry!
The code implementation of this article has changed a lot, please click here View all code changes.
Blockchain network
The blockchain network is decentralized, which means that there is no server, and the client does not need to rely on the server to obtain or process data. In the blockchain network, there are many nodes, and each node is a full fledged member of the network. A node is everything: it is both a client and a server. This needs to be kept in mind because it is very different from traditional web applications.
Blockchain network is a P2P (Peer-to-Peer) network, that is, nodes are directly connected to other nodes. Its topology is flat because there is no hierarchy in the world of nodes. The following is its schematic diagram:
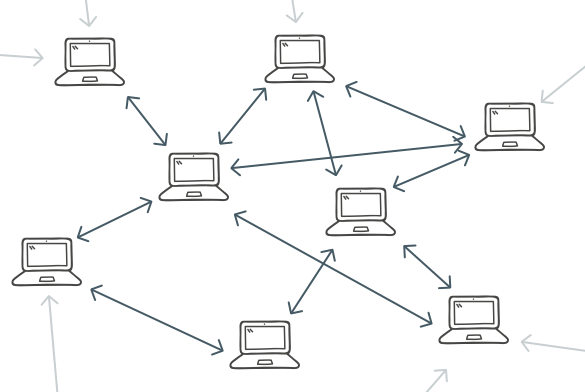
Business vector created by Dooder - Freepik.com
It is more difficult to implement such a network node because they must perform many operations. Each node must update its status with other nodes when it has requested it.
Node role
Although nodes have mature properties, they can also play different roles in the network. For example:
- miner
Such nodes run on powerful or dedicated hardware (such as ASIC), and their only goal is to dig out new blocks as soon as possible. Miners are the only role in the blockchain that may use proof of workload, because mining actually means solving PoW problems. In the blockchain of proof of interest PoS, there is no mining. - All nodes
These nodes verify the validity of the blocks dug out by the miners and confirm the transaction. To do this, they must have a full copy of the blockchain. At the same time, the whole node performs routing operations to help other nodes find each other. For the network, a very important section is to have enough full nodes. Because it is these nodes that perform the decision function: they determine the effectiveness of a block or a transaction. - SPV
SPV means Simplified Payment Verification. These nodes do not store the entire blockchain copy, but can still verify transactions (but not all transactions, but a subset of transactions, such as transactions sent to a specified address). An SPV node depends on a whole node to obtain data. There may be multiple SPV nodes connected to a whole node. SPV makes wallet application possible: a person does not need to download the whole blockchain, but can still verify his transaction.
Network simplification
In order to implement the network in the current blockchain prototype, we have to simplify some things. Because we don't have so many computers to simulate a multi node network. Of course, we can use virtual machine or Docker to solve this problem, but it will make everything more complicated: you will have to solve the possible problems of virtual machine or Docker first, and my goal is to focus all your energy on the implementation of blockchain. Therefore, we want to run multiple blockchain nodes on one machine and want them to have different addresses. In order to achieve this, we will use the port number as the node identifier instead of the IP address. For example, the node that will have such an address: 127.0.0.1:3000127.0.0.1:3001127.0.0.1:3002, etc. We call it the port node ID and use the environment variable NODE_ID to set them. Therefore, you can open multiple terminal windows and set different node_ Run different nodes with different IDs.
This method also requires different blockchain and wallet files. They must now be named depending on the node ID, such as blockchain_3000.db, blockchain_30001.db and wallet_3000.db, wallet_30001.db, etc.
realization
So what happens when you download Bitcoin Core and run it for the first time? It must connect to a node to download the blockchain with the latest status. Considering that your computer is not aware of all or part of the bitcoin nodes, what is the "certain node" connected to?
Hard coding an address in Bitcoin Core has been proved to be an error: because the node may be attacked or shut down, which will make the new node unable to join the network. In Bitcoin Core, hard coded DNS seeds . Although these are not nodes, the DNS server knows the addresses of some nodes. When you start a new Bitcoin Core, it will connect to a seed node, obtain the list of all nodes, and then download the blockchain from these nodes.
However, in our current implementation, we cannot achieve complete decentralization, because there will be the characteristics of centralization. We will have three nodes:
- A central node. All other nodes will be connected to this node, and this node will send data between other nodes.
- A miner node. This node will store new transactions in the memory pool. When there are enough transactions, it will pack and dig out a new block.
- A wallet node. This node will be used to send coins between wallets. However, unlike the SPV node, it stores a complete copy of the blockchain.
scene
The goal of this article is to achieve the following scenarios:
- The central node creates a blockchain.
- One other (wallet) node connects to the central node and downloads the blockchain.
- Another (miner) node connects to the central node and downloads the blockchain.
- The wallet node creates a transaction.
- The miner node receives the transaction and saves the transaction to the memory pool.
- When there are enough transactions in the memory pool, the miners start digging a new block.
- When a new block is excavated, it is sent to the central node.
- The wallet node is synchronized with the central node.
- Users of the wallet node check whether their payment is successful.
This is the general process in bitcoin. Although we will not implement a real P2P network, we will implement a real and the most common and important user scenario of bitcoin.
edition
Nodes communicate through messages. When a new node starts running, it will get several nodes from a DNS seed and send them version messages. Our implementation looks like this:
type version struct {
    Version    int
    BestHeight int
    AddrFrom   string
}
Since we only have one blockchain Version, the Version field does not actually store any important information. Height of the storage node in the blockchain. AddFrom stores the sender's address.
What should the node receiving the version message do? It will respond to its version message. This is a handshake: there can be no other communication without greeting each other in advance. However, this is not out of courtesy: version is used to find a longer blockchain. When a node receives the version message, it will check whether the blockchain of this node is greater than the value of BestHeight. If not, the node will request and download the missing block.
In order to receive messages, we need a server:
var nodeAddress string
var knownNodes = []string{"localhost:3000"}

func StartServer(nodeID, minerAddress string) {
    nodeAddress = fmt.Sprintf("localhost:%s", nodeID)
    miningAddress = minerAddress
    ln, err := net.Listen(protocol, nodeAddress)
    defer ln.Close()

    bc := NewBlockchain(nodeID)

    if nodeAddress != knownNodes[0] {
        sendVersion(knownNodes[0], bc)
    }

    for {
        conn, err := ln.Accept()
        go handleConnection(conn, bc)
    }
}
First, we hard code the address of the central node: because each node must know where to start initialization. The minerAddress parameter specifies the address to receive mining rewards. Code snippet:
if nodeAddress != knownNodes[0] {
    sendVersion(knownNodes[0], bc)
}
This means that if the current node is not the central node, it must send a version message to the central node to query whether its blockchain is outdated.
func sendVersion(addr string, bc *Blockchain) {
    bestHeight := bc.GetBestHeight()
    payload := gobEncode(version{nodeVersion, bestHeight, nodeAddress})

    request := append(commandToBytes("version"), payload...)

    sendData(addr, request)
}
Our message is a sequence of bytes at the bottom. The first 12 bytes specify the command name (such as version here), and the following bytes will contain the gob encoded message structure. commandToBytes looks like this:
func commandToBytes(command string) []byte {
    var bytes [commandLength]byte

    for i, c := range command {
        bytes[i] = byte(c)
    }

    return bytes[:]
}
It creates a 12 byte buffer and fills it with the command name, leaving the remaining bytes empty. The opposite function:
func bytesToCommand(bytes []byte) string {
    var command []byte

    for _, b := range bytes {
        if b != 0x0 {
            command = append(command, b)
        }
    }

    return fmt.Sprintf("%s", command)
}
When a node receives a command, it will run bytesToCommand to extract the command name and select the correct processor to process the command body:
func handleConnection(conn net.Conn, bc *Blockchain) {
    request, err := ioutil.ReadAll(conn)
    command := bytesToCommand(request[:commandLength])
    fmt.Printf("Received %s command\n", command)

    switch command {
    ...
    case "version":
        handleVersion(request, bc)
    default:
        fmt.Println("Unknown command!")
    }

    conn.Close()
}
The following is the version command processor:
func handleVersion(request []byte, bc *Blockchain) {
    var buff bytes.Buffer
    var payload verzion

    buff.Write(request[commandLength:])
    dec := gob.NewDecoder(&buff)
    err := dec.Decode(&payload)

    myBestHeight := bc.GetBestHeight()
    foreignerBestHeight := payload.BestHeight

    if myBestHeight < foreignerBestHeight {
        sendGetBlocks(payload.AddrFrom)
    } else if myBestHeight > foreignerBestHeight {
        sendVersion(payload.AddrFrom, bc)
    }

    if !nodeIsKnown(payload.AddrFrom) {
        knownNodes = append(knownNodes, payload.AddrFrom)
    }
}
First, we need to decode the request and extract valid information. All processors are similar in this section, so we will omit this section in the following code snippet.
The node then compares the BestHeight extracted from the message with itself. If the blockchain of its own node is longer, it will reply to the version message; Otherwise, it sends a getblocks message.
getblocks
type getblocks struct {
    AddrFrom string
}
getblocks means "show me what blocks you have" (in bitcoin, this will be more complicated). Note that instead of saying "give me all your blocks", it requests a list of block hashes. This is to reduce the network load, because blocks can be downloaded from different nodes, and we don't want to download tens of GB of data from a single node.
Processing commands are simple:
func handleGetBlocks(request []byte, bc *Blockchain) {
    ...
    blocks := bc.GetBlockHashes()
    sendInv(payload.AddrFrom, "block", blocks)
}
In our simplified implementation, it returns all block hashes.
inv
type inv struct {
    AddrFrom string
    Type     string
    Items    [][]byte
}
Bitcoin uses inv to show other nodes what blocks and transactions the current node has. Again, it doesn't contain a complete blockchain and transaction, it's just a hash. The Type field indicates whether this is a block or a transaction.
Processing inv is slightly complicated:
func handleInv(request []byte, bc *Blockchain) {
    ...
    fmt.Printf("Recevied inventory with %d %s\n", len(payload.Items), payload.Type)

    if payload.Type == "block" {
        blocksInTransit = payload.Items

        blockHash := payload.Items[0]
        sendGetData(payload.AddrFrom, "block", blockHash)

        newInTransit := [][]byte{}
        for _, b := range blocksInTransit {
            if bytes.Compare(b, blockHash) != 0 {
                newInTransit = append(newInTransit, b)
            }
        }
        blocksInTransit = newInTransit
    }

    if payload.Type == "tx" {
        txID := payload.Items[0]

        if mempool[hex.EncodeToString(txID)].ID == nil {
            sendGetData(payload.AddrFrom, "tx", txID)
        }
    }
}
If we receive block hashes, we want to save them in the blocksInTransit variable to track the downloaded blocks. This allows us to download blocks from different nodes. When the block is placed in the delivery state, we send the getdata command to the sender of inv message and update blocksInTransit. In a real P2P network, we want to transfer blocks from different nodes.
In our implementation, we will never send INVs with multiple hashes. That's why when payload When type = = "TX", only the first hash will be obtained. Then we check whether the hash already exists in the memory pool. If not, we send a getdata message.
getdata
type getdata struct {
    AddrFrom string
    Type     string
    ID       []byte
}
getdata is used for the request of a block or transaction. It can contain only the ID of a block or transaction.
func handleGetData(request []byte, bc *Blockchain) {
    ...
    if payload.Type == "block" {
        block, err := bc.GetBlock([]byte(payload.ID))

        sendBlock(payload.AddrFrom, &block)
    }

    if payload.Type == "tx" {
        txID := hex.EncodeToString(payload.ID)
        tx := mempool[txID]

        sendTx(payload.AddrFrom, &tx)
    }
}
This processor is more intuitive: if they request a block, they return the block; If they request a transaction, they return the transaction. Note that we do not check whether this block or transaction actually exists. This is a defect 😃
block and tx
type block struct {
    AddrFrom string
    Block    []byte
}

type tx struct {
    AddFrom     string
    Transaction []byte
}
It is these messages that actually complete the data transfer.
Handling block messages is simple:
func handleBlock(request []byte, bc *Blockchain) {
    ...

    blockData := payload.Block
    block := DeserializeBlock(blockData)

    fmt.Println("Recevied a new block!")
    bc.AddBlock(block)

    fmt.Printf("Added block %x\n", block.Hash)

    if len(blocksInTransit) > 0 {
        blockHash := blocksInTransit[0]
        sendGetData(payload.AddrFrom, "block", blockHash)

        blocksInTransit = blocksInTransit[1:]
    } else {
        UTXOSet := UTXOSet{bc}
        UTXOSet.Reindex()
    }
}
When a new block is received, we put it into the blockchain. If there are more blocks to download, we continue to request from the node of the last downloaded block. When all blocks are finally downloaded, the UTXO set is re indexed.
TODO: not unconditional trust. We should verify each block before adding it to the blockchain.
TODO: not running utxoset Reindex(), but utxoset Update (block), because if the blockchain is large, it will take a lot of time to re index the entire UTXO set.
Processing tx messages is the hardest part:
func handleTx(request []byte, bc *Blockchain) {
    ...
    txData := payload.Transaction
    tx := DeserializeTransaction(txData)
    mempool[hex.EncodeToString(tx.ID)] = tx

    if nodeAddress == knownNodes[0] {
        for _, node := range knownNodes {
            if node != nodeAddress && node != payload.AddFrom {
                sendInv(node, "tx", [][]byte{tx.ID})
            }
        }
    } else {
        if len(mempool) >= 2 && len(miningAddress) > 0 {
        MineTransactions:
            var txs []*Transaction

            for id := range mempool {
                tx := mempool[id]
                if bc.VerifyTransaction(&tx) {
                    txs = append(txs, &tx)
                }
            }

            if len(txs) == 0 {
                fmt.Println("All transactions are invalid! Waiting for new ones...")
                return
            }

            cbTx := NewCoinbaseTX(miningAddress, "")
            txs = append(txs, cbTx)

            newBlock := bc.MineBlock(txs)
            UTXOSet := UTXOSet{bc}
            UTXOSet.Reindex()

            fmt.Println("New block is mined!")

            for _, tx := range txs {
                txID := hex.EncodeToString(tx.ID)
                delete(mempool, txID)
            }

            for _, node := range knownNodes {
                if node != nodeAddress {
                    sendInv(node, "block", [][]byte{newBlock.Hash})
                }
            }

            if len(mempool) > 0 {
                goto MineTransactions
            }
        }
    }
}
The first thing to do is to put the new transaction into the memory pool (again, it is necessary to verify the transaction before putting it into the memory pool). Next clip:
if nodeAddress == knownNodes[0] {
    for _, node := range knownNodes {
        if node != nodeAddress && node != payload.AddFrom {
            sendInv(node, "tx", [][]byte{tx.ID})
        }
    }
}
Check whether the current node is the central node. In our implementation, the central node does not mine. It will only push new transactions to other nodes in the network.
The next big piece of code is "exclusive" to the miner node. Let's break it down:
if len(mempool) >= 2 && len(miningAddress) > 0 {
miningAddress will only be set on the miner node. If there are two or more transactions in the memory pool of the current node (miner), start mining:
for id := range mempool {
    tx := mempool[id]
    if bc.VerifyTransaction(&tx) {
        txs = append(txs, &tx)
    }
}

if len(txs) == 0 {
    fmt.Println("All transactions are invalid! Waiting for new ones...")
    return
}
First, all transactions in the memory pool are verified. Invalid transactions will be ignored. If there is no valid transaction, mining will be interrupted.
cbTx := NewCoinbaseTX(miningAddress, "")
txs = append(txs, cbTx)

newBlock := bc.MineBlock(txs)
UTXOSet := UTXOSet{bc}
UTXOSet.Reindex()

fmt.Println("New block is mined!")
The verified transactions are put into a block, and there are coinbase transactions with rewards. When the block is dug out, the UTXO assembly is re indexed.
TODO: remind that utxoset should be used Update instead of utxoset Reindex.
for _, tx := range txs {
    txID := hex.EncodeToString(tx.ID)
    delete(mempool, txID)
}

for _, node := range knownNodes {
    if node != nodeAddress {
        sendInv(node, "block", [][]byte{newBlock.Hash})
    }
}

if len(mempool) > 0 {
    goto MineTransactions
}
When a transaction is dug out, it is removed from the memory pool. All other nodes to which the current node is connected receive inv messages with new block hashes. After processing the message, they can request the block.
result
Let's review the scenario defined above.
First, add node in the first terminal window_ The ID is set to 3000 (export NODE_ID=3000). In order to let you know which nodes perform what operations, I will use nodes like NODE 3000 or NODE 3001 for identification.
NODE 3000
Create a wallet and a new blockchain:
$ blockchain_go createblockchain -address CENTREAL_NODE
(for brevity, I'll use a fake address.)
Then, a blockchain containing only creation blocks will be generated. We need to save the block and use it at other nodes. Genesis block plays the role of a chain identifier (in Bitcoin Core, genesis block is hard coded)
$ cp blockchain_3000.db blockchain_genesis.db
NODE 3001
Next, open a new terminal window and set the node ID to 3001. This will act as a wallet node. Through blockchain_go createwallet generates some addresses, which we call wallet_ 1, WALLET_ 2, WALLET_ three
NODE 3000
Send some coins to the wallet address:
$ blockchain_go send -from CENTREAL_NODE -to WALLET_1 -amount 10 -mine
$ blockchain_go send -from CENTREAL_NODE -to WALLET_2 -amount 10 -mine
-The mine flag means that the block will be dug out by the same node immediately. We must have this flag because there are no miner nodes in the network in the initial state.
Node startup:
$ blockchain_go startnode
This node will continue to run until the end of the scenario defined in this article.
NODE 3001
Start the blockchain with the creation block node saved above:
$ cp blockchain_genesis.db blockchain_3001.db
Operation node:
$ blockchain_go startnode
It will download all blocks from the central node. In order to check that everything is normal, suspend the operation of the node and check the balance:
$ blockchain_go getbalance -address WALLET_1
Balance of 'WALLET_1': 10

$ blockchain_go getbalance -address WALLET_2
Balance of 'WALLET_2': 10
You can also check central_ The balance of node address, because node 3001 now has its own blockchain:
$ blockchain_go getbalance -address CENTRAL_NODE
Balance of 'CENTRAL_NODE': 10
NODE 3002
Open a new terminal window, set its ID to 3002, and then generate a wallet. This will be a miner's node. Initialize blockchain:
$ cp blockchain_genesis.db blockchain_3002.db
Start node:
$ blockchain_go startnode -miner MINER_WALLET
NODE 3001
Send some coins:
$ blockchain_go send -from WALLET_1 -to WALLET_3 -amount 1
$ blockchain_go send -from WALLET_2 -to WALLET_4 -amount 1
NODE 3002
Quickly switch to the miner node and you will see a new piece dug out! At the same time, check the output of the central node.
NODE 3001
Switch to wallet node and start:
$ blockchain_go startnode
It will download the recently dug blocks!
Pause node and check balance:
$ blockchain_go getbalance -address WALLET_1
Balance of 'WALLET_1': 9

$ blockchain_go getbalance -address WALLET_2
Balance of 'WALLET_2': 9

$ blockchain_go getbalance -address WALLET_3
Balance of 'WALLET_3': 1

$ blockchain_go getbalance -address WALLET_4
Balance of 'WALLET_4': 1

$ blockchain_go getbalance -address MINER_WALLET
Balance of 'MINER_WALLET': 10
That's all!
summary
This is the last article in this series. I could have continued to implement a real P2P network prototype, but I really don't have so much time. I hope this article has answered some questions about bitcoin technology and put forward some questions to readers. You can find the answers by yourself. There are many interesting things hidden in bitcoin technology! good luck!
Postscript: you can start to improve the network by implementing the addr message, as described in the bitcoin network protocol (the link can be found below). This is a very important message because it allows nodes to discover each other. I've started to realize it, but it's not finished yet!
Link:
Original text: Building Blockchain in Go. Part 7: Network