preface
The purpose of blogging is to accumulate information for yourself, so that it is convenient for yourself to find and others to consult in the future. I also hope that I will gain or feel when I look back at my blog in the future.
To be a blog is to be beautiful, simple and generous, or not.
After learning this course, you can make your blog run locally!
Introduction to common blog frameworks
There are two popular frameworks for Blogs: Hexo framework and Halo framework.
- Hexo Hexo official website , Hexo is a fast, concise and efficient blog framework. It is also an old blog development framework. It adopts node JS development, powerful, easy to deploy, but there is no blog background management system, so it is not very convenient to manage the blog.
- Halo Halo official website , Halo is an excellent open source blog publishing application and a new blog development framework. It is developed in Java language with powerful functions and slightly complex deployment. However, it has a powerful blog background management system, so it is very convenient to manage each other's blogs.
- Following the trend of the market, this paper mainly introduces the construction and use of Halo framework.
Configuring the Java environment
1. JDK download and installation, download address: https://www.oracle.com/java/technologies/javase-downloads.html , it is recommended to download the Java 8 version. After downloading, you can install it directly.
2. To configure Java environment variables, you can refer to this tutorial: https://www.runoob.com/java/java-environment-setup.html
3. Test whether the JDK is successfully installed. Enter java -version, java and javac commands on the command line. The following information appears, indicating that the environment variable configuration is successful, for example:
C:\Users\Jin>java -version
java version "1.8.0_221"
Java(TM) SE Runtime Environment (build 1.8.0_221-b11)
Java HotSpot(TM) 64-Bit Server VM (build 25.221-b11, mixed mode)
C:\Users\Jin>java
 usage: java [-options] class [args...]
           (Execution class)
   or  java [-options] -jar jarfile [args...]
           (implement jar file)
Options include:
    -d32          Using 32-bit data model (If available)
    -d64          Using 64 bit data model (If available)
    -server       choice "server" VM
                  default VM yes server.

    -cp <Catalogue and zip/jar Class search path for file>
    -classpath <Catalog and zip/jar Class search path for file>
                  use ; Delimited directory, JAR archives
                  and ZIP File list, Used to search for class files.
    -D<name>=<value>
                  Set system properties
    -verbose:[class|gc|jni]
                  Enable verbose output
    -version      Output product version and exit
    -version:<value>
                  warning: This feature is obsolete, Will be in
                  Removed from future releases.
                  The specified version is required to run
    -showversion  Output product version and continue
    -jre-restrict-search | -no-jre-restrict-search
                  warning: This feature is obsolete, Will be in
                  Removed from future releases.
                  Include in version search/Exclude user specific JRE
    -? -help      Output this help message
    -X            Output help for nonstandard options
    -ea[:<packagename>...|:<classname>]
    -enableassertions[:<packagename>...|:<classname>]
                  Enables assertions at the specified granularity
    -da[:<packagename>...|:<classname>]
    -disableassertions[:<packagename>...|:<classname>]
                  Disables assertions with the specified granularity
    -esa | -enablesystemassertions
                  Enable system assertion
    -dsa | -disablesystemassertions
                  Disable system assertion
    -agentlib:<libname>[=<option>]
                  Load native agent Library <libname>, for example -agentlib:hprof
                  See also  -agentlib:jdwp=help and -agentlib:hprof=help
    -agentpath:<pathname>[=<option>]
                  Load the native agent library by full pathname
    -javaagent:<jarpath>[=<option>]
                  load Java Programming language agent, see also java.lang.instrument
    -splash:<imagepath>
                  Displays the startup screen using the specified image
 For more information, see also http://www.oracle.com/technetwork/java/javase/documentation/index.html.
C:\Users\Jin>javac
 usage: javac <options> <source files>
among, Possible options include:
  -g                         Generate all debugging information
  -g:none                    No debug information is generated
  -g:{lines,vars,source}     Only some debugging information is generated
  -nowarn                    No warnings are generated
  -verbose                   Outputs a message about the operation being performed by the compiler
  -deprecation               Output using obsolete API Source location for
  -classpath <route>            Specify where to find user class files and comment handlers
  -cp <route>                   Specify where to find user class files and comment handlers
  -sourcepath <route>           Specifies where to find the input source file
  -bootclasspath <route>        Overwrite the location of the boot class file
  -extdirs <catalogue>              Overwrite the location of the installed extensions
  -endorseddirs <catalogue>         The location of the standard path that overrides the signature
  -proc:{none,only}          Controls whether annotation processing and/Or compile.
  -processor <class1>[,<class2>,<class3>...] The name of the annotation handler to run; Bypass the default search process
  -processorpath <route>        Specifies where to find comment handlers
  -parameters                Generate metadata for reflection of method parameters
  -d <catalogue>                    Specify where to place the generated class file
  -s <catalogue>                    Specify where to place the generated source file
  -h <catalogue>                    Specifies where to place the generated native header file
  -implicit:{none,class}     Specifies whether to generate class files for implicitly referenced files
  -encoding <code>             Specifies the character encoding used by the source file
  -source <Distribution>              Provides source compatibility with the specified distribution
  -target <Distribution>              Generate specific VM Version of class file
  -profile <configuration file>            Make sure you use API Available in the specified profile
  -version                   Version information
  -help                      Output a feed of standard options
  -A keyword[=value]                  Options passed to the comment handler
  -X                         Output a feed of nonstandard options
  -J<sign>                     Directly <sign> Pass to runtime system
  -Werror                    Terminate compilation on warning
  @<file name>                     Read options and filename from file
Download Halo runtime package
- Download from Github: https://github.com/halo-dev/halo/releases
- Download from Halo's website: https://dl.halo.run
After downloading, we will get a halo - {version} Jar file, for example: halo-1.3.2 jar
Install and run Halo
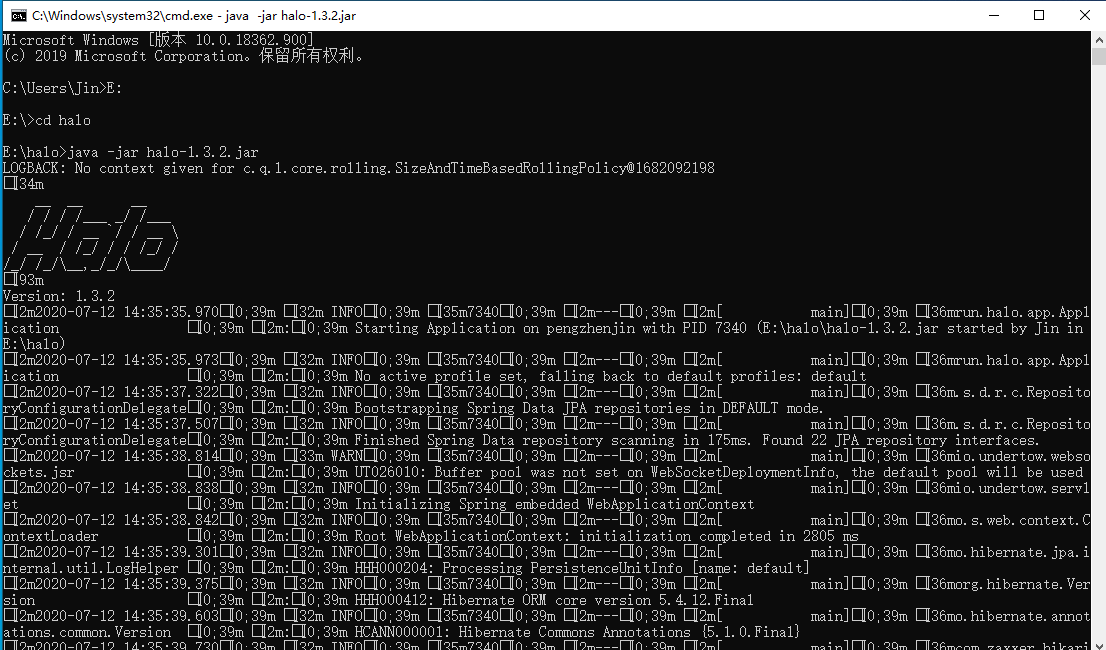
Open the terminal command line and enter the halo-1.3.2 you just downloaded Jar package directory, and then execute the following command:
java -jar halo-1.3.2.jar
The following information is displayed, indicating successful execution:
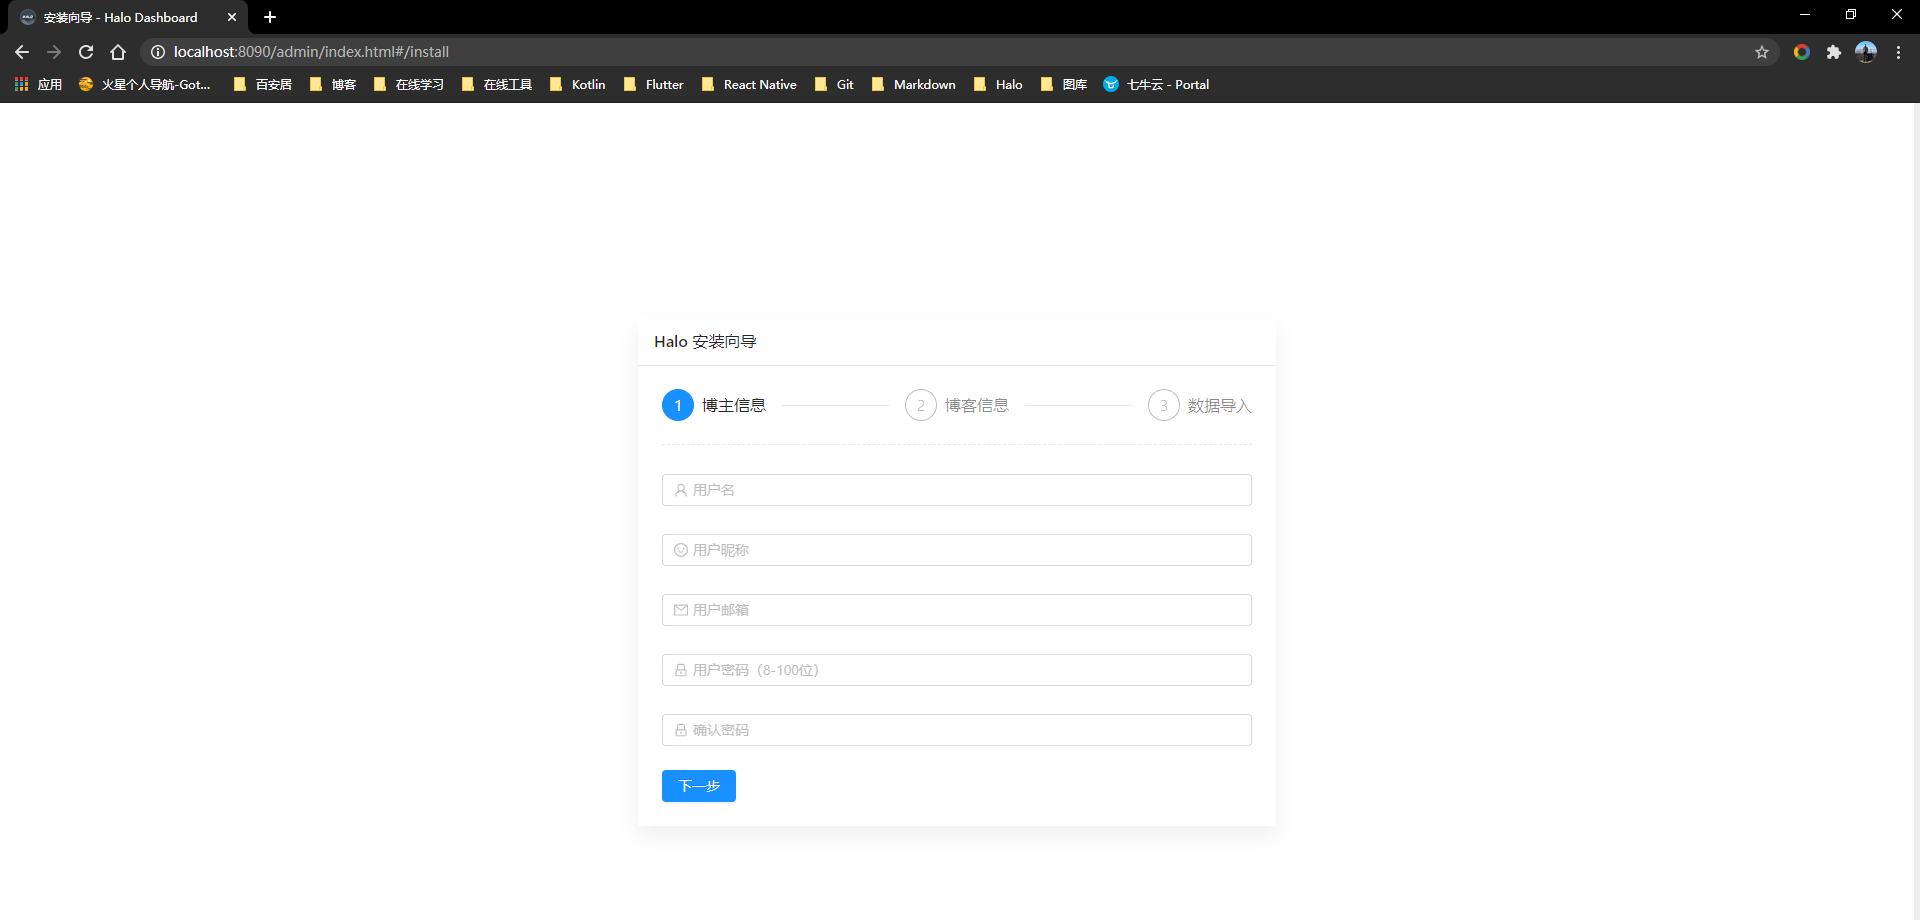
Test whether the installation is successful
Enter in the browser: http://localhost:8090 As shown in the figure below:
How to reset background login password
- Visit the background login page. If you don't have a custom background address, the login page is http://localhost:8090/admin. ;
- Press and hold shift+alt+h on the keyboard to call up the "retrieve password" button.
- Enter the user name and user email, and click the "get" button to obtain the verification code for resetting the password.
- After receiving the verification code, enter the verification code into the verification code input box.
- Fill in the new password and confirm the password, and click "reset password".