Introduction to Baas
Baas, short for Backend as a Service, is "Mobile Backend as a Service".
"Mobile Backend as a Service" is a typical practice of mobile platform in the concept of "cloud". Baas helps us pack things in servers. People who are mobile end don't need to think about how to write servers, how to design databases, how to build servers, etc. It puts all these in the cloud. Users only need to call API interface to realize various functions.
Baas originates from abroad and develops rapidly in China. In addition to Bmob, there are atomic cloud, AVOS Cloud, Baidu frontia, Huawei PowerApp and so on. These platforms provide a series of cloud services for developers, including data storage, message push, file service, API analysis, application statistics, mobile official network, but they are different. The services provided by Bass providers focus on different aspects. Today we'll learn how to use Bmob to build the server side of a mobile platform in the cloud.
Introduction of Bmob
Bmob is the earliest Bass platform in China. Its services mainly include data service, short message service, instant messaging, push function, mobile payment, cloud logic and container service.
Due to time constraints, I will only give a brief introduction and code practice to the data service of Bmob platform. Bmob official website provides developers with very perfect documents, and you can learn about other functions if you want to know.
Bmob official website: http://www.bmob.cn/
(1) Basic operations of data services
1. Create JavaBean s
First, create a JavaBean for storing user data, which inherits BmobObject so that the Bmob SDK can recognize:
public class User extends BmobObject{
    //User name
    private String userName;

    //Password
    private String userPwd;

    public String getUserName() {
        return this.userName;
    }

    public void setUserName(String userName) {
        this.userName = userName;
    }

    public String getUserPwd() {
        return this.userPwd;
    }

    public void setUserPwd(String userPwd) {
        this.userPwd = userPwd;
    }
}
2. Add a row of data
User user = new User();
user.setUserName("sqchen");
user.setPassword("123");
user.save(new SaveListener<String>() {
    @Override
    public void done(String objectId,BmobException e) {
        if(e==null){
            Toast.makeText(context,
                    "Successful data addition!",
                    Toast.LENGTH_SHORT).show();
        }else{
            Toast.makeText(context,
                    "Data addition failed!",
                    Toast.LENGTH_SHORT).show();
        }
    }
});
When the User table does not exist on the server side, the system will automatically create tables for you according to your User.class. The table name and class name are identical. Besides the fields owned by User.class itself, the fields of objectId (data number), createdAt, updateAt and ACL will be added. If there are User tables and corresponding fields on the server side, the data and data types we add should be consistent with those on the server side. The following additions, deletions and modifications are the same as the above.
When the returned BmobException object is null, the operation succeeds or fails.
3. Get a row of data
BmobQuery<User> userQuery = new BmobQuery<User>();
//Adding Query Conditions
userQuery.addWhereEqualTo("userName","sqchen");
userQuery.findObjects(new FindListener<User>() {
    @Override
    public void done(List<User> list, BmobException e) {
        if(e == null) {
            Toast.makeText(context,
                    "Data Acquisition Success!",
                    Toast.LENGTH_SHORT).show();
        }else{
            Toast.makeText(context,
                    "Data Acquisition Success!",
                    Toast.LENGTH_SHORT).show();
        }
    }
});
4. Modify a row of data
User user = new User();
user.setUserPassword("456");
user.update("objectId",new UpdateListener() {
    @Override
    public void done(BmobException e) {
        if(e == null) {
            Toast.makeText(context,
                    "Successful data modification!",
                    Toast.LENGTH_SHORT).show();
        } else {
            Toast.makeText(context,
                    "Data modification failed!",
                    Toast.LENGTH_SHORT).show();
        }
    }
});
Handsome people will find that when they get data above, they can specify query conditions to add data, that is, the "addWhereEqualTo()" method. For data modification and deletion, Bmob SDK only supports updating and deleting through objectId (data number,) at present (of course, the acquisition operation also supports updating and deleting according to objec). TId for data acquisition.
Since V3.4.4, SDK has provided setValue (key,value) methods for updating data. Such as:
User user = new User();
user.setValue("userPwd","456");
5. Delete a row of data
User user = new User();
user.setObjectId("objectId");
user.delete(new UpdateListener() {
    @Override
    public void done(BmobException e) {
        if(e == null) {
            Toast.makeText(context,
                    "Data deletion was successful!",
                    Toast.LENGTH_SHORT).show();
        } else {
            Toast.makeText(context,
                    "Data deletion failed!",
                    Toast.LENGTH_SHORT).show();
        }
    }
});
Above is the basic operation of Bmob data service. Now let's practice.
(2) Practice of Data Services
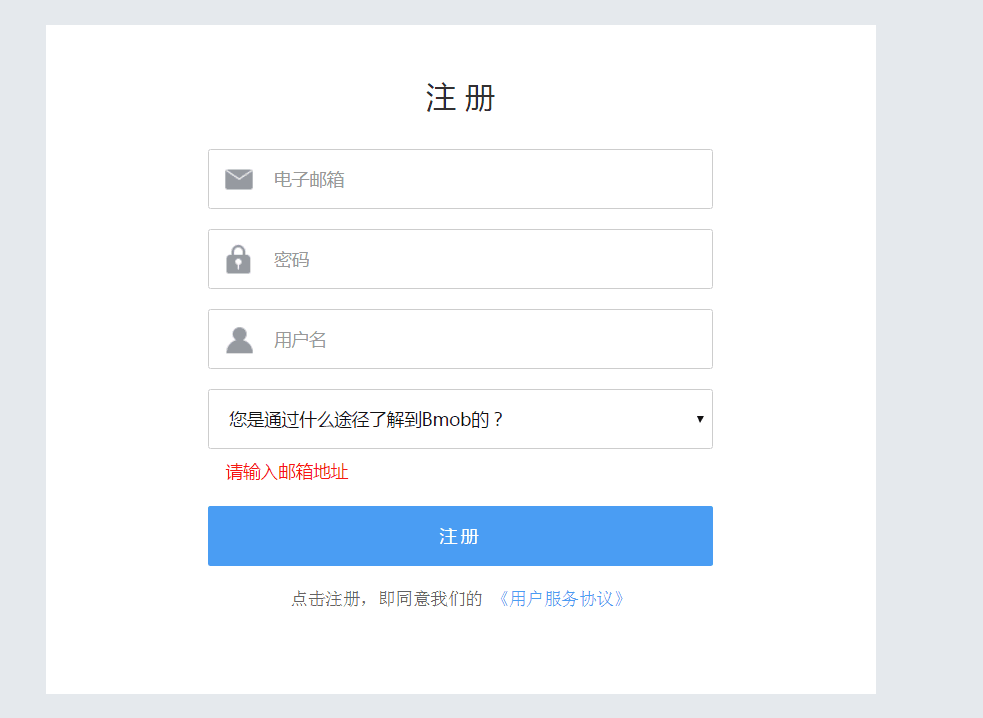
1. Registered Account
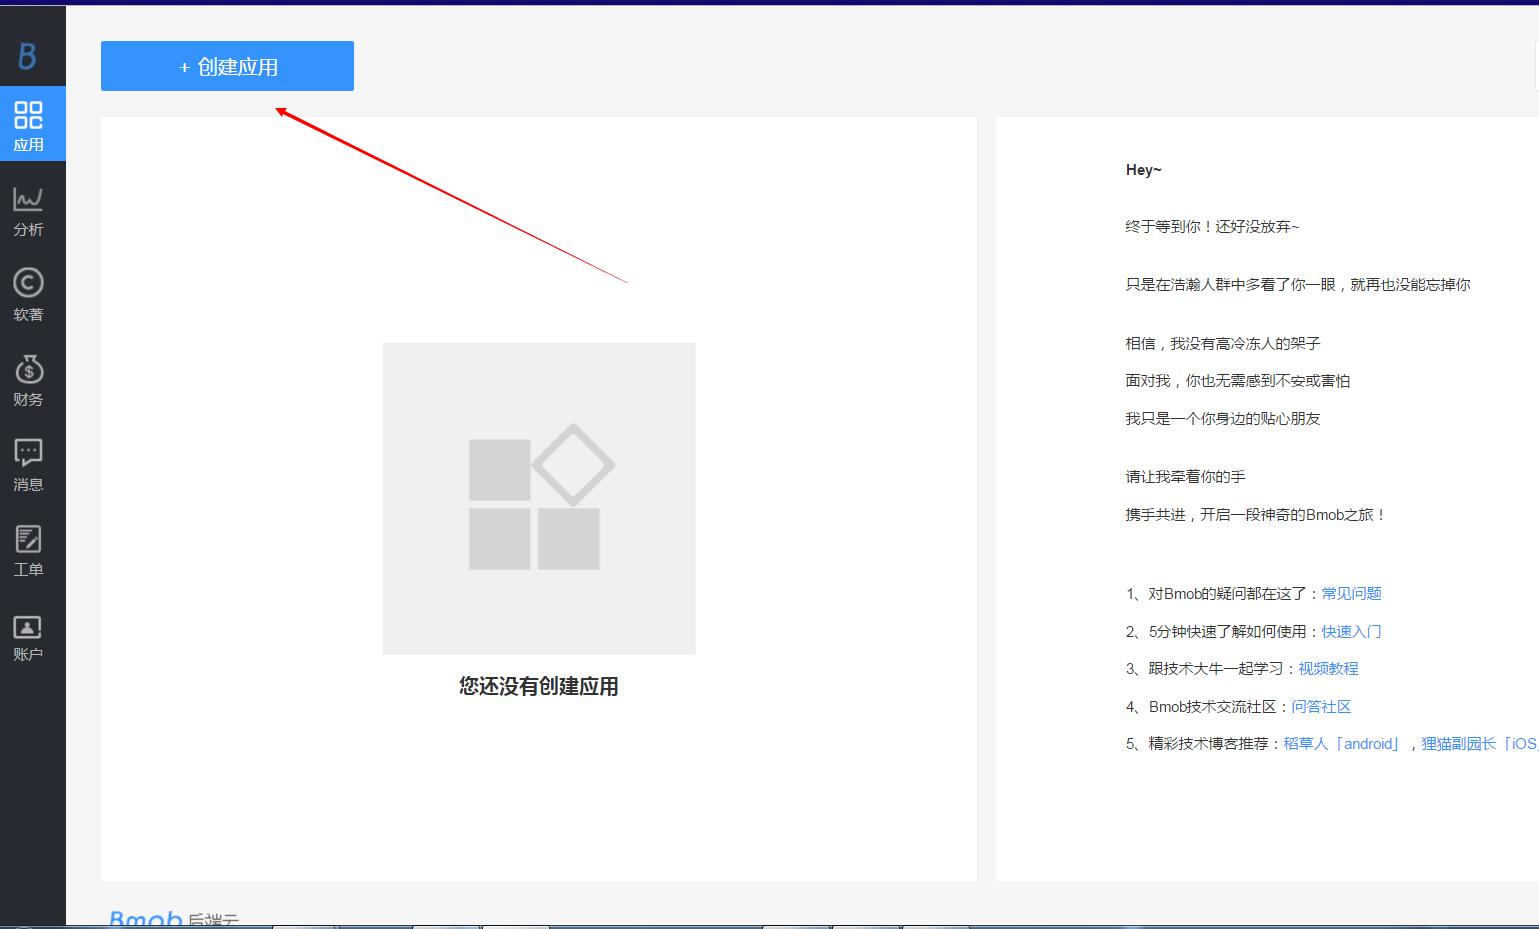
2. Creating applications
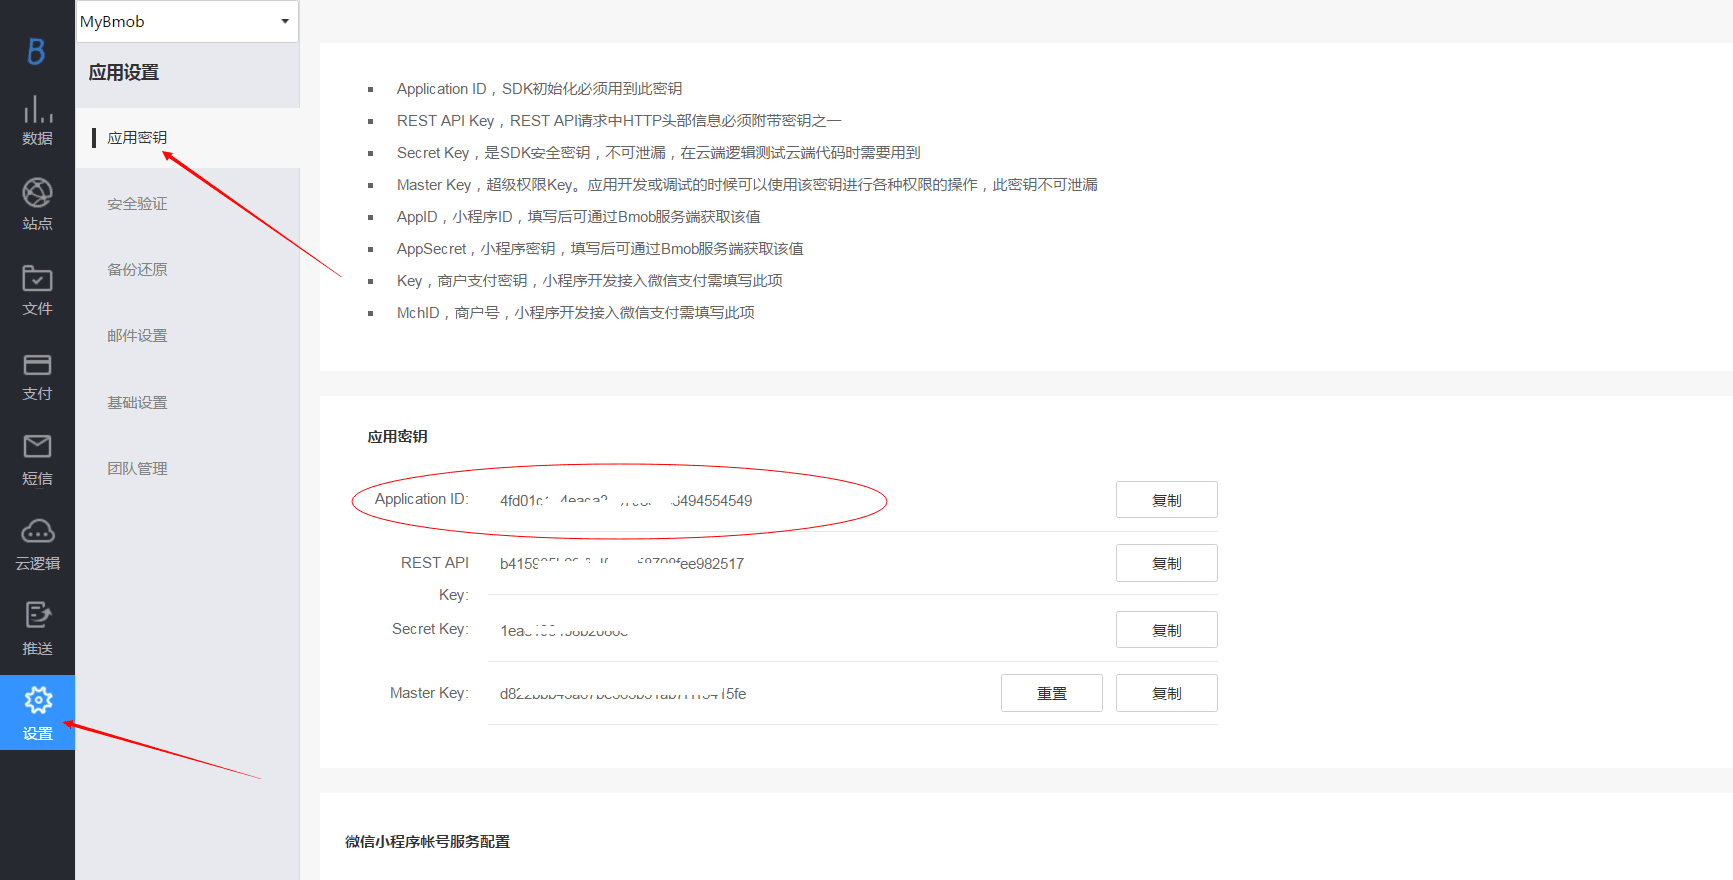
3. Get the key
4. Import SDK
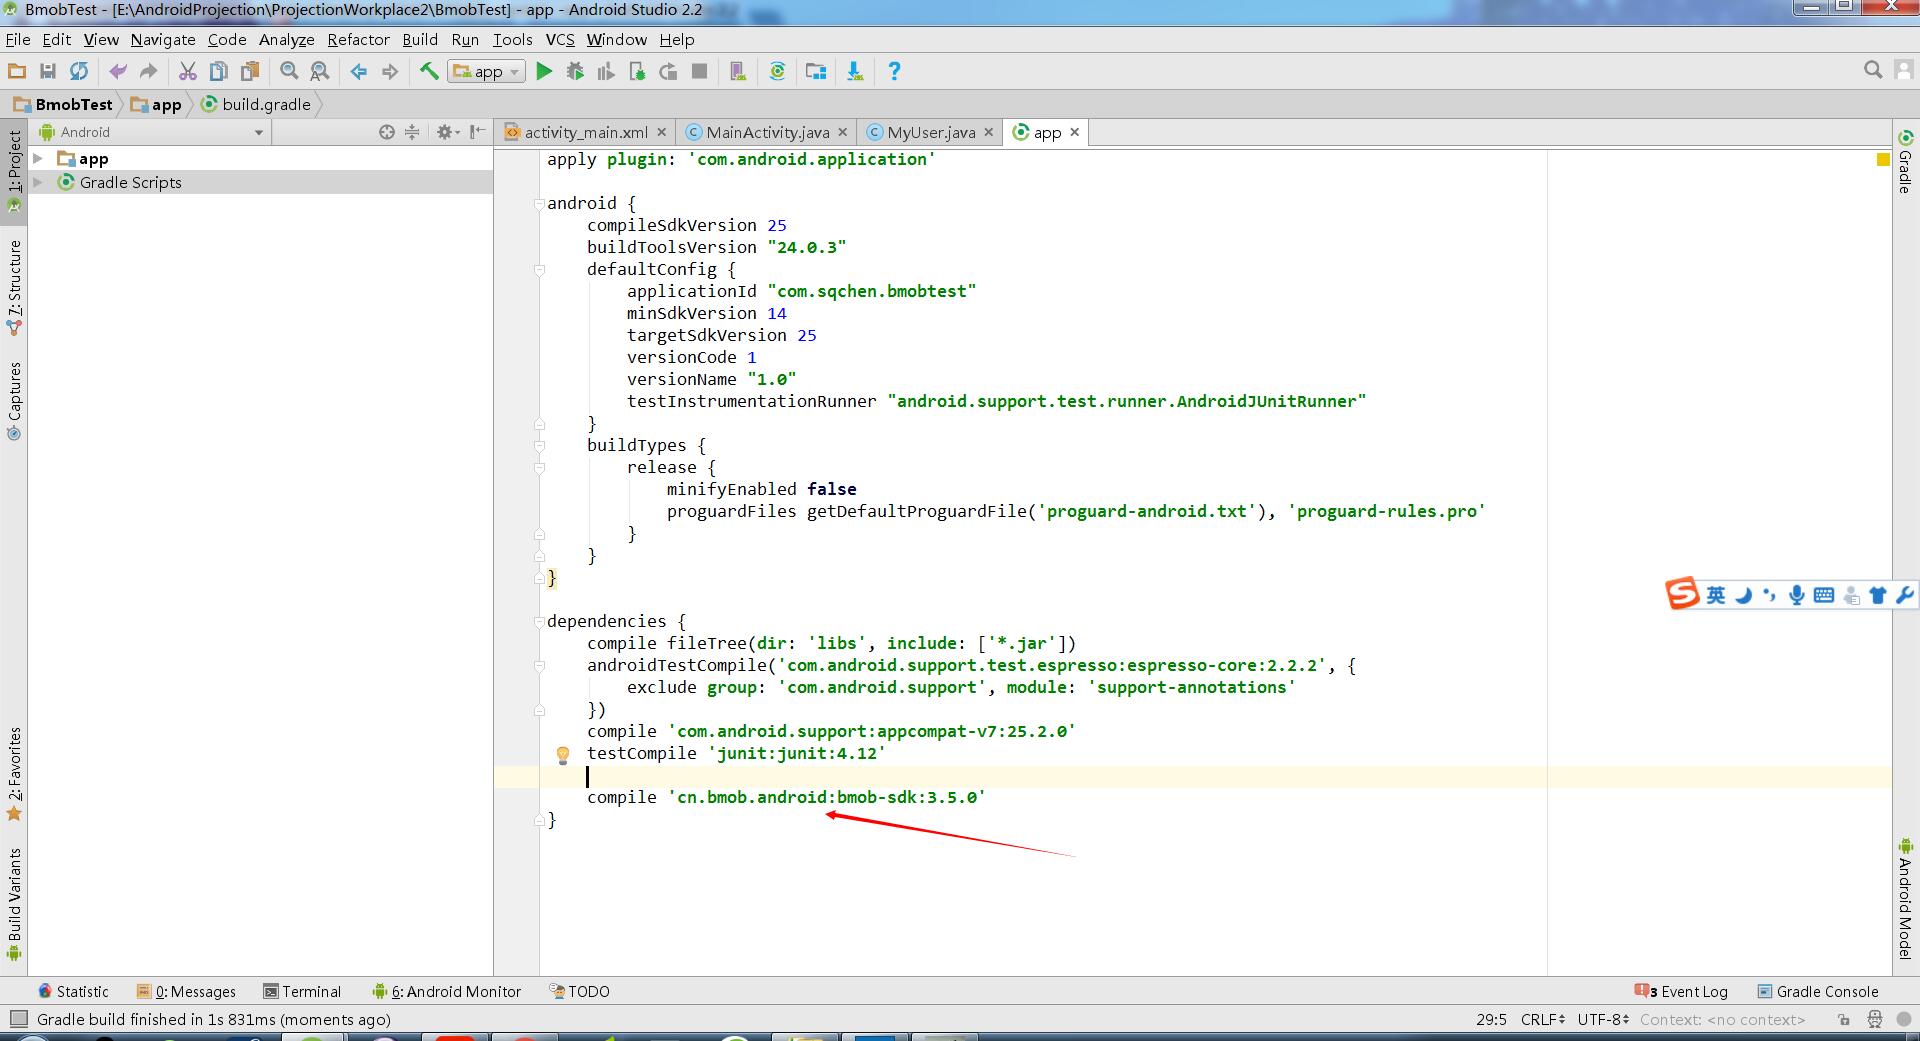
Add in the build.gradle of the project, as shown below:
 repositories {
     jcenter()
 }
 dependencies {
     classpath 'com.android.tools.build:gradle:1.2.3'
 }
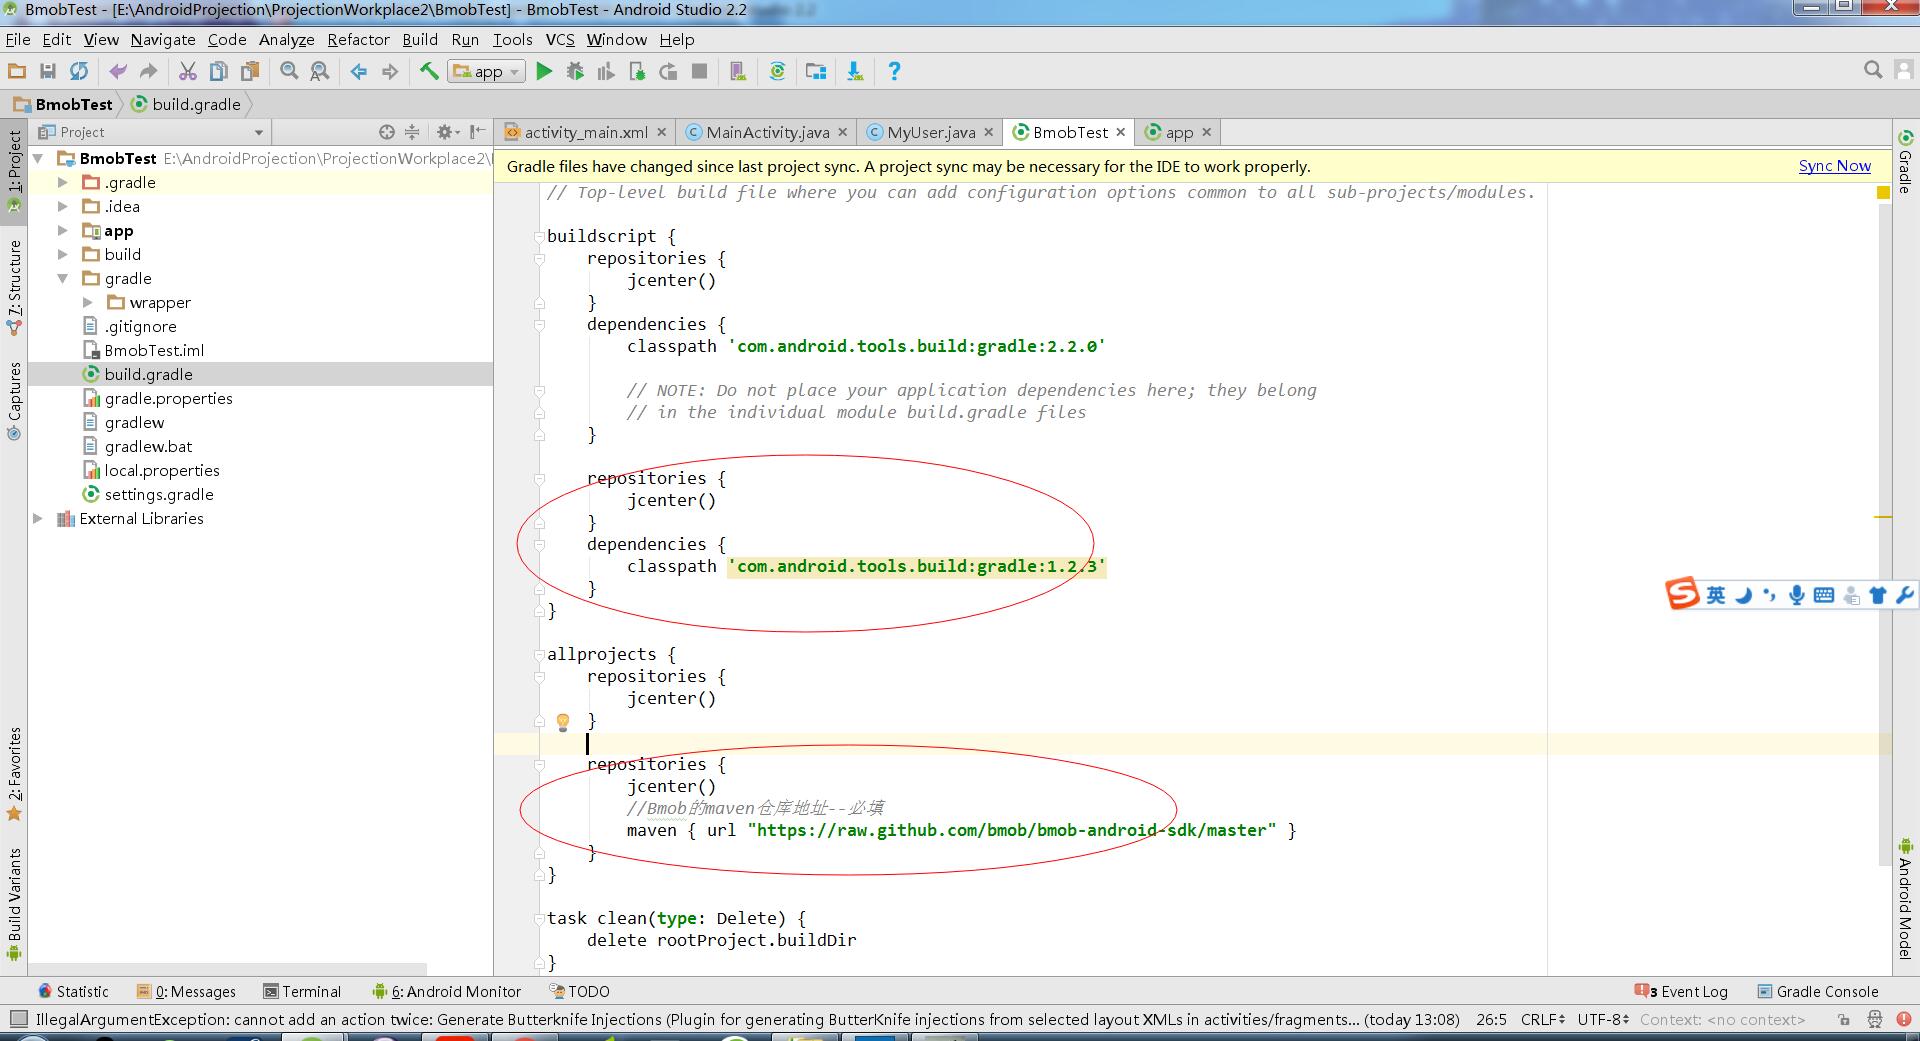
Add in the build.gradle of the project, as shown below:
 repositories {
     jcenter()
     //Bmob's maven warehouse address -- required
     maven { url "https://raw.github.com/bmob/bmob-android-sdk/master" }
 }
5. Configure Android Manifest. XML
Add the following permissions:
<! - Allow networking - >
<uses-permission android:name="android.permission.INTERNET" />
<! - Obtain information about network status such as GSM (2g), WCDMA (Unicom 3g) --> __________.
<uses-permission android:name="android.permission.ACCESS_NETWORK_STATE" />
<! - Get information about the state of wifi Network - >
<uses-permission android:name="android.permission.ACCESS_WIFI_STATE" />
<! - Keep CPU running, screen and keyboard lights may be off for file upload and download.
<uses-permission android:name="android.permission.WAKE_LOCK" />
<! - Get permission to write sd cards for file upload and download - >
<uses-permission android:name="android.permission.WRITE_EXTERNAL_STORAGE" />
<! - Allows reading mobile phone status for creating Bmob Installation - >
<uses-permission android:name="android.permission.READ_PHONE_STATE" />
6. Initialize SDK
Add the following sentence to the onCreate() lifecycle method in launching Activity. The value of the second parameter is the value of the Application ID obtained in step 3.
Bmob.initialize(this, "Your ApplicationID");
7. Creating JavaBean s
MyUser.class
public class MyUser extends BmobObject{
    //User name
    private String userName;

    //Password
    private String userPwd;

    public String getUserName() {
        return this.userName;
    }

    public void setUserName(String userName) {
        this.userName = userName;
    }

    public String getUserPwd() {
        return this.userPwd;
    }

    public void setUserPwd(String userPwd) {
        this.userPwd = userPwd;
    }
}
Because when User.class inherits from BmobUser.class (a special class in BmobSDK), it has a specific meaning (introduced in the "User Management" of the official document of its data service), and we just want to experience the operation of adding, deleting and checking through it, so in order to distinguish, we call the entity class name "MyUs". Er. class ".
8. Login Interface
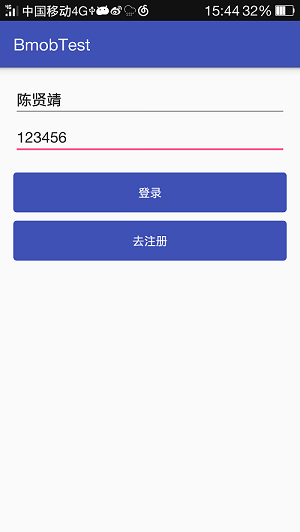
LoginActivity.class
public class LoginActivity extends AppCompatActivity implements View.OnClickListener{

    private EditText editName;

    private EditText editPwd;

    private Button btnLogin;

    private Button btnToRegister;

    private String strName;

    private String strPwd;

    @Override
    protected void onCreate(Bundle savedInstanceState) {
        super.onCreate(savedInstanceState);
        //Initialize the BmobSDK,
        Bmob.initialize(this, "Your ApplicationID");
        setContentView(R.layout.activity_login);
        initView();
    }

    /**
     * Control initialization
     */
    private void initView() {
        editName = (EditText) findViewById(R.id.edit_login_name);
        editPwd = (EditText) findViewById(R.id.edit_login_pwd);
        btnLogin = (Button) findViewById(R.id.btn_login);
        btnToRegister = (Button) findViewById(R.id.btn_to_register);
        btnLogin.setOnClickListener(this);
        btnToRegister.setOnClickListener(this);
    }

    /**
     * Rewrite button click event
     * @param view
     */
    @Override
    public void onClick(View view) {
        switch (view.getId()) {
            case R.id.btn_login:
                userLogin();
                break;
            case R.id.btn_to_register:
                toRegister();
                break;
            default:
                break;
        }
    }

    /**
     * User login
     */
    private void userLogin() {
        BmobQuery<MyUser> userQuery = new BmobQuery<MyUser>();
        userQuery.addWhereEqualTo("userName",strName);
        userQuery.addWhereEqualTo("userPwd",strPwd);
        userQuery.findObjects(new FindListener<MyUser>() {
            @Override
            public void done(List<MyUser> list, BmobException e) {
                if(e == null) {
                    if(list.size() == 1) {
                        Toast.makeText(getApplicationContext(),
                                "Log in successfully!",
                                Toast.LENGTH_SHORT).show();
                        Intent intentMain = new Intent(LoginActivity.this,MainActivity.class);
                        startActivity(intentMain);
                    } else {
                        Toast.makeText(getApplicationContext(),
                                "User name or password error, please re-enter!",
                                Toast.LENGTH_SHORT).show();
                        cleanInput();
                    }
                } else {
                    Toast.makeText(getApplicationContext(),
                            "Logon failure, error code:" + e.getErrorCode(),
                            Toast.LENGTH_SHORT).show();
                    cleanInput();
                }
            }
        });
    }

    /**
     * To login
     */
    private void toRegister() {
        Intent intentReg = new Intent(LoginActivity.this,RegisterActivity.class);
        startActivity(intentReg);
    }

    /**
     * Get user input data
     */
    private void getInput() {
        strName = editName.getText().toString();
        strPwd = editPwd.getText().toString();
    }

    /**
     * Clear user input data
     */
    private void cleanInput() {
        editName.setText("");
        editPwd.setText("");
    }
}
9. Registration Interface
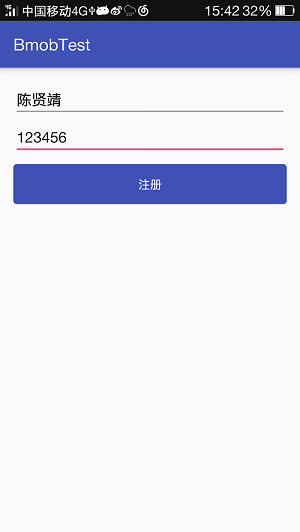
RegisterActivity.class
public class RegisterActivity extends AppCompatActivity {

    private EditText editName;

    private EditText editPwd;

    private Button btnRegister;

    private String strName;

    private String strPwd;

    @Override
    protected void onCreate(Bundle savedInstanceState) {
        super.onCreate(savedInstanceState);
        setContentView(R.layout.activity_register);
        initView();
    }

    /**
     * Control initialization
     */
    private void initView() {
        editName = (EditText) findViewById(R.id.edit_register_name);
        editPwd = (EditText) findViewById(R.id.edit_register_pwd);
        btnRegister = (Button) findViewById(R.id.btn_register);
        btnRegister.setOnClickListener(new View.OnClickListener() {
            @Override
            public void onClick(View v) {
                userRegister();
            }
        });
    }

    /**
     * User registration, which adds a row of data
     */
    private void userRegister() {
        getInput();
        Log.d("sqchen",strName + strPwd);
        MyUser mUser = new MyUser();
        mUser.setUserName(strName);
        mUser.setUserPwd(strPwd);
        mUser.save(new SaveListener<String>() {
            @Override
            public void done(String s, BmobException e) {
                if(e == null) {
                    Toast.makeText(getApplicationContext(),
                            "Successful registration! Please login",
                            Toast.LENGTH_SHORT).show();
                    finish();
                } else {
                    Toast.makeText(getApplicationContext(),
                            "Registration failed!" + "Error code:" + e.getMessage(),
                            Toast.LENGTH_SHORT).show();
                }
            }
        });

    }

    /**
     * Get user input data
     */
    private void getInput() {
        strName = editName.getText().toString();
        strPwd = editPwd.getText().toString();
    }
}
10. Interface after login
The main interface after login is to display a paragraph of text, nothing special.
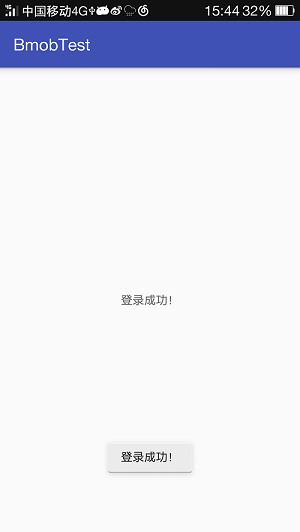
MainActivity.class
public class MainActivity extends AppCompatActivity {

    @Override
    protected void onCreate(Bundle savedInstanceState) {
        super.onCreate(savedInstanceState);
        setContentView(R.layout.activity_main);
    }
}
Summary:
A few days ago, I built a blog with Aliyun+Wordpress. After consulting several classmates and spending a few days, I finally succeeded. So, as a usual practice project, it is undoubtedly convenient for developers to use the back-end cloud of third-party platform, which greatly reduces the cost of learning and the complexity of code, but on the other hand. Look, the third-party platform SDK encapsulates the application-level development code, and many business logic actually needs to be implemented by ourselves.
Source download:
CSDN Download
Github Download
Personal Blog Portal: Handsome Chen eats apples
Author: Chen Xianjing; Original address