Note: This article mainly demonstrates the steps of accessing IM through the wechat applet developed by uniapp:
Preparations: first, it is recommended that you save a copy of your project git to the remote warehouse before trying to access IM (prepare for the worst and recover later);
The first step below is to connect IM to the project. If you want to import the corresponding package file through npm, you must first check whether there is a package in the current project JSON is the package management configuration file for the project. If not, the file is automatically initialized through npm init -y.
1, Access Tencent cloud instant messaging IM SDK for the project:
Core:
Install the following two packages through npm
// Download dependency
npm i tim-upload-plugin --save
// For the version of Tim JS SDK or Tim Wx SDK, please use v2 Tim upload plugin can only be integrated with 9.2 or later
// npm i tim-js-sdk@latest --save // web environment usage
npm i tim-wx-sdk@latest --save // Applet environment usage
II. Try to log in to IM
Tutorial link: SDK - Documentation
The login business generally cooperates with the project to log in at an appropriate time according to the project business logic.
The approximate code example is as follows:
During the test, if the backend does not provide userID and userSig, you can simulate one:
First, introduce the following code at the top of the < script > < / script > tag on the page of logging in to IM:
    // Introduce the module into the project script and initialize it
	// import TIM from 'tim-js-sdk'; // web environment usage
	import TIM from 'tim-wx-sdk'; //  Applet environment usage
	import TIMUploadPlugin from 'tim-upload-plugin';

    // Introduce the file that generates IM userSig - from the debug folder
    import { genTestUserSig } from '@/debug/GenerateTestUserSig.js';

	let options = {
	  SDKAppID: 0 // When accessing, you need to replace 0 with the SDKAppID of your cloud communication application
	};
	// Create SDK instance, ` Tim The create() ` method will only return the same instance for the same 'SDKAppID'
	let tim = TIM.create(options); // SDK instances are usually represented by tim
Note: the main core of this code is to fill in your own SDKAppID, which can generally be obtained from the project server. At the same time, the file for generating IM userSig is also introduced - from the debug folder, which is from IM Demo uniapp (more) SDK & demo source code ) after downloading the Demo of the uniapp version, open the TUIKit file to see the debug folder. (when testing, put the folder under the root directory of your project and import it according to the path)
Note: after introducing the debug folder, you need to create generatetestusersig. In this folder The. JS file modifies the. SDKAPPID and. SECRETKEY to their own values, which are generally provided by the back end.
        // The userID and userSig here are returned by the server interface later
		const userID = '001' // So I wrote a random test here
		const userSig = genTestUserSig(userID).userSig

		const promise = await tim.login({
			userID: userID,
			userSig: userSig
		});
		if (promise.code) return false
		console.log('IM Login successful', promise);
		return true
Note: the userID and userSig in the code should be returned to the front end by the server through the api, so the main code here is from const promise = await Tim login() ... At the beginning, also note that the await keyword is used here, so you should match the async keyword in front of the function name of this code, otherwise the operation will report an error!
Login IM , for example:
    // Call function login IM
	async imLogin() {
		// Log in to IM when the page is loaded
		// The userID and userSig here are returned by the server interface later
		const userID = '001' // So I wrote a random test here
		const userSig = genTestUserSig(userID).userSig

		const promise = await tim.login({
			userID: userID,
			userSig: userSig
		});
		if (promise.code) return false
		console.log('IM Login successful', promise);
		// Set the SDK log output level. For details, see the description of the setLogLevel interface
		// tim.setLogLevel(0); //  Normal level, with a large amount of logs, it is recommended to use it when accessing
		tim.setLogLevel(1); // release level. The SDK outputs key information. It is recommended to use it in the production environment

		return true
	}
Screenshot of successful login:
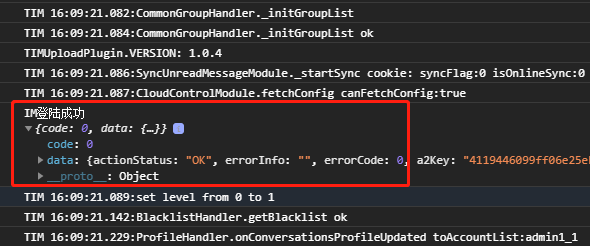
After successful login, subsequent business processes can be started, such as: Get session list,Get history messages,send message , onMessageReceived, etc More basic concepts of instant messaging IM SDK.
Send pictures, voice, video and other messages
If you need to send pictures, voice, video and other messages, you need to install and register the cos-wx-sdk-v5 upload plug-in. The steps are as follows:
Installation:
npm i cos-wx-sdk-v5@1.0.10 --save
Registration: introduce the following code at the top of the < script > < / script > tag on the chat page:
// Introduce the module into the project script and initialize it
import TIM from 'tim-wx-sdk'; //  Applet environment usage
import TIMUploadPlugin from 'tim-upload-plugin';
let options = {
	SDKAppID: 0  // When accessing, you need to replace 0 with the SDKAppID of your cloud communication application
};
let tim = TIM.create(options); // SDK instances are usually represented by tim
// Register Tencent cloud instant messaging IM upload plug-in
tim.registerPlugin({
	'tim-upload-plugin': TIMUploadPlugin
});
Screenshot of program operation:
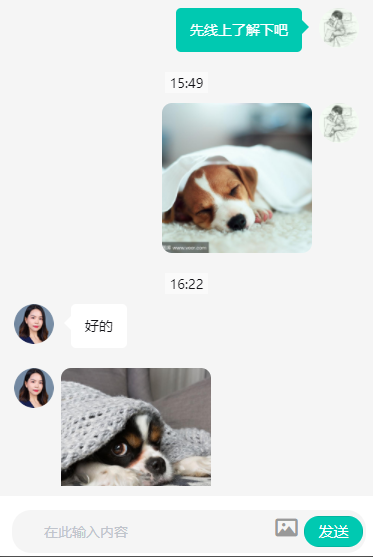
The blogger's current project only needs to send text and pictures, but does not involve more complex message types. I hope this article can help you. For more information, please visit Tencent cloud instant messaging IM official document .