Decentralized open source social platform – misskey
I can't bear to see the leaders deploy mammoths. In fact, I also want to have my own district centered social platform... hmmm, but mammoths eat too much memory. Is there a better source program? So I found this high color value and low occupancy program misskey on github
##Program introduction
Misskey is a decentralized microblog platform born on earth. Because it exists in Fediverse (a universe that organizes various social media platforms), it is interconnected with other social media platforms. Why don't you take a break from the hustle and bustle of the city and sneak into a new Internet? Find an instance! -- Excerpt from github introduction
Official github https://github.com/misskey-dev/misskey
An interface drawing is attached!
[external chain picture transfer failed. The source station may have anti-theft chain mechanism. It is recommended to save the picture and upload it directly (img-iqz31bmp-1632653845645)( https://imgcdn.moe.loliloli.top/2021/09/24/5b52cf1ec8f70.png )]
###Program running environment
- nodejs >=14
- Postgresql
- redis
- Nginx (used to set anti substitution)
Due to the high requirements of configuration, it is recommended to use 2h4g server!
Formal deployment
1. Purchase the server and configure the basic server
Here I choose Tencent cloud Hong Kong 2h4g lightweight application server, AMD's U, yyds! (it is recommended to select ubuntu
[the external chain picture transfer fails. The source station may have an anti-theft chain mechanism. It is recommended to save the picture and upload it directly (img-bn3vjsns-1632653845666)( https://imgcdn.moe.loliloli.top/2021/09/24/256d076c2c275.png )]
1.1 after the creation is successful, log in to the background and reset the password
[external chain picture transfer failed. The source station may have anti-theft chain mechanism. It is recommended to save the picture and upload it directly (img-lhslw3wx-1632653845667)( https://imgcdn.moe.loliloli.top/2021/09/24/1923484d4bd75.png )]
1.2 open firewall security group
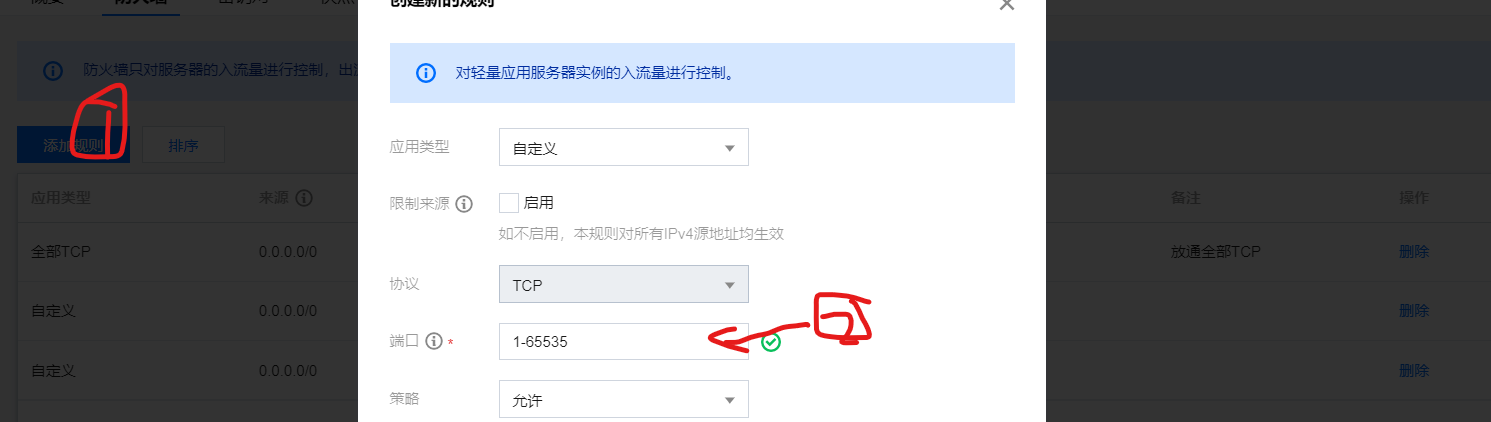
Remember to enter port 1-65535 for release!
2. Configure the installation environment
Now let me assume that you have installed ssh link, and now we begin to deploy the environment required by misskey
####2.1 installing nodejs15
#Installing nodejs
curl -sL https://deb.nodesource.com/setup_15.x | bash -
apt-get install -y nodejs
node -v#View node version

#####Install yarn
npm install -g yarn
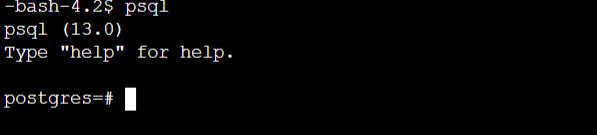
2.2 installing Postgresql
#Installing postgresql
sudo apt-get update
sudo apt-get install postgresql postgresql-client
Configuring the PostgreSQL database
sudo -i -u postgres
psql#Enter database command
CREATE DATABASE misskey;#Create a database named misskey
CREATE USER [your name] WITH PASSWORD '[your password]';#Create database
GRANT ALL PRIVILEGES ON DATABASE misskey TO [your name];#Get database management permission
#After creation
\q#Exit SQL interface
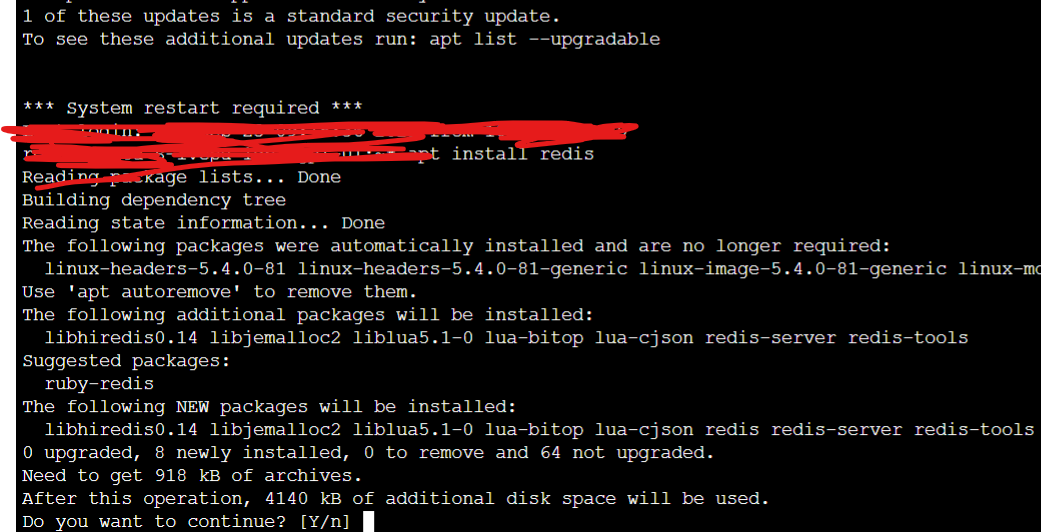
2.3 installing redis
2.3.1 pagoda users directly enable redis

2.3.2 direct installation
apt install redis
#####2.3.3 compile and install redis yourself (troublesome)
wget http://download.redis.io/releases/redis-6.2.5.tar.gz# obtain the installation package from the official website
tar xzvf redis-6.2.5.tar.gz#decompression
cd redis-6.2.5
make
cd src
make install PREFIX=/usr/local/redis#Compile and install
redis-server /usr/local/redis/etc/redis.conf#Enable redis
2.4 installation nginx
#####2.4.1 pagoda user: I just click to install

#####2.4.2 direct apt installation (more complex)
apt install nginx
2.4.3 lnmp installation package installation (recommended! Easy management)
wget http://soft.vpser.net/lnmp/lnmp1.8.tar.gz -cO lnmp1.8.tar.gz && tar zxf lnmp1.8.tar.gz && cd lnmp1.8 && ./install.sh nginx
2.5 installation of FFMpeg
apt isntall ffmpeg
3. Formally install misskey
3.1 github cloning
git clone https://github.com/misskey-dev/misskey.git
cd misskey
yarn #Installing nodejs dependencies
[external chain picture transfer failed. The source station may have anti-theft chain mechanism. It is recommended to save the picture and upload it directly (img-ijfdr8rh-1632653845673)( https://imgcdn.moe.loliloli.top/2021/09/24/ae2a43d0e2d99.png )]
3.2 configuration and installation files
cp .config/example.yml .config/default.yml
nano .config/default.yml#Edit file
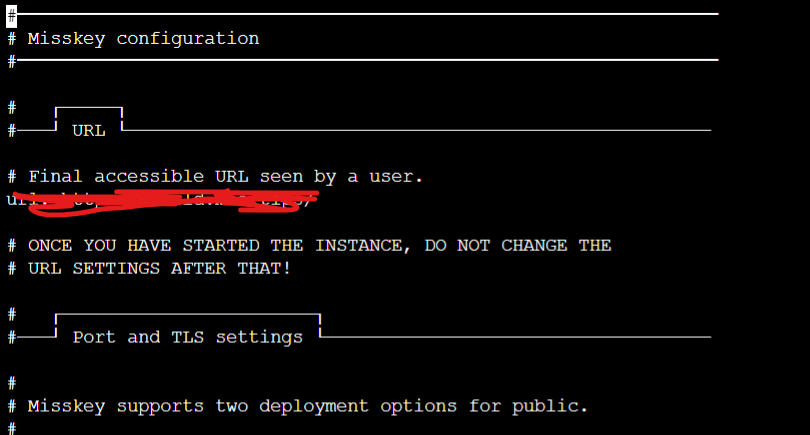
3.2.1 configuration details
━━━━━━━━━━━━━━━━━━━━━━━━━━━━━━━━━━━━━━━━━━━━━━━━━━━━━━━━━━━━━━━
# Misskey configuration
#━━━━━━━━━━━━━━━━━━━━━━━━━━━━━━━━━━━━━━━━━━━━━━━━━━━━━━━━━━━━━━━

#   ┌─────┐
#───┘ URL └─────────────────────────────────────────────────────

# Final accessible URL seen by a user.
url: Your website

# ONCE YOU HAVE STARTED THE INSTANCE, DO NOT CHANGE THE
# URL SETTINGS AFTER THAT!

#   ┌───────────────────────┐
#───┘ Port and TLS settings └───────────────────────────────────

#
# Misskey supports two deployment options for public.
#

# Option 1: With Reverse Proxy
#
#                 +----- https://example.tld/ ------------+
#   +------+      |+-------------+      +----------------+|
#   | User | ---> || Proxy (443) | ---> | Misskey (3000) ||
#   +------+      |+-------------+      +----------------+|
#                 +---------------------------------------+
#
#   You need to setup reverse proxy. (eg. nginx)
#   You do not define 'https' section.

# Option 2: Standalone
#
#                 +- https://example.tld/ -+
#   +------+      |   +---------------+    |
#   | User | ---> |   | Misskey (443) |    |
#   +------+      |   +---------------+    |
#                 +------------------------+
#
#   You need to run Misskey as root.
#   You need to set Certificate in 'https' section.

# To use option 1, uncomment below line.
port: 3000    # misskey running port

# To use option 2, uncomment below lines.
#port: 443

#https:
#  # path for certification
#  key: /etc/letsencrypt/live/example.tld/privkey.pem
#  cert: /etc/letsencrypt/live/example.tld/fullchain.pem

#   ┌──────────────────────────┐
#───┘ PostgreSQL configuration └────────────────────────────────

db:
  host: localhost
  port: 5432

  # Database name
  db: misskey

  # Auth
  user: Your username
  pass: Your password

  # Whether disable Caching queries
  #disableCache: true

  # Extra Connection options
  #extra:
  #  ssl: true

#   ┌─────────────────────┐
#───┘ Redis configuration └─────────────────────────────────────

redis:
  host: localhost
  port: 6379
  #pass: example-pass
  #prefix: example-prefix
  #db: 1

#   ┌─────────────────────────────┐
#───┘ Elasticsearch configuration └─────────────────────────────

#elasticsearch:
#  host: localhost
#  port: 9200
#  ssl: false
#  user:
#  pass:

#   ┌───────────────┐
#───┘ ID generation └───────────────────────────────────────────

# You can select the ID generation method.
# You don't usually need to change this setting, but you can
# change it according to your preferences.

# Available methods:
# aid ... Short, Millisecond accuracy
# meid ... Similar to ObjectID, Millisecond accuracy
# ulid ... Millisecond accuracy
# objectid ... This is left for backward compatibility

# ONCE YOU HAVE STARTED THE INSTANCE, DO NOT CHANGE THE
# ID SETTINGS AFTER THAT!

id: 'aid'

#   ┌─────────────────────┐
#───┘ Other configuration └─────────────────────────────────────

# Whether disable HSTS
#disableHsts: true

# Number of worker processes
clusterLimit: 8

# Job concurrency per worker
# deliverJobConcurrency: 128
# inboxJobConcurrency: 16

# Job rate limiter
# deliverJobPerSec: 128
# inboxJobPerSec: 16

# Job attempts
# deliverJobMaxAttempts: 12
# inboxJobMaxAttempts: 8

# IP address family used for outgoing request (ipv4, ipv6 or dual)
#outgoingAddressFamily: ipv4

# Syslog option
#syslog:
#  host: localhost
#  port: 514

# Proxy for HTTP/HTTPS
#proxy: http://127.0.0.1:3128

#proxyBypassHosts: [
#  'example.com',
#  '192.0.2.8'
#]

# Proxy for SMTP/SMTPS
#proxySmtp: http://127.0.0.1:3128   # use HTTP/1.1 CONNECT
#proxySmtp: socks4://127.0.0.1:1080 # use SOCKS4
#proxySmtp: socks5://127.0.0.1:1080 # use SOCKS5

# Media Proxy
#mediaProxy: https://example.com/proxy

# Sign to ActivityPub GET request (default: false)
#signToActivityPubGet: true
####3.3 installing misskey
cd misskey
NODE_ENV=production yarn build

After that, you can configure persistence (at this time, you will find that ssh is broken and cannot be opened
3.4 it is configured as system service to facilitate startup
cd /etc/systemd/system
touch misskey.service#Create the misskey.service file
nano misskey.service
Write the following
[Unit]
Description=Misskey daemon
[Service]
Type=simple
User=misskey
ExecStart=/usr/bin/npm start
WorkingDirectory=/root/misskey
Environment="NODE_ENV=production"
TimeoutSec=60
StandardOutput=syslog
StandardError=syslog
SyslogIdentifier=misskey
Restart=always
[Install]
WantedBy=multi-user.target
Then use
systemctl enable misskey
systemctl start misskey#Start misskey
4. Configure reverse substitution
4.1 special nginx configuration for pagoda users
map $http_upgrade $connection_upgrade {
    default upgrade;
    ''      close;
}

#proxy_cache_path /tmp/nginx_cache levels=1:2 keys_zone=cache1:16m max_size=1g inactive=720m use_temp_path=off;

server {
    listen 80;
   	listen 443 ssl http2;
    listen [::]:443 ssl http2;
    server_name Your domain name;
    if ($server_port !~ 443){
        rewrite ^(/.*)$ https://$host$1 permanent;
        }
    ssl_certificate    /www/server/panel/vhost/cert/Your certificate configuration;
    ssl_certificate_key    /www/server/panel/vhost/cert/Your certificate configuration;
    ssl_protocols TLSv1.1 TLSv1.2 TLSv1.3;
    ssl_ciphers EECDH+CHACHA20:EECDH+CHACHA20-draft:EECDH+AES128:RSA+AES128:EECDH+AES256:RSA+AES256:EECDH+3DES:RSA+3DES:!MD5;
    ssl_prefer_server_ciphers on;
    ssl_session_cache shared:SSL:10m;
    ssl_session_timeout 10m;
    add_header Strict-Transport-Security "max-age=31536000";
    error_page 497  https://$host$request_uri;
    client_max_body_size 80m;

      # Proxy to Node
    location / {
        proxy_pass http://127.0.0.1:3000;
        proxy_set_header Host $host;
        proxy_http_version 1.1;
        proxy_redirect off;

        # If it's behind another reverse proxy or CDN, remove the following.
        proxy_set_header X-Real-IP $remote_addr;
        proxy_set_header X-Forwarded-For $proxy_add_x_forwarded_for;
        proxy_set_header X-Forwarded-Proto https;

        # For WebSocket
        proxy_set_header Upgrade $http_upgrade;
        proxy_set_header Connection $connection_upgrade;

        # Cache settings
        #proxy_cache cache1;
        #proxy_cache_lock on;
        #proxy_cache_use_stale updating;
        #add_header X-Cache
	#$upstream_cache_status;

        #Timeout setting
        proxy_connect_timeout 5400s;
            proxy_read_timeout 5400s;
            proxy_send_timeout 5400s;
            send_timeout 5400s;
    }
}
It has its own anti generation configuration, so you don't need to add it!!! Change the anti generation and put it in the configuration file in the figure below
Reverse configuration from https://ovo.ci/2021/02/15/misskey-de-tu-cao-bu-shu-he-yun-ying Thanks for the solution provided by this blogger!
###[external chain picture transfer failed. The source station may have anti-theft chain mechanism. It is recommended to save the picture and upload it directly (img-rmxkn050-1632653845675)( https://imgcdn.moe.loliloli.top/2021/09/24/b7819eaa36a94.png )]#4.2 pure nginx reverse configuration
map $http_upgrade $connection_upgrade {
  default upgrade;
  ''      close;
}

server {
    listen       80;
    listen       443 ssl http2;
    server_name  Your domain name;
    client_max_body_size 100m;
    client_body_buffer_size 2048k;
    if ($server_port !~ 443){
        rewrite ^(/.*)$ https://$host$1 permanent;
    }

    ssl_certificate    Your certificate path;
    ssl_certificate_key    Your private key path;
    ssl_protocols TLSv1 TLSv1.1 TLSv1.2;
    ssl_ciphers ECDHE-RSA-AES128-GCM-SHA256:HIGH:!aNULL:!MD5:!RC4:!DHE;
    ssl_prefer_server_ciphers on;
    ssl_session_cache shared:SSL:10m;
    ssl_session_timeout 10m;
    error_page 497  https://$host$request_uri;

location / {
    proxy_set_header Host $host;
    proxy_set_header X-Real-IP $remote_addr;
    proxy_set_header X-Forwarded-For $proxy_add_x_forwarded_for;
    proxy_set_header X-Forwarded-Proto https;
    proxy_set_header Proxy "";
    proxy_pass_header Server;

    proxy_pass http://127.0.0.1:3000;
    proxy_buffering off;
    proxy_redirect off;
    proxy_http_version 1.1;
    proxy_set_header Upgrade $http_upgrade;
    proxy_set_header Connection $connection_upgrade;

    tcp_nodelay on;
  }
}
Write to / etc/nginx/conf.d/ your domain name. Conf
systemctl start nginx#Restart nginx
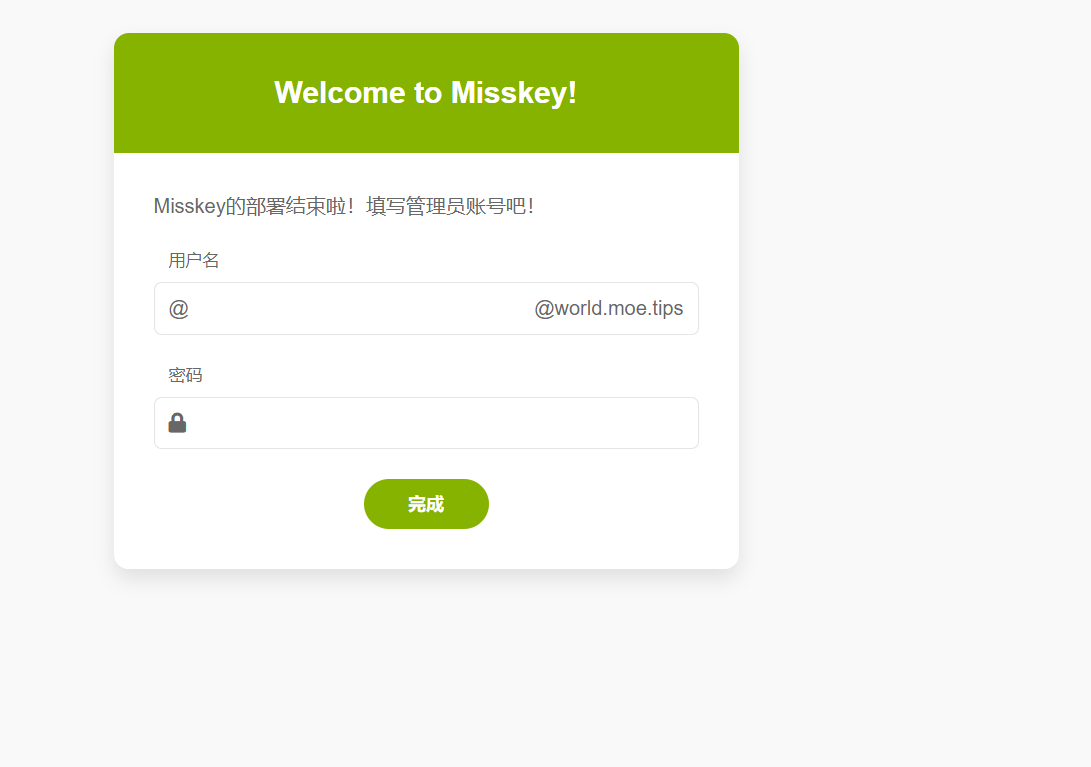
5. Installation succeeded
Just visit your domain name! Configure your administrator account!
be careful
misskey uses WS for communication. Your CDN must support WS (websocket)!!!
The Tencent cloud CDN I use supports WS! Dog head
What can I do with the free conscience cloud
How about building a misskey similar to a mammoth?
Unclaimed ~ portal