(win10,virtualbox ,centos)
This article refers to the website:
https://www.jianshu.com/p/e43f5e848da1
https://kubernetes.io/docs/setup/production-environment/tools/kubeadm/install-kubeadm/
https://www.jianshu.com/p/1aebf568b786
https://blog.csdn.net/donglynn/article/details/47784393
https://blog.csdn.net/MC_CodeGirl/article/details/79998656
https://blog.csdn.net/andriy_dangli/article/details/85062983
https://docs.projectcalico.org/v3.8/getting-started/kubernetes/installation/calico
https://www.jianshu.com/p/70efa1b853f5
Every quotation from someone else's article is used.
Quote
Tagging.
1 Preface
Three virtual machines have been created before.
The IP of the three nodes are:
Node2: 192.168.56.101
Node3: 192.168.56.102
master: 192.168.56.103
Now that XSHELL has been linked separately, we are starting to create a kubernetes cluster.
2 Creating Clusters
Execute on Master master node (k8s-node1):
kubeadm init --pod-network-cidr=192.168.0.0/16 --kubernetes-version=v1.15.1 --apiserver-advertise-address=192.168.56.103
1. Option - pod-network-cidr=192.168.0.0/16 indicates that the cluster will use the Calico network, where the Calico subnet scope needs to be specified in advance.
2. Option - kubernetes-version=v1.15.1 specifies the kubernetes version.
3. Option --- apiserver-advertise-address denotes the bound network card IP, here must be bound to the enp0s8 network card mentioned above, otherwise the enp0s3 network card will be used by default.
4. If a kubeadm init error or forced termination occurs, then when the command needs to be executed again, the kubeadm reset reset reset needs to be executed first.
Then there were problems, as follows
[root@k8s_master centos_master]# kubeadm init --pod-network-cidr=192.168.0.0/16 --kubernetes-version=v1.15.1 --apiserver-advertise-address=192.168.56.103
name: Invalid value: "k8s_master": a DNS-1123 subdomain must consist of lower case alphanumeric characters, '-' or '.', and must start and end with an alphanumeric character (e.g. 'example.com', regex used for validation is '[a-z0-9]([-a-z0-9]*[a-z0-9])?(\.[a-z0-9]([-a-z0-9]*[a-z0-9])?)*')
After checking, because the hostname here can not carry so can only go back to modify, three honstname s were modified according to the previous steps, after modification restart the virtual machine. Replace with the following:
k8s-master: 192.168.56.103
k8s-node2: 192.168.56.101
k8s-node3: 192.168.56.102
Then I'll do it again, and then I'll make a mistake.
[root@k8s-master centos_master]# kubeadm init --pod-network-cidr=192.168.0.0/16 --kubernetes-version=v1.15.1 --apiserver-advertise-address=192.168.56.103
[init] Using Kubernetes version: v1.15.1
[preflight] Running pre-flight checks
	[WARNING IsDockerSystemdCheck]: detected "cgroupfs" as the Docker cgroup driver. The recommended driver is "systemd". Please follow the guide at https://kubernetes.io/docs/setup/cri/
error execution phase preflight: [preflight] Some fatal errors occurred:
	[ERROR NumCPU]: the number of available CPUs 1 is less than the required 2
[preflight] If you know what you are doing, you can make a check non-fatal with `--ignore-preflight-errors=...`
The first warning is that the recommended driver is different from the driver we installed before. Enter docker info to see the following driver for docker.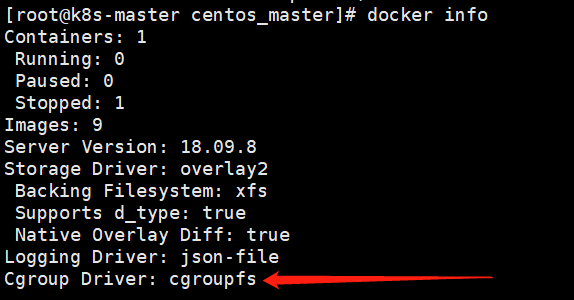
Before, our docker's CGroup driver and kubelet's CGroup driver were both CGroup upfs, and their drivers needed to be consistent, so we need to change them to system Med here.
2.1 Modify docker's cgroup drive
Modify or create / etc/docker/daemon.json by adding the following:
{
  "exec-opts": ["native.cgroupdriver=systemd"]
}
Then restart the docker, or restart the virtual machine directly.
Start revising and report errors~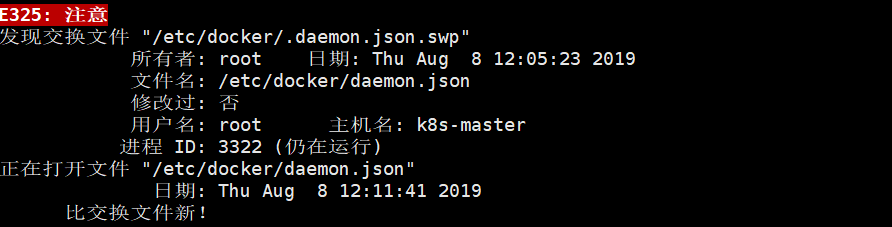 Because when opening a file with vim, it will produce a cmd.swap file to save data. When the file closes abnormally, it can be restored. When the file closes normally, the file will be deleted. When the file closes abnormally, it will not be deleted, so it prompts the existence of. swap file.
Enter this folder, ls-a queries hidden files
Delete the file with the suffix. swp
rm .daemon.json.swp
Edit the file again without warning!
Then I still can't, saying that this is a directory, can't be edited, and finally checked for a long time, only to find that I created the wrong way, I used mkdir to create files, but found that this is used to create directories, folders!!! The correct way is to use vi to create, and then write in the content, although it takes a lot of time here, but also have a deeper understanding of linux system.
Then restart docker
systemctl daemon-reload
systemctl restart docker
Successful revision~
2.2 Modify the cgroup drive of kubelet
Here are the recommendations for most of the tutorials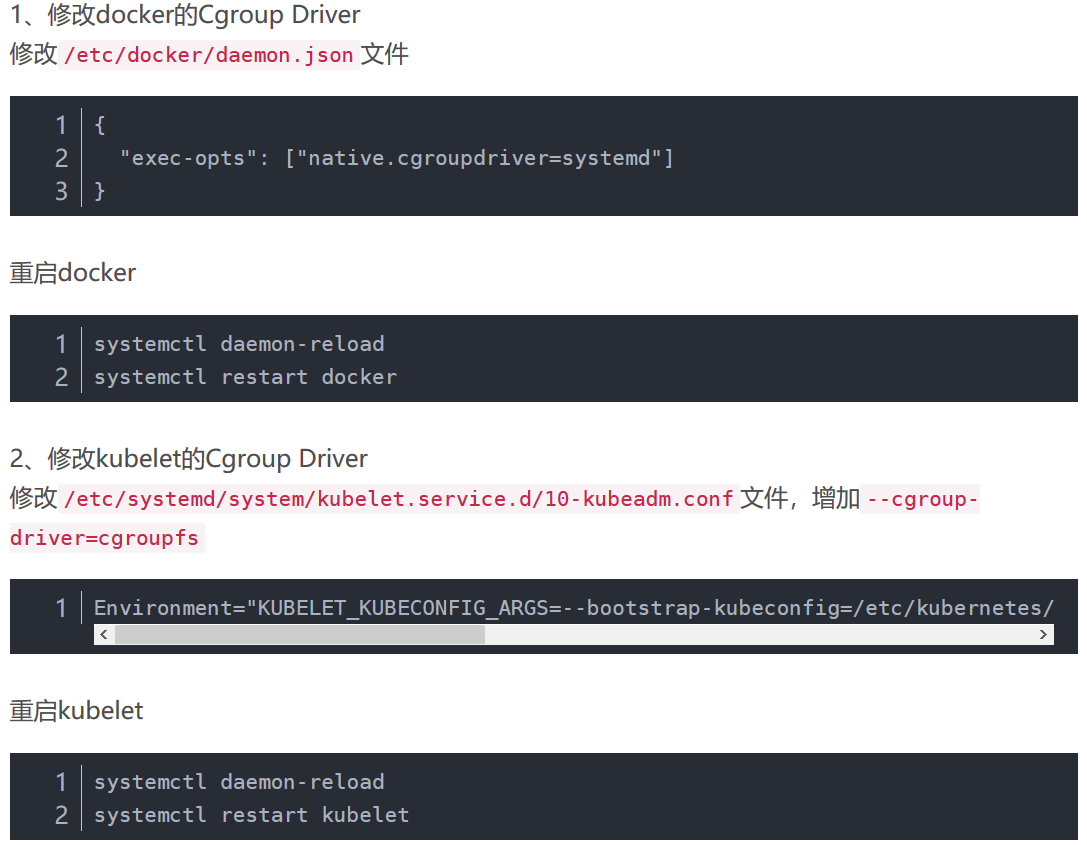
But in practice, it was found that the address was empty. In the end, it may be because our version is 1.15.1, which belongs to the new version, so the address should be changed to
/usr/lib/systemd/system/kubelet.service.d/10-kubeadm.conf
The code is as follows
[root@k8s-master centos_master]# vi /usr/lib/systemd/system/kubelet.service.d/10-kubeadm.conf

# Note: This dropin only works with kubeadm and kubelet v1.11+
[Service]
Environment="KUBELET_KUBECONFIG_ARGS=--bootstrap-kubeconfig=/etc/kubernetes/bootstrap-kubelet.conf --kubeconfig=/etc/kubernetes/kubelet.conf"
Environment="KUBELET_CONFIG_ARGS=--config=/var/lib/kubelet/config.yaml"
# This is a file that "kubeadm init" and "kubeadm join" generates at runtime, populating the KUBELET_KUBEADM_ARGS variable dynamically
EnvironmentFile=-/var/lib/kubelet/kubeadm-flags.env
# This is a file that the user can use for overrides of the kubelet args as a last resort. Preferably, the user should use
# the .NodeRegistration.KubeletExtraArgs object in the configuration files instead. KUBELET_EXTRA_ARGS should be sourced from this file.
EnvironmentFile=-/etc/sysconfig/kubelet
ExecStart=
ExecStart=/usr/bin/kubelet $KUBELET_KUBECONFIG_ARGS $KUBELET_CONFIG_ARGS $KUBELET_KUBEADM_ARGS $KUBELET_EXTRA_ARGS
~
~
~
Then add - cgroup-driver=systemd after Environment= "KUBELET_KUBECONFIG_ARGS=--bootstrap-kubeconfig=/etc/kubernetes/bootstrap-kubelet.conf--kubeconfig=/etc/kubernetes/kubelet.conf".
Become
Environment="KUBELET_KUBECONFIG_ARGS=--bootstrap-kubeconfig=/etc/kubernetes/bootstrap-kubelet.conf --kubeconfig=/etc/kubernetes/kubelet.conf --cgroup-driver=systemd"
Then restart kubelet
systemctl daemon-reload
systemctl restart kubelet
Then make the same modifications to the other two virtual machines.
2.3 Modify cgroup drive by doing the same for the other two virtual machines
2.4 Continue to build clusters
The first of the previous errors has disappeared. Now we can solve the next one.
[root@k8s-master centos_master]# kubeadm init --pod-network-cidr=192.168.0.0/16 --kubernetes-version=v1.15.1 --apiserver-advertise-address=192.168.56.103
[init] Using Kubernetes version: v1.15.1
[preflight] Running pre-flight checks
error execution phase preflight: [preflight] Some fatal errors occurred:
	[ERROR NumCPU]: the number of available CPUs 1 is less than the required 2
[preflight] If you know what you are doing, you can make a check non-fatal with `--ignore-preflight-errors=...`
This is because the virtual machine configuration is low. Look back at our virtual machine configuration.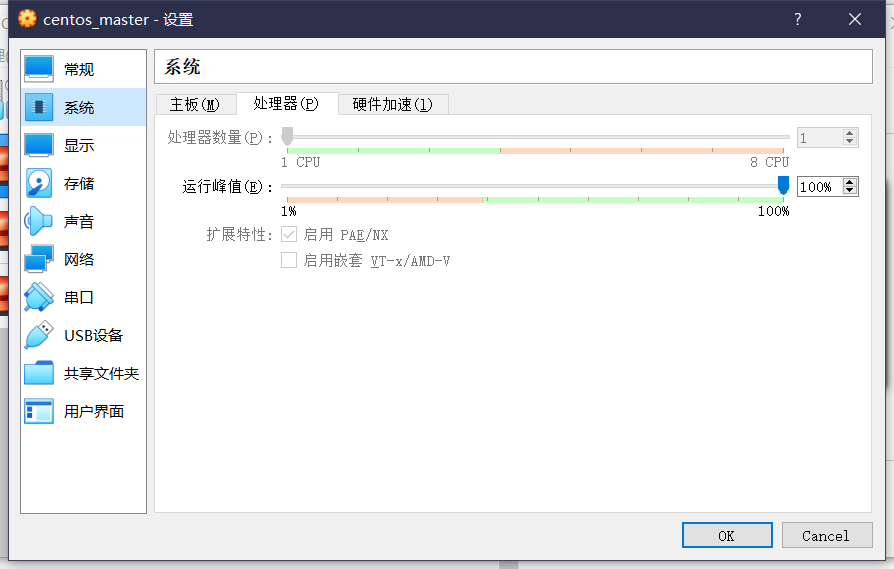 Sure enough, there is only one CPU, so you need to shut down the virtual machine and upgrade its configuration.
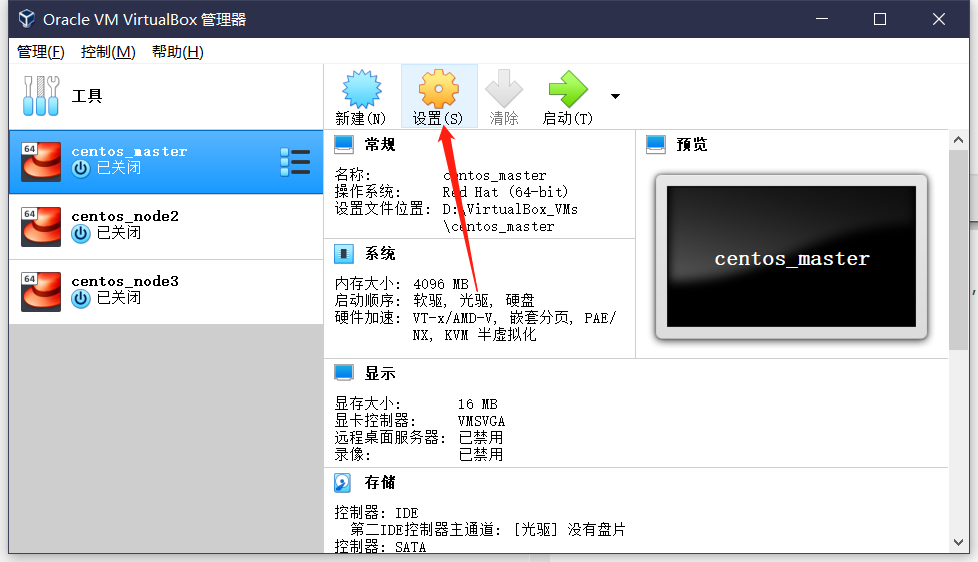
 I wondered if it would be better to give three CPUs, but the 8CPU s behind told me it was unrealistic...
The last two virtual machines operate the same way, and each virtual machine is given two CPU s.
2.4 Continue building clusters again
[root@k8s-master centos_master]# kubeadm init --pod-network-cidr=192.168.0.0/16 --kubernetes-version=v1.15.1 --apiserver-advertise-address=192.168.56.103
[init] Using Kubernetes version: v1.15.1
[preflight] Running pre-flight checks
[preflight] Pulling images required for setting up a Kubernetes cluster
[preflight] This might take a minute or two, depending on the speed of your internet connection
[preflight] You can also perform this action in beforehand using 'kubeadm config images pull'
[kubelet-start] Writing kubelet environment file with flags to file "/var/lib/kubelet/kubeadm-flags.env"
[kubelet-start] Writing kubelet configuration to file "/var/lib/kubelet/config.yaml"
[kubelet-start] Activating the kubelet service
[certs] Using certificateDir folder "/etc/kubernetes/pki"
[certs] Generating "ca" certificate and key
[certs] Generating "apiserver" certificate and key
[certs] apiserver serving cert is signed for DNS names [k8s-master kubernetes kubernetes.default kubernetes.default.svc kubernetes.default.svc.cluster.local] and IPs [10.96.0.1 192.168.56.103]
[certs] Generating "apiserver-kubelet-client" certificate and key
[certs] Generating "etcd/ca" certificate and key
[certs] Generating "etcd/server" certificate and key
[certs] etcd/server serving cert is signed for DNS names [k8s-master localhost] and IPs [192.168.56.103 127.0.0.1 ::1]
[certs] Generating "apiserver-etcd-client" certificate and key
[certs] Generating "etcd/peer" certificate and key
[certs] etcd/peer serving cert is signed for DNS names [k8s-master localhost] and IPs [192.168.56.103 127.0.0.1 ::1]
[certs] Generating "etcd/healthcheck-client" certificate and key
[certs] Generating "front-proxy-ca" certificate and key
[certs] Generating "front-proxy-client" certificate and key
[certs] Generating "sa" key and public key
[kubeconfig] Using kubeconfig folder "/etc/kubernetes"
[kubeconfig] Writing "admin.conf" kubeconfig file
[kubeconfig] Writing "kubelet.conf" kubeconfig file
[kubeconfig] Writing "controller-manager.conf" kubeconfig file
[kubeconfig] Writing "scheduler.conf" kubeconfig file
[control-plane] Using manifest folder "/etc/kubernetes/manifests"
[control-plane] Creating static Pod manifest for "kube-apiserver"
[control-plane] Creating static Pod manifest for "kube-controller-manager"
[control-plane] Creating static Pod manifest for "kube-scheduler"
[etcd] Creating static Pod manifest for local etcd in "/etc/kubernetes/manifests"
[wait-control-plane] Waiting for the kubelet to boot up the control plane as static Pods from directory "/etc/kubernetes/manifests". This can take up to 4m0s
[apiclient] All control plane components are healthy after 20.503142 seconds
[upload-config] Storing the configuration used in ConfigMap "kubeadm-config" in the "kube-system" Namespace
[kubelet] Creating a ConfigMap "kubelet-config-1.15" in namespace kube-system with the configuration for the kubelets in the cluster
[upload-certs] Skipping phase. Please see --upload-certs
[mark-control-plane] Marking the node k8s-master as control-plane by adding the label "node-role.kubernetes.io/master=''"
[mark-control-plane] Marking the node k8s-master as control-plane by adding the taints [node-role.kubernetes.io/master:NoSchedule]
[bootstrap-token] Using token: 4lomz9.l7dq7yewuiuo7j6r
[bootstrap-token] Configuring bootstrap tokens, cluster-info ConfigMap, RBAC Roles
[bootstrap-token] configured RBAC rules to allow Node Bootstrap tokens to post CSRs in order for nodes to get long term certificate credentials
[bootstrap-token] configured RBAC rules to allow the csrapprover controller automatically approve CSRs from a Node Bootstrap Token
[bootstrap-token] configured RBAC rules to allow certificate rotation for all node client certificates in the cluster
[bootstrap-token] Creating the "cluster-info" ConfigMap in the "kube-public" namespace
[addons] Applied essential addon: CoreDNS
[addons] Applied essential addon: kube-proxy

Your Kubernetes control-plane has initialized successfully!

To start using your cluster, you need to run the following as a regular user:

  mkdir -p $HOME/.kube
  sudo cp -i /etc/kubernetes/admin.conf $HOME/.kube/config
  sudo chown $(id -u):$(id -g) $HOME/.kube/config

You should now deploy a pod network to the cluster.
Run "kubectl apply -f [podnetwork].yaml" with one of the options listed at:
  https://kubernetes.io/docs/concepts/cluster-administration/addons/

Then you can join any number of worker nodes by running the following on each as root:

kubeadm join 192.168.56.103:6443 --token 4lomz9.l7dq7yewuiuo7j6r \
    --discovery-token-ca-cert-hash sha256:a7c45b56471cfa88e897007b74618bae0c16bf4179d98710622bc64e3f0f6ed4
Success!
2.5 Interpretation
As you can see, the cluster is prompted to initialize successfully, and we need to execute the following commands:
mkdir -p $HOME/.kube
sudo cp -i /etc/kubernetes/admin.conf $HOME/.kube/config
sudo chown $(id -u):$(id -g) $HOME/.kube/config
In addition, we need to create a network.
You should now deploy a pod network to the cluster. Run "kubectl apply
-f [podnetwork].yaml" with one of the options listed at: https://kubernetes.io/docs/concepts/cluster-administration/addons/
The way other nodes join the cluster is also discussed.
Then you can join any number of worker nodes by running the following
on each as root:kubeadm join 192.168.56.103:6443 --token 4lomz9.l7dq7yewuiuo7j6r
–discovery-token-ca-cert-hash sha256:a7c45b56471cfa88e897007b74618bae0c16bf4179d98710622bc64e3f0f6ed4
2.6 Continue construction
First, follow the instructions to execute the following commands:
mkdir -p $HOME/.kube
sudo cp -i /etc/kubernetes/admin.conf $HOME/.kube/config
sudo chown $(id -u):$(id -g) $HOME/.kube/config
Then look at the pod status. If the network is not created, the dns-related components are blocked.
[root@k8s-master centos_master]# kubectl get pod -n kube-system
NAME                                 READY   STATUS    RESTARTS   AGE
coredns-5c98db65d4-dnb85             0/1     Pending   0          60m
coredns-5c98db65d4-jhdsl             0/1     Pending   0          60m
etcd-k8s-master                      1/1     Running   0          59m
kube-apiserver-k8s-master            1/1     Running   0          59m
kube-controller-manager-k8s-master   1/1     Running   0          59m
kube-proxy-78k2m                     1/1     Running   0          60m
kube-scheduler-k8s-master            1/1     Running   0          59m
2.8 Building Network
When we build the network, we also encounter many inappropriate tutorials or other misleading explanations. In order to prevent people from getting confused, we will write the correct steps directly below.
According to official documents
https://docs.projectcalico.org/v3.8/getting-started/kubernetes/
1. This step was completed at the time of initialization, so we ignored it.
sudo kubeadm init --pod-network-cidr=192.168.0.0/16
2. This step has also been completed and neglected.
mkdir -p $HOME/.kube
sudo cp -i /etc/kubernetes/admin.conf $HOME/.kube/config
sudo chown $(id -u):$(id -g) $HOME/.kube/config
3. Execute the following commands
kubectl apply -f https://docs.projectcalico.org/v3.8/manifests/calico.yaml
Then you see the following interface
configmap "calico-config" created
customresourcedefinition.apiextensions.k8s.io "felixconfigurations.crd.projectcalico.org" created
customresourcedefinition.apiextensions.k8s.io "ipamblocks.crd.projectcalico.org" created
customresourcedefinition.apiextensions.k8s.io "blockaffinities.crd.projectcalico.org" created
customresourcedefinition.apiextensions.k8s.io "ipamhandles.crd.projectcalico.org" created
customresourcedefinition.apiextensions.k8s.io "bgppeers.crd.projectcalico.org" created
customresourcedefinition.apiextensions.k8s.io "bgpconfigurations.crd.projectcalico.org" created
customresourcedefinition.apiextensions.k8s.io "ippools.crd.projectcalico.org" created
customresourcedefinition.apiextensions.k8s.io "hostendpoints.crd.projectcalico.org" created
customresourcedefinition.apiextensions.k8s.io "clusterinformations.crd.projectcalico.org" created
customresourcedefinition.apiextensions.k8s.io "globalnetworkpolicies.crd.projectcalico.org" created
customresourcedefinition.apiextensions.k8s.io "globalnetworksets.crd.projectcalico.org" created
customresourcedefinition.apiextensions.k8s.io "networksets.crd.projectcalico.org" created
customresourcedefinition.apiextensions.k8s.io "networkpolicies.crd.projectcalico.org" created
clusterrole.rbac.authorization.k8s.io "calico-kube-controllers" created
clusterrolebinding.rbac.authorization.k8s.io "calico-kube-controllers" created
clusterrole.rbac.authorization.k8s.io "calico-node" created
clusterrolebinding.rbac.authorization.k8s.io "calico-node" created
daemonset.extensions "calico-node" created
serviceaccount "calico-node" created
deployment.extensions "calico-kube-controllers" created
serviceaccount "calico-kube-controllers" created
4. Next, execute the following command to observe
watch kubectl get pods --all-namespaces
Until the state of each pod becomes running.
Here's the arrow column. Wait until that column becomes running. Turn into the following scenario
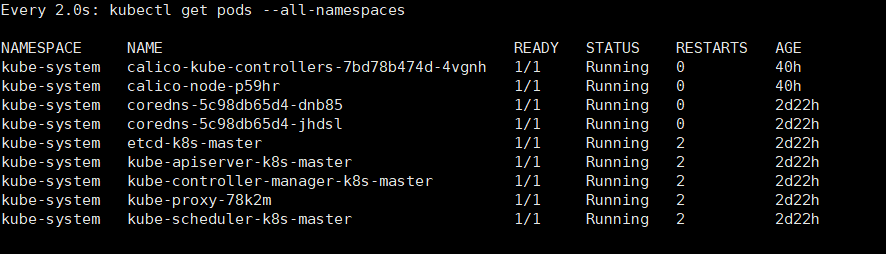 (At that time, I waited for ten minutes and four of them were still blocked. Then I shut down the computer because something happened. When I got back to the virtual machine, I ran watch kubectl get Pods - all-name spaces and got the picture above. All pod s were running.)
Because the K8S cluster does not schedule pod s to Master by default, the master's resources are wasted, and setting up master nodes can also be scheduled.
[root@k8s-master centos_master]# kubectl taint nodes --all node-role.kubernetes.io/master-
node/k8s-master untainted
Use the following command to confirm that there is now a node in our cluster.
kubectl get nodes -o wide
Get the following feedback
NAME         STATUS   ROLES    AGE     VERSION   INTERNAL-IP      EXTERNAL-IP   OS-IMAGE                KERNEL-VERSION               CONTAINER-RUNTIME
k8s-master   Ready    master   2d22h   v1.15.1   192.168.56.103   <none>        CentOS Linux 7 (Core)   3.10.0-957.21.3.el7.x86_64   docker://18.9.8
Congratulations! Now we have a single host Kubernetes cluster with Calico.
2.9 Adding other nodes to the cluster
On the other two nodes k8s-node 2 and k8s-node 3, the kubeadm join command generated by the master node is executed to join the cluster:
kubeadm join 192.168.56.103:6443 --token 4lomz9.l7dq7yewuiuo7j6r --discovery-token-ca-cert-hash sha256:a7c45b56471cfa88e897007b74618bae0c16bf4179d98710622bc64e3f0f6ed4
Then report an error.
[root@k8s-node2 centos_master]# kubeadm join 192.168.56.103:6443 --token 4lomz9.l7dq7yewuiuo7j6r --discovery-token-ca-cert-hash sha256:a7c45b56471cfa88e897007b74618bae0c16bf4179d98710622bc64e3f0f6ed4
[preflight] Running pre-flight checks
error execution phase preflight: couldn't validate the identity of the API Server: abort connecting to API servers after timeout of 5m0s
Cause: The default token expires for 24 hours, and the master node's token expires
Solution: Create a new token
(1) On the master node, get a new token (this changes)
[root@k8s-master centos_master]# kubeadm token create
amrjle.m6zuzmlcfim6ntdk
(2) On the master node, get the ca certificate sha256 encoding hash value (this seems unchanged)
[root@k8s-master centos_master]# openssl x509 -pubkey -in /etc/kubernetes/pki/ca.crt | openssl rsa -pubin -outform der 2>/dev/null | openssl dgst -sha256 -hex | sed 's/^.* //'
a7c45b56471cfa88e897007b74618bae0c16bf4179d98710622bc64e3f0f6ed4
(3) Edit the new added node kubeadm join as follows
kubeadm join 192.168.56.103:6443 --token amrjle.m6zuzmlcfim6ntdk --discovery-token-ca-cert-hash sha256:a7c45b56471cfa88e897007b74618bae0c16bf4179d98710622bc64e3f0f6ed4
(4) Re-adding nodes, taking node2 as an example
    [root@k8s-node2 centos_master]# kubeadm join 192.168.56.103:6443 --token amrjle.m6zuzmlcfim6ntdk --discovery-token-ca-cert-hash sha256:a7c45b56471cfa88e897007b74618bae0c16bf4179d98710622bc64e3f0f6ed4
    [preflight] Running pre-flight checks
    [preflight] Reading configuration from the cluster...
    [preflight] FYI: You can look at this config file with 'kubectl -n kube-system get cm kubeadm-config -oyaml'
    [kubelet-start] Downloading configuration for the kubelet from the "kubelet-config-1.15" ConfigMap in the kube-system namespace
    [kubelet-start] Writing kubelet configuration to file "/var/lib/kubelet/config.yaml"
    [kubelet-start] Writing kubelet environment file with flags to file "/var/lib/kubelet/kubeadm-flags.env"
    [kubelet-start] Activating the kubelet service
    [kubelet-start] Waiting for the kubelet to perform the TLS Bootstrap...

    This node has joined the cluster:
    * Certificate signing request was sent to apiserver and a response was received.
    * The Kubelet was informed of the new secure connection details.

    Run 'kubectl get nodes' on the control-plane to see this node join the cluster.
Success ~, node3 is the same
After all nodes are added to the cluster, run kubectl get nodes on the master node (master node) to see the status of the cluster as follows
[root@k8s-master centos_master]# kubectl get nodes
NAME         STATUS   ROLES    AGE     VERSION
k8s-master   Ready    master   2d23h   v1.15.1
k8s-node2    Ready    <none>   3m38s   v1.15.1
k8s-node3    Ready    <none>   3m28s   v1.15.1
In addition, you can view all pod States and run kubectl get pods-n kube-system
[root@k8s-master centos_master]# kubectl get pods -n kube-system
NAME                                       READY   STATUS    RESTARTS   AGE
calico-kube-controllers-7bd78b474d-4vgnh   1/1     Running   0          41h
calico-node-p59hr                          1/1     Running   0          41h
calico-node-rdcqs                          1/1     Running   0          4m46s
calico-node-sc79x                          1/1     Running   0          4m56s
coredns-5c98db65d4-dnb85                   1/1     Running   0          2d23h
coredns-5c98db65d4-jhdsl                   1/1     Running   0          2d23h
etcd-k8s-master                            1/1     Running   2          2d23h
kube-apiserver-k8s-master                  1/1     Running   2          2d23h
kube-controller-manager-k8s-master         1/1     Running   2          2d23h
kube-proxy-78k2m                           1/1     Running   2          2d23h
kube-proxy-n9ggl                           1/1     Running   0          4m46s
kube-proxy-zvglw                           1/1     Running   0          4m56s
kube-scheduler-k8s-master                  1/1     Running   2          2d23h
As shown in the figure, all pod s are running, which means that the cluster is running normally.
Remarks:
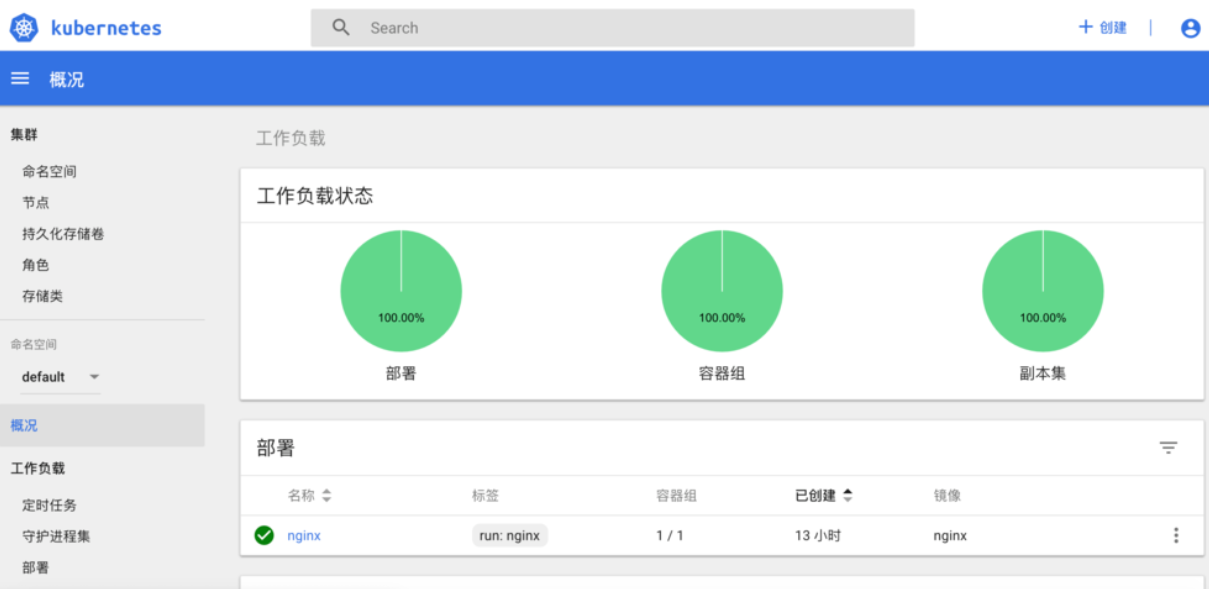
In addition, the k8s project provides an official dashboard, because we usually use the command line more, and then build istio, so I will not repeat here, how to install can go to find the tutorial, the final effect is as follows.