1, Configure local yum source
For Intranet environment, first configure the local yum source to solve the dependent installation of MySQL. For details, refer to this article: Click Open
2, View server environment
cat /etc/redhat-release

III. go to the official website to download mysql installation package Click Open
(1) Select version 5.7.36 and download it directly

 IV. installing mysql
(1) Upload the installation package to the server
Upload to / home with ftp tool
(2) Check whether mysql has been installed before
Before installation, you can check whether there is any previous installation. If so, uninstall it. If there is data before, remember to uninstall it after backup
find / -type f -name "mysql*"
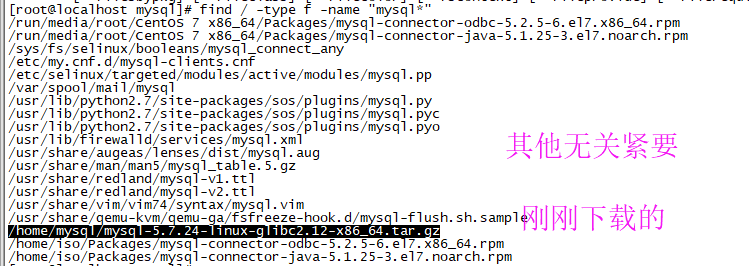
/etc/my.cnf this file, if any, should also be deleted. Generally, this file exists only when mariadb exists in the system. You can uninstall mariadb.
(3) Uninstall mariadb
1. View the current installation list
rpm -qa | grep mariadb

2. Unloading
rpm -e --nodeps mariadb-libs-5.5.56-2.el7.x86_64
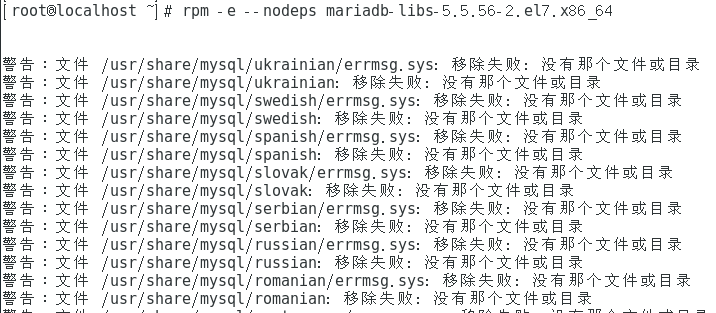
3. Check whether the uninstallation is clean. You can see that there is no list

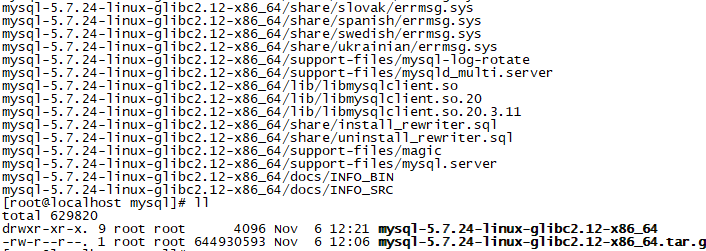
(4) unzip the installation package
tar -xvf mysql-5.7.36-linux-glibc2.12-x86_64.tar.gz
(5) move the unzipped package to / usr/local/
mv mysql-5.7.36-linux-glibc2.12-x86_64 /usr/local/
(6) change the name of the decompression package to mysql
cd /usr/local
mv mysql-5.7.36-linux-glibc2.12-x86_64 mysql
(7) Create MySQL files and change permissions
This directory is for the convenience of using the system variable value secure_file_priv, but before that, you need to create user groups.
groupadd mysql //Create mysql group
useradd -g mysql mysql //Create mysql user and add to mysql group
Then again
#create folder
 mkdir -p /usr/local/mysql/mysql-files
#Modify account permissions: make the mysql account accessible

 chown -R mysql:mysql /usr/local/mysql/mysql-files
#Modify operation permission
 chmod 750 /usr/local/mysql/mysql-files
(8) Initialize
bin/mysqld --initialize --user=mysql
bin/mysql_ssl_rsa_setup
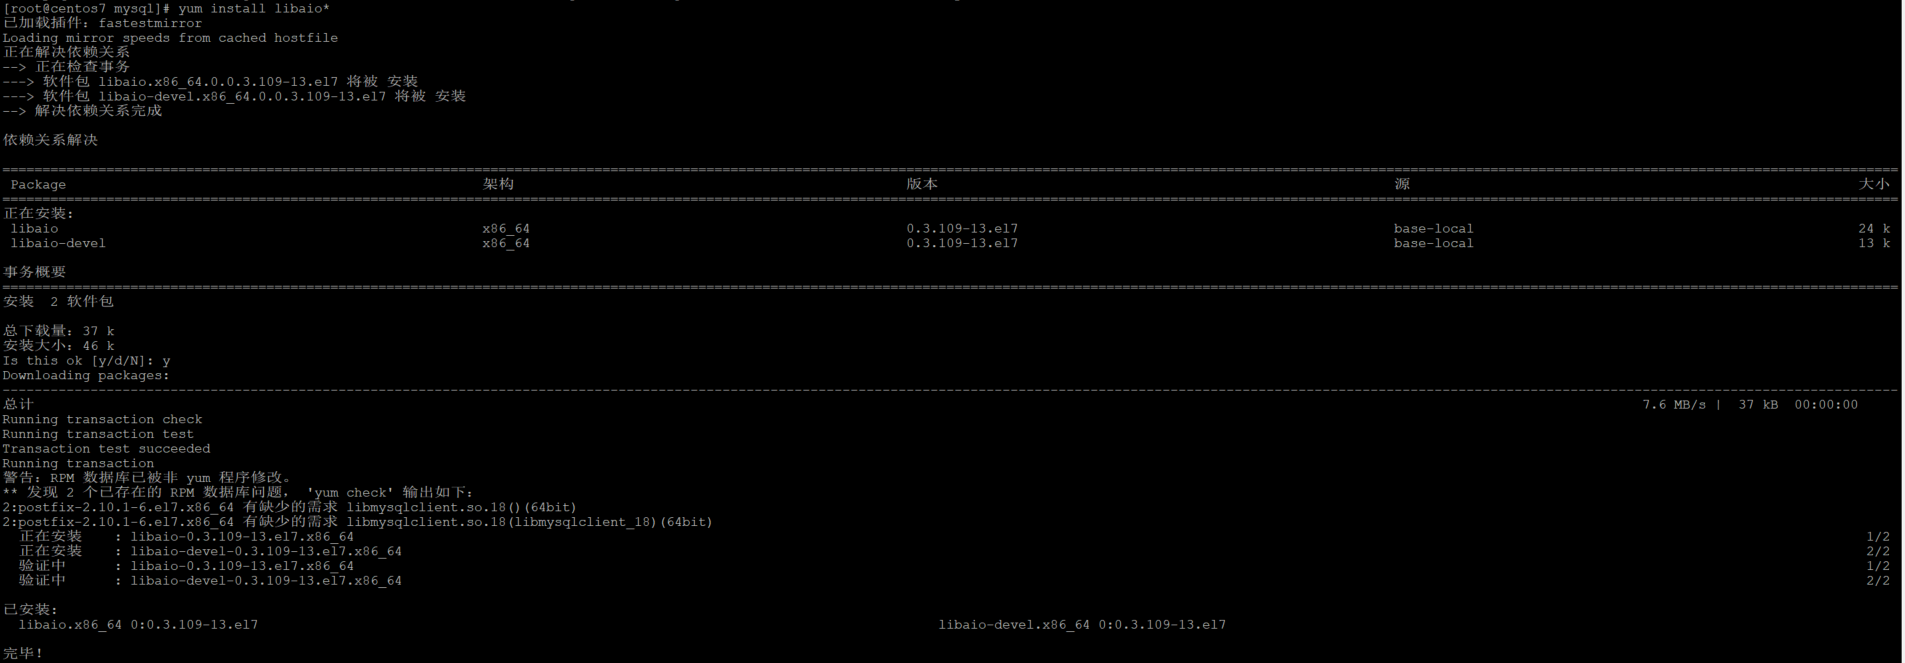
However, if the dependent package is missing, the following error will be reported:

Can run
yum -y install libaio
Then install it.
Then proceed
bin/mysqld --initialize --user=mysql
bin/mysql_ssl_rsa_setup
 Here you can see that the initial password of mysql root is: 7w_sZ3qobQ:9

(9) Start
#start-up

bin/mysqld_safe --user=mysql &

#View mysqld process

ps aux | grep mysqld

To stop and start, you can directly kill the process.
5, Make mysql into a service
If we want to use the service command to start or stop mysql, and the result is an error, we need to configure it
service mysql start
 (1) copy the service to / etc / init D / contents
cp /usr/local/mysql/support-files/mysql.server /etc/init.d/mysql
(2) set operation authority
cd /etc/init.d/

chmod +x /etc/init.d/mysql
(3) Start the test with service
service mysql start
 Vi. add mysql service to the startup self startup item
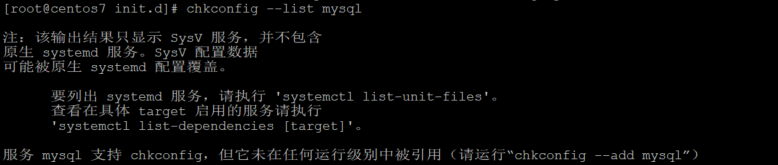
(1) Check whether the startup item is added
chkconfig --list mysql
(2) add the start-up item
chkconfig --add mysql
VII. Soft connection configuration
(1) Set up soft connection
When we use mysql -uroot -p to enter mysql, we find an error bash: mysql: command not found

This is because the system will find the command in / usr/bin by default. If the command is not in this directory, we can't find the command. What we need to do is map a link to / usr/bin directory, which is equivalent to establishing a link file (we call it soft connection).
To make a soft connection, we must first find the full path of the mysql command or the mysql admin command. Our path here is: / usr/local/mysql/bin/mysql
ln -s /usr/local/mysql/bin/mysql /usr/bin
(2) Login to mysql
After setting, log in locally
mysql -uroot -p
7w_sZ3qobQ:9

8, Change password
I modify it here as: 111111
SET PASSWORD = PASSWORD('111111');
ALTER USER 'root'@'localhost' PASSWORD EXPIRE NEVER;
flush privileges;
(2) test the new password
quit
mysql -uroot -p
111111
IX. open remote authorization
(1) Authorization
GRANT ALL PRIVILEGES ON *.* TO 'root'@'%' IDENTIFIED BY '111111' WITH GRANT OPTION;
(2) Remote login authentication
Use navicat client tool to successfully log in remotely.