1. Introduction to Nginx
Nginx is developed for performance optimization. Its greatest advantage is its stability, low system resource consumption, and high processing power for http concurrent connections. A single physical server can support 20,000-50,000 concurrent requests. This is why a large number of enterprises providing services such as social networking, news information, e-commerce and virtual hosts have chosen Nginx to provide web services.Users of nginx websites in the former mainland of China are Sina, NetEase and Tencent. Plurk, a well-known microblog, also uses nginx.
Nginx is a powerful high-performance Web and reverse proxy server with many excellent features:
High concurrent connections: Official tests support 50,000 concurrent connections, running to 2,~3W concurrent connections in actual production environments.
Low memory consumption: With 3W concurrent connections, only 150M memory is consumed by the 10 NGINX processes that are open (15M*10=150M)
The configuration file is very simple: the style is as easy to understand as the program.
Low cost: Nginx is free to use as open source software, while hardware load balancing switches such as F5 BIG-IP and NetScaler require more than 100,000 to hundreds of thousands of RMB.
Support rewrite rewrite rewrite rules: Ability to distribute HTTP requests to different back-end server groups, depending on domain name and URL.
Built-in health check function: If the back-end web server of the Nginx Proxy backend is down, front-end access will not be affected.
Bandwidth savings: Supports GZIP compression by adding Header headers that are cached locally by the browser.
High stability: For reverse proxy, the probability of downtime is negligible.
For a Web server, the basic process of a request is: establishing a connection - receiving data - sending data. At the bottom level of the system, the above process (establishing a connection - receiving data - sending data) is a read-write event at the bottom of the system.
If blocking calls are used, when the read-write event is not ready, you can only wait until the current thread is suspended and the event is ready to read-write.
If you use a non-blocking call: the event returns immediately, telling you that it's not ready yet. Come back later.Later, check the event again until it's ready, during which time you can do something else before you see if it's okay.Although it's not blocked, you have to check the status of the incident from time to time. You can do more, but the cost is not small.A non-blocking call means that it will not block the current thread until the result is not immediately available
Non-blocking determines whether read and write operations are performed by constantly checking the state of events, which is costly and therefore has an asynchronous, non-blocking event handling mechanism.This mechanism allows you to monitor multiple events simultaneously and call them non-blocking, but you can set a timeout within which to return if the event is ready.This mechanism solves the above two issues of blocking and non-blocking calls.
Take the epoll model as an example: when an event is not ready, it is put into the epoll (queue).If an event is ready, go ahead and wait in the epoll when it is not.In this way, we can concurrently process a large number of concurrent requests. Of course, concurrent requests here refer to requests that have not been processed.There is only one thread, so of course there is only one request that can be processed at the same time. It is just a continuous switch between requests, which is also voluntarily given out because the asynchronous events are not ready.Switching here comes at no cost and can be understood as cycling through multiple prepared events.
Compared with multithreading, this event handling method has great advantages, it does not need to create threads, consumes less memory per request, has no context switching, is very lightweight in event handling, and no more concurrency will result in unnecessary waste of resources (context switching).For apache servers, each request has a single worker thread, and when the number of concurrencies reaches several thousand, thousands of threads are processing requests at the same time.This poses a challenge for the operating system: because threads cause a very large memory footprint, the cpu overhead caused by thread context switching is too high for natural performance, resulting in severe performance degradation in high-concurrency scenarios.
Summary: Through an asynchronous, non-blocking event handling mechanism, Nginx implements multiple prepared events to be processed by a process loop, resulting in high concurrency and lightweight.
2. Set up Nginx server
Official download address for Nginx: http://nginx.org/download/
I provided the download address: https://pan.baidu.com/s/1PL0GyzRQ8zSPD74309R44g
Extraction Code: 4mt4
1. Upload nginx-1.14.0.tar.gz to the server (a lower version of Nginx is installed first because there is a later operation to upgrade Nginx)
[root@nginx ~]# rz       #Upload the required source package in the xshell
[root@nginx ~]# tar zxf nginx-1.14.0.tar.gz -C /usr/src  #Unpack
[root@nginx ~]# cd /usr/src/nginx-1.14.0/   #Switch to Unzipped Directory
[root@nginx nginx-1.14.0]# useradd -M -s /sbin/nologin nginx   #Create a user to run Nginx
[root@nginx nginx-1.14.0]# yum -y erase httpd   #Uninstall the system's own httpd service to avoid conflicts
[root@nginx nginx-1.14.0]# yum -y install openssl-devel pcre-devel
[root@nginx nginx-1.14.0]# ./configure --prefix=/usr/local/nginx --user=nginx --group=nginx --with-http_ssl_module && make && make install
3. Upgrade version of Nginx service to 1.2
[root@nginx nginx-1.14.0]# /usr/local/nginx/sbin/nginx    #Start the Nginx service
[root@nginx nginx-1.2.4]# /usr/local/nginx/sbin/nginx -V
nginx version: nginx/1.14.0    #Note that the current version is nginx/1.14.0
            .......................#Omit some information
[root@nginx ~]# rz        #Upload the required source package in the xshell

[root@nginx ~]# tar zxf nginx-1.2.4.tar.gz -C /usr/src   #decompression
[root@nginx ~]# cd /usr/src/nginx-1.2.4/   #Switch to uncompressed path
[root@nginx nginx-1.2.4]# ./configure --prefix=/usr/local/nginx --user=nginx --group=nginx --with-http_ssl_module && make
#Note that when upgrading, do not execute make install command, otherwise you will overwrite the original lower version configuration file
[root@nginx nginx-1.2.4]# pwd    #Confirm Current Path
/usr/src/nginx-1.2.4
[root@nginx nginx-1.2.4]# mv /usr/local/nginx/sbin/nginx nginx.bak
#Rename the old version of the service control command
[root@nginx nginx-1.2.4]# cp objs/nginx /usr/local/nginx/sbin/   #Copy the newly generated control command to the specified directory
[root@nginx nginx-1.2.4]# kill -USR2 `cat /usr/local/nginx/logs/nginx.pid`
#Generate a new PID number
[root@nginx nginx-1.2.4]# kill -HUP `cat /usr/local/nginx/logs/nginx.pid`   #Restart the Nginx service
[root@nginx nginx-1.2.4]# /usr/local/nginx/sbin/nginx -V   #Check to see if you have upgraded
nginx version: nginx/1.2.4     #Version 1.2.4, upgrade successful
4. Modify Nginx Service Header Information
Typically, to improve security, we hide Nginx version information from clients by doing the following:
#Before modification, client access can see the version of our Nginx server and other information, as follows:
[root@nginx nginx-1.2.4]# curl -I 127.0.0.1    #Get header information
HTTP/1.1 200 OK
Server: nginx/1.2.4      #Very detailed version information display
Date: Thu, 17 Oct 2019 14:40:50 GMT
Content-Type: text/html
Content-Length: 612
Last-Modified: Thu, 17 Oct 2019 14:20:40 GMT
Connection: keep-alive
Accept-Ranges: bytes
#Now make the following modifications:
[root@nginx nginx-1.2.4]# pwd   #Determine the current working path in the source package
/usr/src/nginx-1.2.4
[root@nginx nginx-1.2.4]# vim src/core/nginx.h    #Modify the file, just modify it
#define nginx_version      1002004
#define NGINX_VERSION      "666"   #Version number information here
#define NGINX_VER          "ljz/" NGINX_VERSION    #This was originally Nginx, now ljz
#Note that the comment symbols in front of the above configuration items do not need to be deleted
#Save and exit when changes are complete
[root@nginx nginx-1.2.4]# vim src/http/ngx_http_header_filter_module.c
#Edit this profile
static char ngx_http_server_string[] = "Server: ljz" CRLF;
#Search for "nginx", navigate to the line, and change the original nginx to ljz. Note that this must have the same name as the one specified in the previous configuration file
#Save and exit when changes are complete
[root@nginx nginx-1.2.4]# vim src/http/ngx_http_special_response.c   #Edit this profile
static u_char ngx_http_error_tail[] =     #Note that there is a configuration that is very similar to this one, distinguishing this line is sufficient
#If you make a mistake, you will make a mistake later
"<hr><center>ljz</center>" CRLF    #Change nginx in the middle of this line to ljz.
"</body>" CRLF
"</html>" CRLF
#Save and exit when changes are complete
[root@nginx nginx-1.2.4]# ./configure --prefix=/usr/local/nginx --user=nginx --group=nginx --with-http_ssl_module && make
#Reconfiguration and compilation
[root@nginx nginx-1.2.4]# mv /usr/local/nginx/sbin/nginx nginx2.bak   #Rename the original nginx command
[root@nginx nginx-1.2.4]# cp objs/nginx /usr/local/nginx/sbin/    #Copy the newly generated nginx command to the specified directory
[root@nginx nginx-1.2.4]# /usr/local/nginx/sbin/nginx -s stop    #Stop nginx service
[root@nginx nginx-1.2.4]# /usr/local/nginx/sbin/nginx     #start nginx
[root@nginx nginx-1.2.4]# curl -I 127.0.0.1   #View its header information
HTTP/1.1 200 OK
Server: ljz/666       #Successfully changed
    ...............#Omit some content
5. Detailed explanation of location Option in nginx main configuration file
In the main configuration file of nginx, there is a section of HTTP {}, which also contains server {} in http {}. One of the servers {} represents a virtual host in which you can configure different parameters for a web service. Here's the detailed configuration of location {}.
1. Differences between root and alias
- root: is the path where actual file paths are spliced into URL s;
- alias: Actual file paths accessed will not be spliced into URL paths
In the following configuration,'^'denotes what to start with,'~' denotes the use of regular matching expressions
1) Now change the location in the configuration file to the following:
[root@nginx conf]# vim nginx.conf          #Edit Main Profile
http {
    ...............#Omit some content
    server {
        listen       80;
            location ^~ /www {
            root   /var/www/html;   #When accessing 127.0.0.1/ww, the WW directory under the / var/www/html path is found
            index  index.html index.htm;
        }

    ...............#Omit some content
    }
}
[root@nginx nginx]# nginx -t
[root@nginx nginx]# nginx -s reload    #Overload the service twice or it may not take effect
[root@nginx nginx]# nginx -s reload
[root@nginx conf]# mkdir -p /var/www/html/www
[root@nginx conf]# echo "/var/www/html/www/index.html" > /var/www/html/www/index.html
Client access 192.168.20.5/ww for testing: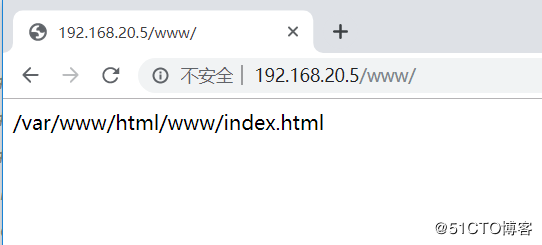
2) Now change the location in the configuration file to the following:
[root@nginx conf]# vim nginx.conf          #Edit Main Profile
http {
    ...............#Omit some content
    server {
        listen       80;
          location ^~ /test02 {
            alias   /var/www/test02;   #Visiting 127.0.0.1/test02 will look for web page files in the / var/www/test02 directory
            index  index.html index.htm;
        }

    ...............#Omit some content
    }
}
[root@nginx nginx]# nginx -t
[root@nginx nginx]# nginx -s reload
[root@nginx nginx]# nginx -s reload
[root@nginx conf]# mkdir -p /var/www/test02
[root@nginx conf]# echo "/var/www/test02/index.html" > /var/www/test02/index.html
Client access 192.168.20.5/test02 for testing: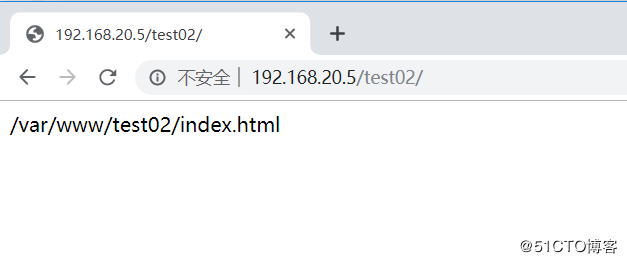
2. When matching the specified suffix, redirect to the specified file
Example 1:
[root@nginx conf]# vim nginx.conf          #Edit Main Profile
http {
    ...............#Omit some content
    server {
        listen       80;
             location ~* .(gif|jpg|png)$ {
            rewrite .(gif|jpg)$ /error.png;
        }
#The above indicates that when accessing files at the end of gif and jpg, jump to / usr/local/nginx/html/error.png
    ...............#Omit some content
    }
}
[root@nginx nginx]# nginx -t
[root@nginx nginx]# nginx -s reload
[root@nginx nginx]# nginx -s reload
[root@nginx html]# pwd    #View Current Path
/usr/local/nginx/html
[root@nginx html]# ls    #error.png needs to be stored in this directory
50x.html  error.png  index.html
Client access 192.168.20.5/bb.gif for testing:
Example 2:
[root@nginx res]# pwd
/webroot/res
[root@nginx res]# ls             #Pictures stored in this path
test1.jpg
[root@nginx html]# pwd           #current path
/usr/local/nginx/html
[root@nginx html]# cat index.html       #There is a homepage file
/usr/local/nginx/html/index.html
[root@nginx html]# vim ../conf/nginx.conf          #Edit Main Profile
    server {
        listen       80;
        server_name  localhost;
        location ~* \.(gif|jpg|jpeg|png|css|js|ico)$ {     #'~'means regular expression and'*' means case insensitive
            root /webroot/res;  #When accessing files that end with gif, jpg, etc., go to the / webroot/res directory
            index index.html index.html;
                }
        location / {
            root   html;
            index  index.html index.htm;
        }
[root@nginx html]# nginx -s reload       #Restart the service for the changes to take effect
Client access to Nginx was tested at 192.168.20.5: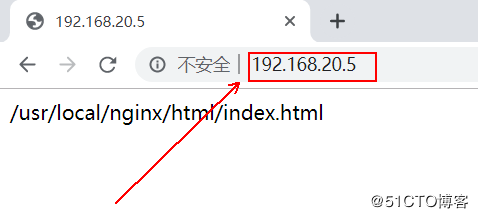
You see the contents of the index.html file under html.Now visit 192.168.20.5/test1.jpg to test: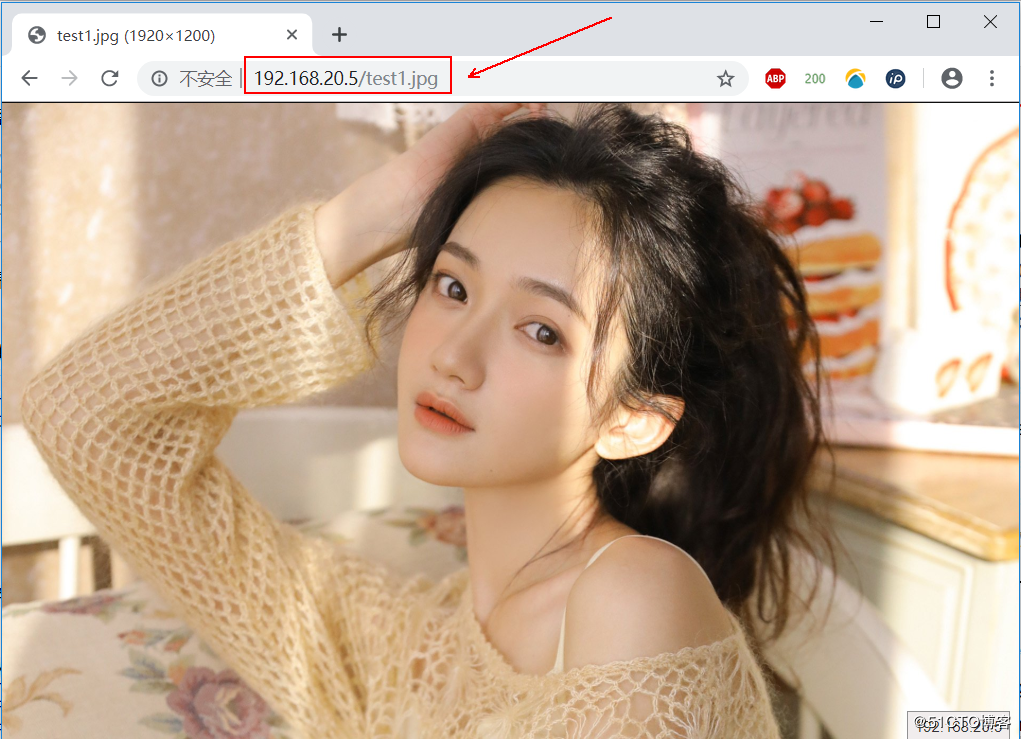
This way, you see the test1.jpg picture in the / webroot/res / directory.
3. Return a specific status code when matching a specified request pattern
[root@nginx conf]# vim nginx.conf          #Edit Main Profile
http {
    ...............#Omit some content
    server {
        listen       80;
          if ($request_method = TEST) {
            return 666;
        }
#Return status code 666 when client accesses TEST
    ...............#Omit some content
    }
}
[root@nginx nginx]# nginx -t
[root@nginx nginx]# nginx -s reload
[root@nginx nginx]# nginx -s reload
Execute the command curl-X TEST-I 127.0.0.1 locally to test:
You can see that the status code we specified was returned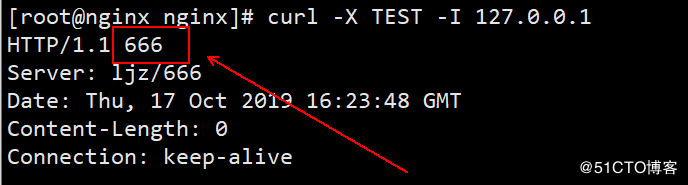
4. When the client does not access the specified domain name, it jumps to the specified domain name
[root@nginx conf]# vim nginx.conf          #Edit Main Profile
http {
    ...............#Omit some content
    server {
        listen       80;
                if ($host != 'www.test.com'){
                           rewrite ^/(.*)$ https://www.baidu.com/$1;
                }
#The above indicates that when the client is not accessed through the domain name of www.test.com, it will jump to the Baidu home page
    ...............#Omit some content
    }
}
[root@nginx nginx]# nginx -t
[root@nginx nginx]# nginx -s reload
[root@nginx nginx]# nginx -s reload
Client access 192.168.20.5 for testing:
Since I visited it once before screenshots, when I enter IP here, it will automatically correspond to Baidu.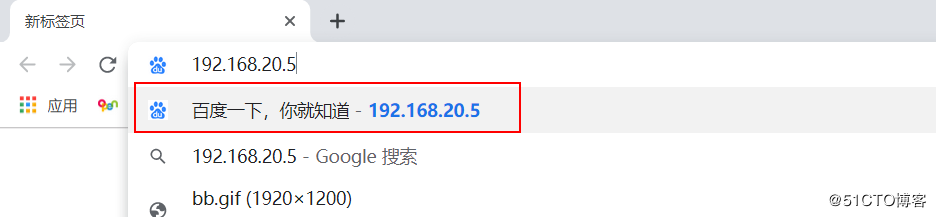
6. Configure https to access Nginx
We all know that http is port 80 and HTTPS is port 443. Because HTTPS is more secure, most web services are now accessed through https. Next, configure HTTPS to access the nginx server.
Since Internet-certified CA certificates need to be purchased for a fee, I will make one myself here without Internet-certified CA certificates.
[root@nginx ca]# pwd     #Switch to specified directory
/usr/local/nginx/ca
[root@nginx ca]# openssl genrsa -out ca.key 4096   #Generate key file
[root@nginx ca]# openssl req -new -x509 -days 7304 -key ca.key -out ca.crt
#For all of the following, press Enter directly to receive default values
             ..................#Omit some content
Country Name (2 letter code) [XX]:zh       #Country Name
State or Province Name (full name) []:beijing         #State or province name (full name)
Locality Name (eg, city) [Default City]:beijing   #City Name
Organization Name (eg, company) [Default Company Ltd]:test  #Corporate name
Organizational Unit Name (eg, section) []:operation     #Department in which you work
Common Name (eg, your name or your server's hostname)    []:test.com  #host name
Email Address []:lv916551516@163.com    #mailbox
[root@nginx ca]# ls      #Make sure the following two files are in the current directory
ca.crt  ca.key
[root@nginx ca]# vim /usr/local/nginx/conf/nginx.conf    #Edit Main Profile
             ..................#Omit some content, search for "HTTPS" to navigate to the following configuration item, and delete all comment symbols for server {} under HTTPS
#Change as follows (two lines altogether):

    server {
        listen       443 ssl;
        server_name  localhost;

        ssl_certificate      /usr/local/nginx/ca/ca.crt;     #In this line, specify the absolute path of ca.crt
        ssl_certificate_key  /usr/local/nginx/ca/ca.key;     #Change this line to specify the absolute path of ca.key

        ssl_session_cache    shared:SSL:1m;
        ssl_session_timeout  5m;

        ssl_ciphers  HIGH:!aNULL:!MD5;
        ssl_prefer_server_ciphers  on;

        location / {
            root   html;
            index  index.html index.htm;
        }
    }

}

#Save and exit when changes are complete
[root@nginx ca]# nginx -s reload    #Restart nginx
[root@nginx ca]# nginx -s reload
Clients use https to access the test (because the certificate is not Internet certified, the following warning message appears, click Advanced, and choose to continue access):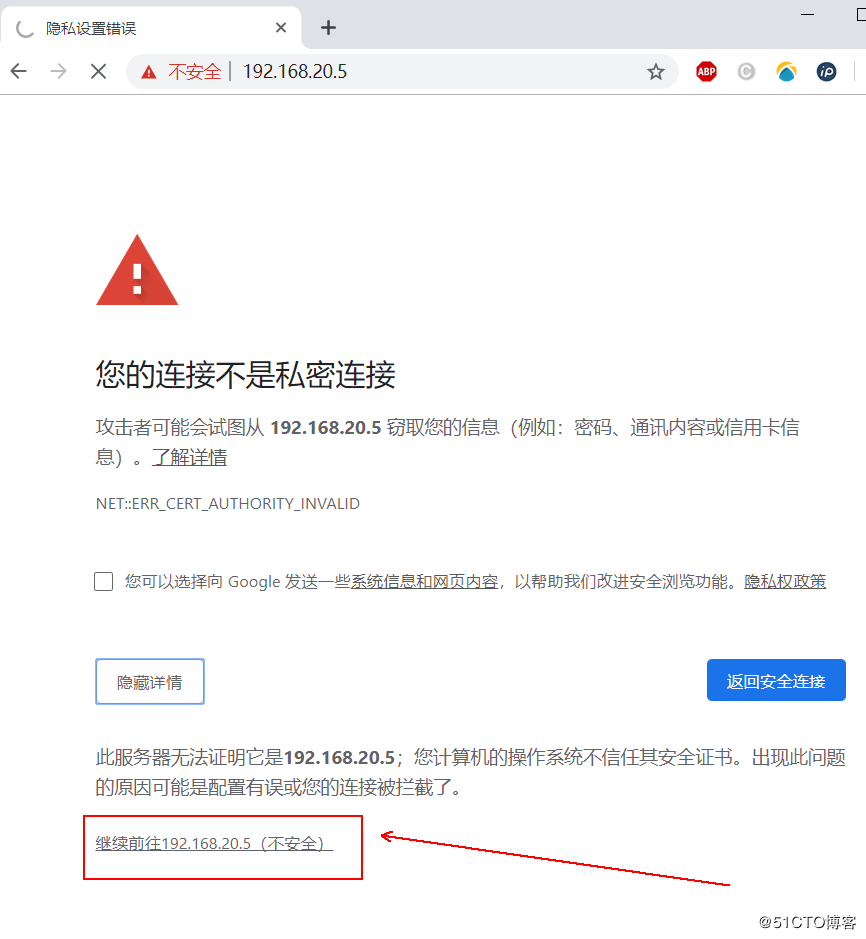
https access was successful: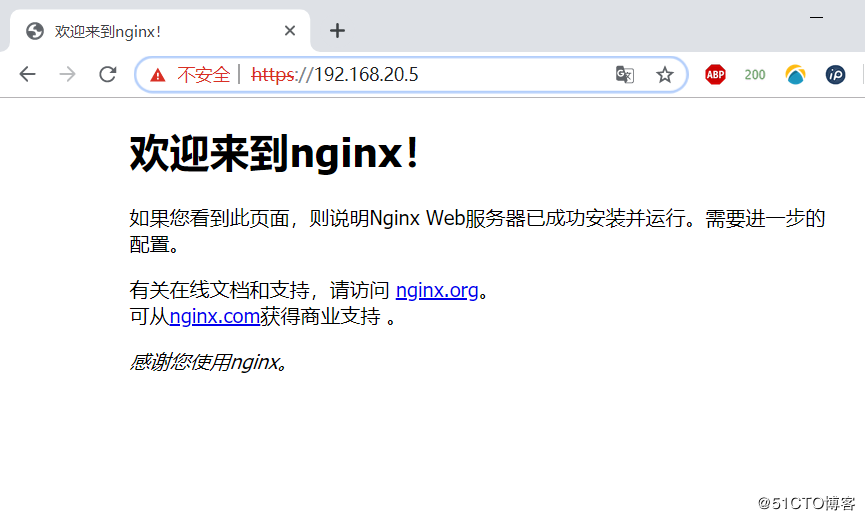
7. Open Nginx Access Certification
Sometimes, some pages of our web service are not easy to open to everyone. This can open the access authentication of the web page. After opening, you need to login with the username password to see the corresponding pages.
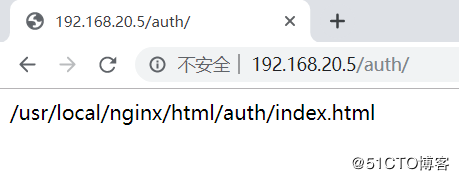
Access to our 192.168.20.5/auth/web file without opening access certification can be directly accessed as follows: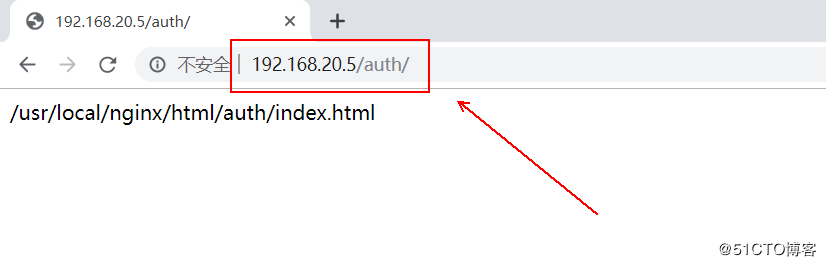
Now turn on authentication:
[root@nginx ~]# yum -y install httpd-tools       #Install required htpasswd tools
[root@nginx ~]# htpasswd -c /usr/local/nginx/.passwd admin     #Create an admin user
New password:       #Enter user password
Re-type new password:       #Confirm Password
#Note: To add a second user to.passwd, you need to omit the'-c'option, otherwise all previous users will be overwritten.
Adding password for user admin
[root@nginx ~]# vim /usr/local/nginx/conf/nginx.conf        #Edit Nginx Profile
             ......................#Omit some content, edit server configuration section that needs to be authenticated
 server {
        listen       80;
        server_name  localhost;

        #charset koi8-r;

        #access_log  logs/host.access.log  main;

        location /auth {             #Note that the actual path here is equivalent to "/usr/local/nginx/html/auth"
            root   html;
            index  index.html index.htm;
            auth_basic "Please enter a login account";        #Add prompt statement
            auth_basic_user_file /usr/local/nginx/.passwd;     #Specify the path to store the password file
        }
#When editing is complete, save and exit
[root@nginx nginx]# nginx -s reload        #Restart the Nginx service
Clients will be prompted for a username and password to log in whenever they are included in the.passwd file: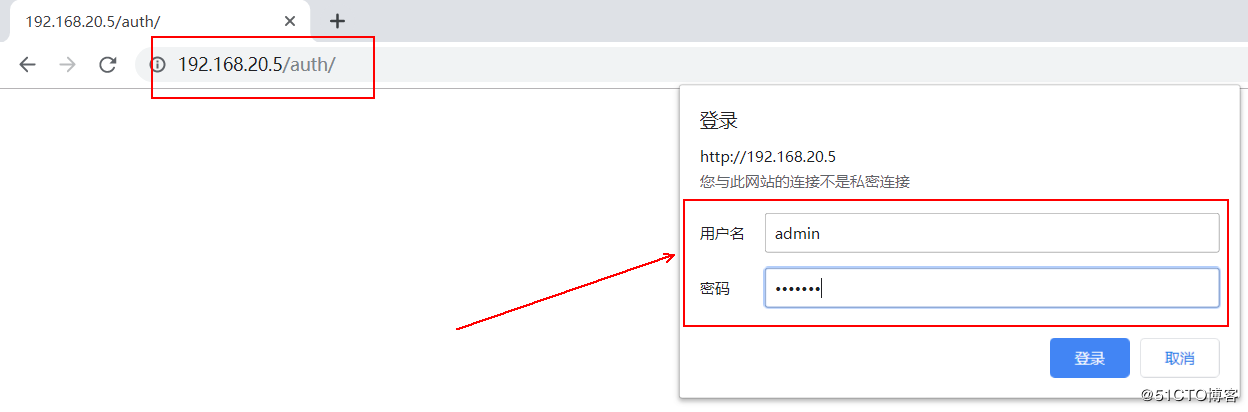
After successful login, you can see the web page file: