Through the contents of the first two chapters, I believe we can write simple plug-ins to complete some functions of QQ robot. But because it is running on your own computer, when you close go cqhttp or stop bot When py is running, it will stop the robot. So how can we keep the robot working?
That is to deploy our code and go cqhttp on the server. This article will take you to deploy your QQ robot on the Linux server.
Server selection
At present, there are many types of servers on the market. For Xiaobai, it is recommended that you rent cloud servers.
Here are some websites for purchasing ECs.
Alibaba cloud server:
https://www.aliyun.com/product/ecs?source=5176.11533457&userCode=ywqc0ubl
Huawei ECS:
https://www.huaweicloud.com/product/ecs.html
Baidu cloud server:
https://cloud.baidu.com/product/bcc.html?track=navigation20200904
Tencent cloud server:
https://cloud.tencent.com/product/cvm
You can choose your own cloud server according to your economic ability (there may be a discount for Youbao)
I chose Tencent cloud's 2-core 4G lightweight cloud server.
Server environment configuration
After purchasing ECs, you need to select the corresponding operating system.
I chose Ubuntu for Linux.
Configuring python on Ubuntu server
If you choose Ubuntu, refer to the following CSDN blogger's article for configuration.
Server mirroring configuration:
Mirror source configuration: https://www.jianshu.com/p/d4525ca41a49 when replacing an image source, you delete all the original images and replace your own image source
 tsinghua ubuntu Mirror source:https://mirror.tuna.tsinghua.edu.cn/help/ubuntu/

The server ubuntu of python to configure:
cd / # You can enter the root directory
ls You can see all folders under the root directory
cd home/ubuntu
1. sudo mkdir /usr/local/python3 # Create installation directory
2. wget https://www.python.org/ftp/python/3.9.6/Python-3.9.6.tgz # can be https://www.python.org/ftp/python/ Select any version you want to install. Note that it is tgz
3.tar -xzvf Python-3.9.6.tgz	#decompression
4.cd Python-3.9.6
5.sudo ./configure --prefix=/usr/local/python3 # Note that the specified directory is created under the Python-3.9.6 folder
6.sudo make
7.sudo make install #install
8.sudo apt install python3-pip	#pip can not be used to install pip3
 If it is centos Server: yum install python-pip

Repeat and compile again:
9.cd Python-3.9.6
10.sudo ./configure --prefix=/usr/local/python3
11.sudo make
12.sudo make install
#Installing setuptool
13.wget https://files.pythonhosted.org/packages/a6/5b/f399fcffb9128d642387133dc3aa9bb81f127b949cd4d9f63e5602ad1d71/setuptools-39.1.0.zip
 14.unzip setuptools-39.1.0.zip
15. cd setuptools-39.1.0
#Install pip
17.curl https://bootstrap.pypa.io/get-pip.py -o get-pip.py
18.python get-pip.py
 For download module: pip3 install xxx
 Add environment variable: export PATH=/home/ubuntu/.local/bin similar

vim Edit document
:wq Save and exit
:wq!Force save exit
--------
Copyright notice: This article is CSDN Blogger「Sichuan rookie」Original articles, follow CC 4.0 BY-SA Copyright agreement, please attach the original source link and this statement.
Original link: https://blog.csdn.net/weixin_46211269/article/details/118167962
Configuring the Nonebot2 environment
Environment configuration
After the Python environment is installed
The configuration of Nonebot2 under Linux and Windows is not much different
You can refer to the configuration method under Windows in the first article.
Environment configuration under Window
Note that:
Since we can upload files through xftp, we don't need nb create to create a project
Install the following python packages in sequence
pip3 install nb-cli
pip3 install pydantic loguru pygtrie httpx python-dotenv uvicorn fastapi requests selenium aiocqhttp ffmpeg aiohttp -i https://pypi.tuna.tsinghua.edu.cn/simple/
pip3 install nonebot2 -i https://pypi.tuna.tsinghua.edu.cn/simple/
pip3 install nonebot-plugin-apscheduler nonebot-adapter-cqhttp -i https://pypi.tuna.tsinghua.edu.cn/simple/
Upload project file
Use XFTP to upload directly
Attached is a complete X7 series installation package:
Link: https://pan.baidu.com/s/1uqt2fnp1dJlL8fW0iENzHA
Extraction code: CR77
Let's take the project in the previous section as an example
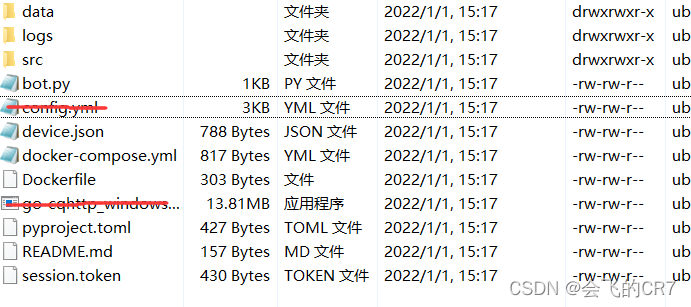
Upload the whole project named csdn. The uploaded file is as follows:
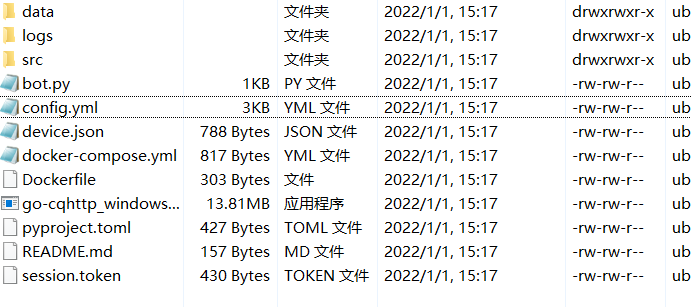
You need to delete two files, config YML and go cqhttp.
Configure env file
The configuration is similar to that in Windows environment
Enter the project folder and enter ls -a to view all files
ls -a

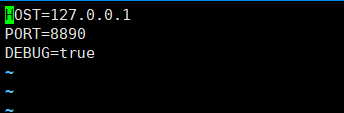
Modification env:
vim .env
The modification is shown in the figure below

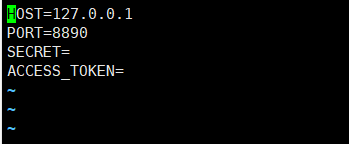
Modification env.dev:
vim .env.dev
Note that 8890 here is the port number. You can enter ps -ef at the terminal to check the port occupation. It can be used as long as the port number is not occupied.
Modification env.prod:
vim .env.prod
Run bot py
Input:
python3 bot.py
If the running result is the same as below, it is configured

go-cqhttp
Download go cqhttp
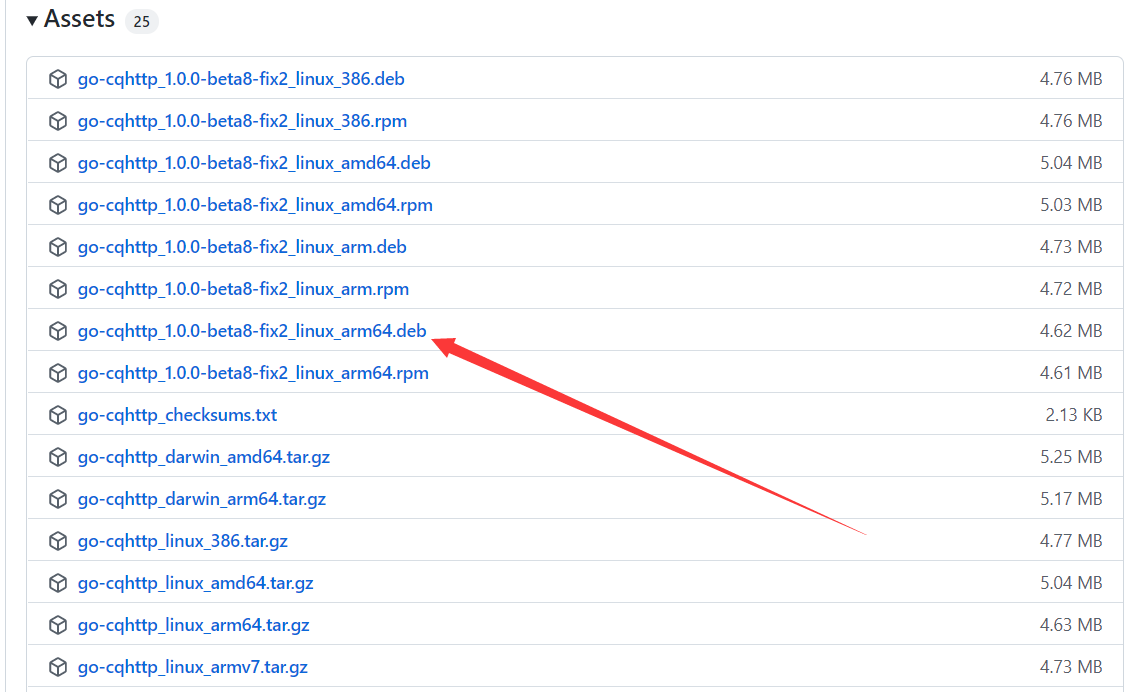
Choose the Linux system installation package here. You can choose the appropriate installation package according to your installation habits.
If you are not familiar with Linux decompression, you can follow my method.
First download the installation package pointed by the red arrow to Windows local.
After downloading successfully, get a deb compressed file, and decompress it with the compression software that supports decompressing the deb file. I use 7-zip with a download link
7-zip unzip link
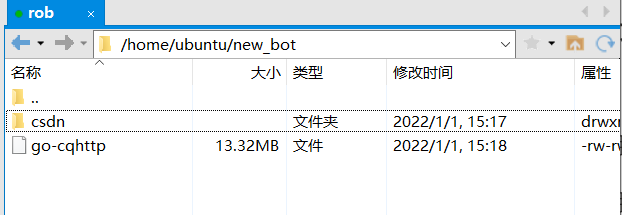
After decompression, enter the folder and click open. The last file is a file named go cqhttp. Use xftp to upload this go cqhttp file together with our project folder. As shown in the figure:
Configure go cqhttp
Use the Xshell to enter the directory where go cqhttp is located.

Grant permission to go cqhttp.
chmod 777 ./go-cqhttp
As shown in the figure:

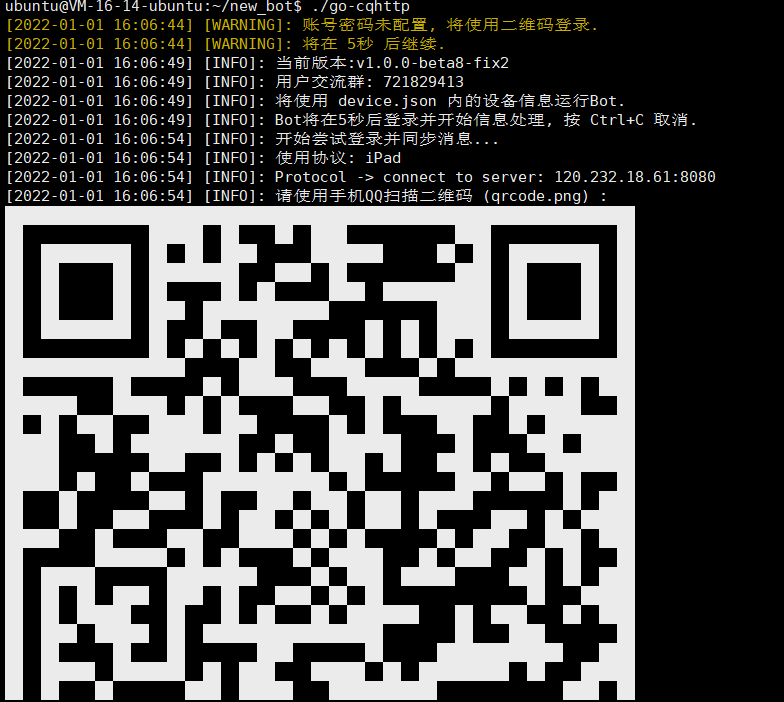
Run go cqhttp
./go cq-http
As in Windows, select 3 reverse websocket communication
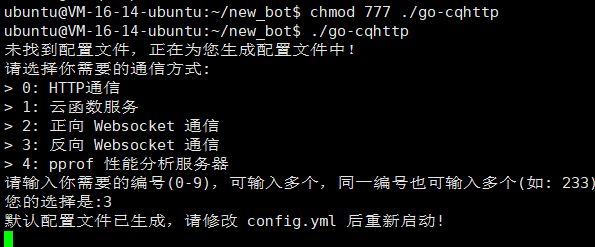
At this time, go cqhttp will automatically generate config.config in the directory where it is located YML configuration file.

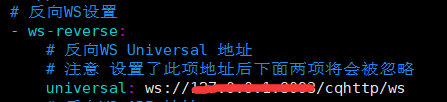
Modify the configuration file config yml
vim config.yml
Like the Windows configuration, you only need to modify uin and universal,

Note: change the following in universal to ws://127.0.0.1:8890/cqhttp/ws, and the 8890 here to its own port number
Run go cqhttp again
input
./go-cqhttp
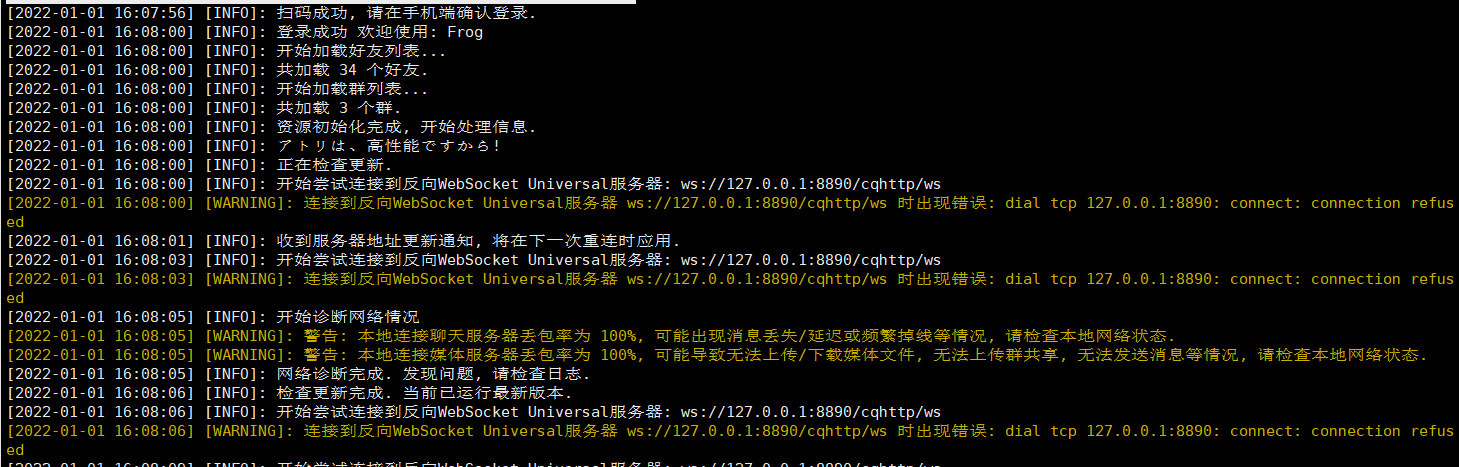
Run gocq
After successful login, as shown in the figure.
Start the robot and keep it running in the background
If the Nonebot2 environment and go-cqhttp configuration are OK, we can start the robot.
Before that, list a few common commands.
Common Linux commands
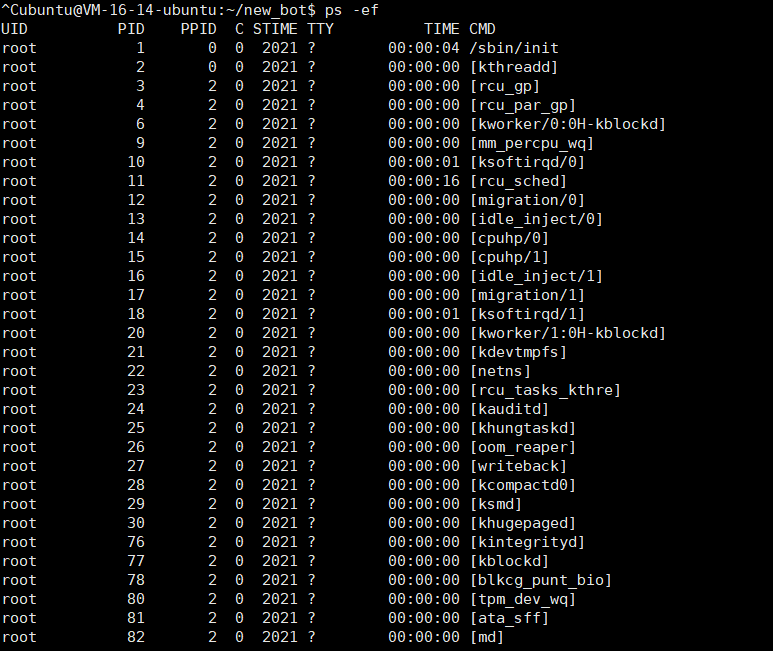
View Daemons
ps -ef #View Daemons
Through this command, we can see the running status of the process and the PID occupied by the process
Search process
ps -ef|grep go-cqhttp #ps -ef|grep + process name to view the specified process
Through this command, we can see the operation of the specified process and the PID occupied by the process
This command is usually used to quickly view the pid

Start without hanging up
nohup ./go-cqhttp &
Usually, when we run a program normally, it will hang up automatically when we close the server connection. If we want the program not to hang up, we can use this instruction.

Force end process
With ps -ef, when we want to end a process in the background, first use ps -ef to check the pid of the process, and then use kill plus pid to kill the process.
kill 542188

Start the robot
Enter bot Py folder, start BOT without hanging up Py file
nohup python3 bot.py &
As shown in the figure:

Enter the folder where go cqhttp is located and start the go cqhttp file without hanging up

At this time, the robot is successfully deployed on Linux