With the progress of technology, cross platform development has become a standard configuration. Under this background, ASP Net core also came into being. This paper mainly uses ASP Net core to develop a student management system as an example, this paper briefly describes ASP The common knowledge points of net core development are only for learning and sharing. If there are deficiencies, please correct them.
Knowledge points involved
Develop student management system, involving knowledge points, as follows:
- Development tools: Visual Studio 2019
- Target frame: Net 5.0
- Architecture: MVC three-tier architecture [model view controller]
Create project
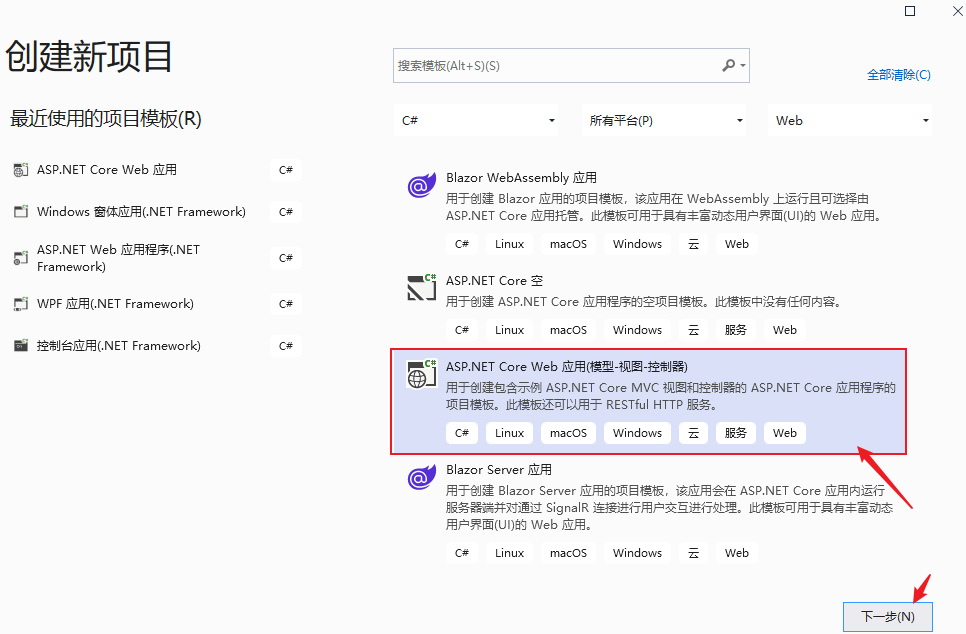
File -- > New -- > Project -- > ASP Net core web application (model view controller), as follows:
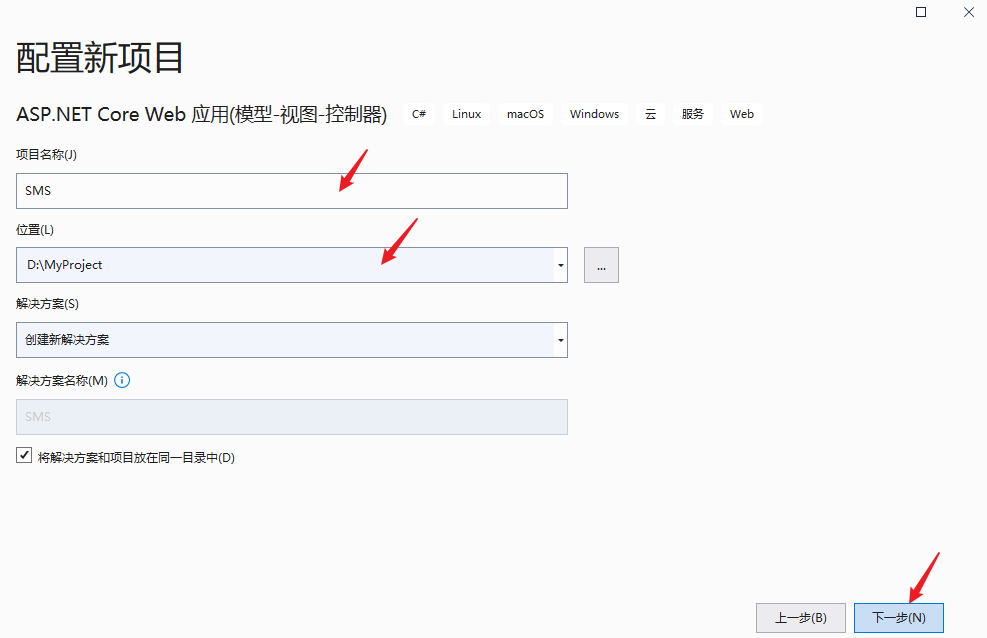
Then click next to enter the page of configuring a new project, enter the project name [SMS=Student Management System] and save location, and then click next, as shown below:
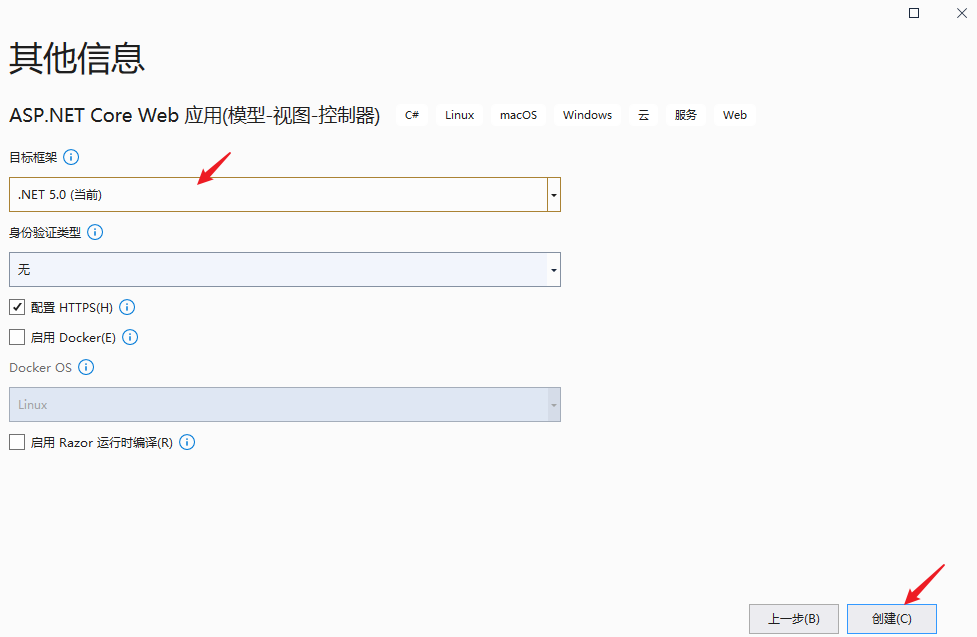
Select other information [target framework selection. NET 5.0], and then click create, as shown below:
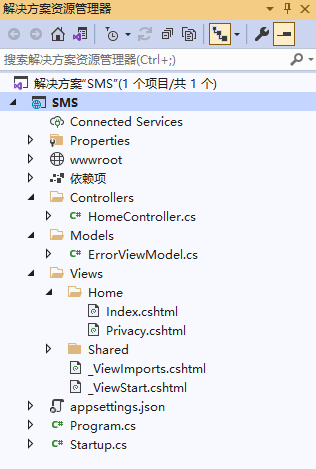
The project created by default is as follows:
Login module
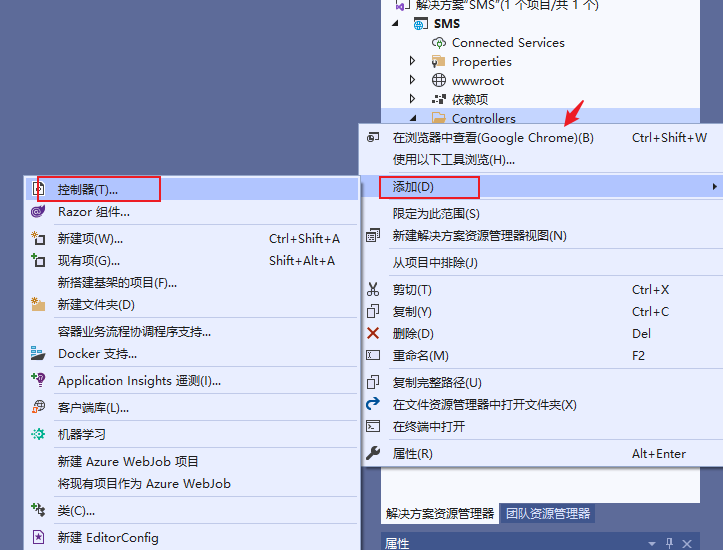
1. Create controller -- LoginController
Right click -- > in the Controllers folder to add -- > controller, as shown below:
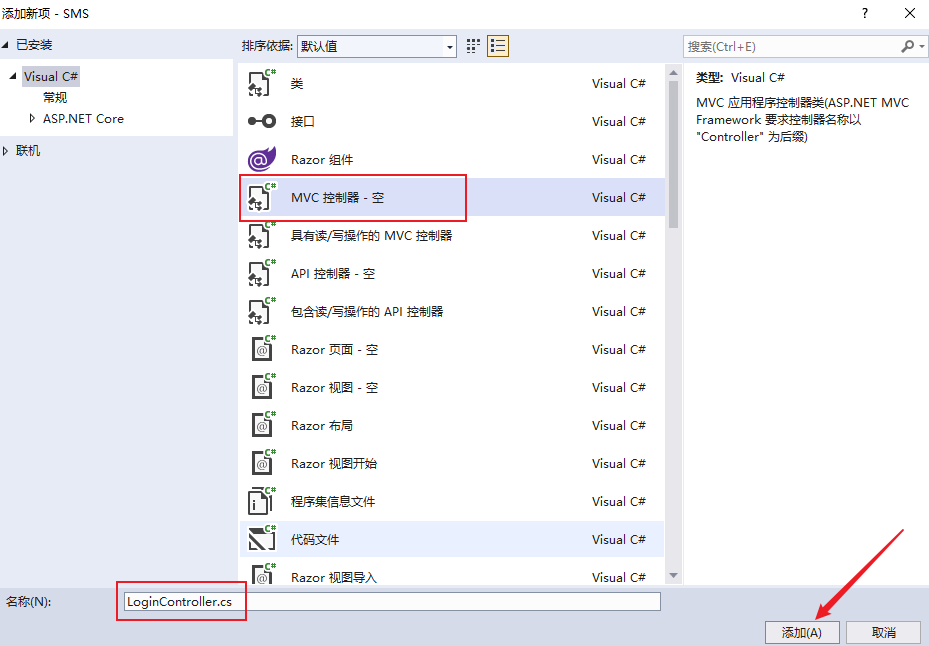
Open the create view controller window, select MVC controller - empty, and then click Add. As follows:

The add new item window pops up, select MVC controller - empty, enter the controller name, and click create, as shown below:
The controller code is as follows:
namespace SMS.Controllers
{
public class LoginController : Controller
{
private DataContext dataContext;
public LoginController(DataContext context) {
dataContext = context;
}
[HttpGet]
public IActionResult Index()
{
return View();
}
[HttpPost]
public IActionResult Login(User user)
{
if (string.IsNullOrEmpty(user.UserName) || string.IsNullOrEmpty(user.Password))
{
ViewBag.Msg = "User name or password is empty";
return View("Index", user);
}
else {
var item = dataContext.Users.FirstOrDefault(i=>i.UserName==user.UserName && i.Password == user.Password);
if (item != null)
{
HttpContext.Session.SetInt32("UserId",item.Id);
return Redirect("/Home");
}
else
{
ViewBag.Msg = "User name or password authentication error";
return View("Index", user);
}
}
}
}
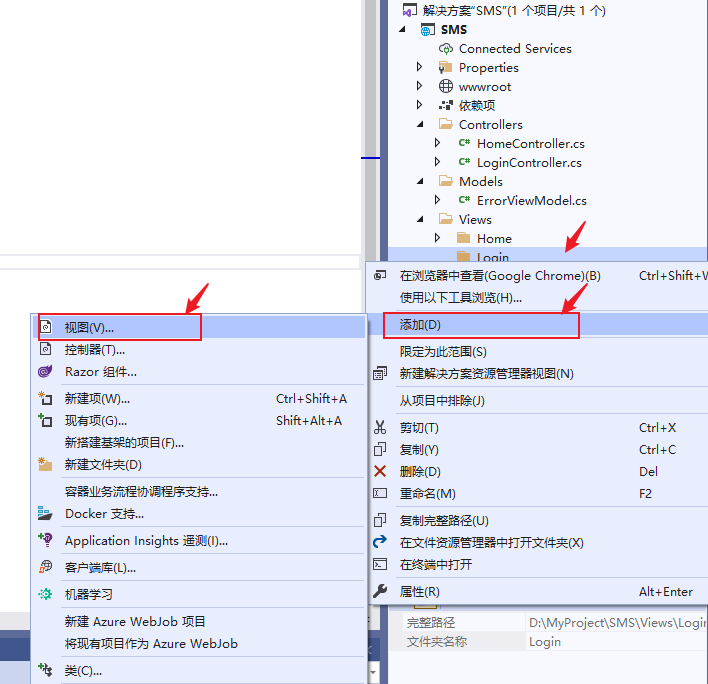
}2. Create login view
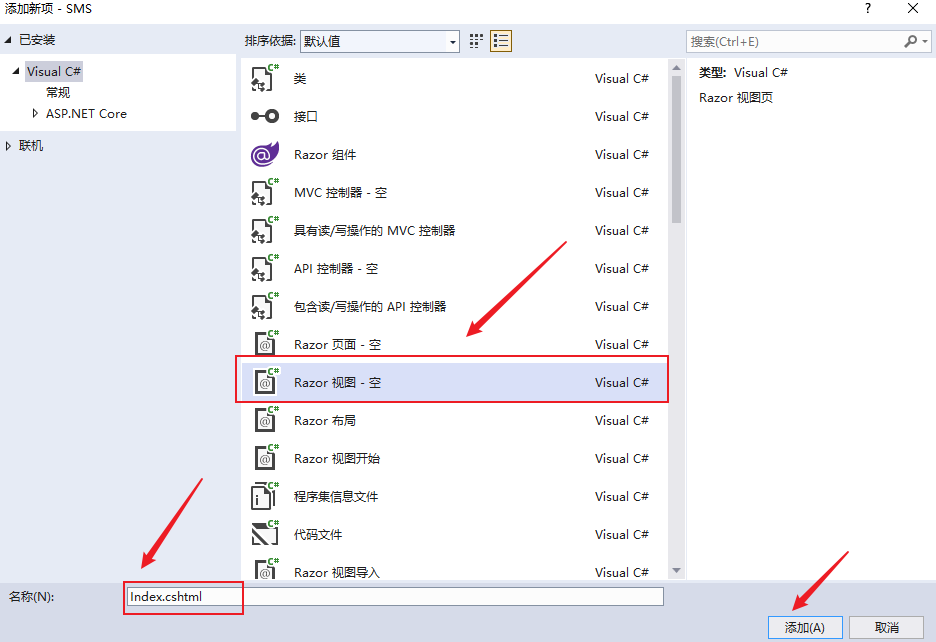
Add a Login folder under the Views folder, and then add a view [Index.cshtml], as shown below:
Then select the empty view as follows:
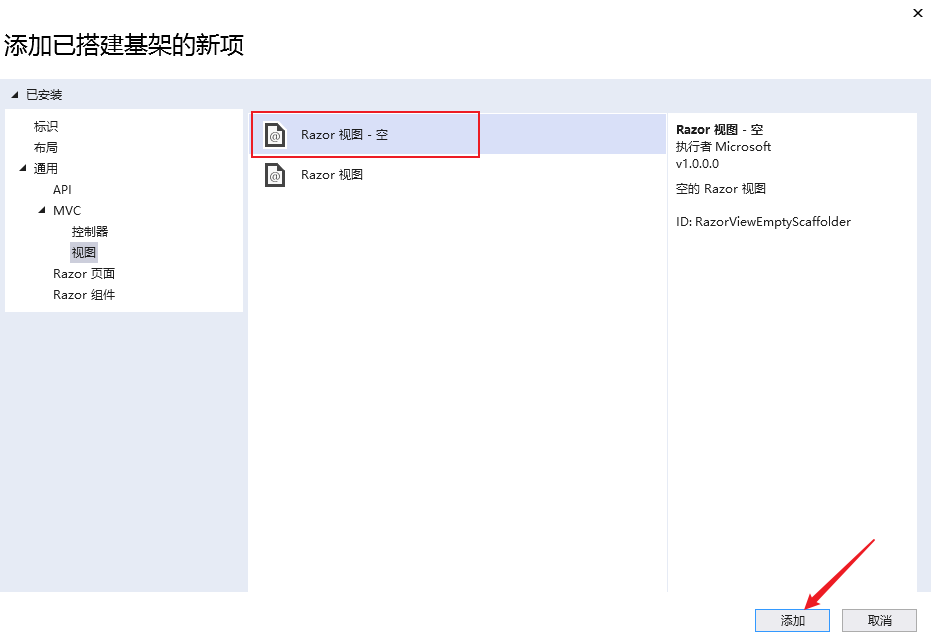
Enter the view name [Index.cshtml] and click add, as shown below:
On the login page, add the following code as follows:
@{ Layout = null;}
<!DOCTYPE html>
<html>
<head>
    <title>Student management system</title>
    <link rel="stylesheet" href="/css/login.css">
    <!-- For-Mobile-Apps-and-Meta-Tags -->
    <meta name="viewport" content="width=device-width, initial-scale=1" />
    <meta http-equiv="Content-Type" content="text/html; charset=utf-8" />

    <!-- //For-Mobile-Apps-and-Meta-Tags -->

</head>

<body>
    <h1>Student management system</h1>
    <div class="container w3">

        <form action="/Login/Login" method="post">
            <div class="username">
                <span class="username">Username:</span>
                <input type="text" id="UserName" name="UserName" class="name" placeholder="" required="">
                <div class="clear"></div>
            </div>
            <div class="password-agileits">
                <span class="username">Password:</span>
                <input type="password" id="Password" name="Password" class="password" placeholder="" required="">
                <div class="clear"></div>
            </div>
            <div class="rem-for-agile">
                <input type="checkbox" name="remember" class="remember">Remember password<br>
            </div>
            <div class="login-w3">
                <input type="submit" class="login" value="Sign in">
            </div>
            <div class="clear"></div>
            <div style="color:red;font-size:13px;">
                @ViewBag.Msg
            </div>
        </form>
    </div>
    <div class="footer-w3l">
        <p> © 2021 Student management system. All Rights Reserved | Design by Little six childe</p>
    </div>
</body>
</html>
3. Create user model
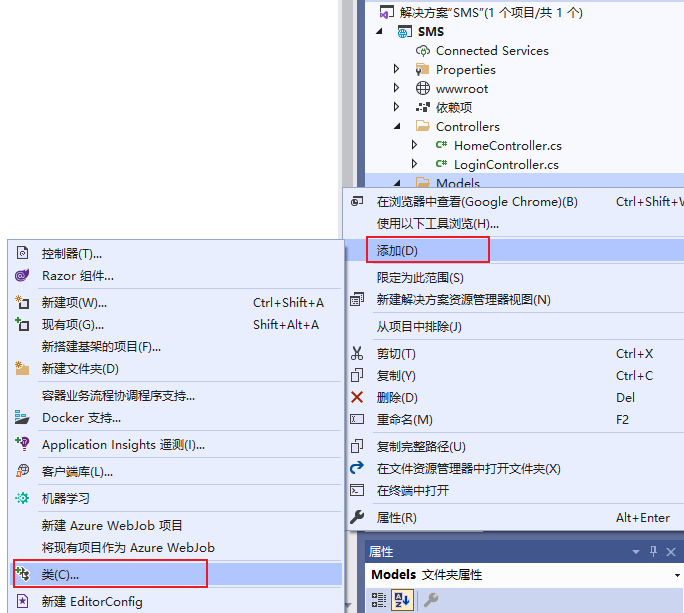
In the Models folder, right-click to add a class, as shown below:
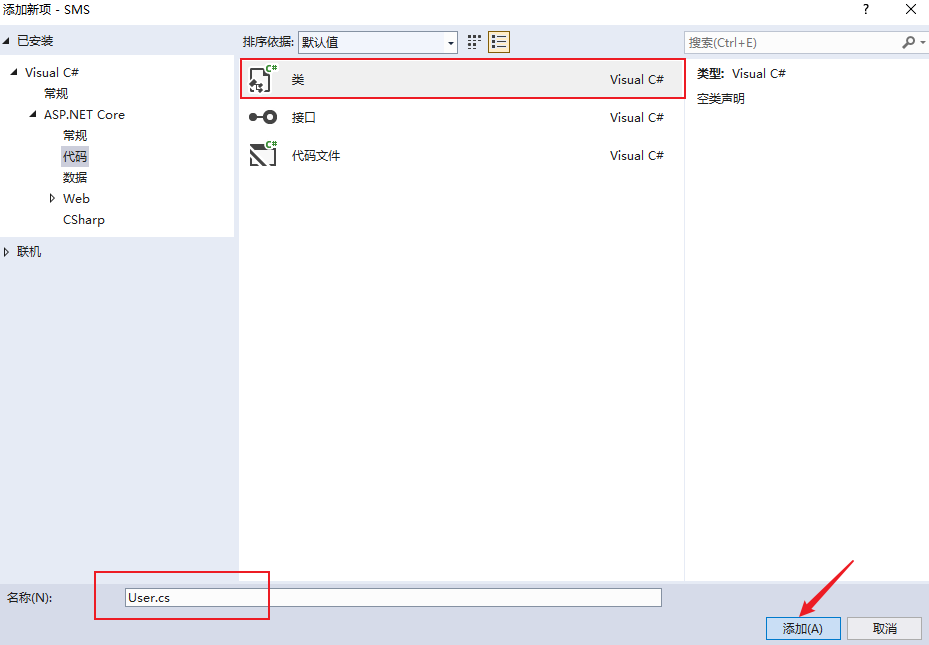
Enter the model name [User] and click add, as shown below:
The User model is as follows:
namespace SMS.Models
{
    public class User
    {
        /// <summary>
        ///User unique ID
        /// </summary>
        public int Id { get; set; }

        /// <summary>
        ///Login account
        /// </summary>
        public string UserName { get; set; }

        /// <summary>
        ///Code
        /// </summary>
        public string Password { get; set; }

        /// <summary>
        ///Display name
        /// </summary>
        public string NickName { get; set; }
    }
}
4. Create database operation DataContext
The database operation adopts the EntityFrameCore framework and inherits from DbContext, as shown below:
namespace SMS.Models
{
public class DataContext:DbContext
{
public DbSet<User> Users { get; set; }
public DataContext(DbContextOptions options) : base(options)
{
}
}
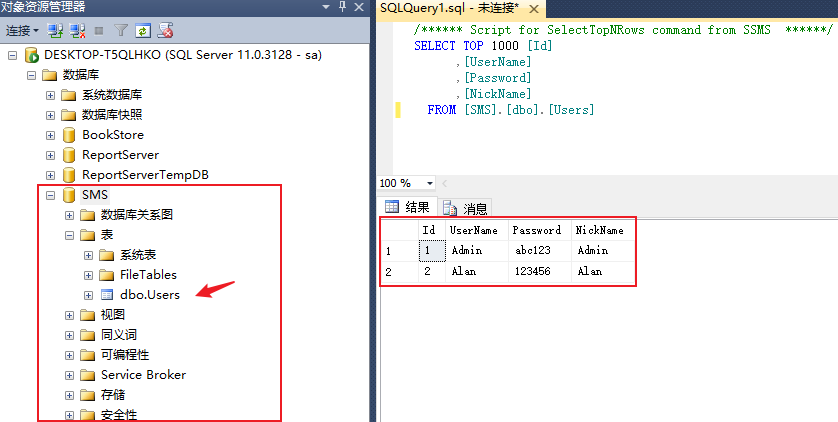
}5. Create databases and tables and construct data
Create databases and tables and construct data as follows:
6. Add database connection configuration
To connect to the database, the configuration file Appsettings JSON, add the database connection string as follows:
{
  "Logging": {
    "LogLevel": {
      "Default": "Information",
      "Microsoft": "Warning",
      "Microsoft.Hosting.Lifetime": "Information"
    }
  },
  "ConnectionStrings": {
    "Default": "Server=localhost;Database=SMS;Trusted_Connection=True;User Id=sa;Password=abc123"
  },
  "AllowedHosts": "*"
}
7. Add injection information
At startup CS, add the injection of EntittyFramework as follows:
namespace SMS
{
public class Startup
{
public Startup(IConfiguration configuration)
{
Configuration = configuration;
}
public IConfiguration Configuration { get; }
// This method gets called by the runtime. Use this method to add services to the container.
public void ConfigureServices(IServiceCollection services)
{
services.AddControllersWithViews();
//Database EntityFrameworkCore injection
services.AddDbContext<DataContext>(options=>options.UseSqlServer(Configuration.GetConnectionString("Default")));
services.AddHttpContextAccessor();
services.AddSession();//Configure session access service
}
// This method gets called by the runtime. Use this method to configure the HTTP request pipeline.
public void Configure(IApplicationBuilder app, IWebHostEnvironment env)
{
if (env.IsDevelopment())
{
app.UseDeveloperExceptionPage();
}
else
{
app.UseExceptionHandler("/Home/Error");
// The default HSTS value is 30 days. You may want to change this for production scenarios, see https://aka.ms/aspnetcore-hsts.
app.UseHsts();
}
app.UseHttpsRedirection();
app.UseStaticFiles();
app.UseRouting();
app.UseSession();//Injection session is required
app.UseAuthorization();
app.UseEndpoints(endpoints =>
{
endpoints.MapControllerRoute(
name: "default",
pattern: "{controller=Home}/{action=Index}/{id?}");
});
}
}
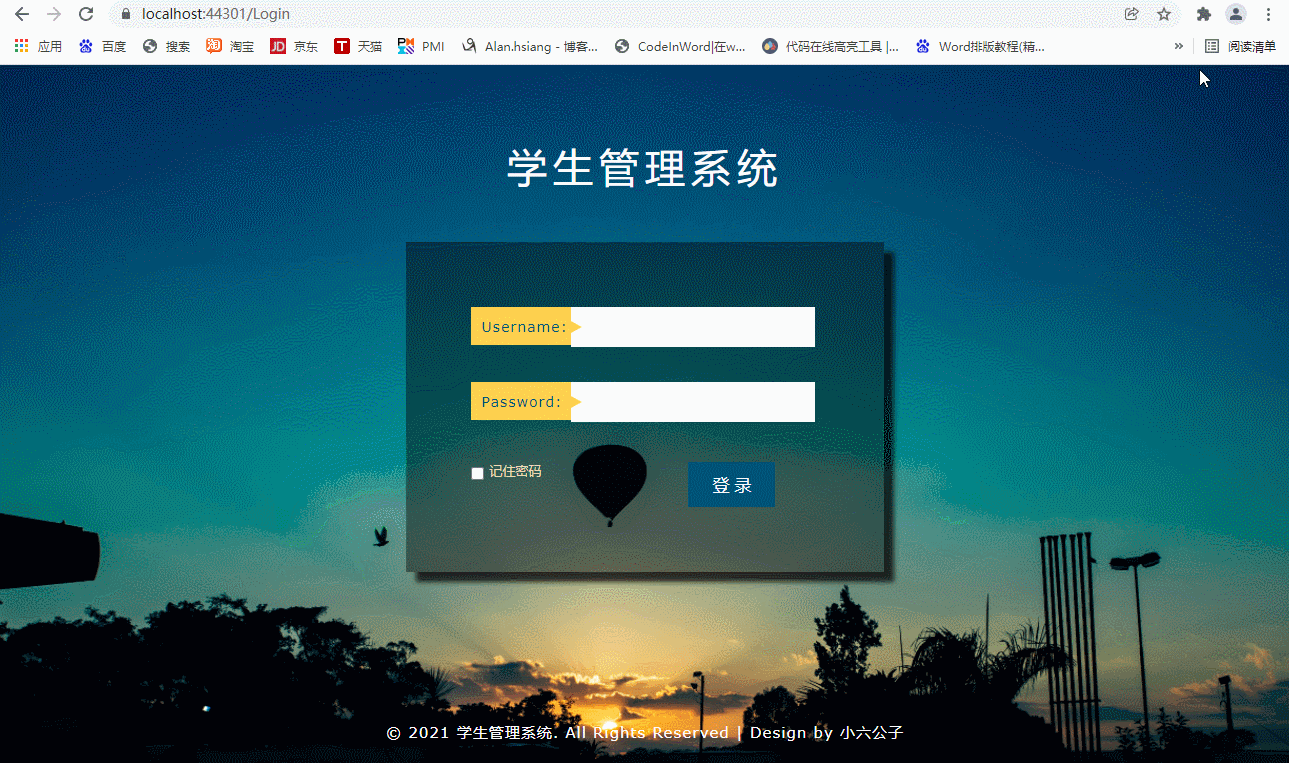
}8. Operation test
After the above steps, the login function has been completed and the program is run. Then the data account password, click login to jump, as shown below:
The above is the realization of the login function of the student management system. The follow-up functions will continue to be introduced. It aims to attract jade, learn together and make common progress.