1, Experimental environment
1. Node rule
| IP address | Host name | Node description |
| 192.168.18.8 | masterdb | Database master node |
| 192.168.18.18 | nginx | nginx server node |
| 192.168.18.88 | slavedb | Database slave node |
| 192.168.18.188 | php | PHP environment node |
2. Node service installation
(1) Deploy and configure the distributed master-slave database server. See:
Installing and configuring PHP 8.1.1 environment under CentOS 8_ u013007181 blog - CSDN blog I. installation environment:[ root@red3212 ~]# cat /etc/redhat-release CentOS Linux release 8.3.2011[ root@red3212 ~]# ifconfig ens32ens32: flags=4163<UP,BROADCAST,RUNNING,MULTICAST> mtu 1500 inet 192.168.18.89 netmask 255.255.255.0 broadcast 192.168.18.25 https://blog.csdn.net/u013007181/article/details/122339130 (3) To deploy and configure nginx server nodes, see:
(1) Edit modify nginx configuration file
[root@red3212 ~]# vim /usr/local/nginx/conf/nginx.conf
......Some information is omitted here
        location / {
            root   /www;
            index  index.php  index.html index.htm;
        }
......Some information is omitted here
#Precede the following 7 lines with a comment#Delete the number and change the content in the note
        location ~ \.php$ {
            root           /www;
            fastcgi_pass   192.168.18.188:9000; #The IP address here is the IP address of the PHP service node
            fastcgi_index  index.php;
            fastcgi_param  SCRIPT_FILENAME  $document_root$fastcgi_script_name;  #Change / scripts to $document_root
            include        fastcgi_params;
        }
(2) Edit modify fastcgi_params configuration file
[root@red3212 ~]# vim /usr/local/nginx/conf/fastcgi_params
......

fastcgi_param  SCRIPT_NAME        $fastcgi_script_name;
fastcgi_param  FILESCRIPT_NAME    $document_root$fastcgi_script_name;  #Add this line
fastcgi_param  REQUEST_URI        $request_uri;

......
3, Create site root
(1) Customize the website root directory on the nginx node and change the owner to nginx
[root@nginxnode ~]# mkdir /www
[root@nginxnode ~]# chown -Rf nginx:nginx /www/
(2) Customize the website root directory on the PHP service node and change the owner to nginx
[root@phpnode ~]# mkdir /www
[root@phpnode ~]# chown -Rf nginx:nginx /www/
4, Deploy Wordpress
(1) In the Nginx node, download and unzip wordpress to the / www directory
[root@nginxnode ~]# wget https://cn.wordpress.org/latest-zh_CN.tar.gz
[root@nginxnode ~]# tar -xzvf latest-zh_CN.tar.gz
[root@nginxnode ~]# mv wordpress/* /www
(2) Download and unzip wordpress from the PHP node to the / www directory
[root@phpnode ~]# wget https://cn.wordpress.org/latest-zh_CN.tar.gz -P /www
[root@phpnode ~]# tar -xzvf latest-zh_CN.tar.gz
[root@phpnode ~]# mv wordpress/* /www
(3) Modify the Wordpress configuration file in the Nginx node
[root@nginxnode ~]# cd /www
[root@nginxnode www]# cp wp-config-sample.php wp-config.php
[root@nginxnode www]# vim wp-config.php
......Some information is omitted here
define( 'DB_NAME', 'wordpress' );

/** MySQL database username */
define( 'DB_USER', 'zhangsan' );

/** MySQL database password */
define( 'DB_PASSWORD', 'Mima1234' );

/** MySQL hostname */
define( 'DB_HOST', '192.168.18.8' );    #The IP address here is the primary database IP address

/** Database charset to use in creating database tables. */
define( 'DB_CHARSET', 'utf8' );

/** The database collate type. Don't change this if in doubt. */
define( 'DB_COLLATE', '' );
......Some information is omitted here
(4) Put WP config. In the nginx node Copy the PHP configuration file to the / www directory of the PHP node
[root@nginxnode www]# scp /www/wp-config.php 192.168.18.188:/www
5, Create databases and users in the primary database node
[root@masterdb ~]# mysql -u root -p666666
Welcome to the MariaDB monitor.  Commands end with ; or \g.
Your MariaDB connection id is 11
Server version: 10.3.28-MariaDB-log MariaDB Server

Copyright (c) 2000, 2018, Oracle, MariaDB Corporation Ab and others.

Type 'help;' or '\h' for help. Type '\c' to clear the current input statement.

MariaDB [(none)]> create database wordpress;
Query OK, 1 row affected (0.014 sec)

MariaDB [(none)]> create user 'zhangsan'@'%' identified by 'Mima1234';
Query OK, 0 rows affected (0.020 sec)

MariaDB [(none)]> grant all privileges on wordpress.* to 'zhangsan'@'%';
Query OK, 0 rows affected (0.022 sec)
6, Test access to Wordpress
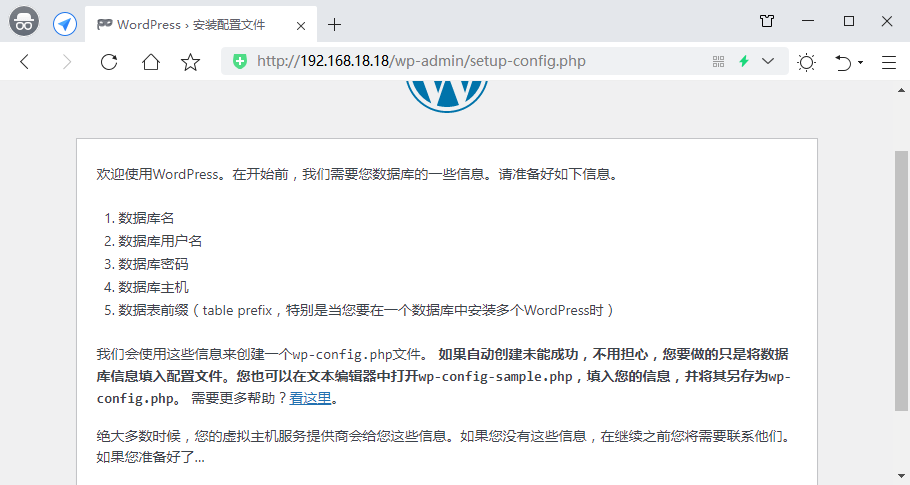
Enter the IP address of nginx server in the browser to access, and the Wordpress installation interface as shown in the following figure will appear.
