1, Configuration:
A centos ECS:
Let's mainly talk about some of my problems here. Don't choose too high centos system version, otherwise it may not be set successfully.
My setting here is centos7 2-bit linux alicloud server.
Say important things three times (otherwise I must step on the pit. I found out the reason after the third day): CentOS 7 2-bit linux alicloud server, centos7 2-bit linux alicloud server, centos7 2-bit linux alicloud server
Tucao, ah, before, it used centos8 system, and the result was not successful. Then I set up socks5 to try, and it still didn't work. I saw an article saying that I needed 7.2 centos system. After I changed the system, I searched some articles, and then successfully built sock5. Then I make complaints about whether squid was building up http. Then I tested it with my own server. The result is really the reason for the system. My own system was replaced with 7.2, and both sock5 and HTTP were successful.
Steps:
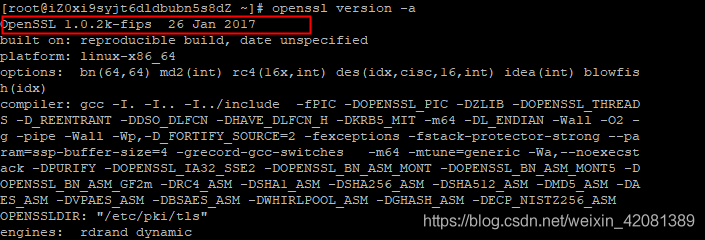
1. Install openssl
Determine whether to install openssl:
openssl version -a
If the following interface appears, it indicates that it has been installed and then does not need to be installed again:
Installation command:
yum install openssl
2. Install squid
Installation command:
yum install squid -y
# -y Represents automatic selection y,Fully automatic installation
3. Ann net tools
Installation command:
yum install net-tools
4. Modify squid's configuration file squid conf
① . modify the port number
Reference configuration content:
cat /etc/squid/squid.conf
The default port number is 3128. It is recommended to modify it to prevent the scanning agent from being shared
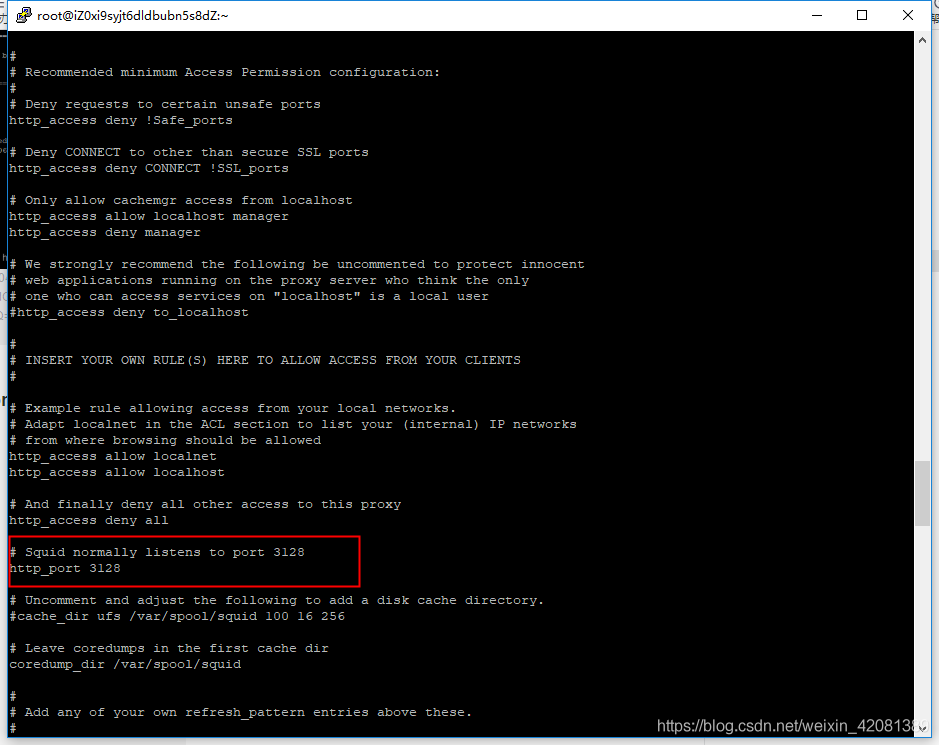
Use vi to modify the configuration file and find the location of the port number above. I change it here to 6128
vi /etc/squid/squid.conf
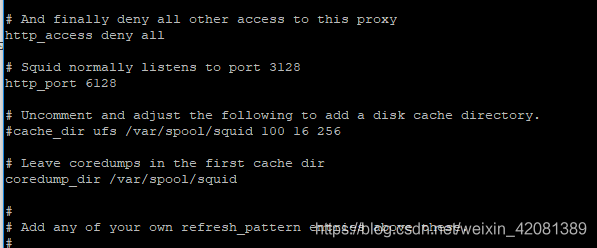
Change the port number:
By default, the time in squid's access log is unix timestamp, which is inconvenient to read. You can use / etc / squid / squid Conf add a line of logformat configuration:
#Add this line to the end of the configuration file
#access log time human-readable
logformat squid %tl.%03tu %6tr %>a %Ss/%03>Hs %<st %rm %ru %un %Sh/%<A %mt
② Turn on the firewall
netstat -tunpl
Open the port number of squid and restart:
firewall-cmd --zone=public --add-port=6128/tcp --permanent
firewall-cmd --reload
Then execute the above to open the port number 6128 of squid (you can change it according to your own settings)
5. Start squid
systemctl start squid
View process:
netstat -tunpl

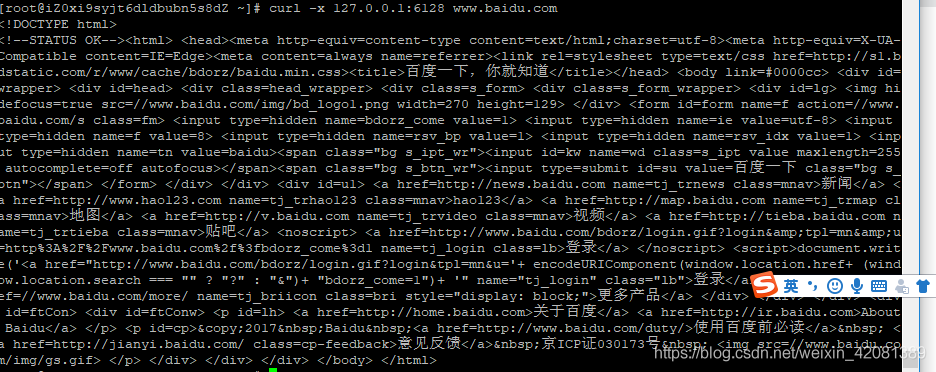
6. Native proxy access:
Native proxy access
curl -x 127.0.0.1:6128 www.baidu.com
It indicates that the preliminary configuration of the agent is successful. But you can't use this agent using your own computer.
7. Modify to support all proxy access (use)
Edit squid's configuration file at http_ Add two lines before access deny all:
acl client src 0.0.0.0/0
http_access allow client
You can put HTTP in the figure below_ Access deny all
If modified and saved:
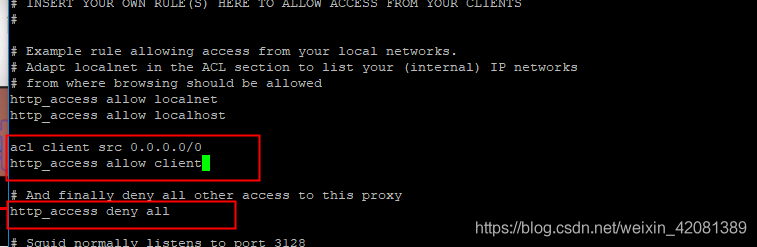
Then restart squid:
systemctl restart squid
The agent can be used at this time, but it will be a transparent agent. You need to set the user name and password to enhance the availability of the agent and prevent it from being scanned and used at will. You can also add some setting fields and make it a high hidden agent.
8. Set user name + password
① Set password file
#Set password
yum -y install httpd-tools
touch /etc/squid/passwd && chown squid /etc/squid/passwd
② Create user password
#Create user password
htpasswd /etc/squid/passwd yourusername
After the naming (your username is the agent's user name), enter the password (the agent's password) twice

③ . change the configuration file:
vi /etc/squid/squid.con
#Add under acl code block in configuration file
auth_param basic program /usr/lib64/squid/basic_ncsa_auth /etc/squid/passwd
auth_param basic children 5
auth_param basic realm Squid Basic Authentication
auth_param basic credentialsttl 2 hours
acl auth_users proxy_auth REQUIRED
http_access allow auth_users
#add to
http_access allow all
#Or comment out
http_access deny all
④ . restart the service squid:
systemctl restart squid
At this time, you can use the proxy of user name to test.
I use a Google plug-in SwitchyOmega here:
Then visit: http://httpbin.org/ip
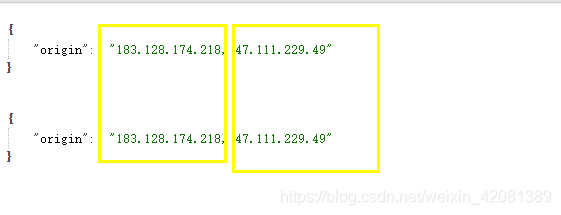
It can be seen from the results that even if the user + password is set, the http agent is still not high hidden. In front is my local agent, followed by the agent ip, which is still bad. You need to set it in the configuration below.
9. Set the agent as high hidden agent:
vi /etc/squid/squid.conf
Add these self segments to the configuration file.
request_header_access X-Forwarded-For deny all
request_header_access From deny all
request_header_access Via deny all
Remember to save after changing the configuration file:
Then restart:
systemctl restart squid
Then visit again: http://httpbin.org/ip
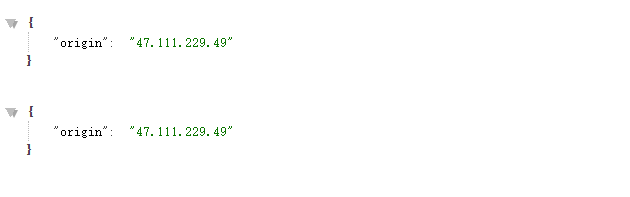
At this time, you can become the agent of gaoni.
10. Set startup and self startup:
systemctl enable squid
Transferred from: https://blog.csdn.net/weixin_42081389/article/details/105405148