I. What is Kubernetes
Kubernetes is an open source container cluster management system of Google (Borg). It provides application deployment, maintenance, extension mechanism and other functions. Kubernetes can easily manage container applications running across machines. It can realize automatic deployment, automatic expansion and maintenance of container clusters. It is not only a container layout tool, but also a new distributed architecture leading scheme based on container technology.
II. Kubernetes Architecture and Components
There are two types of K8S cluster: management node and working node.
1) Architecture
k8s cluster management node is responsible for the management of the cluster, providing access to cluster resources and data. It has Etcd storage service (optional), runs Api Server process, Controller Manager service process and Scheduler service process, and associates working node Node. Kubernetes API server provides the key service process of HTTP Rest interface. It is the only access to add, delete, change, search and other operations of all resources in Kubernetes. It is also an entry process for cluster control; Kubernetes Controller Manager is the automation control center for all resource objects in Kubernetes; Kubernetes Schedule is the process responsible for resource scheduling (Pod scheduling).
Work node is the node that runs Pod in Kubernetes cluster architecture. It provides computing resources for container and Pod. Pod and container all run on work node. Work node communicates with management node through kubelet service to manage the life cycle of container and communicate with other nodes in cluster.
2) Core components
Management node:
1.Kubernetes API Server
As the gateway of Kubernetes system, it encapsulates the addition, deletion and modification operations of core objects and provides them to external customers and internal component calls by RESTful API interface. Maintained REST objects are persisted to Etcd for storage.
2.Kubernetes Scheduler
Node selection (i.e. allocation machine) for the newly established od is responsible for resource scheduling of the cluster. Component extraction can be easily replaced by other schedulers.
3.Kubernetes Controller
Responsible for the implementation of various controllers, many controllers have been provided to ensure the normal operation of Kubernetes.
Work node:
1.Kubelet
Responsible for controlling containers, Kubelet receives Pod creation requests from Kubernetes API Server, starts and stops containers, monitors the running status of containers and reports to Kubernetes API Server.
2.Kubernetes Proxy
Responsible for creating proxy Service for Pod, Kubernetes Proxy will obtain all Service information from Kubernetes API Server, and create proxy Service according to Service information to realize Service-to-Pod request routing and forwarding, thus realizing Kubernetes-level virtual forwarding network.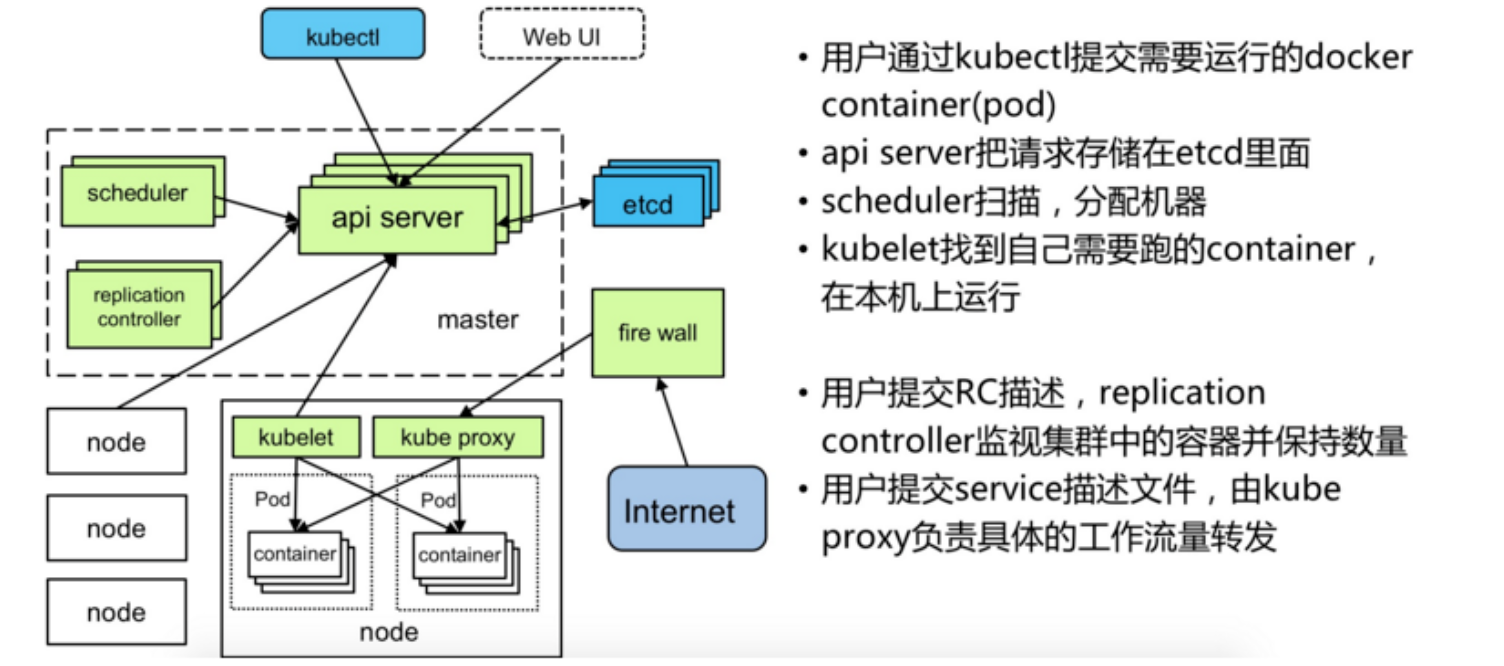
III. Basic environmental preparation
The environment configuration information is as follows (this time using virtual machine as test environment):
| IP address | host name | system | Kernel version | CPU | Memory |
|---|---|---|---|---|---|
| 192.168.100.6 | master01.cluster.k8 | CentOS 7.6 | 5.2.6 | 4c | 4G |
| 192.168.100.7 | node01.cluster.k8 | CentOS 7.6 | 5.2.6 | 4c | 4G |
| 192.168.100.8 | node02.cluster.k8 | CentOS 7.6 | 5.2.6 | 4c | 4G |
1. Set the host name, such as on the master node:
[root@master01 ~]# hostnamectl set-hostname master01.cluster.k8
Host names of other hosts can be set in this way
2. Add native domain name resolution, modify the / etc/hosts files on master and node nodes, and execute the following commands:
[root@master01 ~]# cat <<EOF >>/etc/hosts
192.168.100.6 master01.cluster.k8
192.168.100.7 node01.cluster.k8
192.168.100.8 node02.cluster.k8
EOF
3. Close firewalls, selinux and swap
1) Close the firewall
[root@master01 ~]#  systemctl stop firewalld
[root@master01 ~]#  systemctl disable firewalld
2) Disabling selinux
[root@master01 ~]#  setenforce 0  #Provisional Entry into Force
[root@master01 ~]#  sed -i "s/^SELINUX=enforcing/SELINUX=disabled/g" /etc/selinux/config  #Permanent Effectiveness (Server Restart is required)
3) Close the switching partition
[root@master01 ~]# swapoff -a
[root@master01 ~]# sed -i 's/.*swap.*/#&/' /etc/fstab
4. Configure kernel parameters to transfer bridged IPv4 traffic to the chain of iptables
[root@master01 ~]# cat > /etc/sysctl.d/k8s.conf  <<EOF
net.bridge.bridge-nf-call-ip6tables = 1
net.bridge.bridge-nf-call-iptables = 1
EOF
[root@master01 ~]# sysctl --system
Note: If No such file or directory appears during configuration, simply execute it
[root@master01 ~]# modprobe br_netfilter
5. Install ntpdate to ensure cluster time synchronization
[root@master01 ~]# yum install -y ntpdate
[root@master01 ~]# ntpdate -u ntp.aliyun.com
#Timing tasks can be added to synchronize clocks
[root@master01 ~]# crontab -e
*/10 * * * * /usr/sbin/ntpdate ntp.aliyun.com;/sbin/hwclock -w;
6. Installation of other software
[root@master01 ~]#yum install wget
7. Configure yum source
1) Configure the Kubernetes source of Aliyun
[root@master01 ~]#cat <<EOF > /etc/yum.repos.d/kubernetes.repo
[kubernetes]
name=Kubernetes
baseurl=https://mirrors.aliyun.com/kubernetes/yum/repos/kubernetes-el7-x86_64/
enabled=1
gpgcheck=1
repo_gpgcheck=1
gpgkey=https://mirrors.aliyun.com/kubernetes/yum/doc/yum-key.gpghttps://mirrors.aliyun.com/kubernetes/yum/doc/rpm-package-key.gpg
EOF
2) Configure docker source
[root@master01 ~]#wget https://mirrors.aliyun.com/docker-ce/linux/centos/docker-ce.repo -O /etc/yum.repos.d/docker-ce.repo
IV. Installation and Deployment
1. Installing docker
[root@master01 ~]#yum install -y yum-utils device-mapper-persistent-data lvm2
# List Docker versions
[root@master01 ~]#yum list docker-ce --showduplicates | sort -r
# Install the specified version
[root@master01 ~]#yum install docker-ce-18.06.3
[root@master01 ~]#systemctl enable docker && systemctl start docker
Note that if there is no public network ip in the test environment, in order to ensure that the docker can pull the mirror properly, it is necessary to configure the agent for the docker. The configuration is as follows:
1) Modify / etc/sysconfig/docker directly and add the following (it is not recommended that this method will invalidate when docker upgrades or some updates are made)
HTTP_PROXY="http://[proxy-addr]:[proxy-port]/"
HTTPS_PROXY="https://[proxy-addr]:[proxy-port]/"
export HTTP_PROXY HTTPS_PROXY
2) Create a system D directory for the docker service and a proxy configuration file for the docker proxy, which will remain in effect after configuration.
[root@master01 ~]# mkdir -p /etc/systemd/system/docker.service.d
Create / etc / system / docker. service. D / HTTP - proxy. conf file and add HTTP_PROXY environment variable
[root@master01 ~]#vim /etc/systemd/system/docker.service.d/http-proxy.conf
[Service]
Environment="HTTP_PROXY=http://[proxy-addr]:[proxy-port]/" "HTTPS_PROXY=https://[proxy-addr]:[proxy-port]/" "NO_PROXY=localhost,127.0.0.1,docker-registry.somecorporation.com"
Reload configuration:
[root@master01 ~]#systemctl daemon-reload
Restart docker
[root@master01 ~]#systemctl restart docker
2. Install kubeadm, kubelet, kubectl on three nodes
[root@master01 ~]# yum install -y kubeadm,kubelet,kubectl
[root@master01 ~]# systemctl enable kubelet
Kubelet is responsible for communicating with other node clusters and managing the lifecycle of the node Pod and container. Kubeadm is an automated deployment tool for Kubernetes, which reduces the difficulty of deployment and improves efficiency. Kubectl is a Kubernetes cluster management tool
3. Deployment of master management nodes
[root@master01 ~]# kubeadm init --kubernetes-version=1.15.2 \
--apiserver-advertise-address=192.168.100.6 \
--image-repository registry.aliyuncs.com/google_containers \
--service-cidr=100.64.0.0/10 \
--pod-network-cidr=10.244.0.0/16
Note: kubeadm downloads mirrors from k8s.grc.io by default during deployment. Domestic access may be problematic, so it is recommended to specify domestic image repository by image-repository itself.
Here we use Aliyun's mirror warehouse.
If the cluster initialization is successful, the following information is returned
kubeadm join 192.168.100.6:6443 --token v***ht.38oa8f6snaaiycga --discovery-token-ca-cert-hash sha256:4930dc9796565dd23f221ad7336afee37a7f4790c7487ded6ca26efffae3058a
This information is used to add other nodes to the Kubernetes cluster, and directly execute the above command information on other nodes to join the cluster.
4. Configuration Cluster Management Tool kubectl
[root@master01 ~]#mkdir -p /root/.kube
cp /etc/kubernetes/admin.conf /root/.kube/config
Note: It is necessary to copy the master node's / root/.kube/config to other node nodes at the same time, otherwise The connection to the server localhost:8080 was refused - did you specify the right host or port when viewing cluster resource information through kubectl?
If an Unable to connect to the server: Forbidden occurs when the master node's / root/.kube/config is copied to another node and other node's information about the cluster resource object is obtained through kubectl, check whether the node has an https proxy configured and if the proxy needs to be cancelled.
5. Deploying node nodes
The output information of the third step of cluster initialization on the direct node can be added to the Kubernetes cluster:
[root@node01 ~]#kubeadm join 192.168.100.6:6443 --token v***ht.38oa8f6snaaiycga --discovery-token-ca-cert-hash sha256:4930dc9796565dd23f221ad7336afee37a7f4790c7487ded6ca26efffae3058a
View the node information of the cluster at this time:
[root@master01 ~]#kubectl get nodes
NAME                STATUS   ROLES    AGE     VERSION
node01.cluster.k8   NotReady    master   5m   v1.15.2
node02.cluster.k8   NotReady    <none>   1m   v1.15.2
node03.cluster.k8   NotReady    <none>   1m   v1.15.2
You can see that the status of cluster nodes is still in NotReady state. It should be that there are no network plug-ins installed yet. The main network plug-ins are flannel, calico, canel, etc.
6. Deployment of flannel network
[root@master01 ~]#kubectl apply -f https://raw.githubusercontent.com/coreos/flannel/a70459be0084506e4ec919aa1c114638878db11b/Documentation/kube-flannel.yml
During the deployment process, you need to pull the flannel image, which may be a little slower. After the deployment is completed, you can check the status of the cluster and find that all the cluster nodes are Ready.
[root@master01 ~]#kubectl get nodes
NAME                STATUS   ROLES    AGE     VERSION
node01.cluster.k8   Ready    master   15m   v1.15.2
node02.cluster.k8   Ready    <none>   10m   v1.15.2
node03.cluster.k8   Ready    <none>   10m   v1.15.2
At this point, we can use the kubectl tool to create the Pod.
7. For ease of management, a Dashboard can be deployed for the cluster
[root@master01 ~]#kubectl apply -f https://raw.githubusercontent.com/kubernetes/dashboard/v1.10.1/src/deploy/recommended/kubernetes-dashboard.yaml
Note:
Firstly, the docker image of k8s dashboard is downloaded from k8s.grc.io by default. It may not be accessible in China, so you can download kubernetes-dashboard.yaml to the local area first, and then modify the warehouse address of the docker image to Aliyun warehouse address.
[root@master01 ~]#wget https://raw.githubusercontent.com/kubernetes/dashboard/v1.10.1/src/deploy/recommended/kubernetes-dashboard.yaml
#Replacement Mirror Warehouse
[root@master01 ~]#sed -i 's/k8s.gcr.io/registry.aliyuncs.com/google_containers/g' kubernetes-dashboard.yaml
Secondly, in kubernetes-dashboard.yaml, the definition of Service of kubernetes-dashboard is as follows:
kind: Service
apiVersion: v1
metadata:
  labels:
    k8s-app: kubernetes-dashboard
  name: kubernetes-dashboard
  namespace: kube-system
spec:
  ports:
    - port: 443
      targetPort: 8443
  selector:
    k8s-app: kubernetes-dashboard
The default does not specify spec.type, so the default type is ClusterIP, so the result is that the kubernetes-dashboard service does not map local ports. To access dashboard through node IP+port number, the following modifications are required to kubernetes-dashboard.yaml:
[root@master01 ~]#sed -i '/targetPort:/a\ \ \ \ \ \ nodePort: 30443\n\ \ type: NodePort' kubernetes-dashboard.yaml
#After modification, the Service of kubernetes-dashboard is defined as follows:
kind: Service
apiVersion: v1
metadata:
  labels:
    k8s-app: kubernetes-dashboard
  name: kubernetes-dashboard
  namespace: kube-system
spec:
  ports:
    - port: 443
      targetPort: 8443
      nodePort: 30443
  type: NodePort
  selector:
    k8s-app: kubernetes-dashboard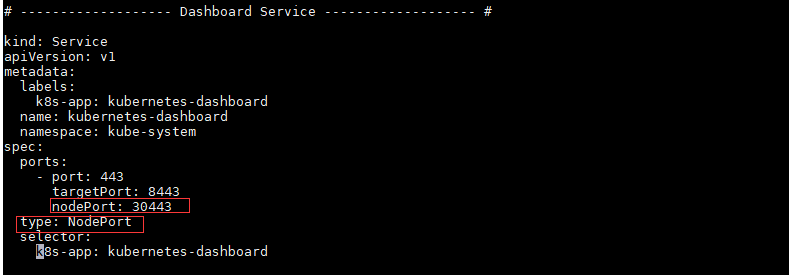
Redeployment of Dashboard
[root@master01 ~]#kubectl delete -f kubernetes-dashboard.yaml
[root@master01 ~]#kubectl apply -f kubernetes-dashboard.yaml
Firefox is recommended to access Dashboard's address: https://192.168.100.6:30443
Note: Other browsers may not be accessible because Kubernetes Dashboard's own certificate is a problem that can be solved by generating its own self-signed visa. See: https://blog.51cto.com/10616534/2430512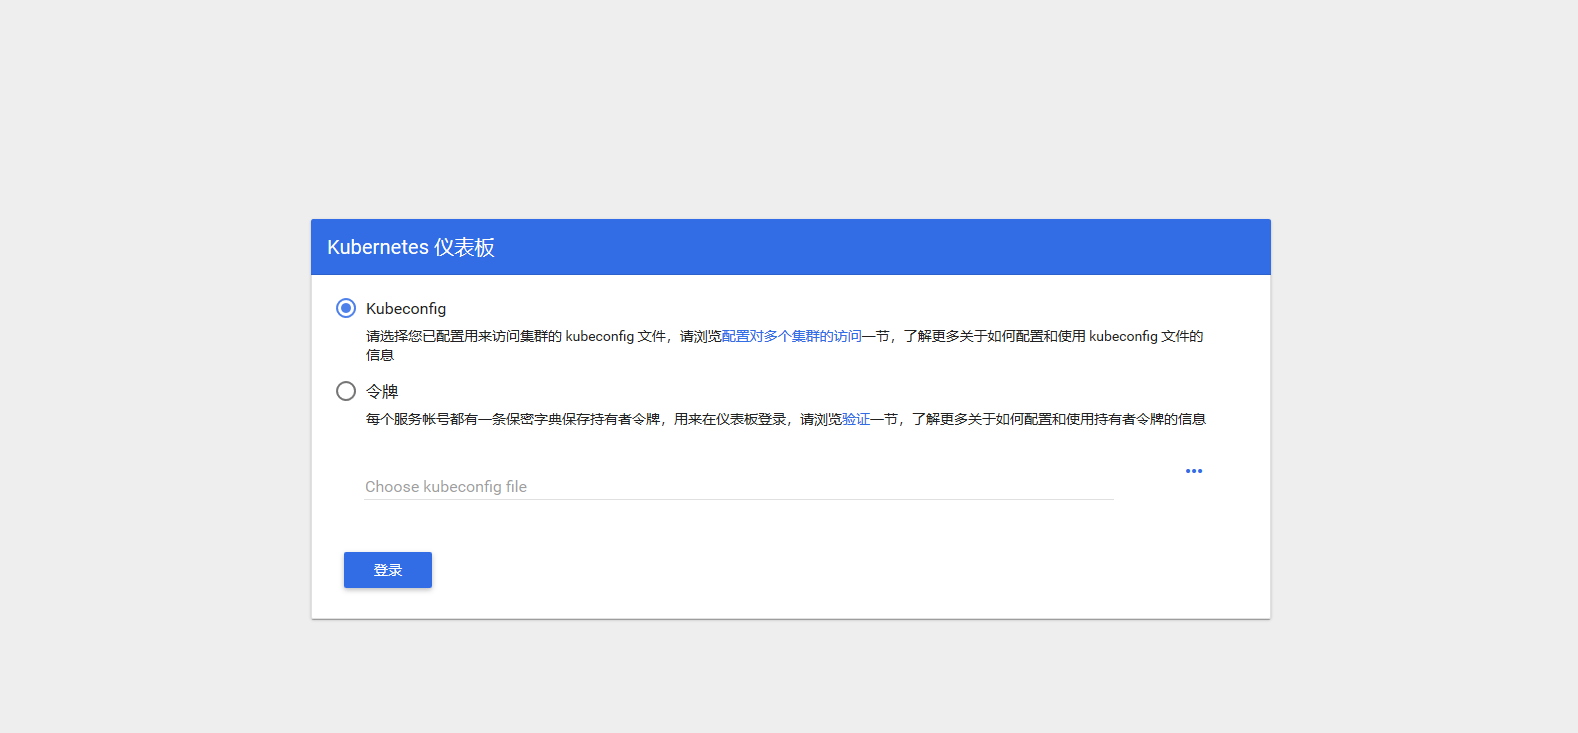
8. Get token (token) to log in to Dashboard:
#Create a service account dashboard-admin for Dashboard access cluster
[root@master01 ~]#kubectl create serviceaccount  dashboard-admin -n kube-system
#Bind the service account dashboard-admin to the default cluster role cluster-admin
[root@master01 ~]#kubectl create clusterrolebinding  dashboard-admin --clusterrole=cluster-admin --serviceaccount=kube-system:dashboard-admin
#Get token
[root@master01 ~]#kubectl describe secrets -n kube-system $(kubectl -n kube-system get secret | awk '/dashboard-admin/{print $1}')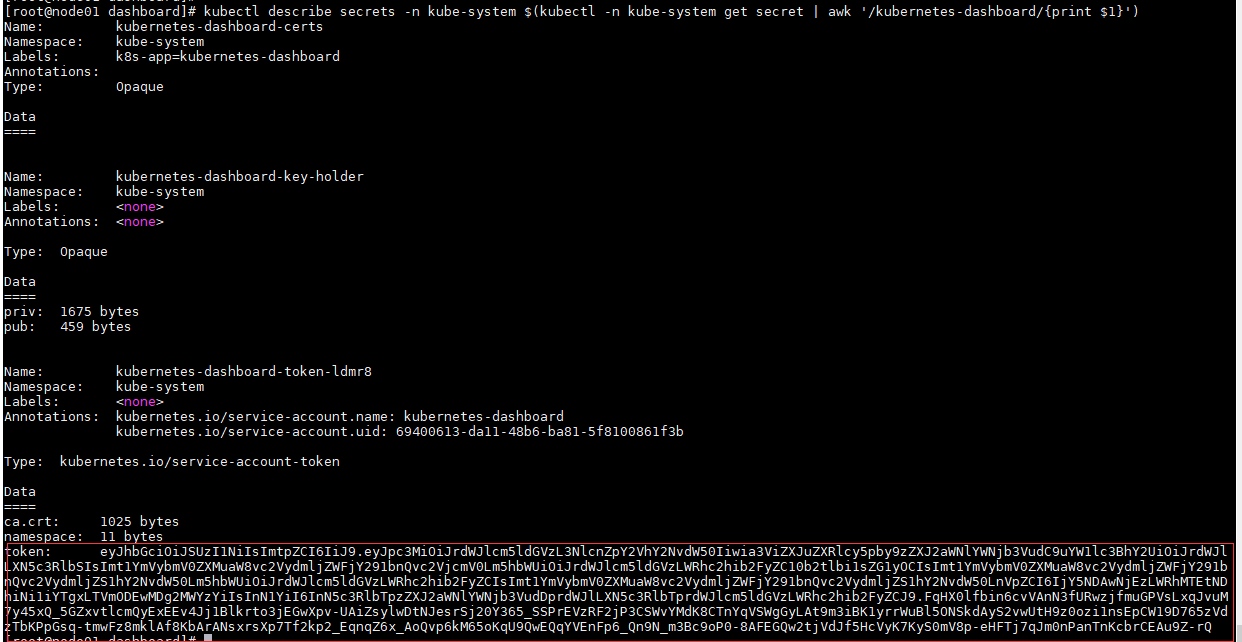
9. Log in to Dashboard with token
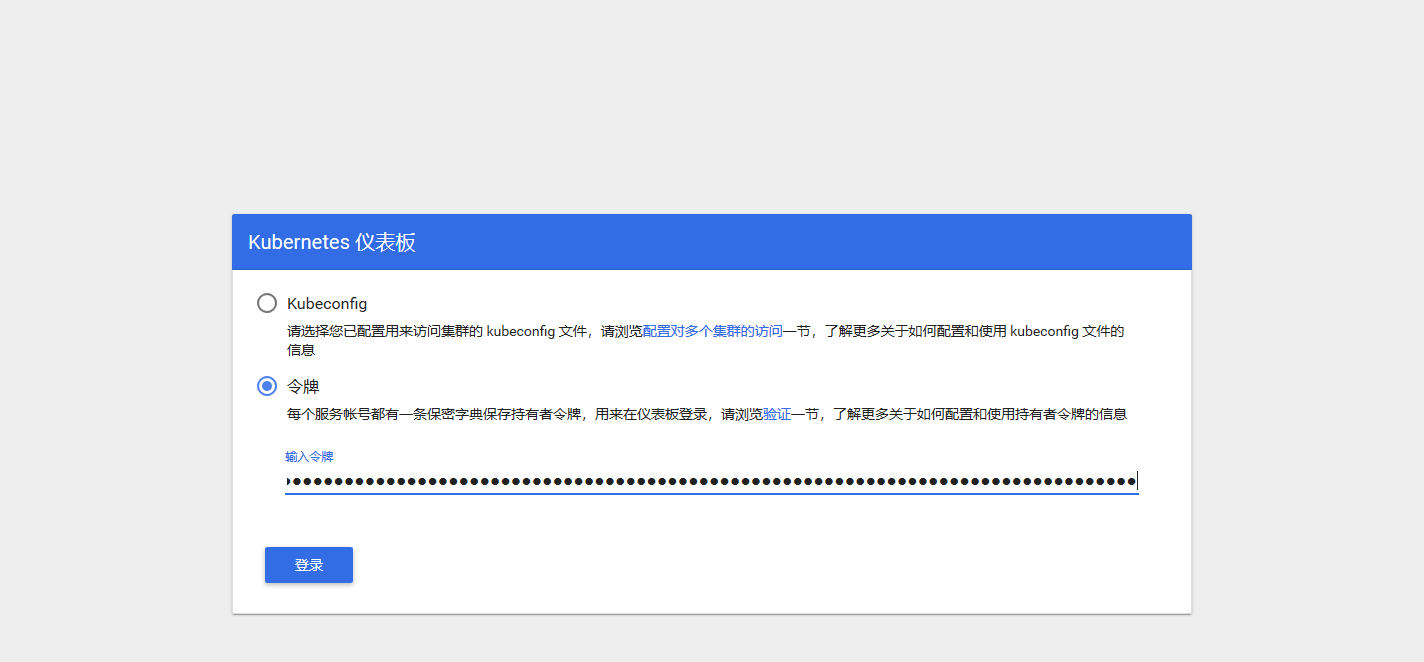
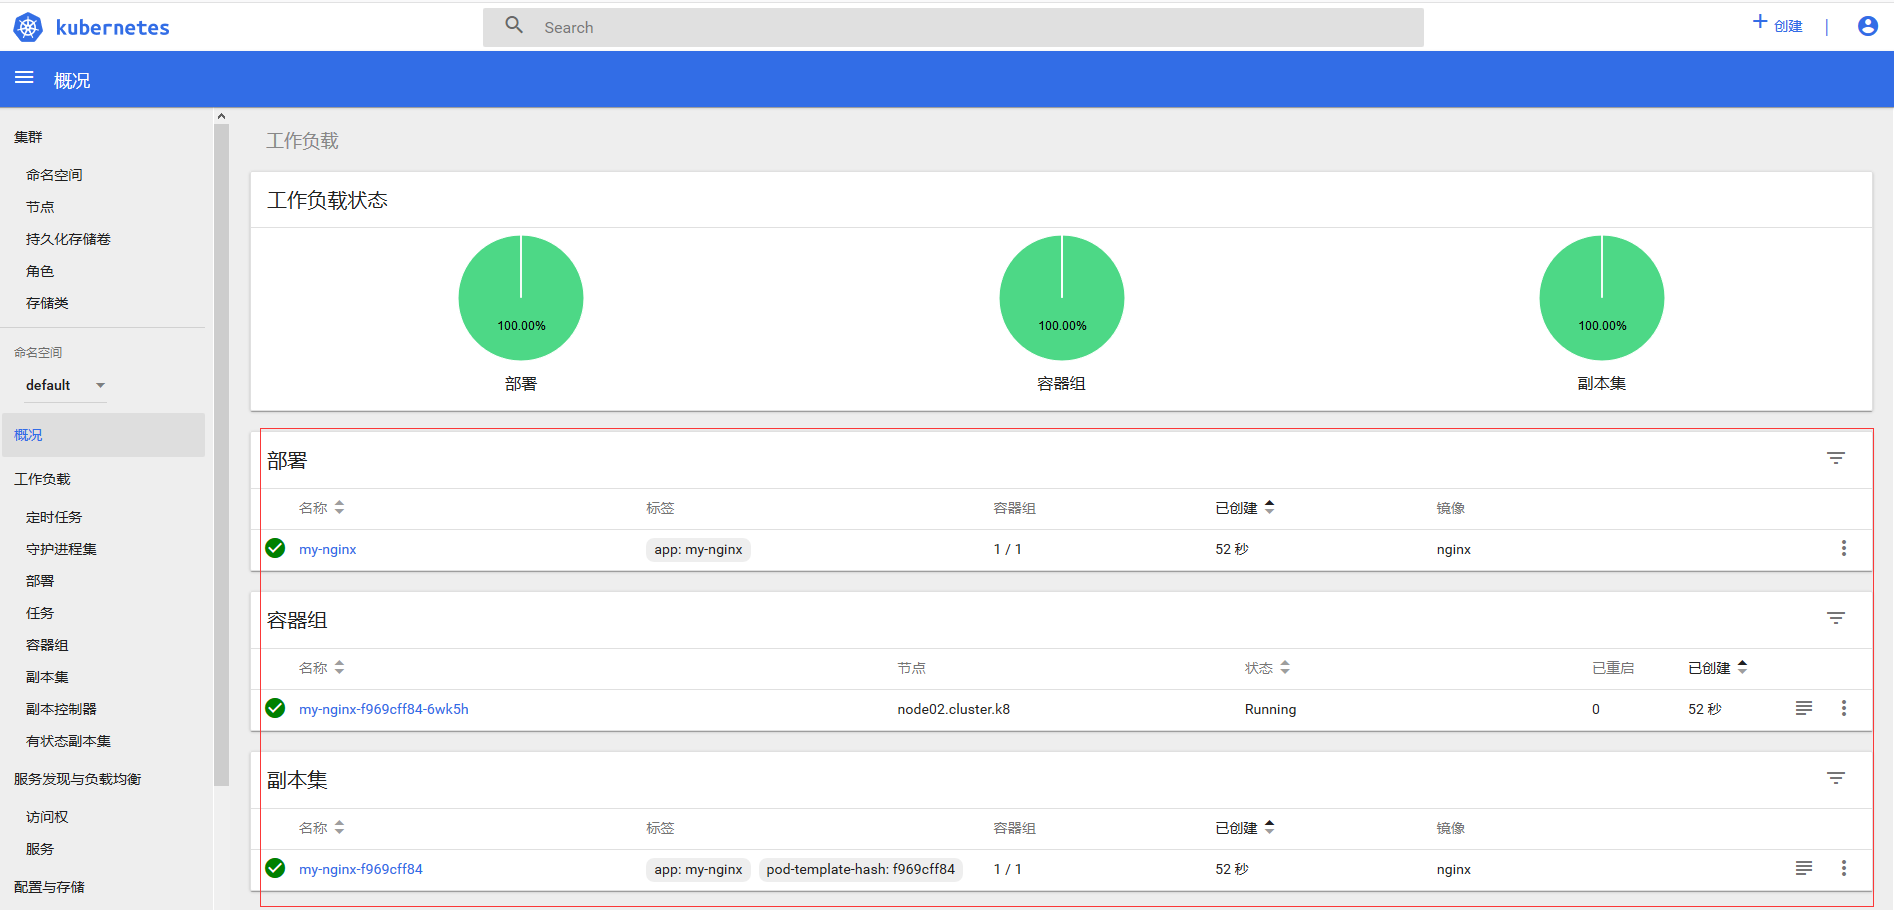
After authentication, you can see the following Dashboard interface: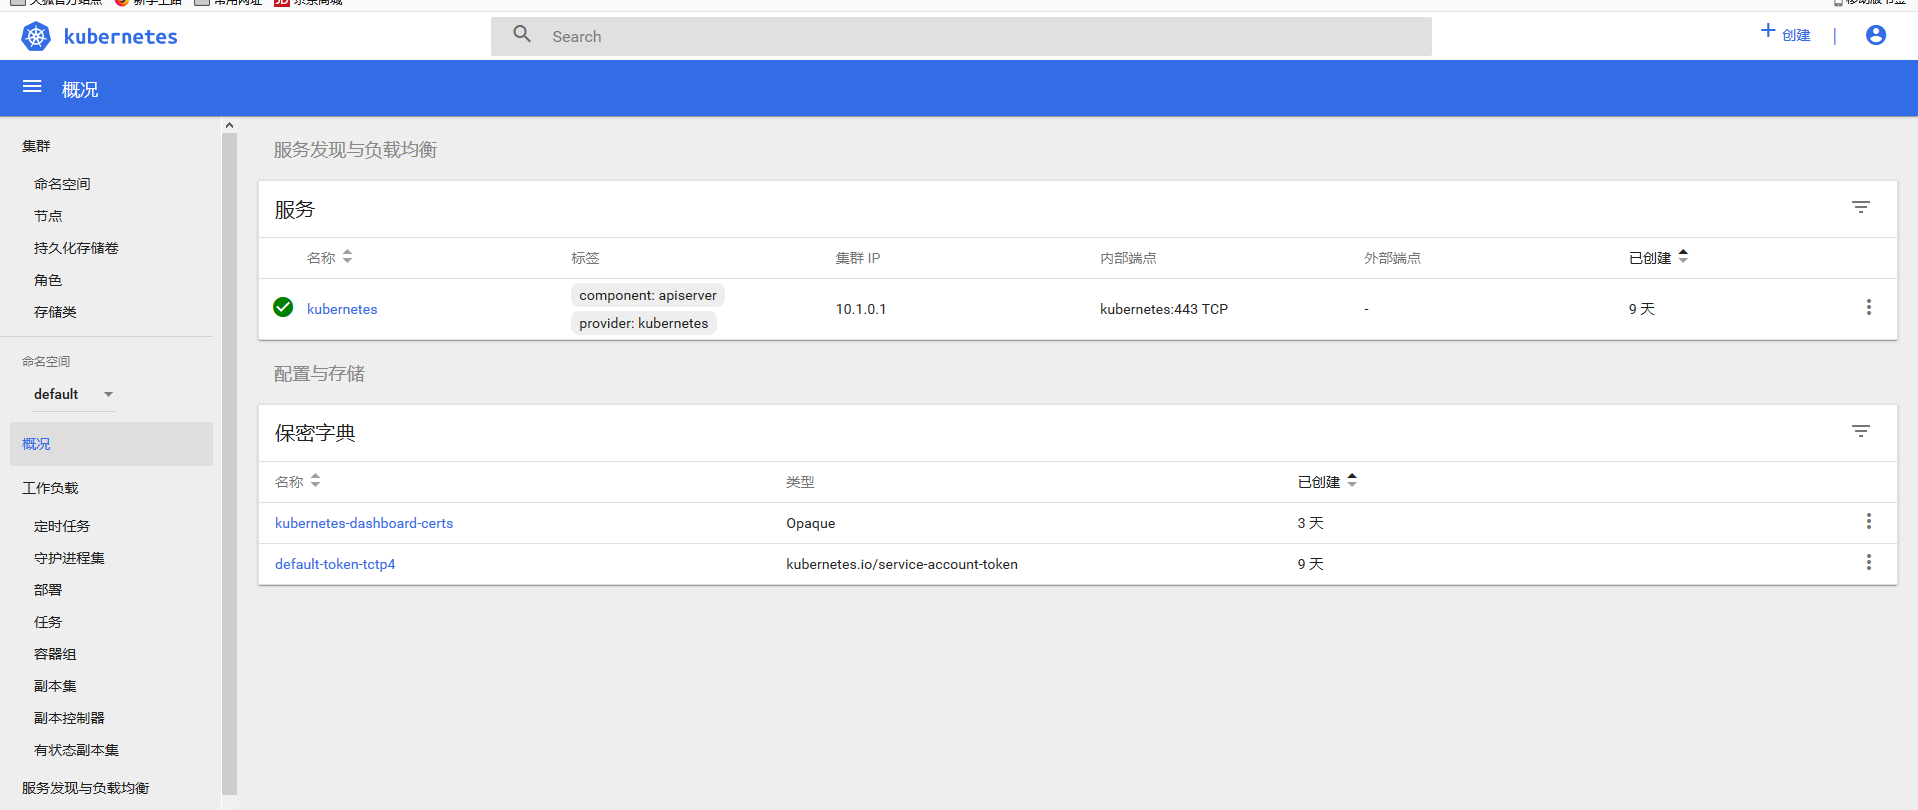
10. Attempt to deploy a pod and view it through Dashboard
[root@master01 ~]#kubectl create deployment my-nginx --image=nginx