Steps for installing MySQL database in CentOS7
Delete the installed MySQL service
Install MySQL installation package
MySQL database installation
First, enter su, press enter, enter the password, and enter the root authority
Download wget command
Before downloading MySQL database, first use the wget command. The code is as follows:
yum -y install wget
Delete the installed MySQL service
Before downloading MySQL data package, you need to check whether MySQL service has been installed. The code is as follows:
rpm -qa | grep mysql
 or
yum list installed | grep mysql
If the MySQL service has been installed, you need to delete the MySQL service. The code is as follows:
yum -y remove mysql-libs.x86_64
Install MySQL installation package
Before installing the MySQL installation package, first enter the / usr/local directory, create tools and MySQL files, enter the tools directory, and execute the following code:
cd /usr/local/
mkdir -p tools
mkdir -p mysql
cd tools
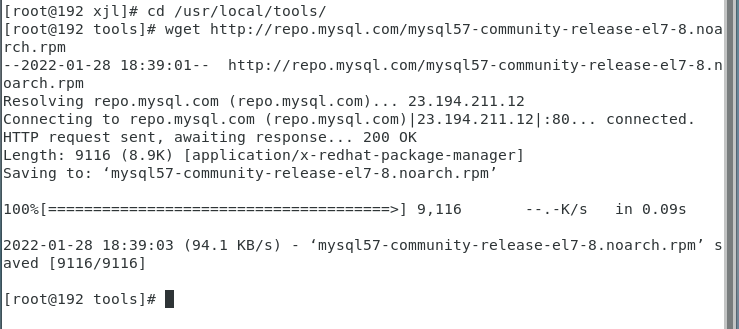
Download the installation package and execute the following code:
wget http://repo.mysql.com/mysql57-community-release-el7-8.noarch.rpm
As shown in the figure below:
Install MySQL and execute the following code:
rpm -ivh mysql57-community-release-el7-8.noarch.rpm
As shown in the figure below:

After installation, it will be displayed in / etc / yum repos. Two repo packages are generated under the D / directory, as shown in the following figure:

Enter / etc / yum.com repos. Install MySQL service under D / directory and execute the following code:
yum install mysql-server
As shown in the figure below:

Possible problems
Question one
The GPG keys listed for the "MySQL 5.7 Community Server" repository are already installed but they are not correct for this package.
or
Public key for mysql-community-libs-compat-5.7.37-1.el7.x86_64.rpm is not installed
Execute the following code to force the installation of MySQL service:
yum install mysql-server --nogpgcheck
Question two
Loaded plugins: fastestmirror, langpacks
Existing lock /var/run/yum.pid: another copy is running as pid 2847.
Another app is currently holding the yum lock; waiting for it to exit...
yum is locked. There is already a yum process running. You can kill it with kill:
kill -s 9 2847				#kill process
 or
rm -f /var/run/yum.pid		#Forced stop
Then continue the installation:
yum install mysql-server
 or
yum install mysql-server --nogpgcheck
MySQL database configuration
After installing mysql, we will start the MySQL database and configure some environments.
Get temporary password
First start MySQL and execute the following code:
systemctl start mysqld
Obtain the temporary password and execute the following code:
grep 'temporary password' /var/log/mysqld.log
As shown in the figure below:

·Log in to MySQL
mysql -u root -p
Enter the above temporary password, as shown in the figure below:

Change Password
The temporary password is too complex for us to remember. When we want to use the simple password to log in to MySQL, we need to modify the MySQL configuration,
Modify validate_ password_ The value of the policy parameter, because MySQL defaults to validate_ password_ The value of the policy parameter is 1, that is, the set password must conform to the length, and must contain numbers, lowercase or uppercase letters and special characters, so we need to validate_ password_ Change the value of the policy parameter to 0 and validate_ password_ The default value of the length parameter is 8. We modify it to 1. Execute the following code:
set global validate_password_policy=0;
set global validate_password_length=1;
As shown in the figure below:

After modifying the above configuration, we start to modify the password of MySQL and execute the following code:
alter user 'root'@'localhost' identified by '123456';
Here we change the password of MySQL to 123456.
Modify MySQL default code
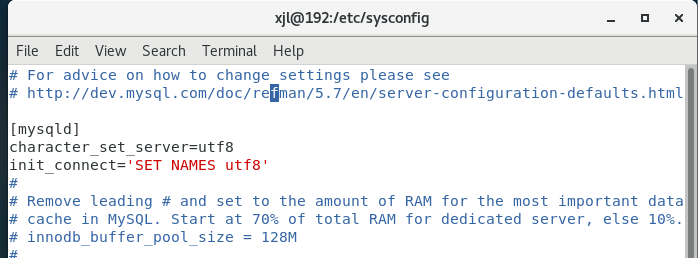
First exit mysql and then enter my CNF file:
exit			#Exit mysql
vim /etc/my.cnf		#Enter my CNF file
Add the following code:
character_set_server=utf8
init_connect='SET NAMES utf8'
As shown in the figure below:
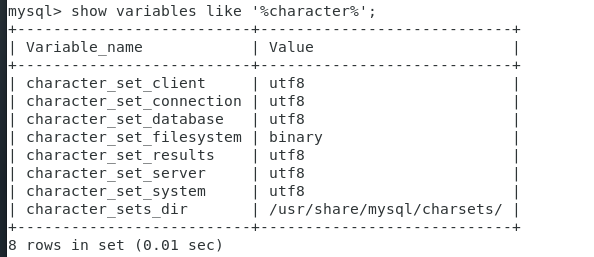
Check the database code and execute the following code:
systemctl restart mysqld		#mysql start
mysql -u root -p			   #Login to mysql
show variables like '%character%';	#View encoding
As shown in the figure below:
Simple database operation
show databases;			#Look at all current databases
use mysql;			    #Enter mysql database
show tables;			#View all tables in mysql database
Set up firewall
Since firewalls in CentOS 7 are already managed by firewalld, you can use the yum command to install firewalld and execute the following commands:
yum install firewalld firewalld-config
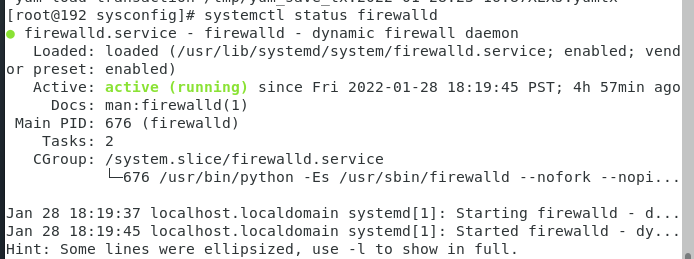
Check the firewall status and execute the following code:
systemctl status firewalld
As shown in the figure below:
Firewall other commands
systemctl start firewalld.service		#Start firewall
firewall-cmd --reload  perhaps  service firewalld restart		#service iptables restart
firewall-cmd --zone=public --add-port=3306/tcp --permanent  #permanent takes effect permanently. Without this parameter, the firewall will become invalid after restart, and the firewall will open port 3306
firewall-cmd --zone=public --remove-port=3306/tcp --permanent	#The firewall closes the open 3306 port
systemctl stop firewalld		#Disable firewall
systemctl enable firewalld       #Set startup
systemctl disable firewalld		#Stop and disable boot
firewall-cmd --permanent --list-port    #View port list