
Zabbix introduction
Zabbix official website https://www.zabbix.com/ (English version) https://www.zabbix.com/cn/ (Chinese version)
Zabbix is a highly integrated network monitoring solution, which can provide enterprise level open source distributed monitoring solutions. It is continuously maintained and updated by a foreign team. The software can be downloaded and used freely. The operation team makes a profit by providing charged technical support.
zabbix is an enterprise class open source solution based on Web interface, which provides distributed system monitoring and network monitoring functions.
zabbix can monitor various network parameters, ensure the safe operation of the server system, and provide a flexible notification mechanism to enable the system administrator to quickly locate / solve various problems
zabbix mainly consists of two parts: zabbix server and zabbix agent. zabbix proxy can be set up optionally
zabbix server can monitor the remote server or network status and collect data through SNMP, zabbix agent, fping port monitoring and other methods. Both Linux and Unix platforms are supported. Windows platform can only install clients
New features of Zabbix 5.0
ZABBIX version 5.0 was officially released on May 12, 2020. 5.0 brings many functions and features. See for details Official documents.
Zabbix 5.0 installation and deployment
1. Shut down selinux and firewall and restart
Bash
sed -i 's/SELINUX=enforcing/SELINUX=disabled/' /etc/selinux/config
systemctl disable --now firewalld
reboot
2. Set the zabbix rpm source to Alibaba cloud zabbix source (the default zabbix source is the slow domestic connection abroad)
Bash
rpm -Uvh https://mirrors.aliyun.com/zabbix/zabbix/5.0/rhel/7/x86_64/zabbix-release-5.0-1.el7.noarch.rpm
sed -i 's#http://repo.zabbix.com#https://mirrors.aliyun.com/zabbix#' /etc/yum.repos.d/zabbix.repo
yum clean all
3. Install zabbix server and agent
Bash
yum install zabbix-server-mysql zabbix-agent -y
4. Install Software Collections to facilitate subsequent installation of higher versions of php. By default, the php version installed by yum is 5.4
Bash
yum install centos-release-scl -y
5. Enable ZABBIX front-end source and modify VI / etc / yum.com repos. d/zabbix. Repo, change enabled under [ZABBIX frontend] to 1
Bash
enabled=1
6. Install zabbix front end and related environment
Bash
yum install zabbix-web-mysql-scl zabbix-apache-conf-scl -y
7. Install Centos7 default mariadb database using yum or up2date
Bash
yum install mariadb-server -y
8. Start the database and configure automatic startup
Bash
systemctl enable --now mariadb
9. Initialize the mariadb database and configure the root password
Bash
mysql_secure_installation
10. Use the root user to enter mysql and establish zabbix_db database, pay attention to the database code
# mysql -uroot -p
Bash
create database zabbix_db character set utf8 collate utf8_bin;
create user zabbix@localhost identified by 'password';
grant all privileges on zabbix_db.* to zabbix@localhost;
quit;
11. Import zabbix data using the following command, zabbix_ The DB database user is zabbix and the password is password
Bash
zcat /usr/share/doc/zabbix-server-mysql*/create.sql.gz | mysql -uzabbix -p zabbix_db
12 modify zabbix server configuration file / etc / ZABBIX / ZABBIX_ server. Database name, database user and password in conf
# vi /etc/zabbix/zabbix_server.conf
Bash
DBName=zabbix_db
DBUser=zabbix
DBPassword=password
13. Modify the PHP configuration file of ZABBIX / etc / opt / Rh / Rh php72 / PHP FPM d/zabbix. The time zone in conf is changed to Asia/Shanghai
# vi /etc/opt/rh/rh-php72/php-fpm.d/zabbix.conf
Bash
php_value[date.timezone] = Asia/Shanghai
14. Start relevant services and configure automatic startup
Bash
systemctl restart zabbix-server zabbix-agent httpd rh-php72-php-fpm
systemctl enable zabbix-server zabbix-agent httpd rh-php72-php-fpm
Zabbix WEB initialization
Access with browser http://ip/zabbix You can access ZABBIX's web page
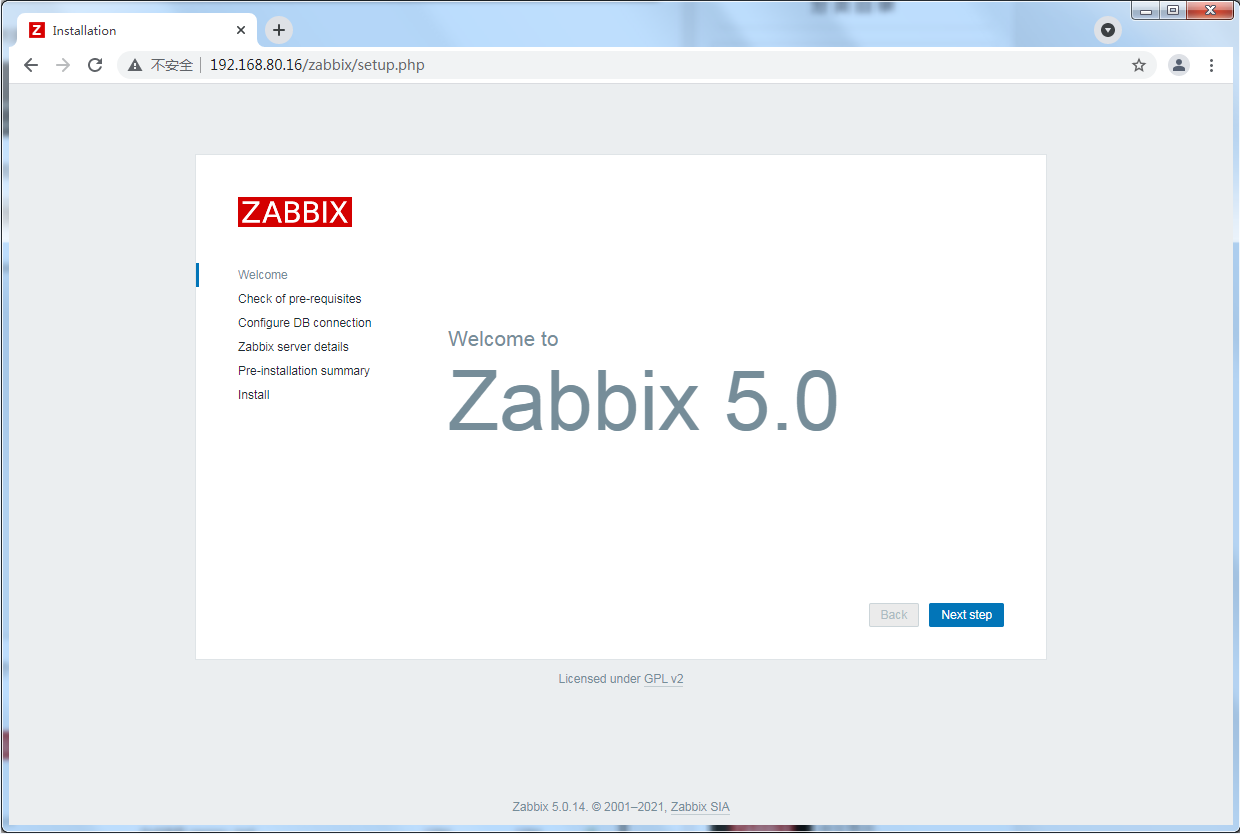
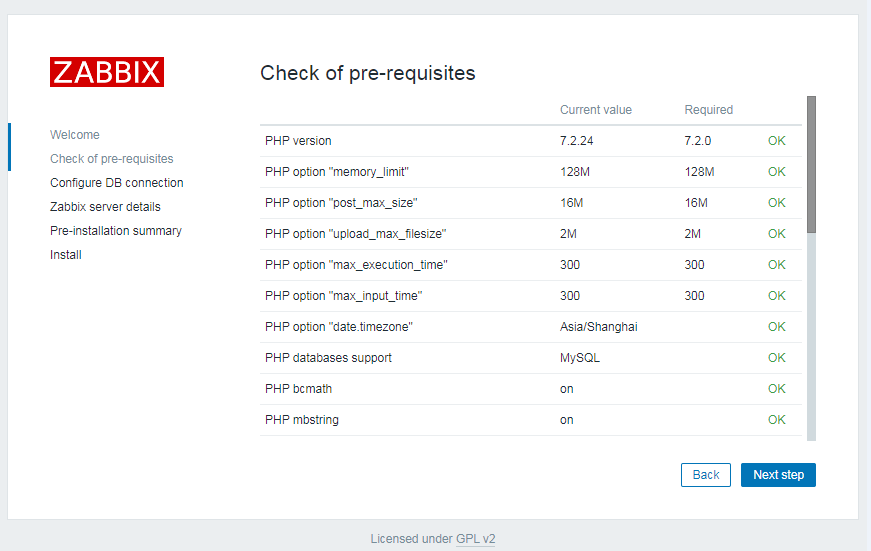
Check whether the configuration of each component is normal
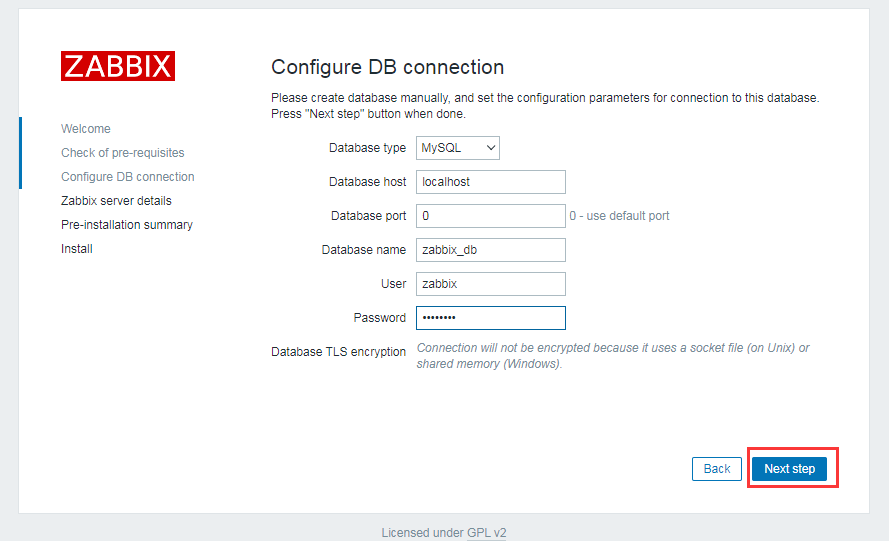
Enter the newly configured database zabbix_db, password of database user
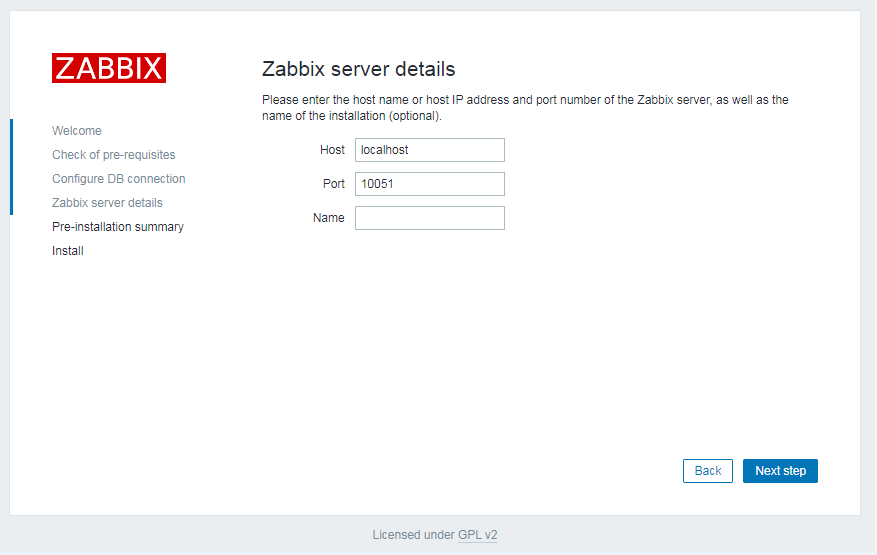
Set the related information of Zabbix service, and the next step can be started by default
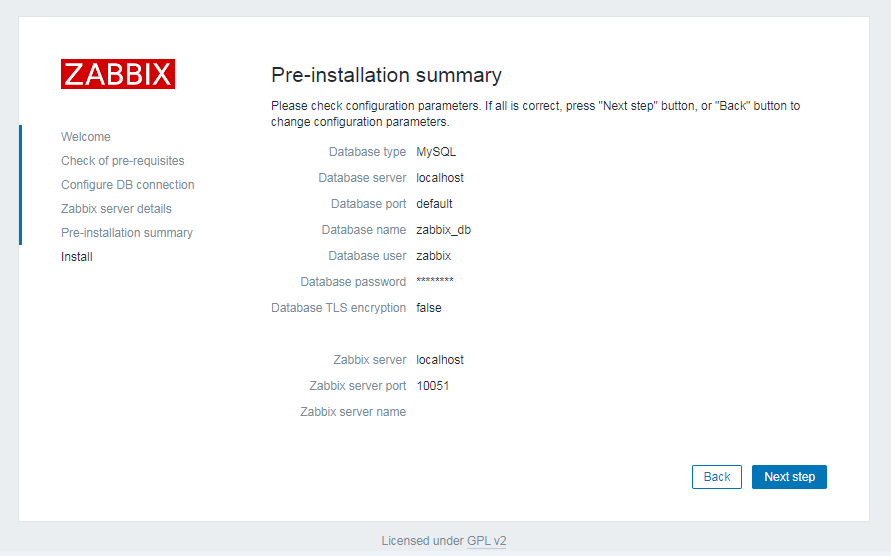
Summarize and check whether there is any input error. The default is the next step and the previous step with errors.
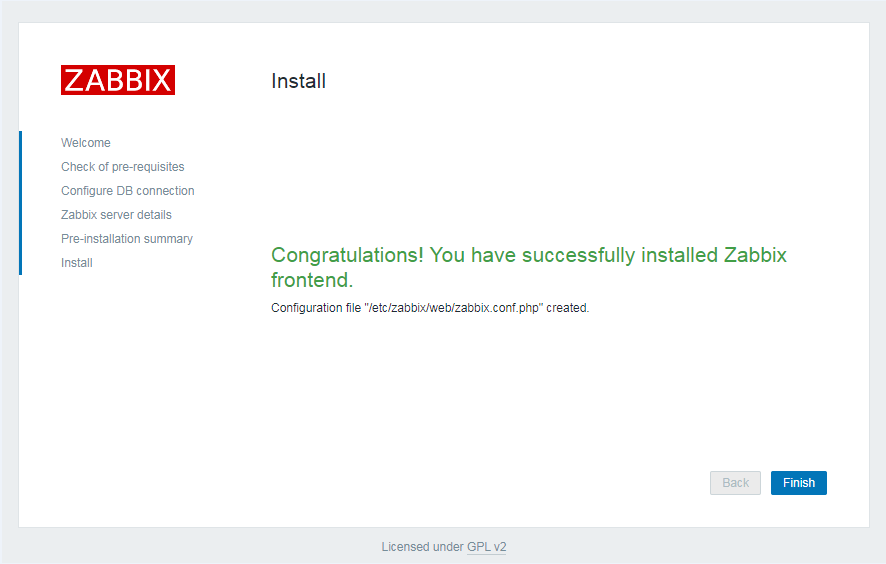
Click Finish to finish the installation
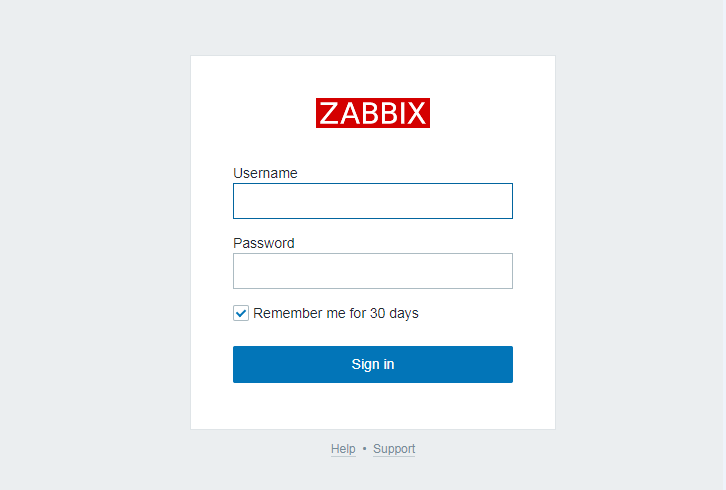
The default login account is Admin and the password is zabbix
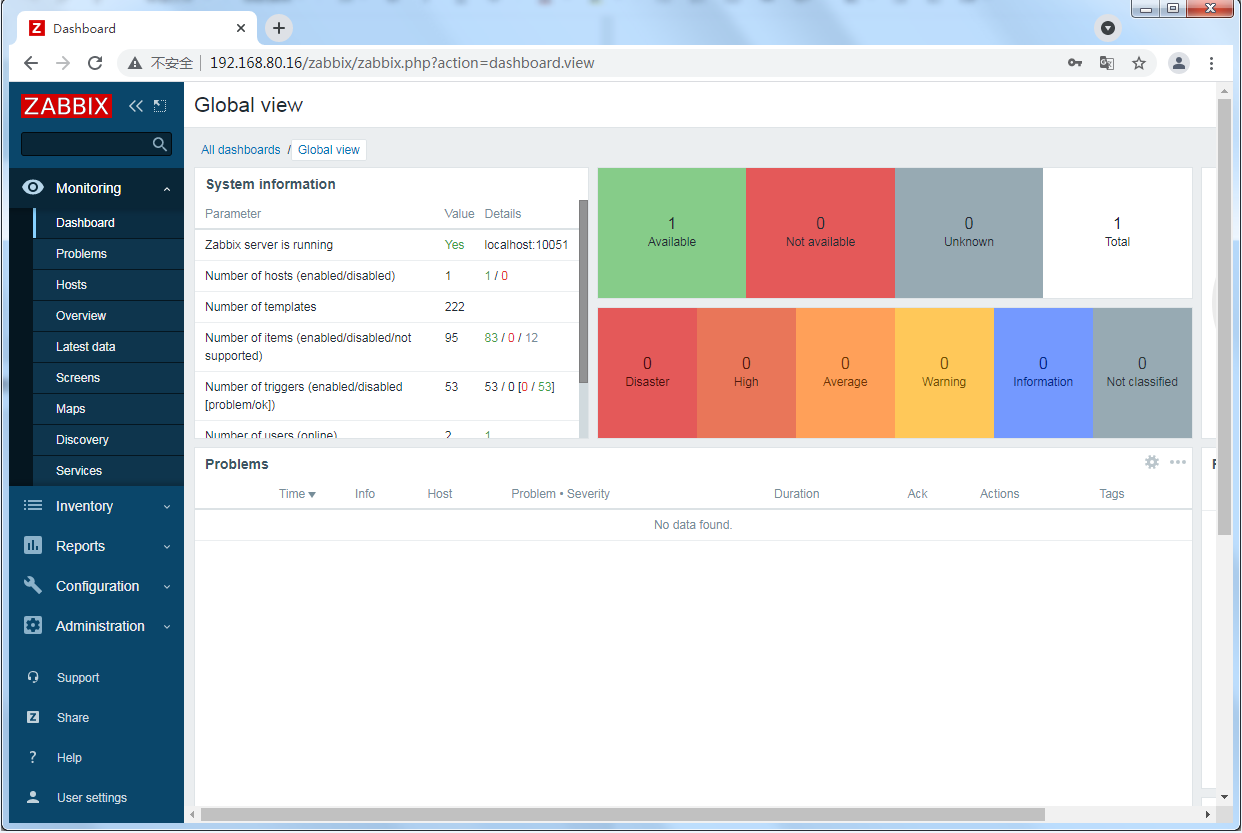
Zabbix home page after login (English by default)
The above is the tutorial on installing Zabbix 5.0LTS version of Centos7 shared by AHAO operation and maintenance road. In the next issue, I will share with you how to modify the English interface of Zabbix 5.0LTS version into Chinese interface