catalogue
3, Configure master node masterdb
4, Configure slave node slavedb
5, Validate database master-slave service
1, Installation environment preparation
1. Node planning
Prepare two virtual hosts to act as master dB and slave DB respectively
| IP address | Host name | node |
| 192.168.18.8 | masterdb | Master database node |
| 192.168.18.88 | slavedb | From database node |
2. Master database node settings
[root@red3212 ~]# hostnamectl set-hostname masterdb
[root@red3212 ~]# exit
[root@master ~]# hostnamectl
   Static hostname: masterdb
         Icon name: computer-vm
           Chassis: vm
        Machine ID: 651d4c1ca62b4b45aa3f2adb5bfd2230
           Boot ID: 75e152eb882c4428b12fe310c4bf91ae
    Virtualization: vmware
  Operating System: CentOS Linux 8
       CPE OS Name: cpe:/o:centos:centos:8
            Kernel: Linux 4.18.0-240.el8.x86_64
      Architecture: x86-64

[root@masterdb ~]# ifconfig ens33
ens33: flags=4163<UP,BROADCAST,RUNNING,MULTICAST>  mtu 1500
        inet 192.168.18.8  netmask 255.255.255.0  broadcast 192.168.18.255
        inet6 fe80::5fa9:b95a:e382:5831  prefixlen 64  scopeid 0x20<link>
        ether 00:0c:29:82:a2:fe  txqueuelen 1000  (Ethernet)
        RX packets 34325  bytes 47142373 (44.9 MiB)
        RX errors 0  dropped 0  overruns 0  frame 0
        TX packets 14183  bytes 1298293 (1.2 MiB)
        TX errors 0  dropped 0 overruns 0  carrier 0  collisions 0
3. Set from database node
[root@red3212 ~]# hostnamectl set-hostname slavedb
[root@red3212 ~]# exit
[root@slavedb ~]# hostnamectl
   Static hostname: slavedb
         Icon name: computer-vm
           Chassis: vm
        Machine ID: d8c2c33a40804fb4abf233975a7e17e5
           Boot ID: f72a0bf6ede743f9a8fc1f8606bbeef1
    Virtualization: vmware
  Operating System: CentOS Linux 8
       CPE OS Name: cpe:/o:centos:centos:8
            Kernel: Linux 4.18.0-240.el8.x86_64
      Architecture: x86-64

[root@slavedb ~]# ifconfig ens33
ens33: flags=4163<UP,BROADCAST,RUNNING,MULTICAST>  mtu 1500
        inet 192.168.18.88  netmask 255.255.255.0  broadcast 192.168.18.255
        inet6 fe80::444d:4556:783:d78f  prefixlen 64  scopeid 0x20<link>
        ether 00:0c:29:60:ad:70  txqueuelen 1000  (Ethernet)
        RX packets 91  bytes 12341 (12.0 KiB)
        RX errors 0  dropped 0  overruns 0  frame 0
        TX packets 147  bytes 19041 (18.5 KiB)
        TX errors 0  dropped 0 overruns 0  carrier 0  collisions 0
4. Configuring firewalls and SELinux services
Although you can directly turn off the firewall (systemctl stop firewalld) and SELinux service (setenforce0), this is not recommended in practical applications.
Both the master and slave nodes execute the following commands for configuration
[root@masterdb ~]# firewall-cmd --permanent --zone=public --add-service=mysql
success
[root@masterdb ~]# firewall-cmd --reload
success
5. Configure hosts file
Both nodes are configured as follows
[root@masterdb ~]# vim /etc/hosts
127.0.0.1   localhost localhost.localdomain localhost4 localhost4.localdomain4
::1         localhost localhost.localdomain localhost6 localhost6.localdomain6
192.168.18.8  masterdb
192.168.18.88 slavedb
6. Configure local software warehouse
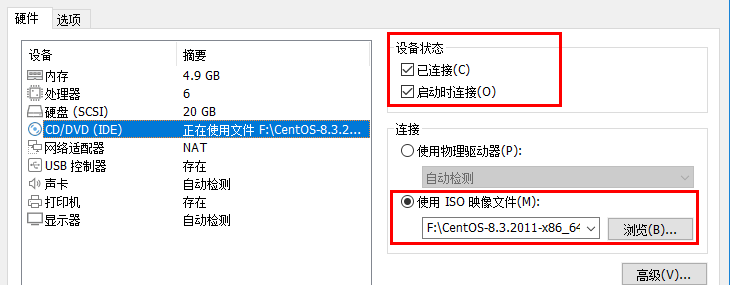
Ensure that the optical drive of the virtual machine remains connected, and use the ISO image file of CentOS8, as shown in the following figure
Then create and edit the local software warehouse, and both nodes do the following
[root@masterdb ~]# vim /etc/yum.repos.d/local.repo
[centos-appstream]
name=centos8-appstream
baseurl=file:///opt/centos8/AppStream
gpgcheck=0
enabled=1
[centos-baseos]
name=centos8-baseos
baseurl=file:///opt/centos8/BaseOS
gpgcheck=0
enabled=1
Mount the local software warehouse, and both nodes perform the following operations
[root@masterdb ~]# mkdir  -p  /media/cdrom
[root@masterdb ~]# mount  /dev/cdrom  /media/cdrom
mount: /media/cdrom: WARNING: device write-protected, mounted read-only.
7. Install the MariaDB database service program, and both nodes perform the following operations
[root@masterdb ~]# dnf -y install mariadb mariadb-server
8. Start and set the startup self startup mariadb service. Both nodes perform the following operations
[root@masterdb ~]# systemctl start mariadb
[root@masterdb ~]# systemctl enable mariadb
Created symlink /etc/systemd/system/mysql.service → /usr/lib/systemd/system/mariadb.service.
Created symlink /etc/systemd/system/mysqld.service → /usr/lib/systemd/system/mariadb.service.
Created symlink /etc/systemd/system/multi-user.target.wants/mariadb.service → /usr/lib/systemd/system/mariadb.service.
2, Initialize database
To initialize the database, both nodes perform the following operations
[root@masterdb ~]# mysql_secure_installation

NOTE: RUNNING ALL PARTS OF THIS SCRIPT IS RECOMMENDED FOR ALL MariaDB
      SERVERS IN PRODUCTION USE!  PLEASE READ EACH STEP CAREFULLY!

In order to log into MariaDB to secure it, we'll need the current
password for the root user.  If you've just installed MariaDB, and
you haven't set the root password yet, the password will be blank,
so you should just press enter here.

Enter current password for root (enter for none):         #By default, press Enter directly
OK, successfully used password, moving on...

Setting the root password ensures that nobody can log into the MariaDB
root user without the proper authorisation.

Set root password? [Y/n] y            #Enter y to set the password of the database administrator root
New password:                         #Enter a password, such as 666666
Re-enter new password:                 #Enter the password again, such as 666666
Password updated successfully!
Reloading privilege tables..
 ... Success!


By default, a MariaDB installation has an anonymous user, allowing anyone
to log into MariaDB without having to have a user account created for
them.  This is intended only for testing, and to make the installation
go a bit smoother.  You should remove them before moving into a
production environment.

Remove anonymous users? [Y/n] y        #Enter y to delete the database anonymous account
 ... Success!

Normally, root should only be allowed to connect from 'localhost'.  This
ensures that someone cannot guess at the root password from the network.

Disallow root login remotely? [Y/n] n        #Enter n to allow root remote login
 ... skipping.

By default, MariaDB comes with a database named 'test' that anyone can
access.  This is also intended only for testing, and should be removed
before moving into a production environment.

Remove test database and access to it? [Y/n] y        #Enter y to delete the test database
 - Dropping test database...
 ... Success!
 - Removing privileges on test database...
 ... Success!

Reloading the privilege tables will ensure that all changes made so far
will take effect immediately.

Reload privilege tables now? [Y/n] y        #Enter y to reload the authorization table
 ... Success!

Cleaning up...

All done!  If you've completed all of the above steps, your MariaDB
installation should now be secure.

Thanks for using MariaDB!
3, Configure master node masterdb
1. Modify the database configuration file / etc / my cnf. d/mariadb-server. CNF, add the following last three lines.
[root@masterdb ~]# vim /etc/my.cnf.d/mariadb-server.cnf
......Some information is omitted here
[mysqld]
datadir=/var/lib/mysql
socket=/var/lib/mysql/mysql.sock
log-error=/var/log/mariadb/mariadb.log
pid-file=/run/mariadb/mariadb.pid
log_bin = mysql-bin            #Record operation log
binlog_ignore_db = mysql        #Out of sync mysql system database
server_id=8                    #Each node ID in the database cluster is different
                #server_id is generally the value of the last field of the server IP address. For example, 192.168.18.8 is 8
......Some information is omitted here
2. Restart the database service and enter the database
[root@masterdb ~]# systemctl restart mariadb.service
[root@masterdb ~]# mysql -u root -p666666
Welcome to the MariaDB monitor.  Commands end with ; or \g.
Your MariaDB connection id is 10
Server version: 10.3.28-MariaDB-log MariaDB Server

Copyright (c) 2000, 2018, Oracle, MariaDB Corporation Ab and others.

Type 'help;' or '\h' for help. Type '\c' to clear the current input statement.

MariaDB [(none)]>
3. Establish an account on the master node and authorize the slave
Authorization on the master node allows the root user to log in to the database on any client machine, creates a database user named zhangsan on the master node, and authorizes the account to connect to all slave nodes. Here, you can also replace% with the specific slave node host name or IP, and give the slave node the right to synchronize the master node database.
Note:% indicates all hosts.
MariaDB [(none)]> grant all privileges on *.* to root@'%' identified by '666666';
Query OK, 0 rows affected (0.001 sec)

MariaDB [(none)]> grant replication slave on *.* to 'zhangsan'@'%' identified by '666666';
Query OK, 0 rows affected (0.000 sec)
MariaDB [(none)]> show master status;
+------------------+----------+--------------+------------------+
| File             | Position | Binlog_Do_DB | Binlog_Ignore_DB |
+------------------+----------+--------------+------------------+
| mysql-bin.000001 |      709 |              | mysql            |
+------------------+----------+--------------+------------------+
1 row in set (0.001 sec)

MariaDB [(none)]> exit
Bye
4, Configure slave node slavedb
1. Like the master node, make sure to complete the installation, startup, initialization and firewall configuration of the previous database mariadb, and then modify the / etc/hosts file.
2. Next, modify the database configuration file / etc / my cnf. d/mariadb-server. CNF, add the last three lines as shown below.
[root@slavedb ~]# vim /etc/my.cnf.d/mariadb-server.cnf
......Some information is omitted here
[mysqld]
datadir=/var/lib/mysql
socket=/var/lib/mysql/mysql.sock
log-error=/var/log/mariadb/mariadb.log
pid-file=/run/mariadb/mariadb.pid
log_bin = mysql-bin            #Record operation log
binlog_ignore_db = mysql        #Out of sync mysql system database
server_id=88                    #Each node ID in the database cluster is different
          #server_ The ID value is generally the value of the last field of the server IP address, and the value is 88 when the node IP is 192.168.18.88
......Some information is omitted here
3. Configure login to database on slave node
Master among them_ Host is used to specify the host name of the primary node, master_user is used to specify the user account created and authorized in the master node, master_password is the corresponding account password.
[root@slavedb ~]# systemctl restart mariadb.service
[root@slavedb ~]# mysql -u root -p666666
Welcome to the MariaDB monitor.  Commands end with ; or \g.
Your MariaDB connection id is 9
Server version: 10.3.28-MariaDB-log MariaDB Server

Copyright (c) 2000, 2018, Oracle, MariaDB Corporation Ab and others.

Type 'help;' or '\h' for help. Type '\c' to clear the current input statement.

MariaDB [(none)]> change master to master_host='masterdb',master_user='zhangsan',master_password='666666';
Query OK, 0 rows affected (0.004 sec)
4. Enable slave node service
MariaDB [(none)]> start slave;
Query OK, 0 rows affected (0.001 sec)

MariaDB [(none)]> show slave status \G
*************************** 1. row ***************************
                Slave_IO_State: Waiting for master to send event
                   Master_Host: masterdb
                   Master_User: zhangsan
                   Master_Port: 3306
                 Connect_Retry: 60
               Master_Log_File: mysql-bin.000002
           Read_Master_Log_Pos: 1111
                Relay_Log_File: mariadb-relay-bin.000003
                 Relay_Log_Pos: 1410
         Relay_Master_Log_File: mysql-bin.000002
              Slave_IO_Running: Yes
             Slave_SQL_Running: Yes
               Replicate_Do_DB:
           Replicate_Ignore_DB:
            Replicate_Do_Table:
        Replicate_Ignore_Table:
       Replicate_Wild_Do_Table:
   Replicate_Wild_Ignore_Table:
                    Last_Errno: 0
                    Last_Error:
                  Skip_Counter: 0
           Exec_Master_Log_Pos: 1111
               Relay_Log_Space: 2473
               Until_Condition: None
                Until_Log_File:
                 Until_Log_Pos: 0
            Master_SSL_Allowed: No
            Master_SSL_CA_File:
            Master_SSL_CA_Path:
               Master_SSL_Cert:
             Master_SSL_Cipher:
                Master_SSL_Key:
         Seconds_Behind_Master: 0
 Master_SSL_Verify_Server_Cert: No
                 Last_IO_Errno: 0
                 Last_IO_Error:
                Last_SQL_Errno: 0
                Last_SQL_Error:
   Replicate_Ignore_Server_Ids:
              Master_Server_Id: 8
                Master_SSL_Crl:
            Master_SSL_Crlpath:
                    Using_Gtid: No
                   Gtid_IO_Pos:
       Replicate_Do_Domain_Ids:
   Replicate_Ignore_Domain_Ids:
                 Parallel_Mode: conservative
                     SQL_Delay: 0
           SQL_Remaining_Delay: NULL
       Slave_SQL_Running_State: Slave has read all relay log; waiting for the slave I/O thread to update it
              Slave_DDL_Groups: 6
Slave_Non_Transactional_Groups: 0
    Slave_Transactional_Groups: 0
1 row in set (0.000 sec)
MariaDB [(none)]> exit
Bye
If Slave_IO_Running and slave_ SQL_ When the running status is Yes, it indicates that the master-slave database cluster configuration is successful.
5, Validate database master-slave service
1. Create database on master node
First, create the database test in the master node masterdb, create the table company in the database test, insert the table data, and view the table comany data after creation
[root@masterdb ~]# mysql -u root -p666666
Welcome to the MariaDB monitor.  Commands end with ; or \g.
Your MariaDB connection id is 41
Server version: 10.3.28-MariaDB-log MariaDB Server

Copyright (c) 2000, 2018, Oracle, MariaDB Corporation Ab and others.

Type 'help;' or '\h' for help. Type '\c' to clear the current input statement.

MariaDB [(none)]> create database test;
Query OK, 1 row affected (0.000 sec)

MariaDB [(none)]> use test;
Database changed
MariaDB [test]> create table company (id int not null primary key, name varchar(50),addr varchar(255));
Query OK, 0 rows affected (0.061 sec)

MariaDB [test]> insert into company values(1,"Baidu","BeiJing");
Query OK, 1 row affected (0.013 sec)

MariaDB [test]> select * from company;
+----+-------+---------+
| id | name  | addr    |
+----+-------+---------+
|  1 | Baidu | BeiJing |
+----+-------+---------+
1 row in set (0.001 sec)
2. Verify the data synchronization function on the slave node
Log in to the slave slavedb node's database and view the database list. Find the test database, query the table and the data in it.
[root@slavedb ~]# mysql -u root -p666666
Welcome to the MariaDB monitor.  Commands end with ; or \g.
Your MariaDB connection id is 15
Server version: 10.3.28-MariaDB-log MariaDB Server

Copyright (c) 2000, 2018, Oracle, MariaDB Corporation Ab and others.

Type 'help;' or '\h' for help. Type '\c' to clear the current input statement.

MariaDB [(none)]> show databases;
+--------------------+
| Database           |
+--------------------+
| information_schema |
| mysql              |
| performance_schema |
| test               |
+--------------------+
4 rows in set (0.001 sec)

MariaDB [(none)]> use test;
Reading table information for completion of table and column names
You can turn off this feature to get a quicker startup with -A

Database changed
MariaDB [test]> show tables;
+----------------+
| Tables_in_test |
+----------------+
| company        |
+----------------+
1 row in set (0.000 sec)

MariaDB [test]> select * from company;
+----+-------+---------+
| id | name  | addr    |
+----+-------+---------+
|  1 | Baidu | BeiJing |
+----+-------+---------+
1 row in set (0.000 sec)
It can be seen that the master-slave database data can be synchronized successfully.