Article catalogue
- 1. Axios post request
- 2.Mybatis
- Common notes
1. Axios post request
1.1 INTRODUCTION cases
1.1.1 front end JS
//1. Specify the prefix of the request
			axios.defaults.baseURL="http://localhost:8080/axios"

			/**
			 * 2. Requirement: when adding a general business, it is submitted by post
			 *    URL: http://localhost:8080/axios/saveUser
			 * axios.post(url Address, js object)
			 * 		.then(Callback function!!!)
			 */
			let user1 = {id: 100,name:"tomcat cat",age:18,sex:"female"}
			axios.post("/saveUser",user1)
				 .then( promise => {
					 console.log(promise.data)
				 })
1.1.2 post request parameter description
Note: for the post request in axios, the parameters passed are JSON strings

1.1.3 AxiosController call
  /**
     * Business description: receive post request
     * url Address: http://localhost:8080/axios/saveUser
     * Parameters: JSON string = {"id":100,"name":"tomcat cat", "age":18,"sex": "female"}
     * Return value: User object
     * Knowledge points:
     *      1.Convert JSON string to object @ RequestBody
     *      2.Convert object to JSON string @ ResponseBody
     */
    @PostMapping("/saveUser")
    public User saveUser(@RequestBody User user){

        return user;
    }
1.2 syntax description of common request types
- GET/DELETE syntax is the same
- The syntax of POST/PUT is the same
1.3 put request test
1.3.1 edit front-end JS
/**
			 * Business requirements: update data
			 * 		     Modify data with id=3 name = "Zhang San" age=18
			 * URL:http://localhost:8080/axios/updateUser
			 * Type: put
			 * Writing method 1: submit data by using object parameters
			 * Writing method 2: using restFul structure
			 */
			let user2 = {id:3, name:"Zhang San", age:18}
			axios.put("/updateUser",user2)
				 .then(promise => {
					 console.log(promise.data)
				 })

			let url3=`http://localhost:8080/axios/user/${user2.name}/${user2.age}/${user2.id}`
			axios.put(url3)
				 .then(promise => {
				 	console.log(promise.data)
				 })
1.3.2 editing AxiosController
/**
     * Business: finish modifying
     * Type: put type
     * URL Address: http://localhost:8080/axios/updateUser
     * Parameter: JSON string of user
     * Return value: User return
     */
    @PutMapping("/updateUser")
    public User updateUser(@RequestBody User user){

        return user;
    }
    /**
     *  Requirements: restFul structure
     *  url Address:` http://localhost:8080/axios/user/${user2.name}/${user2.age}/${user2.id}`
     *  Request type: put
     *  Return value: User
     */
    @PutMapping("/user/{name}/{age}/{id}")
    public User updateUser2(User user){

        return user;
    }
1.4 cross domain description
1.4.1 homology strategy
Element 1: browser access address
Element 2: Ajax request URL
Policy Description: if the above elements meet the protocol at the same time: / / Domain Name: port numbers are the same, it is called meeting the homology policy You can make the correct call It is also called "same domain access"
1.4.2 what is cross domain
Violation of the same origin policy is called cross domain access
1.4.3 test questions
Case 1:
- Browser address: http://www.jd.com/xx/xx
- ajax address: https://www.jd.com/yy/yy Cross domain: different protocols
Case 2:
- Browser address: http://www.jd.com/xx/xx
- ajax address: http://www.jd.com/yy/yy Same domain request
Case 3:
- Browser address: http://www.jd.com:80/xx/xx
- ajax address: http://www.jd.com/yy/yy Same domain request!!!
Case 4:
Premise: the domain name corresponds to the IP address
- Browser address: http://www.jd.com/xx/xx
- ajax address: http://8.8.8.8/yy/yy Cross domain request! Domain name inconsistency
Case 5:
- Browser address: https://www.jd.com/xx/xx
- ajax address: https://www.jd.com:443/yy/yy The default port number of the same domain request HTTPS is 443
Case 6:
- Browser address: http://www.jd.com/xx/yy/xx
- ajax address: http://miaoshi.jd.com/yy/yy Different domain names for cross domain requests
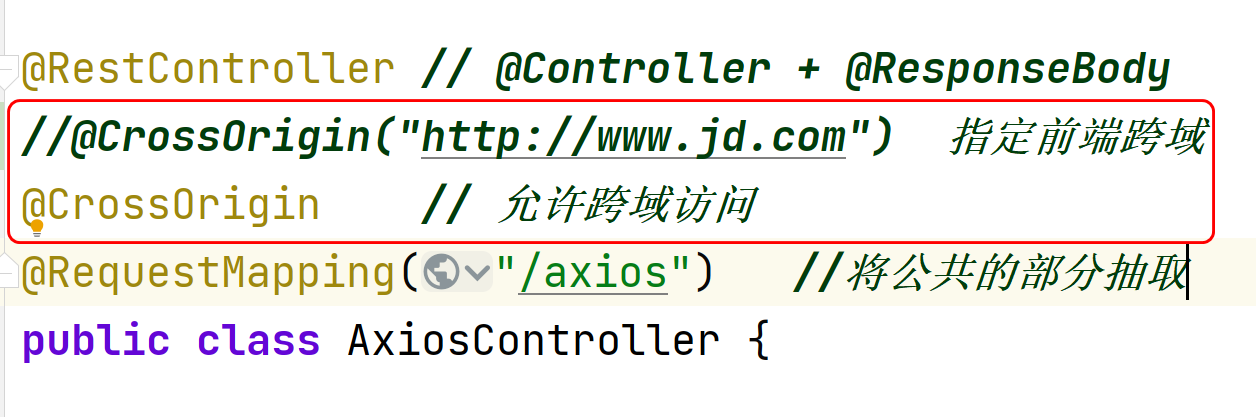
1.4.4 notes on @ CrossOrigin
2.Mybatis
2.1 introduction to mybatis
Official website address: https://mybatis.org/mybatis-3/zh/index.html
MyBatis is an excellent persistence layer framework, which supports custom SQL, stored procedures and advanced mapping. MyBatis eliminates almost all JDBC code and the work of setting parameters and obtaining result sets. MyBatis can configure and map primitive types, interfaces and Java POJO s (Plain Old Java Objects) to records in the database through simple XML or annotations.
Summary:
1. MyBatis is an excellent persistence layer framework, which encapsulates JDBC internally and simplifies the process of operating the database
2. Mapping: the tables in the database and the classes in POJO are mapped one by one
The fields in the table and the attributes in the class are mapped one by one
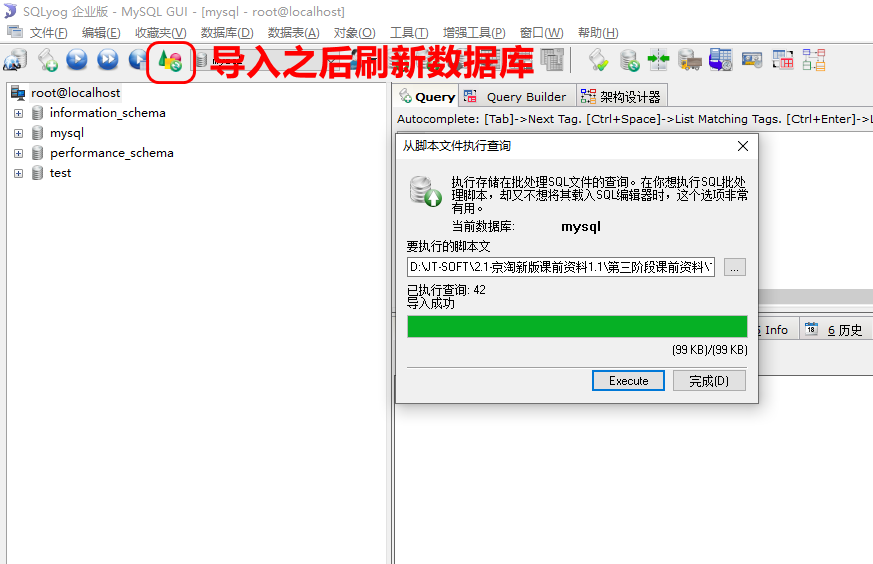
2.2 import database
2.3 introduction to mybatis
2.3.1 create project
- Create project
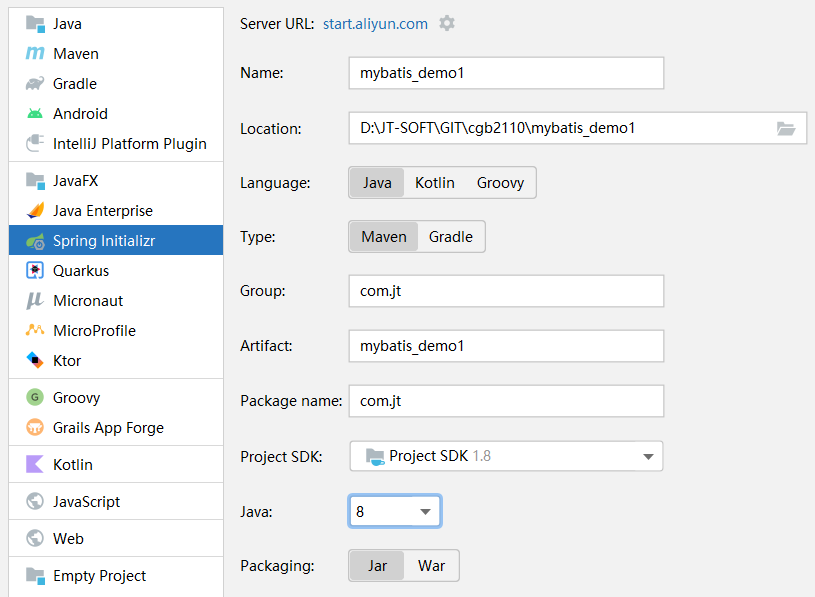
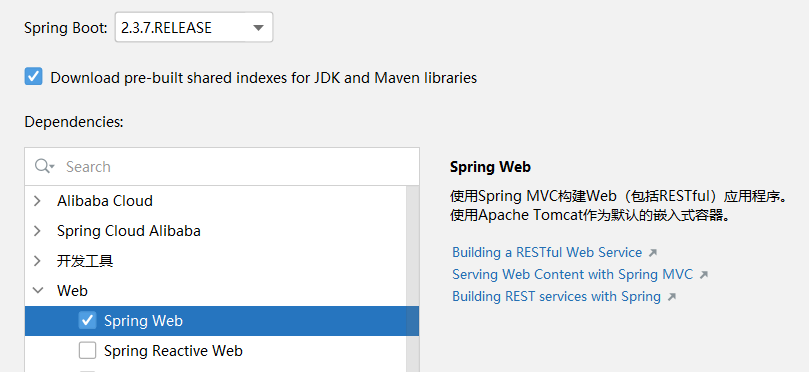
- Check jar package
2.3.2 import project
-
Edit POM XML configuration file
<dependency> <groupId>org.mybatis.spring.boot</groupId> <artifactId>mybatis-spring-boot-starter</artifactId> <version>2.2.0</version> </dependency> <!--jdbc Dependent package--> <dependency> <groupId>mysql</groupId> <artifactId>mysql-connector-java</artifactId> </dependency> <!--add to lombok My bag--> <dependency> <groupId>org.projectlombok</groupId> <artifactId>lombok</artifactId> </dependency> -
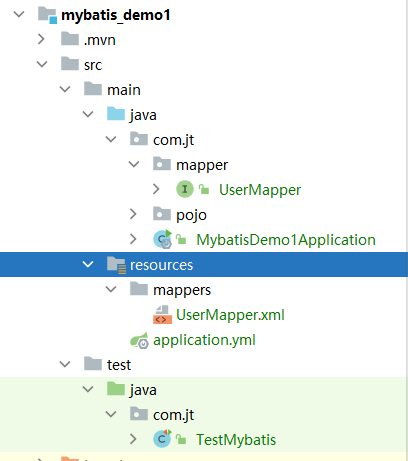
Import src configuration file
Note: import the src file of the project in the pre class materials As shown in the figure
2.3.3 lombok plug-in installation
2.3.3.1 introduction to Lombok
Note: conventional methods such as get/set/toString must be added to the pojo object, but the method is cumbersome to write, but it must be added Therefore, lombok plug-in can be introduced to dynamically generate the above methods
2.3.3.2 import jar package
 		<!--add to lombok My bag-->
        <dependency>
            <groupId>org.projectlombok</groupId>
            <artifactId>lombok</artifactId>
        </dependency>
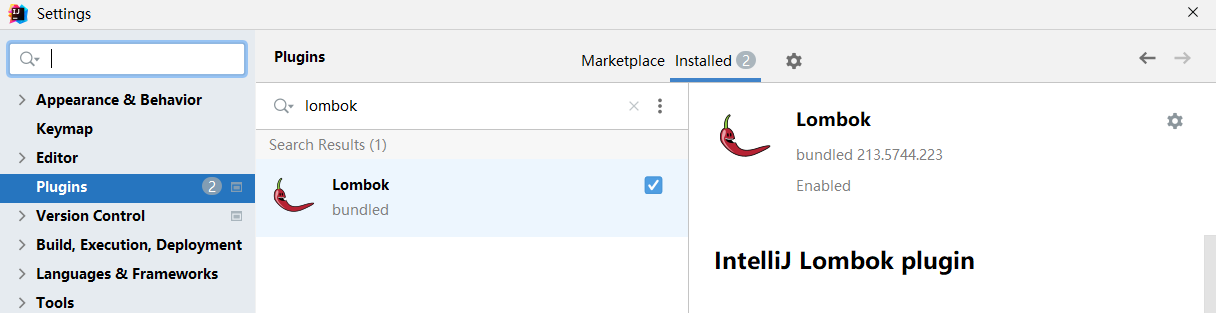
2.3.3.3 installing lombok plug-in
Search and install: lombok plug-ins
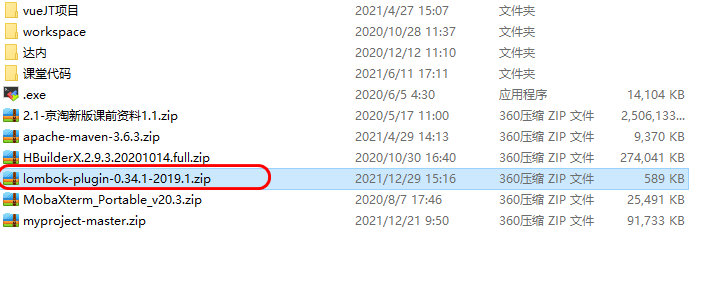
2). Local installation
Note: download the lombok installation file, as shown in the figure:
File download: just download from the code cloud
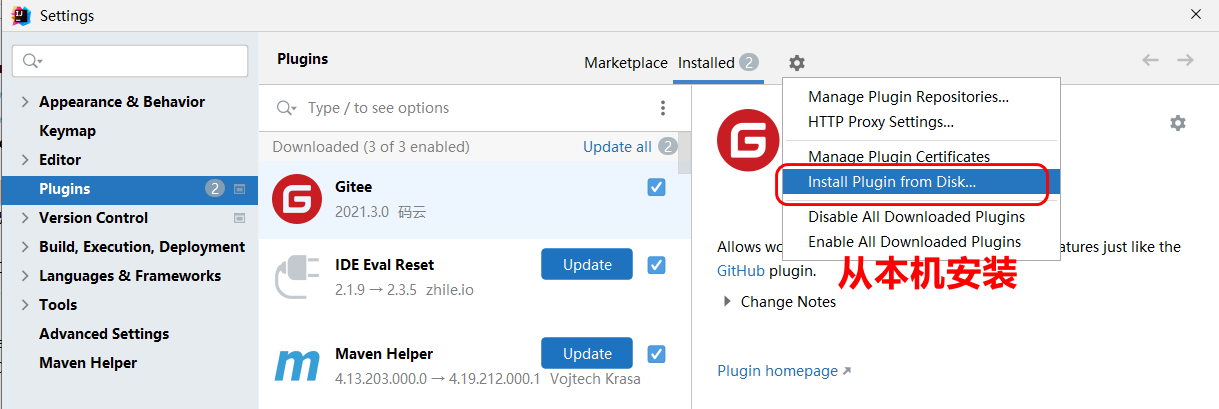
3). Import the plug-in and check the zip package
Lombok version address: https://plugins.jetbrains.com/plugin/6317-lombok/versions
2.3.3.4 lombok annotation mark POJO
@Data //Dynamically generate get/set/toString/equals/hashCode and other methods
@Accessors(chain = true) //Open chain loading override set method
@NoArgsConstructor       //Nonparametric structure
@AllArgsConstructor      //Fully parametric structure
public class User implements Serializable {
    private Integer id;
    private String name;
    private Integer age;
    private String sex;

   /* public User setId(Integer id){
        this.id = id;
        return this; //Indicates that the running period of the current object is valid
    }

    public void xx(){
        User user = new User();
        //The user object rewrites the chained return structure of the set method
        user.setName("xxx").setAge(10).setSex("Female ");
    }*/

}
2.3.3 editing Mapper interface
Rules: prepare a new interface based on the rules of interface oriented development
@Mapper //Give the interface to the Spring container to manage map < usermapper, JDK proxy object >
//@Repository / / hand over the persistence layer to the Spring container for management
public interface UserMapper {
    //Query all user information
    List<User> findAll();
}
2.3.4 edit mapper's mapping file
Core role: edit Sql of database operation
<?xml version="1.0" encoding="UTF-8" ?>
<!DOCTYPE mapper
        PUBLIC "-//mybatis.org//DTD Mapper 3.0//EN"
        "http://mybatis.org/dtd/mybatis-3-mapper.dtd">
<!--
    Call process:
         1.edit Mapper Interface editing interface method
         2.Mapping files and Mapper Interface binding namespace
-->
<mapper namespace="com.jt.mapper.UserMapper">
    <!--
        1.id Bind to the method name of the interface
        2. review:JDBC->resultSet->Traversal result set->Manually encapsulate objects
        3. resultType: mybatis Automatically encapsulate the data of the result set as objects
                       If return value List aggregate,Then it is automatically encapsulated as List,User Act as a generic object in it
                       If return value User object.Return directly User object
    -->
    <select id="findAll" resultType="com.jt.pojo.User">
        select * from demo_user
    </select>

</mapper>
2.3.5 Spring integrates the configuration of Mybatis
Description: the structure of mybatis native code is chaotic and complex Therefore, Spring is adopted to integrate the operation of mybatis, Simplify development steps
It indicates the steps for spring to integrate mybatis, and the configuration information can be understood temporarily
#1. Pay attention to indent when configuring the port number!!!!!
server:
  port: 8090

#2. Configure data source
spring:
  datasource:
    driver-class-name: com.mysql.cj.jdbc.Driver
    url: jdbc:mysql://127.0.0.1:3306/jt?serverTimezone=GMT%2B8&useUnicode=true&characterEncoding=utf8&autoReconnect=true&allowMultiQueries=true
    username: root
    #The yml file 0 is not parsed. If the letter begins with 0, it is wrapped in quotation marks
    #password: "0123456"
    password: root

#3. Configure Mybatis
mybatis:
  #Define alias package
  type-aliases-package: com.jt.pojo
  #Load all mapping files
  mapper-locations: classpath:/mappers/*.xml
  #Turn on hump mapping
  configuration:
    map-underscore-to-camel-case: true

#4. Print Sql com jt. Sql log under mapper
logging:
  level:
    com.jt.mapper: debug
2.3.6 Spring test class
Note: for the convenience of later testing code, Spring has developed an annotation @ SpringBootTest for testing methods
package com.jt;

import com.jt.mapper.UserMapper;
import com.jt.pojo.User;
import org.junit.jupiter.api.Test;
import org.springframework.beans.factory.annotation.Autowired;
import org.springframework.boot.test.context.SpringBootTest;

import java.util.List;

@SpringBootTest //The function of this annotation is to start the spring container, and then get the object dynamically
public class TestMybatis {

    @Autowired  //IDEA compilation exceptions do not affect code execution
    private UserMapper userMapper;

    @Test
    public void test01(){
        List<User> userList = userMapper.findAll();
        System.out.println(userList);
    }
}

Common notes
- @Configuration identifies that the current class is a configuration class
- @ComponentScan package scan annotation scan annotation
- @Bean identifies the return value of this method and gives it to the Spring container for management
- @Scope controls multiple cases and single cases
- @Lazy load
- @PostConstruct initialization method
- @PreDestroy destruction method
- @Component gives the future objects of the current class to the container management
- @Autowired is injected by type
- @Qualifier injects by name
- @Repository identity persistence layer annotation
- @Service identity service layer
- @Controller identification controller layer
- @Value assigns @ Value("${key}") to the attribute
- @PropertySource loads the configuration file properties of the specified path
- @Aspect identifies that the current class is an aspect class
- @Pointcut is used to define pointcut expressions. There are four ways to write expressions
- @EnableAspectJAutoProxy makes AOP annotations effective
- @Before AOP - advance notice
- @AfterReturning AOP post notification
- @AfterThrowing AOP exception notification
- @After AOP - Final notification
- @Around AOP surround notification
- @Order(1) / / you can use the order keyword to sort AOP. The smaller the number, the earlier the execution
- @ResponseBody converts the returned data into a JSON string. If it is the string itself, the original data is returned
- @RequestMapping("/hello") implements the mapping between the browser's request path and method
- @PathVariable restFul structure, receiving annotation of parameters
- @GetMapping('') can only receive GET request types
- @DeleteMapping('') can only receive DELETE request types
- @PostMapping('') can only receive POST request types
- @PutMapping('') can only receive PUT request types
- @RestController represents the Controller class, and the return value is required to be JSON
- @CrossOrigin allows cross domain access
- @When receiving the RequestBody parameter, convert the json string into a java object. The key in json is consistent with the attribute of the object
- @Data lombok dynamically generates methods such as get/set/toString/equals/hashcode
- @Accessors controls whether the chain loading structure is turned on
- @Parameter free construction method generated by NoArgsConstructor
- @AllArgsConstructor generating full parameter construction method
- @Mapper mybatis gives the current interface to Spring container management Map < class name in lowercase, JDK dynamic proxy object >
- @SpringBootTest this annotation is used to start the spring container during code testing, and then dynamically obtain the object. Note that the package path is in the same package and sub package of the main startup class