Experimental environment:
westos-vmctl reset nodea
westos-vmctl reset nodeb
In the virtual machine nodea:
Perform the same operation in the virtual machine nodeb:

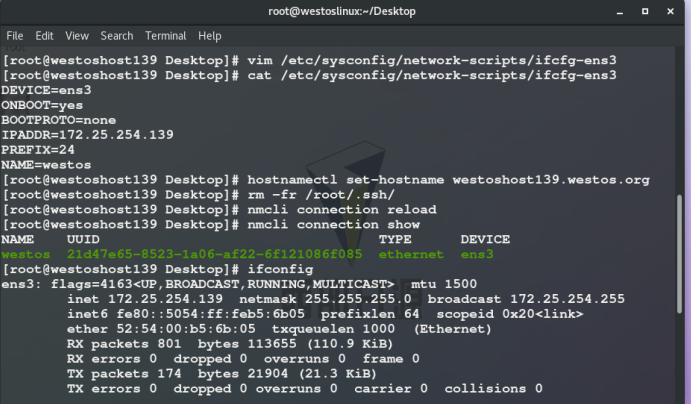
hostnamectl set-hostname westoshost139.westos.org ## Modify virtual machine name
1, Openssh features
1. Purpose of sshd service
Function: it can open the safe shell in the remote host through the network
Secure SHell ===> ssh ## client
Secure SHell daemon ===> sshd ## Server
2. Installation package: openssh server
3. Master profile: / etc/ssh/sshd_conf
4. Default port: 22
5. Client command: ssh
2, Basic usage of ssh
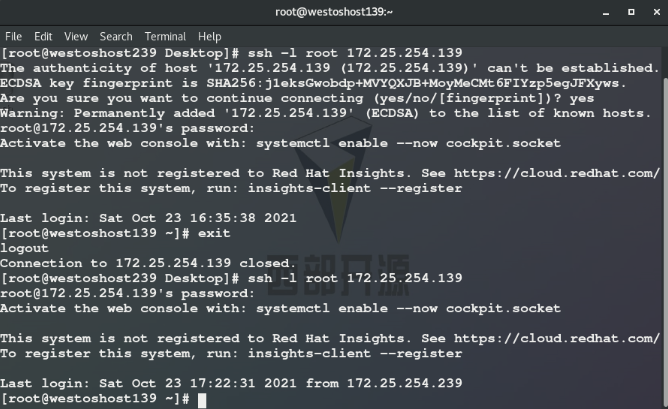
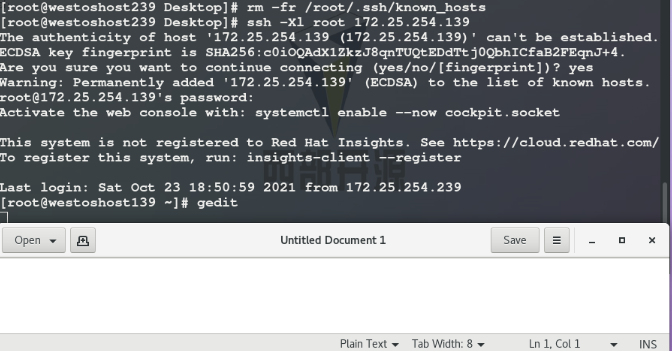
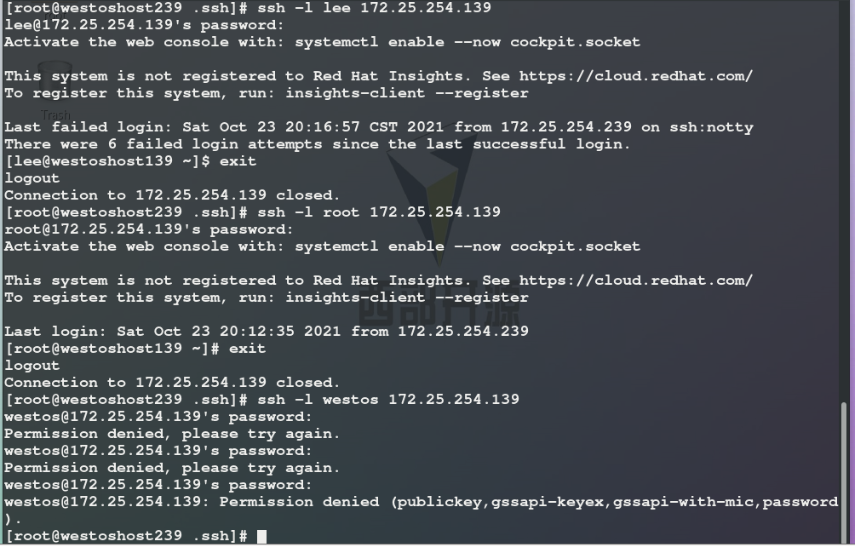
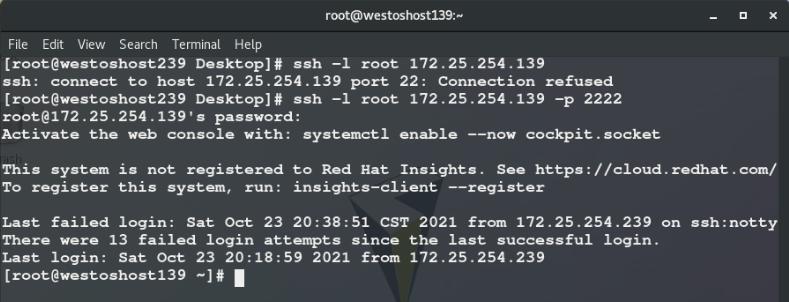
ssh [-l Remote host user] <ip | hostname>

ssh -l root 172.25.254.139  ##Open the remote shell as root in the 139 host through the ssh command
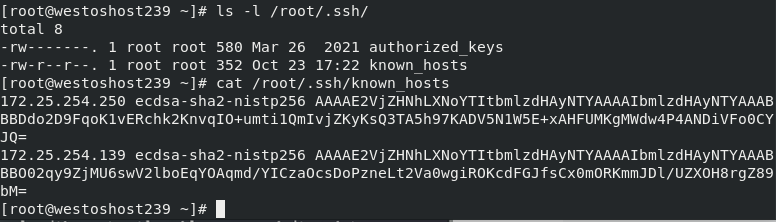
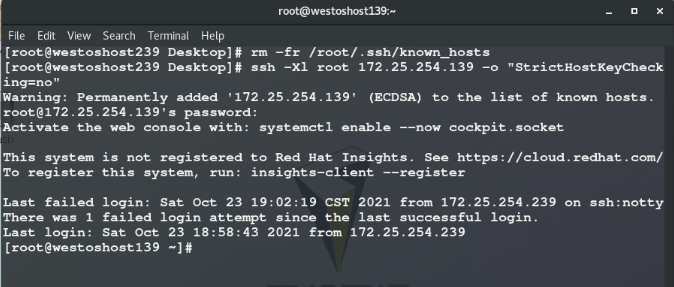
First connection or execution After rm -fr /root/.ssh /, the ID generation process will be confirmed. Log in again and directly enter passwd:
effect:
##When the revenue is < yes >, host 139 will send the identity public key to the current host and save the public key to ~ /. ssh/know_hosts
##139 the host holds the private key and authenticates the client host when the client host connects again.
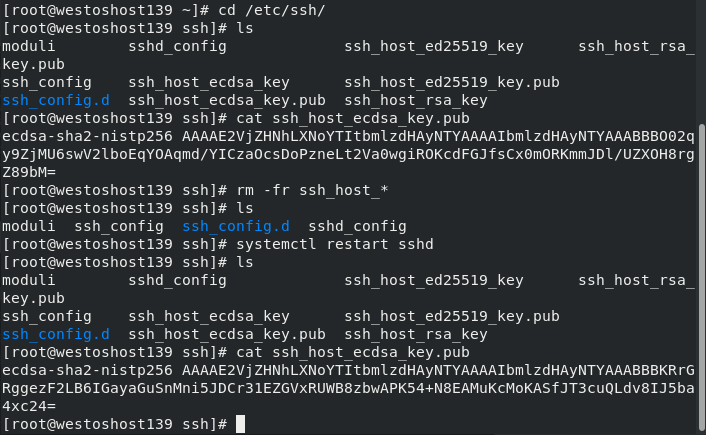
On the server( nodea139 Host)
cd /etc/ssh/
ls
cat ssh_host_ecdsa_key.pub  ##Sent from server storage client
rm -fr ssh_host_*
ls
systemctl restart sshd     ##Restart sshd
ls
cat ssh_host_ecdsa_key.pub   ##Check it again. It's different from the previous one
After the server restarts sshd, the client is rejected. The effect is as follows:
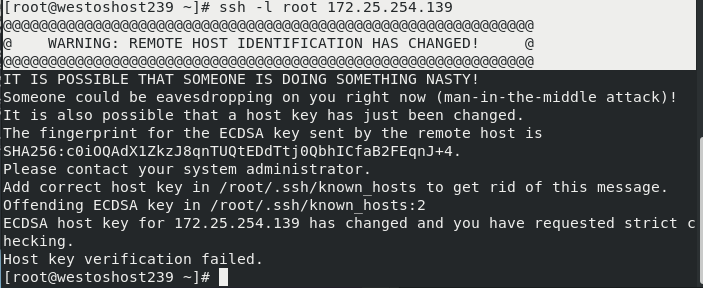
Solution: delete / root /. SSH / known_ The specified line in the hosts file
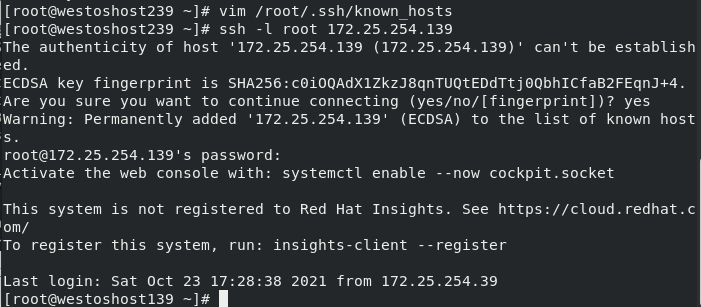
vim /root/.ssh/know_hosts ##Delete the line corresponding to the error prompt in this file
ssh -l root 172.25.254.139 ##Connect again
ssh common parameters:
| -l | Designated login user |
| -i | Specify private key |
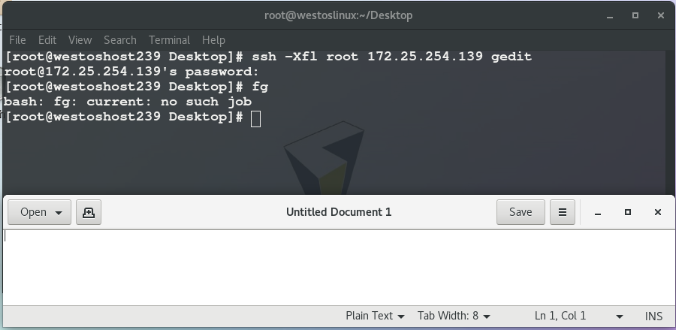
| -X | Open graphics |
| -f | Background operation |
| -o | Specify connection parameters # ssh -l root@172.25.254.x -O "stricthostkeychecking = no" you do not need to enter yes for the first connection |
| -t | Specify connection springboard # ssh -l root 172.25.254.239 -t ssh -l root 172.25.254.139 |
Specific operation:
-Xl open the drawing and specify the user
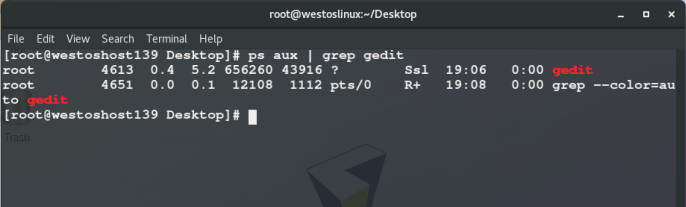
- f ## Background operation
-o specify connection parameters
ssh -l root@172.25.254.x -o "StrictHostKeyChecking=no" You do not need to enter yes for the first connection
- t ## Specify connection springboard
## ssh -l root 172.25.254.239 -t ssh -l root 172.25.254.139
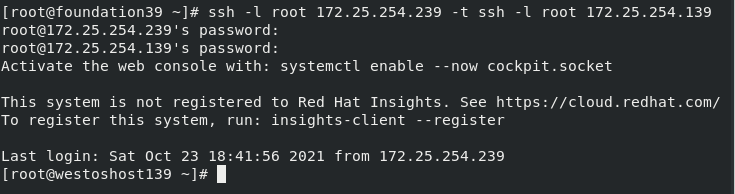
Check in host 139: you can see that the ip address of remote login is 172.25.254.239
3, sshd key authentication
1. Type of certification
- Symmetric encryption: encryption and decryption are the same string of characters. Easy to leak, can be brutally cracked, easy to forget
- Asymmetric encryption: The public key for encryption and the private key for decryption will not be stolen. The attacker cannot log in to the server without a key
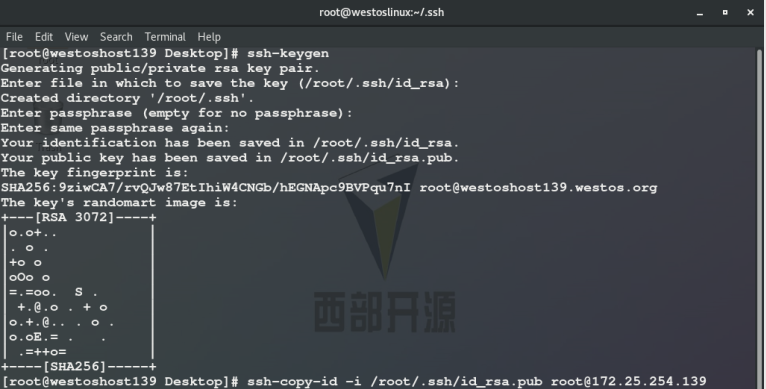
2. Generate asymmetric encryption key
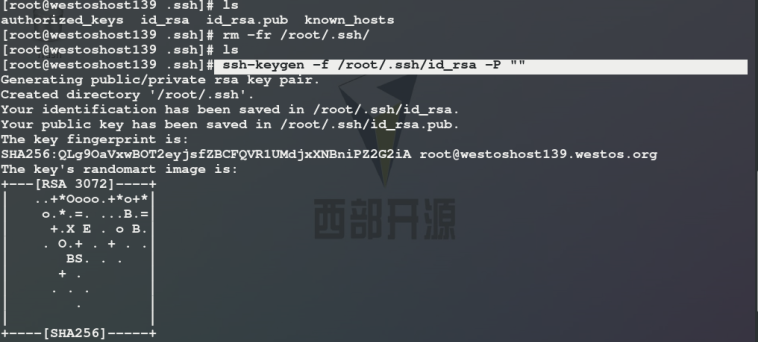
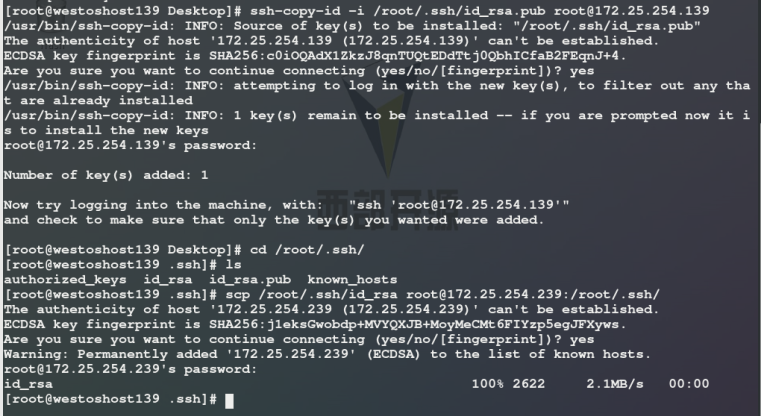
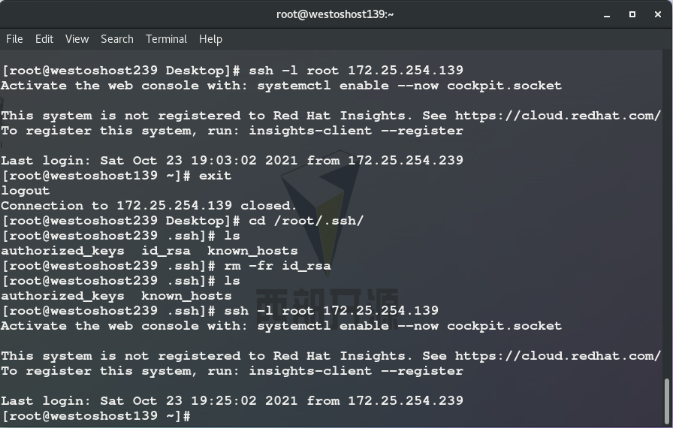
On the server (139 host)
cd /root/.ssh/
rm -fr /root/.ssh/
ssh-keyen -f /root/.ssh/id_rsa -P ""  ##Command to obtain the lock, - f file where the key is saved / root /. SSH / ID_ RSA - P password is empty
ssh-copy-id -i /root/.ssh/id_rsa.pub root@172.25.254.110  ##Encrypt server
scp /root/.ssh/id_rsa root@172.25.254.210:/root/.ssh/  ##Pass the key to nodeb

Log in the client (239 host) without secret:
ssh -l root 172.25.254.110  ##By default, the key is read from / root/.ssh /
Method 1: SSH keygen
Method 2: SSH keygen - F / root /. SSH / ID_ rsa -P ""
3. Encrypt the server
ssh-copy-id -i /root/.ssh/id_rsa.pub username@serverip
ssh-copy-id -i /root/.ssh/id_rsa.pub root@172.25.254.139
# Testing#
ssh - l root@172.25.254.139 ## No password is required to log in as root user
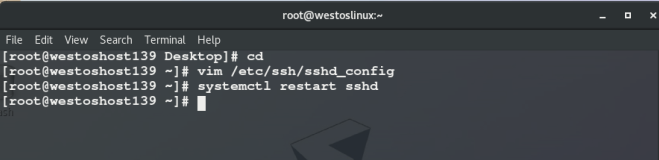
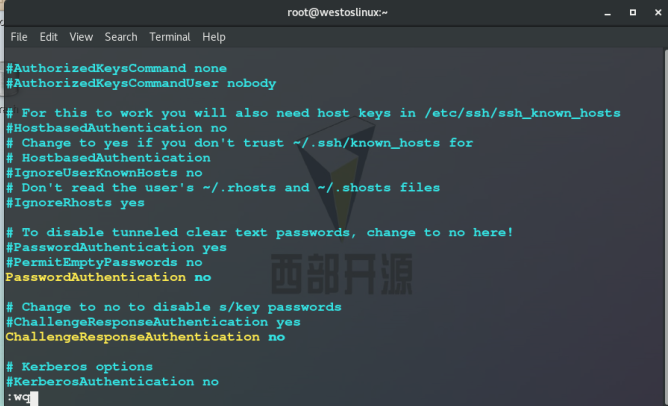
4, Detailed explanation of sshd security optimization parameters
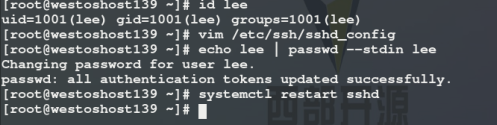
setenforce 0
systemctl disable --now firewalld

Port 2222                     ##Set port to 2222
PermitRootLogin yes|no        ##Is super user login prohibited
PasswordAuthentication yes|no ##Enable the original password authentication method
AllowUsers lee                ##User whitelist
DenyUsers lee                 ##User blacklist
1. PasswordAuthentication no ## Do not turn on the original password authentication method
Test: other clients cannot log in remotely through password authentication:

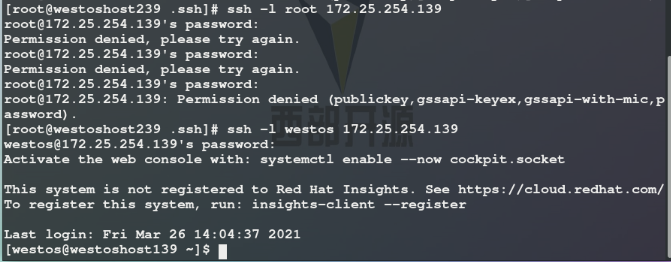
2. PermitRootLogin no ## Prohibit super user login
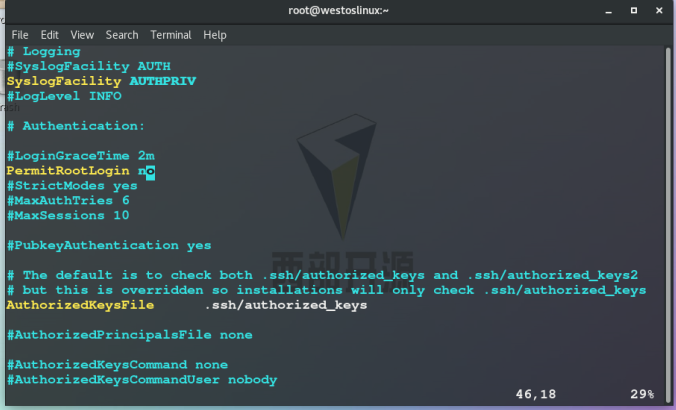
Test: super users are forbidden to log in, while ordinary users can log in:
3.DenyUsers westos ## User blacklist
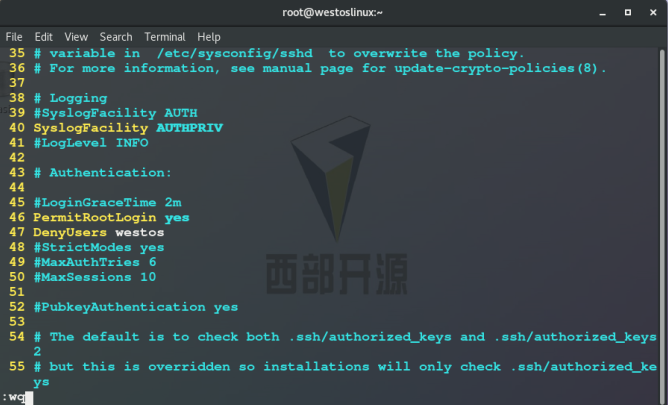
Test: westos users cannot log in, and other users can log in remotely
4.AllowUsers lee ## User whitelist

Test: except that users in the white list can log in, other users cannot log in remotely, nor can root user

5.Port 2222 ## Set port to 2222
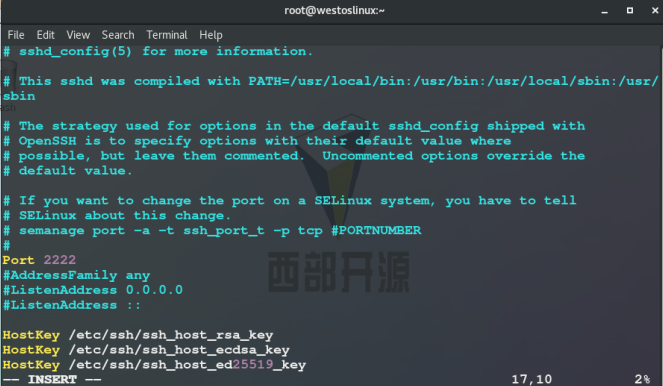
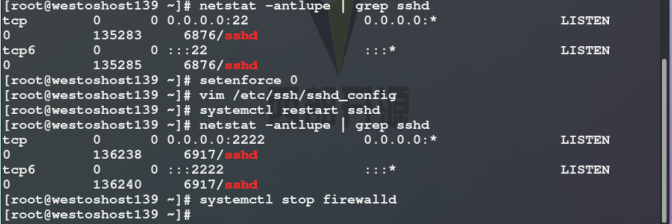
Test: you need to specify a port to log in remotely (the default port is 22)
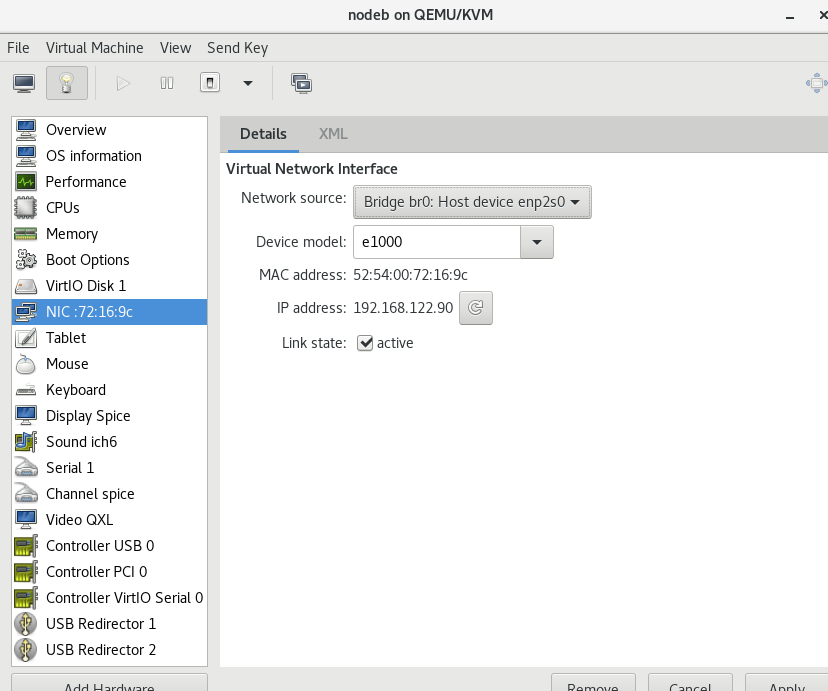
5, Construction of bridge
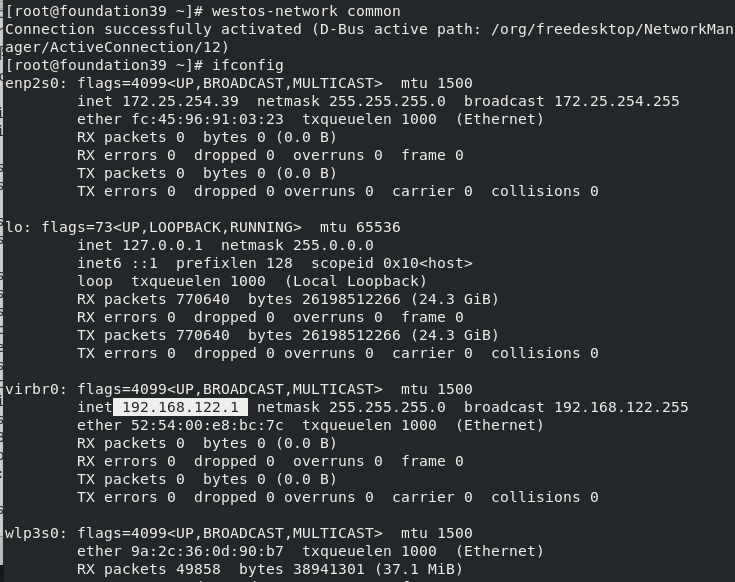
Experimental environment:
At 172.25.254.39 In the host, first shut down all virtual machines and execute the following command:
westos-network common ##Clear the previously set network configuration in the host
ifconfig          ##see
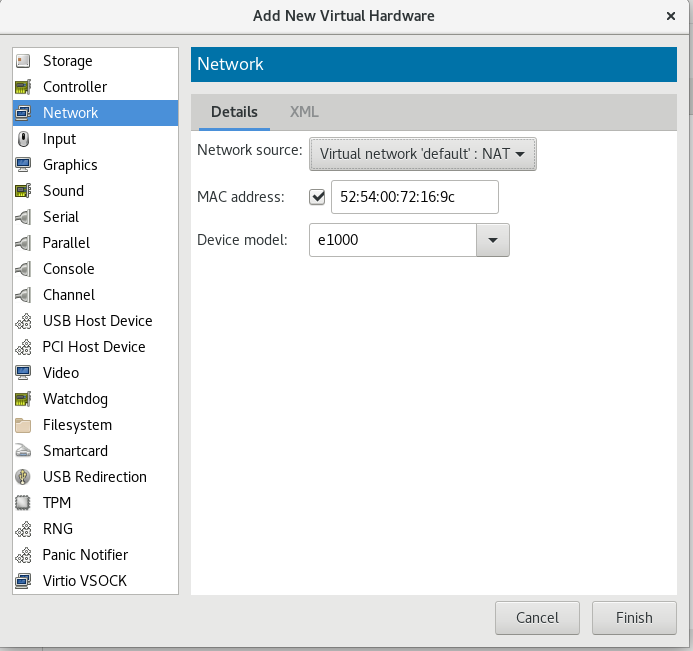
1. In the nodeb of the virtual machine, delete the previous network card and add a new network card (NAT)
2. Enter nodeb:
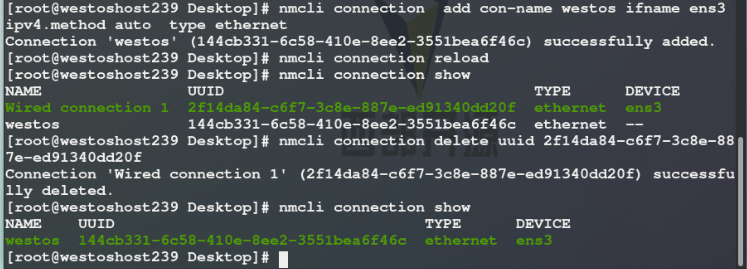
nmcli connection add con-name westos ifname ens3 ipv4.method auto type ethernet
nmcli connection reload
nmcli connection  show
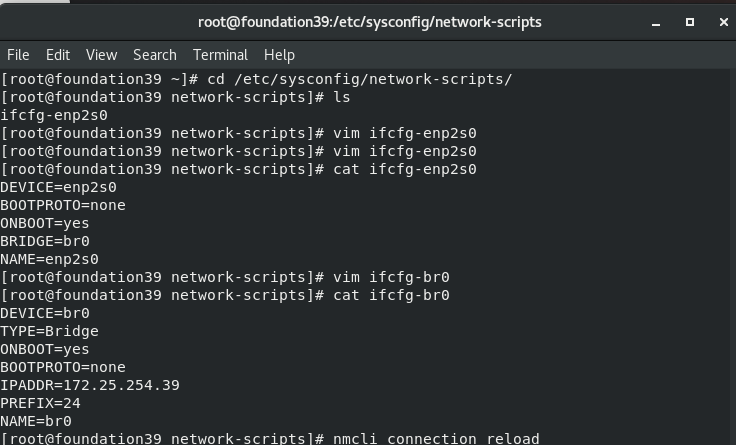
3. Build a bridge in the host:
cd /etc/sysconfig/network-scripts/
ls
vim ifcfg-enp2s0
cat ifcfg-enp2s0
vim ifcfg-br0
cat ifcfg-br0
nmcli connection reload
nmcli connection up br0
nmcli connection up enp2s0
bridge link
systemctl restart libvirtd
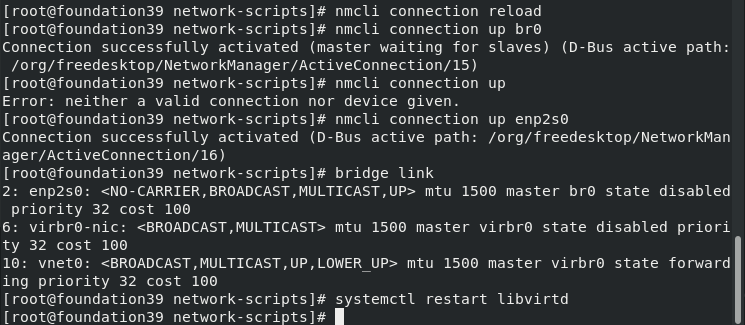
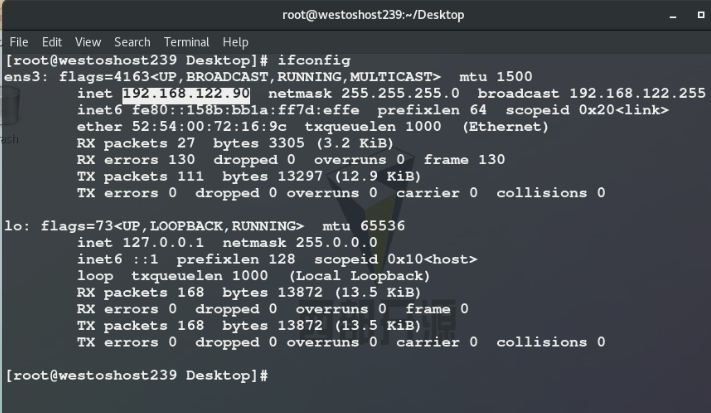
4. Test: check nodeb network card (not only NAT but also Bridage bridge)