PyQt5 provides QUdpSocket and QTcpSocket classes to implement UDP and TCP transmission protocols respectively. Both protocols can be used to create network client and server applications. The former (UDP) sends data from one host to another in the form of packets. It is only responsible for sending, but does not care whether the sending is successful or not. The advantage is light and fast; The latter (TCP) can provide reliable communication connection for applications. It sends data in the form of stream, which can ensure that the data is sent to other computers without error. The advantage is safety and reliability.
TCP is almost the default choice for two Internet programs to communicate, but UDP still has advantages in some aspects (such as broadcasting). In short, the specific situation still needs to be analyzed. In this chapter, we will learn how to use the relevant network modules provided by PyQt5 for communication.
35.1 writing UDP client / server code
Let's use the following example to understand how to use QUdpSocket - the server program continuously sends the system time to the client, and the client receives and displays the data:
Server
client
The following is the server code:
import sys
from PyQt5.QtCore import Qt, QTimer, QDateTime
from PyQt5.QtNetwork import QUdpSocket, QHostAddress
from PyQt5.QtWidgets import QApplication, QWidget, QPushButton, QLabel, QVBoxLayout


class Server(QWidget):

    def __init__(self):
        super(Server, self).__init__()

        # 1
        self.sock = QUdpSocket(self)

        # 2
        self.label = QLabel('0', self)
        self.label.setAlignment(Qt.AlignCenter)
        self.btn = QPushButton('Start Server', self)
        self.btn.clicked.connect(self.start_stop_slot)

        self.v_layout = QVBoxLayout()
        self.v_layout.addWidget(self.label)
        self.v_layout.addWidget(self.btn)
        self.setLayout(self.v_layout)

        # 3
        self.timer = QTimer(self)
        self.timer.timeout.connect(self.send_data_slot)

    def start_stop_slot(self):
        if not self.timer.isActive():
            self.btn.setText('Stop Server')
            self.timer.start(1000)
        else:
            self.btn.setText('Start Server')
            self.timer.stop()

    def send_data_slot(self):
        message = QDateTime.currentDateTime().toString()
        self.label.setText(message)

        datagram = message.encode()
        self.sock.writeDatagram(datagram, QHostAddress.LocalHost, 6666)


if __name__ == '__main__':
    app = QApplication(sys.argv)
    demo = Server()
    demo.show()
    sys.exit(app.exec_())
-
Instantiate a QUdpSocket object;
-
Instantiate QLabel and QPushButton controls and layout them. The slot function connected to the button is used to control the start and stop of timer QTimer. When the timer starts, the server will send data to the client every second;
-
Instantiate a QTimer object and connect the timeout signal with the slot function. In the slot function, the author first obtains the current system time and stores it in the message variable, and then sets the value of the QLabel control to message and displays it in the window. The encode() method is then called to encode the message for transmission. Finally, the writedatagram() method of the QUdpSocket object is invoked to send the encoding byte data to the local host address, with a target port of 6666.
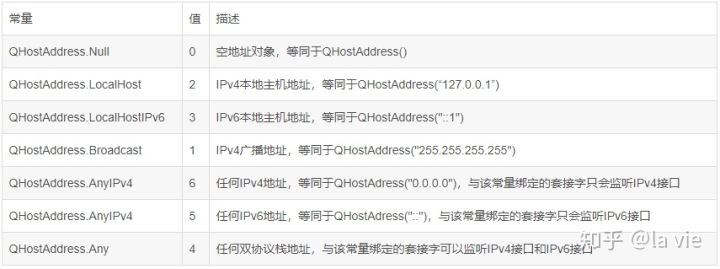
The QHostAddress class used in the above program is usually used together with QTcpSocket, QTcpServer and QUdpSocket to connect the host or build the server. Here are some addresses we may use in the program:
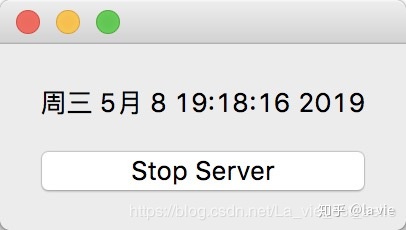
The operation screenshot is as follows:
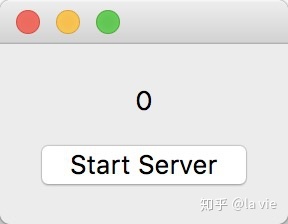
After clicking the button, QLabel displays the system time, and the time data is continuously sent to the client:

If you press the button again, the time will stop updating and the data will stop sending.
The following is the client code:
import sys
from PyQt5.QtNetwork import QUdpSocket, QHostAddress
from PyQt5.QtWidgets import QApplication, QWidget, QTextBrowser, QVBoxLayout


class Client(QWidget):

    def __init__(self):
        super(Client, self).__init__()

        # 1
        self.sock = QUdpSocket(self)
        self.sock.bind(QHostAddress.LocalHost, 6666)
        self.sock.readyRead.connect(self.read_data_slot)

        # 2
        self.browser = QTextBrowser(self)

        self.layout = QVBoxLayout()
        self.layout.addWidget(self.browser)
        self.setLayout(self.layout)

    def read_data_slot(self):
        while self.sock.hasPendingDatagrams():
            datagram, host, port = self.sock.readDatagram(
                self.sock.pendingDatagramSize()
            )

            messgae = 'Date time: {}\nHost: {}\nPort: {}\n\n'.format(datagram.decode(), host.toString(), port)
            self.browser.append(messgae)


if __name__ == '__main__':
    app = QApplication(sys.argv)
    demo = Client()
    demo.show()
    sys.exit(app.exec_())
- Instantiate the QUdpSocket object and call the bind() method to bind the address and port. Every time we are ready to read new data, the readyRead signal will be transmitted, and we will read in the slot function to which the signal is connected. First, call hasPendingDatagrams() to determine whether there is still data to read. If so, call readDatagram() to read the data. The parameter passed into this method is the size of the data to be read. We can use pendingDatagramSize() method to get it.
readDatagram() returns three values: data (bytes), host address (QHostAddress object), and port number (integer value). After that, we decode the data with decode() and get the address string with the toString() method of the QHostAddress object. Finally, the append() method is invoked to display the message value on the QTextBrowser control.
- Instantiate a QTextBrowser text browsing box object and layout it.
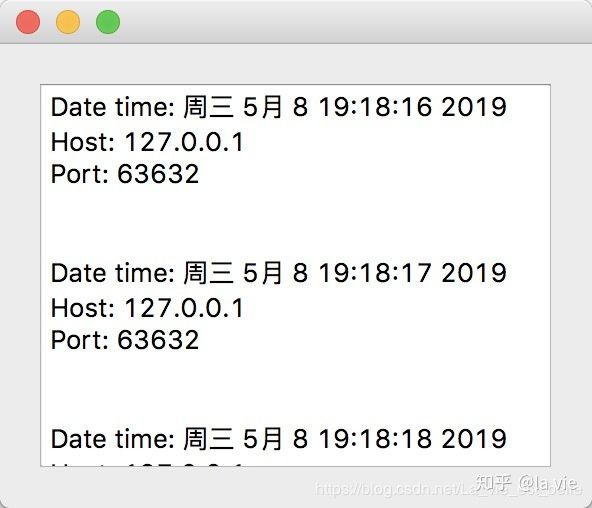
The operation screenshot is as follows:
[the external link image transfer fails. The source station may have an anti-theft chain mechanism. It is recommended to save the image and upload it directly (img-Dms1c6Tb-1641379059140)(data:image/svg+xml;utf8, )]
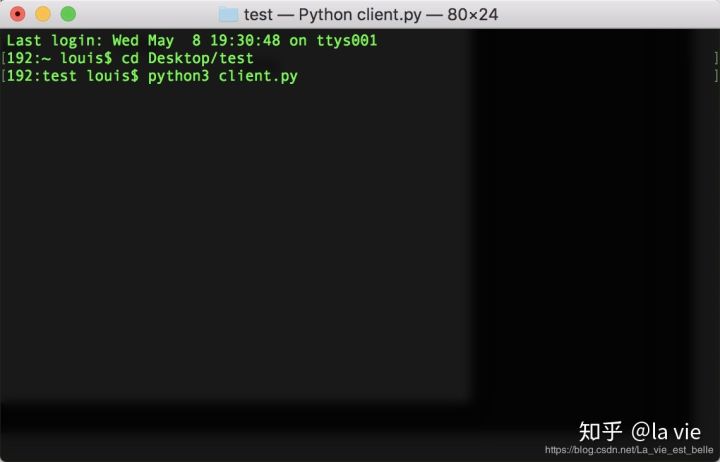
OK, let's run the server code in the command line window and click the button to develop and send data:
[the external link image transfer fails. The source station may have an anti-theft chain mechanism. It is recommended to save the image and upload it directly (img-YT0C9ukH-1641379059141)(data:image/svg+xml;utf8, )]
[the external link image transfer fails. The source station may have an anti-theft chain mechanism. It is recommended to save the image and upload it directly (img-eSIRO6JU-1641379059142)(data:image/svg+xml;utf8, )]
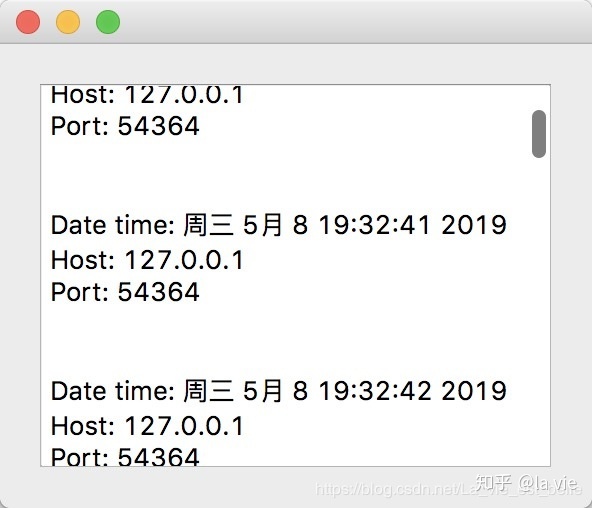
Then open a command line window and run the client code. You can find that the client displays the data, address and port used from the server program (the port is randomly assigned by the system):
If both server and client programs run on the same host for communication, we can also regard it as interprocess communication. If we want to realize LAN communication (connect to two hosts under the same network), we can slightly modify the code in the server and client programs.
The author is now ready to run the server code on another computer with Windows system, and let the client code continue to run on the Mac.
First, you need to obtain the internal IP address of the Mac, open the command line window and enter ifconfig command to view it (ifconfig on Linux and ipconfig on Windows). You can see that the address is "192.168.1.102":
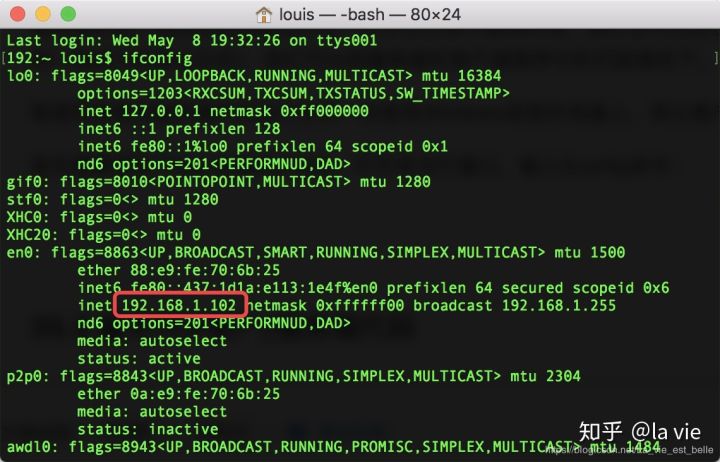
Next, we need to modify the target address of data transmission in the server code to the above address:
self.sock.writeDatagram(datagram, QHostAddress("192.168.1.102"), 6666)
Then modify the address bound in the client code:
self.sock.bind(QHostAddress.Any, 6666)
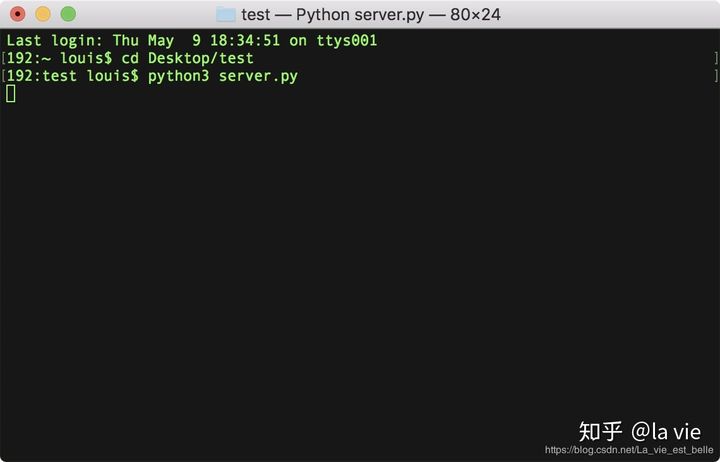
The rest of the code remains unchanged. Now run the server code in the command line window:
[the external link image transfer fails. The source station may have an anti-theft chain mechanism. It is recommended to save the image and upload it directly (img-zNENIwpF-1641379059144)(data:image/svg+xml;utf8, )]
[the external link image transfer fails. The source station may have an anti-theft chain mechanism. It is recommended to save the image and upload it directly (img-MJnzPZEd-1641379059150)(data:image/svg+xml;utf8, )]
Run the client code again and find that the communication is successful:
[the external link image transfer fails. The source station may have an anti-theft chain mechanism. It is recommended to save the image and upload it directly (IMG pmspvtcm-1641379059151) (data: image / SVG + XML; utf8, )]
[the external chain image transfer fails. The source station may have an anti-theft chain mechanism. It is recommended to save the image and upload it directly (img-0SwQXG0N-1641379059151)(data:image/svg+xml;utf8, )]
35.2 writing TCP client / server code
In this section, we will write a chat program - the client sends chat content to the server, and the server transmits the received data to the server through the api Qingyun intelligent robot Processing (of course, you can also choose to use Little yellow chicken simi perhaps Turing robot ), get the returned data and send it to the client:
Server
[the external link image transfer fails. The source station may have an anti-theft chain mechanism. It is recommended to save the image and upload it directly (img-aG3lp6iL-1641379059152)(data:image/svg+xml;utf8, )]
client
[the external link image transfer fails. The source station may have an anti-theft chain mechanism. It is recommended to save the image and upload it directly (IMG eetsntrk-1641379059152) (data: image / SVG + XML; utf8, )]
Let's write the client code first:
import sys
from PyQt5.QtCore import Qt
from PyQt5.QtNetwork import QTcpSocket, QHostAddress
from PyQt5.QtWidgets import QApplication, QWidget, QTextBrowser, QTextEdit, QSplitter, QPushButton, \
                            QHBoxLayout, QVBoxLayout


class Client(QWidget):
    def __init__(self):
        super(Client, self).__init__()
        self.resize(500, 450)
        # 1
        self.browser = QTextBrowser(self)
        self.edit = QTextEdit(self)

        self.splitter = QSplitter(self)
        self.splitter.setOrientation(Qt.Vertical)
        self.splitter.addWidget(self.browser)
        self.splitter.addWidget(self.edit)
        self.splitter.setSizes([350, 100])

        self.send_btn = QPushButton('Send', self)
        self.close_btn = QPushButton('Close', self)

        self.h_layout = QHBoxLayout()
        self.v_layout = QVBoxLayout()

        # 2
        self.sock = QTcpSocket(self)
        self.sock.connectToHost(QHostAddress.LocalHost, 6666)

        self.layout_init()
        self.signal_init()

    def layout_init(self):
        self.h_layout.addStretch(1)
        self.h_layout.addWidget(self.close_btn)
        self.h_layout.addWidget(self.send_btn)
        self.v_layout.addWidget(self.splitter)
        self.v_layout.addLayout(self.h_layout)
        self.setLayout(self.v_layout)

    def signal_init(self):
        self.send_btn.clicked.connect(self.write_data_slot)    # 3
        self.close_btn.clicked.connect(self.close_slot)        # 4
        self.sock.connected.connect(self.connected_slot)       # 5
        self.sock.readyRead.connect(self.read_data_slot)       # 6

    def write_data_slot(self):
        message = self.edit.toPlainText()
        self.browser.append('Client: {}'.format(message))
        datagram = message.encode()
        self.sock.write(datagram)
        self.edit.clear()

    def connected_slot(self):
        message = 'Connected! Ready to chat! :)'
        self.browser.append(message)

    def read_data_slot(self):
        while self.sock.bytesAvailable():
            datagram = self.sock.read(self.sock.bytesAvailable())
            message = datagram.decode()
            self.browser.append('Server: {}'.format(message))

    def close_slot(self):
        self.sock.close()
        self.close()

    def closeEvent(self, event):
        self.sock.close()
        event.accept()


if __name__ == '__main__':
    app = QApplication(sys.argv)
    demo = Client()
    demo.show()
    sys.exit(app.exec_())
-
Instantiate the control and complete the interface layout. The layout code is placed in layout_init() function. If you forget the usage of QSplitter control, you can have a look Chapter 24;
-
Instantiate a QTcpSockset object and call the connectToHost() method to connect to the target host on the specified port (this will happen) Three handshakes Operation), if the connection between the client and the server is successful, the connected() signal will be transmitted;
-
In signal_ The init() function performs the operation of signal and slot connection. After typing in the text edit box QTextEdit, click the send button to send the text to the server. In write_ data_ In the slot () function, we first get the text in the text edit box, then encode it and send it with the write() method (there is no need to write the target address and port, because it has been specified with the connectToHost() method before). Of course, we also clear the text edit box after sending.
-
When the user clicks the close button, the close() method is called to close the QTcpSocket socket, and of course the window has to be turned off.
-
As mentioned earlier, when the client and server are successfully connected, a connected signal will be sent. We connect the signal to connected_slot() slot function, in which we simply add a line "Connected! Ready to chat" to the screen! 😃” Text to prompt users to chat.
-
Like QUdpSocket, readyRead signal will be transmitted when new data is ready to be read. We use the bytesAvailable() method to determine whether there is data. If so, we call the read() method to obtain the data of the size of bytesAvailable(). The data is then decoded and displayed on the screen.
The operation screenshot is as follows:
[the external link image transfer fails. The source station may have an anti-theft chain mechanism. It is recommended to save the image and upload it directly (img-Vz4II7Hp-1641379059153)(data:image/svg+xml;utf8, )]
The following is the server code:
import sys
import json
import requests
from PyQt5.QtNetwork import QTcpServer, QHostAddress
from PyQt5.QtWidgets import QApplication, QWidget, QTextBrowser, QVBoxLayout
class Server(QWidget):
def __init__(self):
super(Server, self).__init__()
self.resize(500, 450)
# 1
self.browser = QTextBrowser(self)
self.v_layout = QVBoxLayout()
self.v_layout.addWidget(self.browser)
self.setLayout(self.v_layout)
# 2
self.server = QTcpServer(self)
if not self.server.listen(QHostAddress.LocalHost, 6666):
self.browser.append(self.server.errorString())
self.server.newConnection.connect(self.new_socket_slot)
def new_socket_slot(self):
sock = self.server.nextPendingConnection()
peer_address = sock.peerAddress().toString()
peer_port = sock.peerPort()
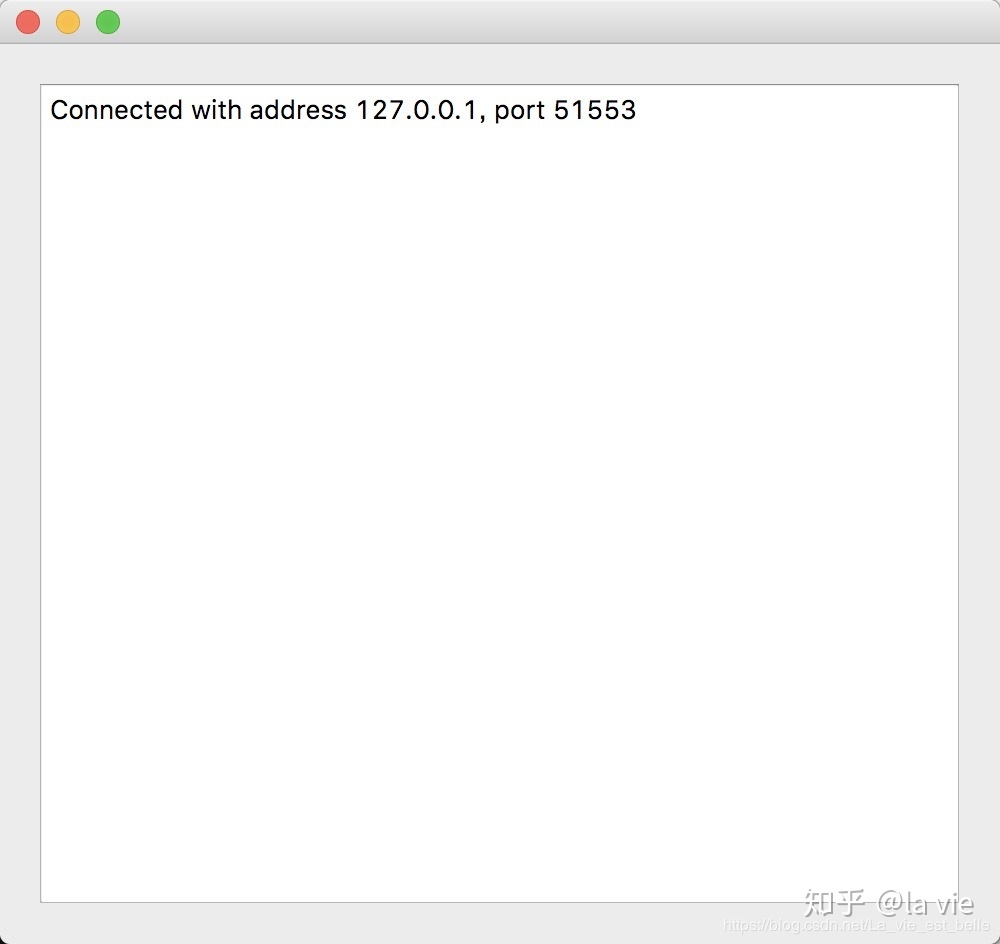
news = 'Connected with address {}, port {}'.format(peer_address, str(peer_port))
self.browser.append(news)
sock.readyRead.connect(lambda: self.read_data_slot(sock))
sock.disconnected.connect(lambda: self.disconnected_slot(sock))
# 3
def read_data_slot(self, sock):
while sock.bytesAvailable():
datagram = sock.read(sock.bytesAvailable())
message = datagram.decode()
answer = self.get_answer(message).replace('{br}', '\n')
new_datagram = answer.encode()
sock.write(new_datagram)
def get_answer(self, message):
payload = {'key': 'free', 'appid': '0', 'msg': message}
r = requests.get("http://api.qingyunke.com/api.php?", params=payload)
answer = json.loads(r.text)['content']
return answer
# 4
def disconnected_slot(self, sock):
peer_address = sock.peerAddress().toString()
peer_port = sock.peerPort()
news = 'Disconnected with address {}, port {}'.format(peer_address, str(peer_port))
self.browser.append(news)
sock.close()
if __name__ == '__main__':
app = QApplication(sys.argv)
demo = Server()
demo.show()
sys.exit(app.exec_())
-
Instantiate a QTextBrowser control and layout it;
-
Instantiate a QTcpServer object and call the listen() method to listen to the specified address and port. If it can listen, it returns True; otherwise, it returns False. You can call the errorString() method to get the reason for listening failure;
Whenever there is a new connection request from the client, QTcpServer sends a newConnection signal. In new connected to the signal_ slot_ In the socket () slot function, we call the nextPendingConnection() method to get a QTcpSocket object connected with the client, and obtain the host address and port of the client through the peerAddress() method and peerPort() method;
-
In read connected to readyRead signal_ data_ In the slot () slot function, we decode the data from the client and pass it to get as a parameter_ Answer() function to get Qingyun intelligent robot About the use of the requests library, you can take a look at its file , very simple). Then, after encoding the answer, call the write() method to send data to the client;
-
When the connection is closed, a disconnected signal is transmitted. When the client window is closed, the connection with the server will be closed, and the disconnected signal will be transmitted. In disconnected_ In the slot function, we display the host address and port of the lost client on the screen. Then call the close() method to close the socket.
OK, let's run the server code first:
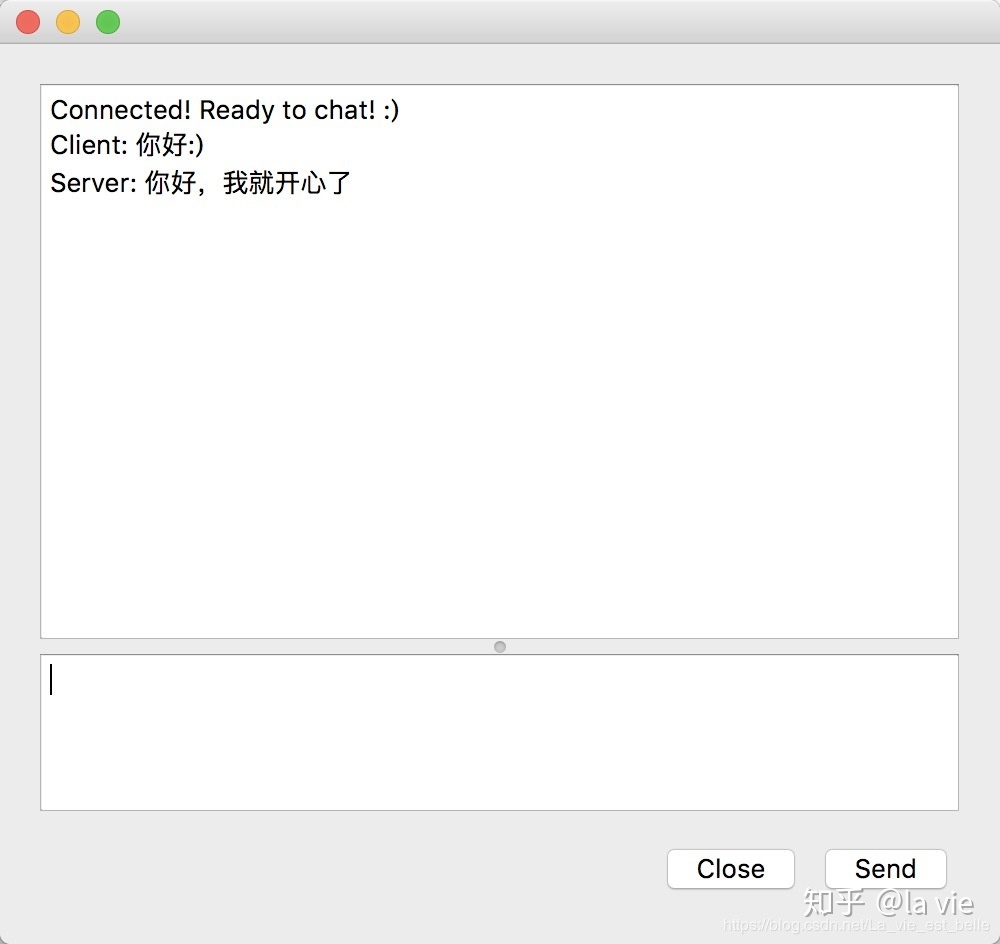
Then open a command line window to run the client code, and the client interface displays "Connected! Ready to chat!"! 😃” Text:

The server interface displays the address and port of the host where the client is located:
Send text through the client and receive the answer from the server
We can also open another command-line window to run the client code (you can open more, which will not be demonstrated here).
Close the client window, and the server interface displays the address and port of the host where the lost client is located:

35.3 summary
-
To write the client and server code based on UDP protocol, we only need to use QUdpSocket. However, if it is based on TCP protocol, we need QTcpSocket and QTcpServer to write it;
-
If you want to establish a secure SSL/TLS connection, you can use QSslSocket instead of QTcpSocket;
-
In this chapter, the author only makes a simple introduction to the relevant network modules of PyQt5, and does not explain too much theoretical content. If you want to know more about network programming in Python, you can take a look at the Python Network Programming jointly written by Brandon Rhodes and John Goerzen