catalogue
(1) Basic measures for account security
(2) User switching and right raising
II. System boot and login control
(2) Terminal login security control
III. weak password detection and port scanning
(1) Weak password detection - John the Ripper
Detailed explanation of Nmap parameters
1, Account security control
(1) Basic measures for account security
1. System account cleaning
1. Set the Shell of the non login user to / sbin/nologin
/sbin/nologin ---- prohibit terminal login to ensure that it is not changed manually (check frequently to prevent malicious tampering)
2. Lock accounts that have not been used for a long time (for example, some users do not use them for a long time, but do not confirm whether to delete them)
3. Delete useless accounts (for example, after uninstalling the mysql program, delete the program user mysql)
4. Lock the account files passwd and shadow (for example, the server account has been fixed and will not be changed. It can be locked)
[root@C7--02 ~]# grep "/sbin/nologin$" /etc/passwd | wc -l      #Query the / etc/passwd file with / sbin/nologin at the end, and count the number
17

[root@C7--02 ~]# grep "/sbin/nologin$" /etc/passwd | awk -F: '{print $1}' > nologin.txt    #The end of the / etc/passwd file is / sbin/nologin $/ to specify that the first field queried is appended to nologin Txt file
[root@C7--02 ~]# cat nologin.txt
bin
daemon
adm
lp
mail
operator
games
ftp
nobody
systemd-network
dbus
polkitd
tss
postfix
chrony
sshd
mysql
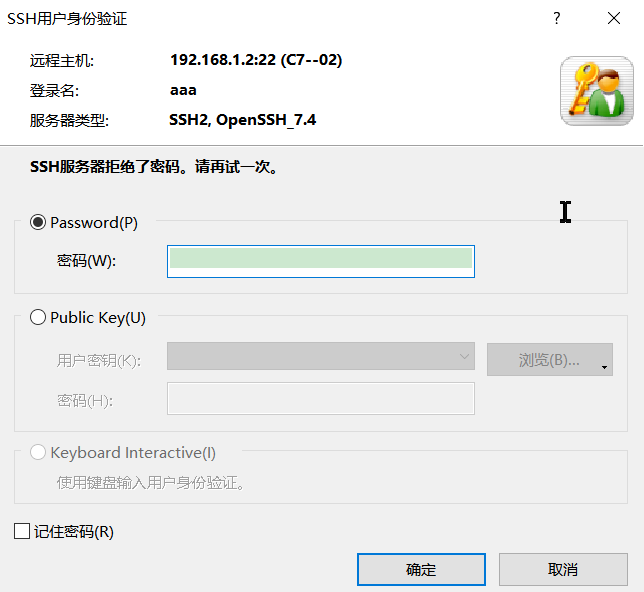
[root@C7--02 ~]# useradd aaa                          #Create user
[root@C7--02 ~]# echo "123" | passwd --stdin aaa      #Set user password
 Change user aaa Your password.
passwd: All authentication tokens have been successfully updated.

[root@C7--02 ~]# usermod -L aaa                       #Lock user aaa
[root@C7--02 ~]# passwd -S aaa                        #query
aaa LK 2021-08-17 0 99999 7 -1 (The password is locked.)
After locking, use other terminal tom login authentication
[root@C7--02 ~]# usermod -U aaa                                #Unlock user
[root@C7--02 ~]# passwd -S aaa                                 #query
aaa PS 2021-08-17 0 99999 7 -1 (Password set, use SHA512 Algorithm.)
onnecting to 192.168.1.2:22...
Connection established.
To escape to local shell, press Ctrl+Alt+].

WARNING! The remote SSH server rejected X11 forwarding request.
Last failed login: Tue Aug 17 16:12:56 CST 2021 from 192.168.1.254 on ssh:notty
There were 2 failed login attempts since the last successful login.
[aaa@C7--02 ~]$
[root@C7--02 ~]# chattr +i /etc/passwd /etc/shadow        #Lock file passwd, shadow

[root@C7--02 ~]# lsattr /etc/passwd /etc/shadow           #Lock files and view status
----i----------- /etc/passwd
----i----------- /etc/shadow

[root@C7--02 ~]# useradd ccc                              #Unable to create user
useradd: Cannot open /etc/passwd

[root@C7--02 ~]# chattr -i /etc/passwd /etc/shadow        #Unlock file
[root@C7--02 ~]# lsattr /etc/passwd /etc/shadow           #Unlock files and view status
---------------- /etc/passwd
---------------- /etc/shadow

[root@C7--02 ~]# useradd ccc                             #Can create
| Chatr command | |
| Attribute options | function |
| i | If i attribute is set for a file, it is not allowed to delete or rename the file, or add or modify data; If i attribute is set for the directory, you can only modify the data in the files under the directory, but you are not allowed to create or delete files; |
| a | If a attribute is set for a file, data can only be added to the file, but cannot be deleted or modified; If the a attribute is set for the directory, only files can be created and modified in the directory, but files cannot be deleted; |
| u | When a file or directory with this attribute is deleted, its contents will be saved to ensure that it can be recovered later. It is often used to prevent accidental deletion of files or directories. |
| s | On the contrary, when deleting a file or directory, it will be completely deleted (directly from the hard disk, and then fill the occ u pied area with 0) and cannot be recovered. |
2. Password security control
Set password validity
| The chat command is used to change the validity period of the account and password | |
| Syntax} chage [options] user name | |
| -m | The minimum number of days a password can be changed. Zero means that the password can be changed at any time |
| -M | Maximum number of days a password remains valid |
| -w | The number of days to receive warning messages before the user password expires |
| -E | Date the account expires. After this day, this account will not be available |
| -d | Date of last change |
| -i | A period of stagnation. If a password has expired for these days, this account will not be available |
| -l | Example the current settings. It is up to non privileged users to determine when their password or account expires |
For new users
[root@C7--02 ~]# vim /etc/login.defs
........
....
#       PASS_MIN_DAYS   Minimum number of days allowed between password changes.
#       PASS_MIN_LEN    Minimum acceptable password length.
#       PASS_WARN_AGE   Number of days warning given before a password expires.
#
PASS_MAX_DAYS   30                            #The password is valid for 30 days
PASS_MIN_DAYS   0
PASS_MIN_LEN    5


Save exit


[root@C7--02 ~]# tail -1 /etc/shadow
ccc:!!:18856:0:99999:7:::                    #Never expire 99999
[root@C7--02 ~]# useradd bbb
[root@C7--02 ~]# tail -1 /etc/shadow
bbb:!!:18856:0:30:7:::                       #Expires in 30 days
Applicable to existing users
[root@C7--02 ~]# chage -M 30 ccc
[root@C7--02 ~]# tail -2 /etc/shadow
ccc:!!:18856:0:30:7:::
bbb:!!:18856:0:30:7:::
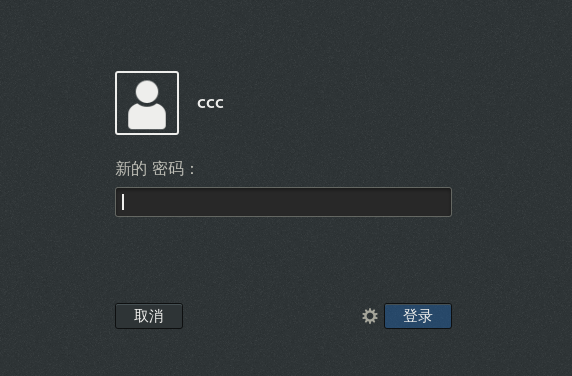
Force password change at next logon
[root@C7--02 ~]# chage -d 0 ccc
Graphical operation on linux
3. Command history limit
It is applicable to new user login and reduce the number of recorded commands
[root@C7--01 ~]# vim /etc/profile
.........
....
fi

HOSTNAME=`/usr/bin/hostname 2>/dev/null`
HISTSIZE=10                                         #Set to 20
if [ "$HISTCONTROL" = "ignorespace" ] ; then
    export HISTCONTROL=ignoreboth
else
    export HISTCONTROL=igno


Save exit


[root@C7--01 ~]# source /etc/profile               #Run script
[root@C7--01 ~]# history                           #View shows only 10 lines
   37  yum -y install vim
   38  init 0
   39  useradd ccc
   40  passwd ccc
   41  chage -d 0 ccc
   42  vim /etc/profile
   43  history
   44  env
   45  source /etc/profile
   46  history
Automatically clear command history on logout
[root@C7--01 ~]# vi ~/.bash_logout

# ~/.bash_logout
history -c              #Clear history
clear                   #Refresh screen

~
Save exit

[root@C7--01 ~]# history             #View after logout
    1  vim centos7.repo
    2  yum -y install vsftpd
    3  vim centos7.repo
    4  yum -y install vsftpd
    5  lsblk -f
    6  yum -y install vsftpd
    7  vim centos7.repo
    8  yum -y install vim
    9  init 0
   10  history
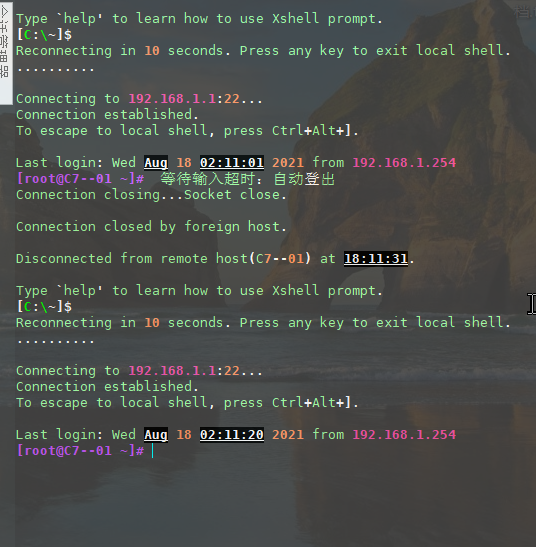
3. Automatic logoff of terminal - Automatic logoff after 5 seconds of inactivity
Applicable to current user
[root@C7--01 ~]# vi ~/.bash_profile
........
...
PATH=$PATH:$HOME/bin

export PATH
export TMOUT=5     #After 5s is set, you can't log out automatically. Screenshot (only terminal logout, not computer logout)
~

Save exit
For new login users
[root@C7--01 ~]# vi  /etc/profile
.......
....
export TMOUT=10                      #Automatically log off after 5s

if [ -x /usr/bin/id ]; then
    if [ -z "$EUID" ]; then
        # ksh workaround
        EUID=`/usr/bin/id -u`
        UID=`/usr/bin/id -ru`
If successful, the xshell will be disconnected after 5 seconds
(2) User switching and right raising
1. Use the su command to switch users
Purpose: Substitute User to switch users
Format: su - target user "-" is equivalent to "-" login "or" - l "
2. Password verification
[root@C7--01 ~]# su boss       #  root switches to any user without verifying the password
[boss@C7--01 root]$
[boss@C7--01 root]$ su root    #Ordinary users switch to other users to verify the password of the target user
 password:
[root@C7--01 ~]#
[boss@C7--01 root]$ su - root    #The - option indicates that the target user's login Shell environment will be used
 password:
Last login: August 18, 2002:16:36 CST 2021pts/0 upper
[root@C7--01 ~]# whoami          #View current user
root
3. Restrict users who use the su command (su command can be used by default to prevent the danger of password exhaustion, and only a small number of users are allowed to use it)
Enable pam_wheel authentication module
Add users who are allowed to use the su command to the wheel group
[root@C7--01 ~]# vim /etc/pam.d/su

#%PAM-1.0
auth            sufficient      pam_rootok.so
auth            required        pam_wheel.so use_uid
......
...

Save exit

[root@C7--01 ~]# grep wheel /etc/group     #View wheel group members
wheel:x:10:boss
verification
[ccc@C7--01 root]$ su - root
 password:
su: Deny permission
You cannot switch to the root user. You need to add the user "ccc" to the "wheel" group
[root@C7--01 ~]# gpasswd -a ccc wheel
 Transferring user“ ccc"Add to“ wheel"Group

[root@C7--01 ~]# grep wheel /etc/group        #View wheel group
wheel:x:10:boss,ccc
verification
[ccc@C7--01 root]$ su - root
 password:
Last login: August 18, 2004:29:55 CST 2021pts/2 upper
 Last failed login: August 18, 2004:30:47 CST 2021pts/1 upper
 After the last successful login, there is 1 failed login attempt.
[root@C7--01 ~]#
4. View su operation log file: / var/log/secure
[root@C7--01 ~]# tail /var/log/secure

Aug 18 04:27:10 C7--01 su: pam_unix(su:session): session opened for user ccc by root(uid=0)
Aug 18 04:27:29 C7--01 su: pam_succeed_if(su-l:auth): requirement "uid >= 1000" not met by user "root"
Aug 18 04:29:38 C7--01 sshd[1562]: Accepted password for root from 192.168.1.254 port 58924 ssh2
Aug 18 04:29:38 C7--01 sshd[1562]: pam_unix(sshd:session): session opened for user root by (uid=0)
Aug 18 04:29:46 C7--01 su: pam_unix(su:session): session opened for user boss by root(uid=0)
Aug 18 04:29:55 C7--01 su: pam_unix(su:session): session opened for user root by root(uid=1000)
Aug 18 04:30:45 C7--01 su: pam_succeed_if(su-l:auth): requirement "uid >= 1000" not met by user "root"
Aug 18 04:32:35 C7--01 gpasswd[1717]: user ccc added by root to group wheel                        #ccc join wheel group
Aug 18 04:44:24 C7--01 su: pam_unix(su:session): session opened for user ccc by root(uid=0)        #ccc user login root
Aug 18 04:44:31 C7--01 su: pam_unix(su-l:session): session opened for user root by root(uid=1001)
5. Disadvantages of Su command
The fewer users who know the root password, the more secure
sudo --- ordinary users have some administrative privileges and do not need to know the root password
Using sudo mechanism to elevate permissions
Usage: execute authorization commands as other users (such as root). Usage: sudo authorization command
Configure the sudo authorization / etc/sudoers} file with the default permission of 440, vi editing ': w! 'save
sudo elevation permission can be opened with either vi / etc/sudoers or vi / visudo
| Record basic configuration format | |
| User name = host name list = command program list = user name = commands | |
| User | Specify the user name of the authorized user, or use "% group name" (all users in the group) |
| Host name (MAHINE) | Host name using this profile. It is mainly convenient to share a sudoers file between multiple hosts, generally localhost or actual host name |
| Commands | It allows authorized users to execute privileged commands through sudo. You need to enter the absolute path of the command. Multiple commands are divided by ',' |
Authorize bbb users to configure ifconfig command
[root@C7--01 ~]# visudo
........
....

root    ALL=(ALL)       ALL
bbb     localhost=/sbin/ifconfig                   #To authorize bbb locally, you can use the ifconfig command

## Allows members of the 'sys' group to run networking, software,
## service management apps and more.
# %sys ALL = NETWORKING, SOFTWARE, SERVICES, STORAGE, DELEGATING, PROCESSES, LOCATE, DRIVERS

## Allows people in group wheel to run all commands
%wheel  ALL=(ALL)       ALL

## Same thing without a password
# %wheel        ALL=(ALL)       NOPASSWD: ALL      #Members of the wheel group can execute any command without verifying the password
Use aliases defined in the set (must be capitalized)
By keyword: User_Alias Host_Alias Cmnd_Alias
For example, the following user aaa executes rpm and yum commands on the local machine
[root@C7--01 ~]# visudo
.......
....
User_Alias OPERATORS = aaa                  #Add to the last. If you want to log in on all machines, you need to modify the hostname to all (it must be capitalized); For multiple users, the number is cut
Host_Alias MAILSVRS = C7--01.1
Cmnd_Alias PKGTOOLS = /bin/rpm,/usr/bin/yum
OPERATORS  MAILSVRS = PKGTOOLS
The default sudo operation is not recorded. Set the sudo operation record file as default: / var/log/sudo
Defaults logfile = "/var/log/sudo"                   #After the log configuration is enabled, the sudo operation process will be recorded and added before the Defaults column
# Defaults specification

#
# Refuse to run if unable to disable echo on the tty.
You did not give ifconfig permission to test aaa user} test yum installation
[aaa@C7--01 root]$ ifconfig ens33:1 11.1.1.1
SIOCSIFADDR: Operation not allowed
SIOCSIFFLAGS: Operation not allowed
[aaa@C7--01 root]$ sudo ifconfig ens33:1 1.1.1.1
 Sorry, user aaa No right to root Where is your identity C7--01.1 Upper execution /sbin/ifconfig ens33:1 1.1.1.1.

[aaa@C7--01 root]$ sudo yum -y install vim             #When using sudo for the first time, you need to verify the password of the current user
[sudo] aaa Password for:
Plug in loaded: fastestmirror, langpacks
Loading mirror speeds from cached hostfile
 Package 2:vim-enhanced-7.4.160-2.el7.x86_64 Installed and the latest version
 No treatment is required
The ip address could not be modified. Instead, it was reported that yum was successfully installed
You can use the ifconfig command on bbb users, but you cannot install using yum
[bbb@C7--01 root]$ sudo ifconfig ens33:1 1.1.1.1
[sudo] bbb Password for:
[bbb@C7--01 root]$ sudo ifconfig
ens33: flags=4163<UP,BROADCAST,RUNNING,MULTICAST>  mtu 1500
        inet 192.168.1.1  netmask 255.255.255.0  broadcast 192.168.1.255
        inet6 fe80::b0bb:e9c5:dd17:b85d  prefixlen 64  scopeid 0x20<link>
        ether 00:0c:29:6d:c2:f2  txqueuelen 1000  (Ethernet)
        RX packets 11698  bytes 960165 (937.6 KiB)
        RX errors 0  dropped 0  overruns 0  frame 0
        TX packets 7076  bytes 899419 (878.3 KiB)
        TX errors 0  dropped 0 overruns 0  carrier 0  collisions 0

ens33:1: flags=4163<UP,BROADCAST,RUNNING,MULTICAST>  mtu 1500
        inet 1.1.1.1  netmask 255.0.0.0  broadcast 1.255.255.255

[bbb@C7--01 root]$ sudo yum -y install vim
[sudo] bbb Password for:
Sorry, user bbb No right to root Where is your identity C7--01.1 Upper execution /bin/yum -y install vim.
View sudo operation records
[root@C7--01 ~]# tail /var/log/sudo
Aug 18 08:35:12 : root : TTY=pts/3 ; PWD=/root ; USER=root ; COMMAND=list
Aug 18 08:35:36 : aaa : TTY=pts/5 ; PWD=/root ; USER=root ; COMMAND=list
Aug 18 08:37:52 : aaa : command not allowed ; TTY=pts/5 ; PWD=/root ; USER=root
    ; COMMAND=/sbin/ifconfig ens33:1 11.1.1.1       #aaa failed to use the command ifconfig
Aug 18 08:37:55 : aaa : TTY=pts/5 ; PWD=/root ; USER=root ; COMMAND=/bin/yum -y
    install vim                                     #aaa has no error using the yum command
Aug 18 08:38:04 : bbb : TTY=pts/6 ; PWD=/root ; USER=root ;
    COMMAND=/sbin/ifconfig ens33:1 11.11.111.11     #The bbb command ifconfig does not report an error
Aug 18 08:38:06 : bbb : command not allowed ; TTY=pts/6 ; PWD=/root ; USER=root
    ; COMMAND=/bin/yum -y install vim               #You can see that the bbb operation yum installation failed
View current user authorization: sudo -l
If not run sudo is displayed, it indicates that the user is not authorized (the default timeout is 5 minutes, and the authentication will not be repeated during this period)
[aaa@C7--01 root]$ sudo -l      #Users can use the sudo command to see which commands are available
[sudo] aaa Password for:
.........
....

user aaa Can be in C7--01 Run the following command on:
    (root) /bin/rpm, /usr/bin/yum
You can also use the "*" wildcard and "*" negate symbols!
[root@C7--01 ~]# vi /etc/sudoers
........
....

## Allow root to run any commands anywhere
root    ALL=(ALL)       ALL
bbb ALL=/sbin/*,!/sbin/ifconfig,!/sbin/route               #First allow all commands of / sbin / to be used, and then use it! Reject / sbin/ifconfig and / sbin/route

## Allows members of the 'sys' group to run networking, software,

Save exit
[bbb@C7--01 root]$ sudo ifconfig ens33:1 11.11.111.11          #After setting, you do not have permission to use the ifconfig command, which indicates that it is successful
[sudo] bbb Password for:
Sorry, user bbb No right to root Where is your identity C7--01.1 Upper execution /sbin/ifconfig ens33:1 11.11.111.11.

[bbb@C7--01 root]$ sudo /sbin/fdisk -l                         #Other commands under / sbin / can be used except ifconfig and route commands
[sudo] bbb Password for:

disk /dev/sda: 42.9 GB, 42949672960 Bytes, 83886080 sectors
Units = a sector of 1 * 512 = 512 bytes
 Sector Size (logic/Physics): 512 byte / 512 byte
I/O size(minimum/optimum): 512 byte / 512 byte
 Disk label type: dos
 Disk identifier: 0 x000ae8bc

   equipment Boot      Start         End      Blocks   Id  System
/dev/sda1   *        2048     2099199     1048576   83  Linux
/dev/sda2         2099200    83886079    40893440   8e  Linux LVM

disk /dev/mapper/centos-root: 39.7 GB, 39720058880 Bytes, 77578240 sectors
Units = a sector of 1 * 512 = 512 bytes
 Sector Size (logic/Physics): 512 byte / 512 byte
I/O size(minimum/optimum): 512 byte / 512 byte


disk /dev/mapper/centos-swap: 2147 MB, 2147483648 Bytes, 4194304 sectors
Units = a sector of 1 * 512 = 512 bytes
 Sector Size (logic/Physics): 512 byte / 512 byte
I/O size(minimum/optimum): 512 byte / 512 byte
II. System boot and login control
The server is generally managed by remote login, while the local boot and terminal login processes are ignored, which will leave potential security risks. Therefore, it is necessary to strengthen the security management of unauthorized intervention of other users
(1) On off safety control
Adjust BIOS boot settings
1) Set the first boot device as the hard disk of the current system
2) It is forbidden to boot the system from other devices (CD, U SB flash disk, network). The corresponding item is set to "Disabled"
3) Set the security level to setup and set the administrator password
Disable the restart hotkey Ctrl+Alt+Del to avoid restarting due to user misoperation
[root@C7--01 ~]# cat /etc/inittab                 #View this file for hotkey information
....
..
# Ctrl-Alt-Delete is handled by /usr/lib/systemd/system/ctrl-alt-del.target
......
..
[root@C7--01 ~]# ll /usr/lib/systemd/system/ctrl-alt-del.target        #View this file
lrwxrwxrwx. 1 root root 13 1 June 26, 2021 /usr/lib/systemd/system/ctrl-alt-del.target -> reboot.target
Found Ctrl Alt del Target is reboot Soft link file of target file; Disable this hotkey without affecting this file (log off this service)
[root@C7--01 ~]# systemctl mask ctrl-alt-del.target                 #Unregister Ctrl Alt del service
Created symlink from /etc/systemd/system/ctrl-alt-del.target to /dev/null.
[root@C7--01 ~]# systemctl daemon-reload                            #Reload systemd configuration
The systemctl mask command is used to log off the specified service. Example: systemctl mask CPU Service - unregister CPU Service - systemctl unmask command to cancel unregistering service example: systemctl unmask CPU Service: cancels and logs off the CPU service; Then reload the systemctl configuration
GRUB restrictions
Using grub2-mkpasswd-pbkdf2 to generate the key, pbkdf2 algorithm encryption is more secure. In / etc / grub d/00_ Add the user password in the header configuration file (Note: the password generated by each person in the experiment is different)
[root@C7--01 ~]# grub2-mkpasswd-pbkdf2    #Specify the password as prompted
 Enter password:
Reenter password:
PBKDF2 hash of your password is grub.pbkdf2.sha512.10000.831ADD4F74B4B9C0AFB3176B021BFAD56199077CA668A54C57D8B432F85CC4BE22F71DBEC5ECF448EA0D7F5135209839AF820EF6F1CEB7BA80ADF9F01CF7031D.06B5B770509EEBDEF9274C076D8220D7FEC7AFB031396551385A529204934DAE9917E059F5AAE747DE92A7221AFC53BF0076150A4E8B549C1B1A1FD160ED81DA
Note: add the password string generated by yourself; Copy the string after PBKDF2 hash of your password is +
[root@C7--01 ~]# cp /boot/grub2/grub.cfg /boot/grub2/grub.cfg.bak       #Backup file
[root@C7--01 ~]# cp /etc/grub.d/00_header /etc/grub.d/00_header.bak     #Backup file
[root@C7--01 ~]# vim /etc/grub.d/00_header                               #Modify / etc / grub d/00_ Header file

......
...
# Play an initial tune
if [ "x${GRUB_INIT_TUNE}" != "x" ] ; then
  echo "play ${GRUB_INIT_TUNE}"
fi

if [ "x${GRUB_BADRAM}" != "x" ] ; then
  echo "badram ${GRUB_BADRAM}"
fi

cat << EOF
set superusers="root"
password_pbkdf2 root grub.pbkdf2.sha512.10000.00F952407F794659F572580BEBC21FEB646DD753A8D71DAFE641ADF0621DCC59E59D22AD38111943CFCD80FCEF98EF26710C43F61A51F10D41570E9E509535FA.1E1DC07F5248D9998352A143A0BE3DDD380FCF72C5E041C8EEE6D961FB374F8FD6BC9C9318ED6067B3F9C6C3DBE4756339918CE3EF77541F6D325EF49442FDE5
EOF

Save exit
[root@C7--01 ~]# grub2-mkconfig -o /boot/grub2/grub.cfg           #Generate a new grub CFG configuration file
Generating grub configuration file ...
Found linux image: /boot/vmlinuz-3.10.0-693.el7.x86_64
Found initrd image: /boot/initramfs-3.10.0-693.el7.x86_64.img
Found linux image: /boot/vmlinuz-0-rescue-4654f44a91754d669a6f620f2497ba9d
Found initrd image: /boot/initramfs-0-rescue-4654f44a91754d669a6f620f2497ba9d.img
done
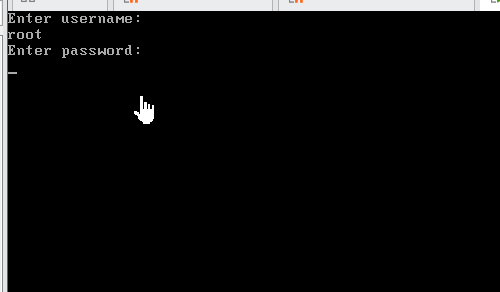
Verification: restart to enter grub menu, press E key, the boot parameters cannot be modified, and the user root and password 123 are required com
(2) Terminal login security control
Restrict root to log in to the secure terminal only. Configure the secure terminal: / etc/securetty
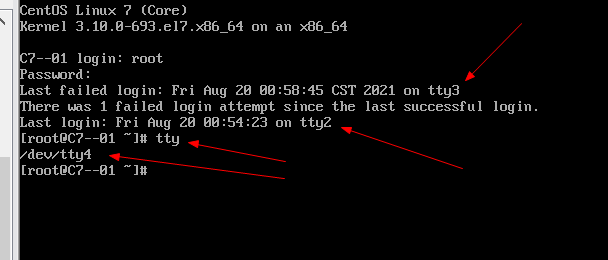
[root@C7--01 ~]# vim /etc/securetty          #root user is prohibited from logging in from terminals tty1 and tty3

........
...
#tty1
tty2
#tty3
tty4
tty5
tty6
tty7
tty8
tty9

Save exit
Enter init 3 in the linux desktop version to enter the character interface (return to the graphical interface and enter init 5)
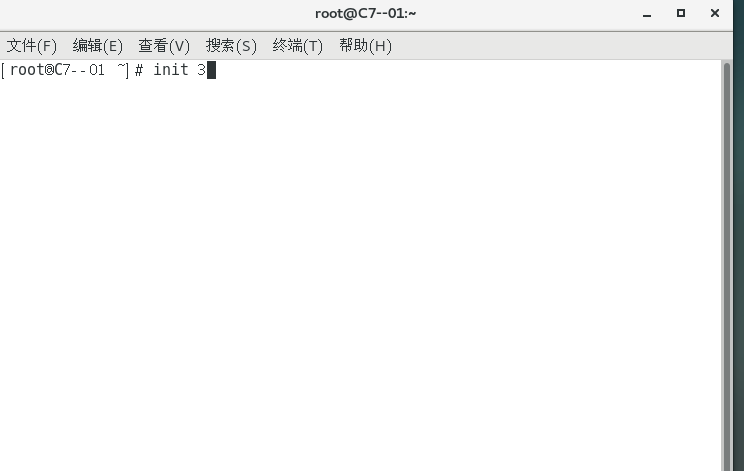
Note: use ctrl + alt + [F1~F8] to switch the operating terminal
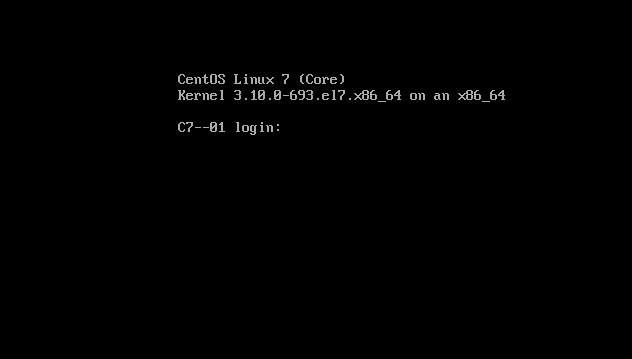
Login on tty1 (default is tty1) login failed
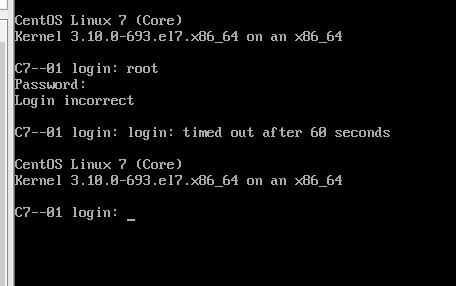
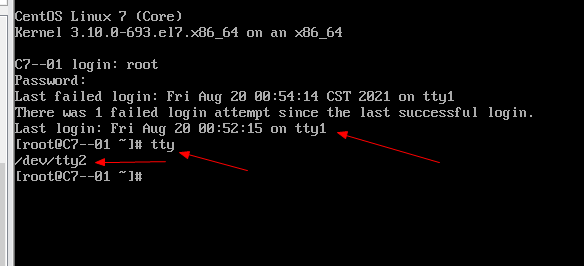
Log in successfully on tty2, which shows that we failed to log in on tty1. Enter TTY to see which terminal we logged in from
Failed to log in on tty3, successfully switched to tty4
Prohibit ordinary users from logging in
Create the / etc/nologin file, and the login program will check whether the file exists. If it exists, ordinary users are refused to log in to the system (root is not restricted)
[root@C7--01 ~]# touch /etc/nologin                #Create nologin file

[root@C7--01 ~]# passwd bbb                        #Create normal user
 Change user bbb Your password.
New password:
Invalid password: the password did not pass the dictionary check - Oversimplification/systematization
 Re enter the new password:
passwd: All authentication tokens have been successfully updated.
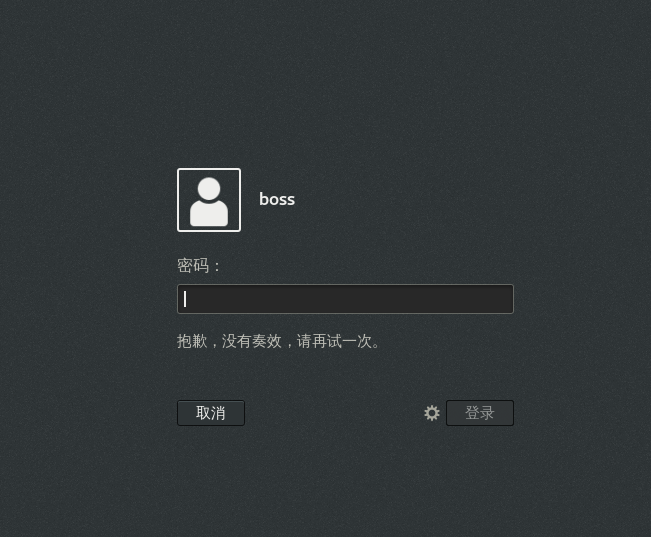
The password entered by ordinary users is rejected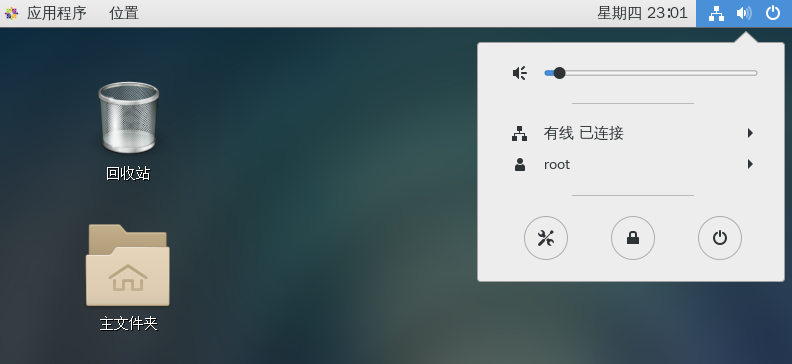
root is not restricted
After deleting the nologin file or restarting, it will return to normal
[root@C7--01 ~]# rm -rf /etc/nologin
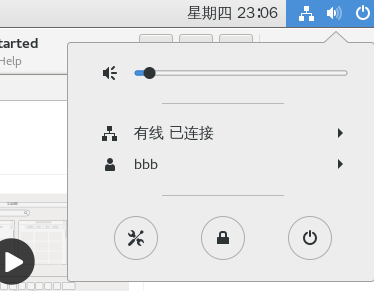
It is recommended to use it temporarily during server maintenance
III. weak password detection and port scanning
(1) Weak password detection - John the Ripper
Introduction: Joseph the Ripper, referred to as JR for short, is a password analysis tool that supports dictionary type brute force cracking. The password strength can be detected through the password analysis of shadow files
[root@C7--01 ~]# tar zxf john-1.8.0.tar.tar                    #Unzip the installation package

[root@C7--01 ~]# cd john-1.8.0/                                #Enter john-1.5 0

[root@C7--01 john-1.8.0]# ls -ld *                             #see file
drwxr-xr-x 2 root root  208 8 September 19-23:11 doc                  # doc manual document
lrwxrwxrwx 1 root root   10 5 June 30, 2013 README -> doc/README  #Link description file
drwxr-xr-x 2 root root  143 8 September 19-23:11 run                  # Run run program
drwxr-xr-x 2 root root 4096 8 September 19-23:11 src                  # src source file
doc contains multiple documents to provide more comprehensive guidance
[root@C7--01 john-1.8.0]# ls doc/
CHANGES  CONTACT  CREDITS   EXTERNAL  INSTALL  MODES    README
CONFIG   COPYING  EXAMPLES  FAQ       LICENSE  OPTIONS  RULES
[root@C7--01 john-1.8.0]# cd src/               #Enter src file
[root@C7--01 src]# make clean linux-x86-64      #Compile and install
.......
...
The make command can list the supported system types and compilation operations
[root@C7--01 src]# make
To build John the Ripper, type:
	make clean SYSTEM
where SYSTEM can be one of the following:
linux-x86-64-avx         Linux, x86-64 with AVX (2011+ Intel CPUs)
linux-x86-64-xop         Linux, x86-64 with AVX and XOP (2011+ AMD CPUs)
linux-x86-64             Linux, x86-64 with SSE2 (most common)
...........
......
[root@C7--01 src]# ls ../run/john     #Confirm that the executable has been generated, john
../run/john
Add test account
[root@C7--01 src]# useradd boss
[root@C7--01 src]# echo "123.com" | passwd --stdin boss
 Change user boss Your password.
passwd: All authentication tokens have been successfully updated.
Prepare the password file to be cracked
[root@C7--01 src]# cp /etc/shadow /root/shadow.txt

[root@C7--01 src]# cd ../run          #Enter run file
Perform brute force cracking
[root@C7--01 run]# ./john /root/shadow.txt                    #It's too long here, so it's all broken
Loaded 3 password hashes with 3 different salts (crypt, generic crypt(3) [?/64])
Press 'q' or Ctrl-C to abort, almost any other key for status
0g 0:00:05:15 20% 2/3 0g/s 133.6p/s 345.9c/s 345.9C/s radar!..whit!
0g 0:00:08:14 32% 2/3 0g/s 127.8p/s 348.1c/s 348.1C/s simone6..republic6
0g 0:00:13:05 57% 2/3 0g/s 123.7p/s 349.2c/s 349.2C/s Scout2..Alien2
0g 0:00:13:22 58% 2/3 0g/s 123.6p/s 349.2c/s 349.2C/s Lionel!..Pascal!
Session aborted
Prepare the password dictionary file, which defaults to password lst
[root@C7--01 run]# vim password.lst

........
...
password1
123456789
123.com                                               #Add a password


Save exit
Execute john program and combine -- wordlist = dictionary file
[root@C7--01 run]# ./john --wordlist=./password.lst /root/shadow.txt
Loaded 3 password hashes with 3 different salts (crypt, generic crypt(3) [?/64])
Press 'q' or Ctrl-C to abort, almost any other key for status
123.com          (boss)
123.com          (root)
2g 0:00:00:09 100% 0.2006g/s 355.7p/s 375.0c/s 375.0C/s OU812..sss
Use the "--show" option to display all of the cracked passwords reliably
Session completed
View cracked passwords
[root@C7--01 run]# ./john --show /root/shadow.txt
root:123.com::0:99999:7:::
boss:123.com:18653:0:99999:7:::

2 password hashes cracked, 1 left
1) If it has been cracked, it will immediately output: password, user name
2) . long detection time available: ctrl+c {terminate
3) . information is automatically saved to John Pot file
Clear the cracked account list
[root@C7--01 run]# :> john.pot
[root@C7--01 run]# ./john --show /root/shadow.txt
0 password hashes cracked, 3 left
(2) Network scanning - NMAP
NMAP: it is a powerful network scanning and security detection tool
Nmap contains four basic functions: Host Discovery, Port Scanning, Version Detection, and Operating System Detection
Scan syntax of nmap: nmap [scan type] [parameter] target IP
Example
[root@C7--01 ~]# yum -y install nmap

.........
...
already installed:
  nmap.x86_64 2:6.40-7.el7

complete!
[root@C7--01 ~]# nmap 127.0.0.1       #View tcp ports

Starting Nmap 6.40 ( http://nmap.org ) at 2021-08-20 01:57 CST
mass_dns: warning: Unable to determine any DNS servers. Reverse DNS is disabled. Try using --system-dns or specify valid servers with --dns-servers
Nmap scan report for localhost (127.0.0.1)
Host is up (0.0000030s latency).
Not shown: 997 closed ports
PORT    STATE SERVICE
22/tcp  open  ssh
111/tcp open  rpcbind
631/tcp open  ipp

Nmap done: 1 IP address (1 host up) scanned in 0.05 seconds


[root@C7--01 ~]# nmap -sU 127.0.0.1  #Viewing udp ports

Starting Nmap 6.40 ( http://nmap.org ) at 2021-08-20 01:58 CST
mass_dns: warning: Unable to determine any DNS servers. Reverse DNS is disabled. Try using --system-dns or specify valid servers with --dns-servers
Nmap scan report for localhost (127.0.0.1)
Host is up (0.000036s latency).
Not shown: 999 closed ports
PORT     STATE         SERVICE
5353/udp open|filtered zeroconf

Nmap done: 1 IP address (1 host up) scanned in 47.75 seconds
Test 192.168 Which hosts in the 1.0/24 network segment provide ssh services
[root@C7--01 ~]# nmap -p 22 192.168.1.0/24

Starting Nmap 6.40 ( http://nmap.org ) at 2021-08-20 02:02 CST
mass_dns: warning: Unable to determine any DNS servers. Reverse DNS is disabled. Try using --system-dns or specify valid servers with --dns-servers
Nmap scan report for 192.168.1.254
Host is up (0.00011s latency).
PORT   STATE    SERVICE
22/tcp filtered ssh
MAC Address: 00:50:56:C0:00:01 (VMware)

Nmap scan report for 192.168.1.1
Host is up (38s latency).
PORT   STATE SERVICE
22/tcp open  ssh

Nmap done: 256 IP addresses (2 hosts up) scanned in 9.10 seconds
Test 192.168 Which surviving hosts are available in the 4.0/24 network segment (can ping through)
[root@C7--01 ~]# nmap -n -sP 192.168.1.0/24

Starting Nmap 6.40 ( http://nmap.org ) at 2021-08-20 02:03 CST
Nmap scan report for 192.168.1.254
Host is up (0.00010s latency).
MAC Address: 00:50:56:C0:00:01 (VMware)
Nmap scan report for 192.168.1.1
Host is up.
Nmap done: 256 IP addresses (2 hosts up) scanned in 4.67 seconds
Check whether the file sharing service is enabled for this address segment
[root@C7--01 ~]# nmap -p 139,445 192.168.1.1-200

Starting Nmap 6.40 ( http://nmap.org ) at 2021-08-20 02:04 CST
mass_dns: warning: Unable to determine any DNS servers. Reverse DNS is disabled. Try using --system-dns or specify valid servers with --dns-servers
Nmap scan report for 192.168.1.1
Host is up (0.000036s latency).
PORT    STATE  SERVICE
139/tcp closed netbios-ssn
445/tcp closed microsoft-ds

Nmap done: 200 IP addresses (1 host up) scanned in 8.08 seconds
Detect the open port tcp1688 corresponding to Starscream software
[root@C7--01 ~]# nmap -p 1688 192.168.1.0/24

Starting Nmap 6.40 ( http://nmap.org ) at 2021-08-20 02:05 CST
mass_dns: warning: Unable to determine any DNS servers. Reverse DNS is disabled. Try using --system-dns or specify valid servers with --dns-servers
Nmap scan report for 192.168.1.254
Host is up (0.00011s latency).
PORT     STATE    SERVICE
1688/tcp filtered nsjtp-data
MAC Address: 00:50:56:C0:00:01 (VMware)

Nmap scan report for 192.168.1.1
Host is up (0.000041s latency).
PORT     STATE  SERVICE
1688/tcp closed nsjtp-data

Nmap done: 256 IP addresses (2 hosts up) scanned in 7.09 seconds
Detect the operating system condition of the target
[root@C7--01 ~]# nmap -O --osscan-guess 192.168.1.1

Starting Nmap 6.40 ( http://nmap.org ) at 2021-08-20 02:06 CST
mass_dns: warning: Unable to determine any DNS servers. Reverse DNS is disabled. Try using --system-dns or specify valid servers with --dns-servers
RTTVAR has grown to over 2.3 seconds, decreasing to 2.0
RTTVAR has grown to over 2.3 seconds, decreasing to 2.0
RTTVAR has grown to over 2.3 seconds, decreasing to 2.0
RTTVAR has grown to over 2.3 seconds, decreasing to 2.0
RTTVAR has grown to over 2.3 seconds, decreasing to 2.0
RTTVAR has grown to over 2.3 seconds, decreasing to 2.0
RTTVAR has grown to over 2.3 seconds, decreasing to 2.0
Nmap scan report for 192.168.1.1
Host is up (0.000030s latency).
Not shown: 998 closed ports
PORT    STATE SERVICE
22/tcp  open  ssh
111/tcp open  rpcbind
Device type: general purpose
Running: Linux 3.X
OS CPE: cpe:/o:linux:linux_kernel:3
OS details: Linux 3.7 - 3.9
Network Distance: 0 hops

OS detection performed. Please report any incorrect results at http://nmap.org/submit/ .
Nmap done: 1 IP address (1 host up) scanned in 1.55 seconds
Review questions
1. Write the command to lock accounts and files in Linux
Lock user: usermod -L user name} unlock user: usermod -U user name
Lock file: chattr +i ^ path file name ^ unlock file: chattr -i ^ path file name
2. Briefly describe the difference between su and sudo commands
su command: you can quickly switch to another user. The precondition is that you must know the user and password. In the production environment, if one more person knows the privileged password on the Linux server, the security risk will be increased.
sudo command: the execution permission can be elevated. It needs to be authorized by the administrator in advance to specify which users are allowed to execute which commands as super users (or other ordinary users)
3. systemctl mask ctrl-alt-del. What is the purpose of the target command?
Unregister Ctrl Alt del service
4. In CentOS 7, what operations are required to set the password for grub menu?
1) . use the command grub2-mkpasswd-pbkdf2 to generate an encrypted password
2) , modify / etc / grub d/00_ In the header file, add a password record
3) , generate a new grub CFG configuration file
5. In the Linux system, what files does the login program read to determine which terminals the root user is allowed to log in to the system from?
The login program reads: / etc / securety
6. What is the function of executing the touch /etc/nologin command in Linux system?
Create a file name nologin under / etc
7. Write out the dictionary file provided by John the Ripper by default
The default file is password lst
8. Write out more than three scan types supported by NMAP?
-sS,-sT,-sF,-sU,-sP,-P0
9. What commands can be executed in the Linux system to scan the commonly used UDP ports of the machine?
Use the command: nmap 127.0 zero point one
10. Execute nmap - P 139445 192.168 in Linux system 4. What is the function of the 100-200 command?
The detected ip address is 192.168 4. Whether the file sharing service is enabled on the 100-200 host
Detailed explanation of Nmap parameters
| -iL filename | Read the target to be detected from the file. The representation method in the file supports machine name, ip and network segment |
| -iR hostnum | Randomly selected for scanning If - iR is specified as 0, it is an endless scan |
| --exclude host1[, host2] | Hosts that need to be excluded from the scan task |
| --exculdefile exclude_file | Exclude the IP in the file. The format is the same as that of the scan file specified by - iL |
| Host discovery | |
| -sL | It only displays the number of IP scanned, and no scanning will be performed |
| -sn | ping scan, i.e. host discovery |
| -Pn | Do not detect host survival |
| -PS/PA/PU/PY[portlist] | TCP SYN Ping/TCP ACK Ping/UDP Ping discovery |
| -PE/PP/PM | Use ICMP echo, timestamp and netmask to request packet discovery hosts |
| -PO[prococol list] | Use the IP protocol packet to detect whether the other host is enabled |
| -n/-R | No reverse domain name resolution for IP / domain name response resolution for all IP |
| Scanning skills | |
| -sS/sT/sA/sW/sM | TCP SYN/TCP connect()/ACK/TCP window scan / TCP Maimon scan |
| -sU | UDP scan |
| -sN/sF/sX | TCP Null, FIN, and Xmas scan |
| --scanflags | Custom flags in TCP packets |
| -sI zombie host[:probeport] | Idlescan |
| -sY/sZ | SCTP INIT/COOKIE-ECHO scan |
| -sO | Use IP protocol scanning to determine the protocol types supported by the target machine |
| -b "FTP relay host" | Using FTP bounce scan |
| Specify port and scan order | |
| -p | Specific port - p80443 or - p1-65535 |
| -p U:PORT | Scan a port of udp, -p U:53 |
| -F | Fast scan mode, less than the Default scan port |
| -r | Ports are not scanned randomly. The default is random scanning |
| --top-ports "number" | Scan the number ports with the highest open probability. Refer to the nmap services file in ubuntu, which is located in / usr / share / nmap Nmap scans the first 1000 by default |
| --port-ratio "ratio" | Scan ports above the specified frequency |
| Service version identification | |
| -sV | Open version detection, you can directly use - A to open operating system detection and version detection at the same time |
| --version-intensity "level" | Set the version scanning intensity. The intensity level indicates which detection messages should be used. The higher the value, the more likely the service is to be correctly identified. The default is 7 |
| --version-light | Open the lightweight mode and set it as the alias of -- version intensity 2 |
| --version-all | Try all probes as an alias for -- version intensity 9 |
| --version-trace | Detailed version detection process information is displayed |
| Script scan | |
| -sC | Call the default script according to the service identified by the port |
| --script="Lua scripts" | Called script name |
| --script-args=n1=v1,[n2=v2] | Parameters passed by the called script |
| --script-args-file=filename | Pass parameters using text |
| --script-trace | Displays all sent and received data |
| --script-updatedb | Update script database |
| --script-help="Lua script" | Displays help for the specified script |
| OS identification | |
| -O | Enable OS detection, - A to enable both OS detection and version detection |
| --osscan-limit | Detect the operating system for the specified target (at least make sure that the host has an open and closed port respectively) |
| --osscan-guess | Infer the operating system detection results. When nmap cannot determine the detected operating system, it will provide the closest matching as far as possible. Nmap will perform this matching by default |
| Firewall / IDS evasion and deception | |
| -f; --mtu value | Specifies the MTU using sharding and specified packets |
| -D decoy1,decoy2,ME | Covert scanning with decoys |
| -S IP-ADDRESS | Source address spoofing |
| -e interface | Use the specified interface |
| -g/ --source-port PROTNUM | Use specified source port |
| --proxies url1,[url2],... | Use HTTP or SOCKS4 proxy |
| --data-length NUM | Fill random data so that the packet length reaches NUM |
| --ip-options OPTIONS | Sends packets using the specified IP options |
| --ttl VALUE | Set IP time to live domain |
| --spoof-mac ADDR/PREFIX/VEBDOR | MAC address camouflage |
| --badsum | Use the wrong checksum to send the packet |
| Nmap output | |
| -oN | Writes standard output directly to the specified file |
| -oX | Output xml file |
| -oS | Change all output to uppercase |
| -oG | Output a format that is easy to process through bash or perl, not xml |
| -oA BASENAME | Scan results can be output in standard format, XML format and Grep format at one time |
| -v | Improve the detail of output information |
| -d level | Set the debug level up to 9 |
| --reason | Displays the reason why the port is in the acknowledged state |
| --open | Only the ports whose port status is open are output |
| --packet-trace | Displays all sent or received packets |
| --iflist | Display routing information and interface for debugging |
| --log-errors | Output the log with the log level of errors / warnings |
| --append-output | Append to specified file |
| --resume FILENAME | Resume stopped scans |
| --stylesheet PATH/URL | Set up XSL stylesheet and transform XML output |
| --webxml | From NAMP Org to get the XML style |
| --no-sytlesheet | XSL style sheets that ignore XML declarations |
| Time performance optimization | |
| -T | Time optimization (0-5) (paranoid|sneaky|poly|normal|aggressive|insane) |
| -F | Fast scan |
| --max-retries | Adjust the number of retransmissions |
| --min-hostgroup/--max-hostgroup size | Sets the size of the group |
| --min-parallelism/--max-parellelism time | Number of probes in the specified time |
| --min-rtt-timrout/--max-rtt-timrout/initial-rtt-timrouttime | Specify probe timeout |
| --scan-delay/-max-scan-delay time | Specifies the time delay between probes |
| --max-retries tries | Specifies the number of probe retransmissions |
| --host-timeout time | Set the maximum time to scan the host |
| --defeat-rst-ratelimit | Set rst limits |
| Other nmap options | |
| -6 | Turn on IPv6 |
| -A | OS recognition, version detection, script scanning and traceroute |
| --datedir DIRNAME | Describes the location of the user Nmap data file |
| --send-eth / --send-ip | Send using the original Ethernet frame / at the original IP layer |
| --privileged | It is assumed that the user has full permissions |
| --unprovoleged | Assuming that the user does not have full privileges, root privileges are required to create the original socket |
| -V | Print version information |
| -h | Output help |