Necessary tools for installation
Install package manager and cURL
macOS install homebrew
/bin/bash -c "$(curl -fsSL https://raw.githubusercontent.com/Homebrew/install/HEAD/install.sh)"
View version and help after installation
brew --version        #Check the current version of homebrew and whether it has been successfully installed
brew --help           #Find out what commands are available for homebrew
Windows install Chocolate
Open Powershell in administrator mode
Set-ExecutionPolicy Bypass -Scope Process -Force; [System.Net.ServicePointManager]::SecurityProtocol = [System.Net.ServicePointManager]::SecurityProtocol -bor 3072; iex ((New-Object System.Net.WebClient).DownloadString('https://community.chocolatey.org/install.ps1'))view help
choco help           #Learn what commands chocolate has
choco -v             #View version number

Install kubectl and minicube
kubectl is the command line tool of Kubernetes. Minikube can deploy Kubernetes locally
macOS
brew install kubectl #Install kubectl brew install minikube #Installing minicube
Windows
choco install kubernetes-cli    #Install kubectl
choco install minikube          #Installing minicube
Check whether the installation is successful
kubectl version --client   #Test installed version
minikube version           #Minicube version information

Note that it is better to operate subsequent commands on Windows in the current powershell, otherwise the command may not be recognized in other command lines.
Create Kubernetes clusters locally
Locally start a single node Kubernetes cluster
minikube start
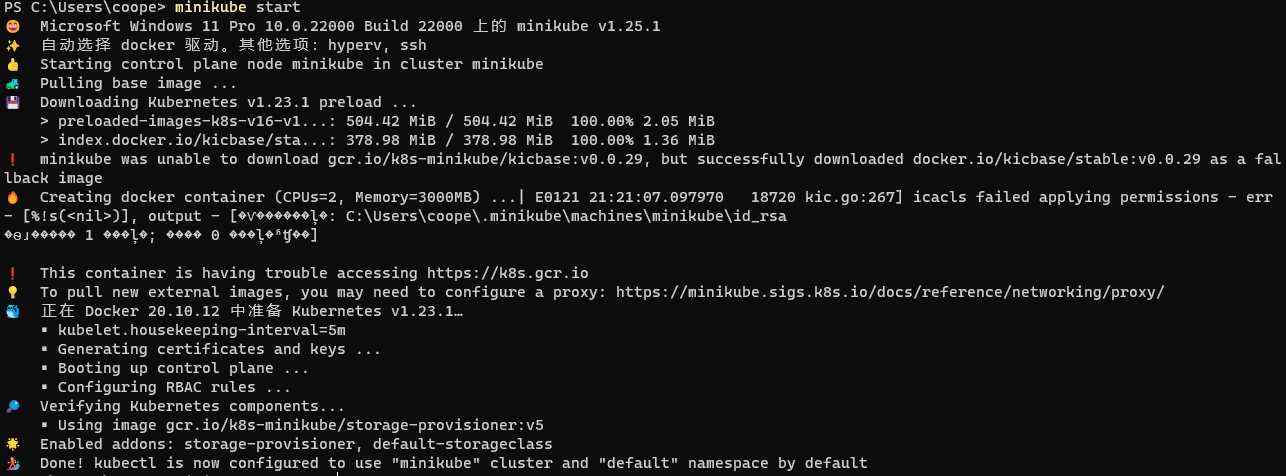
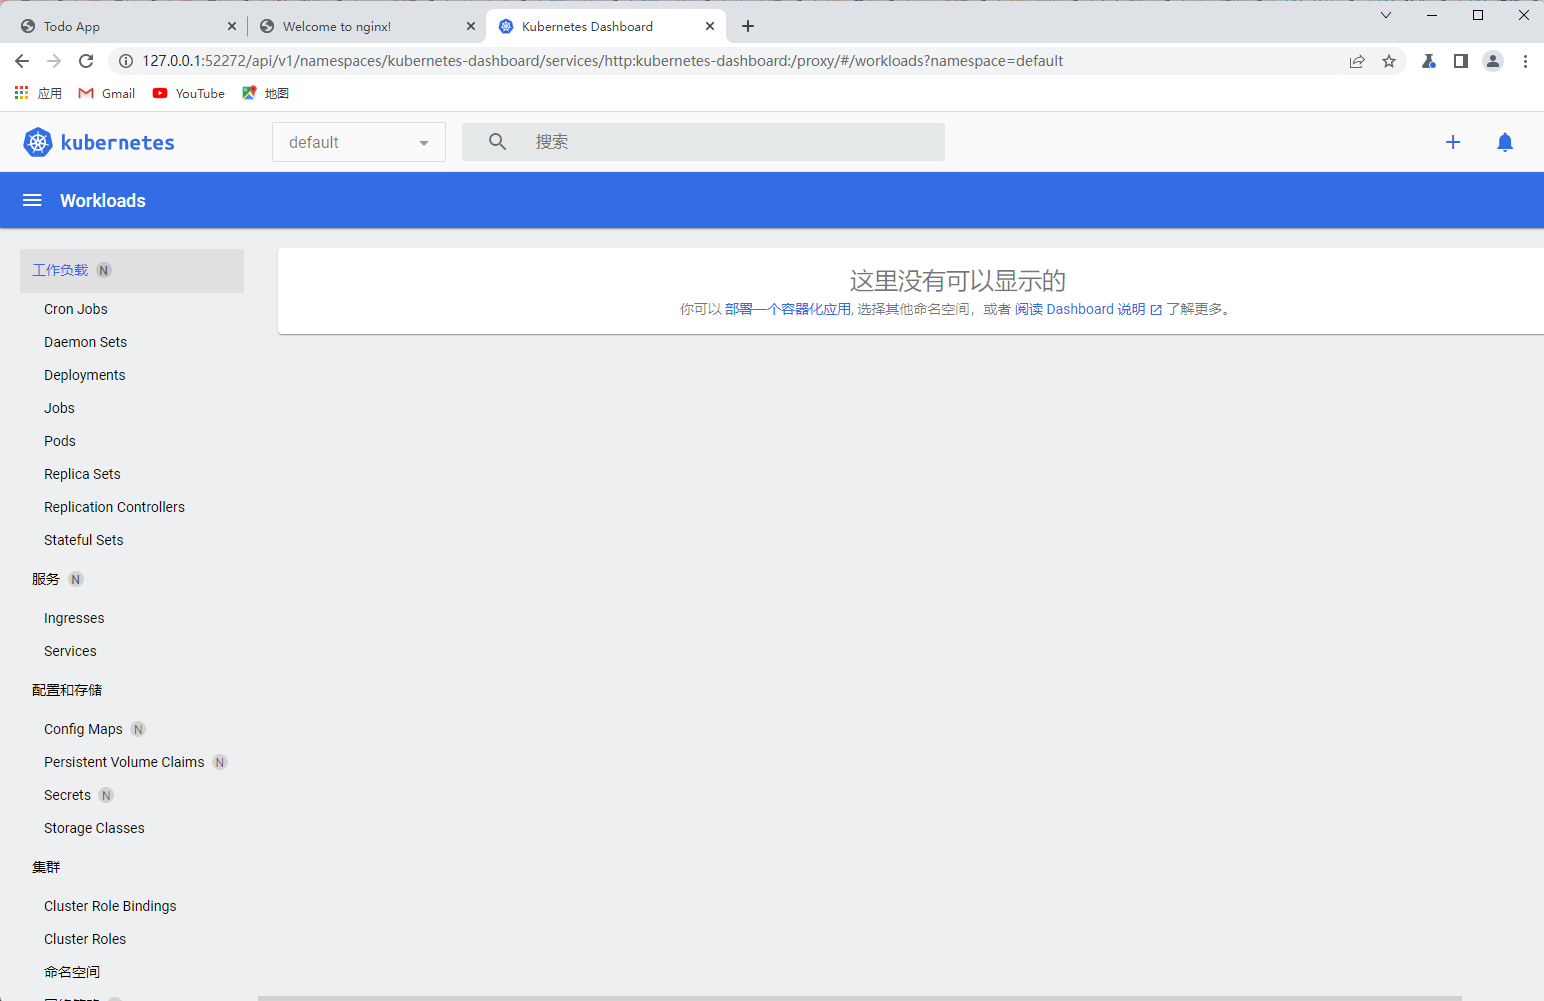
After startup, view the console
minikube dashboard
Connecting kubernetes clusters through Kubectl
Configure Kubeconfig
Kubernetes clusters can be controlled by Kuberctl simultaneous interpreting, just like traditional servers using SSH clients.
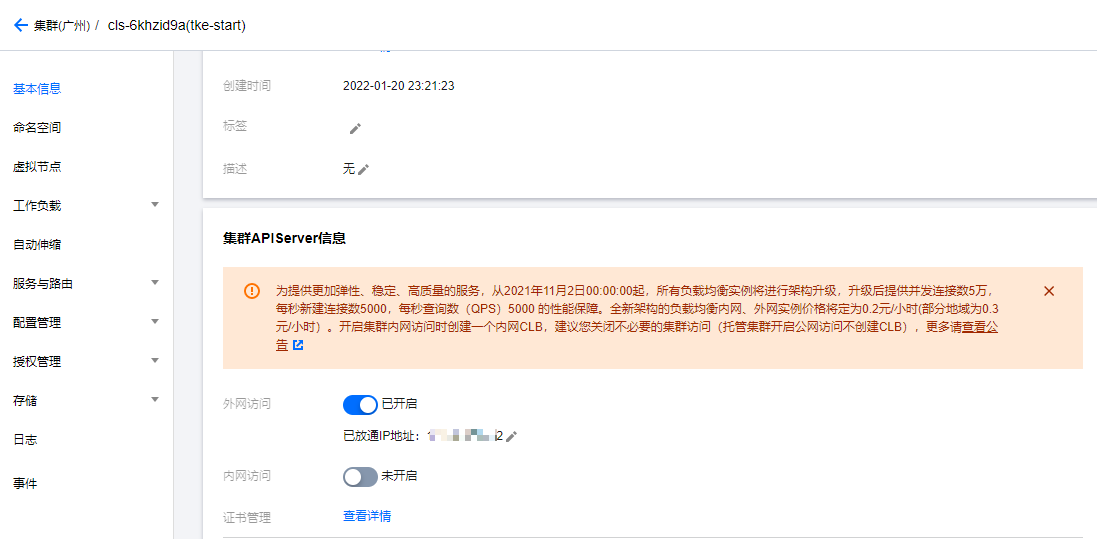
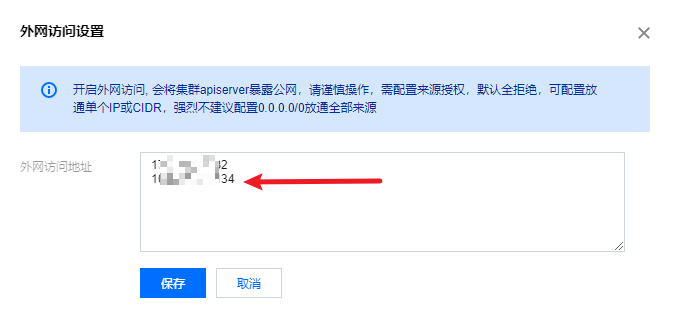
Enter EKS container service, select the container created yesterday, select [basic information], scroll to the bottom, open external network access, and enter the local public network IP address.
The local public IP address can be obtained by Baidu search [IP].
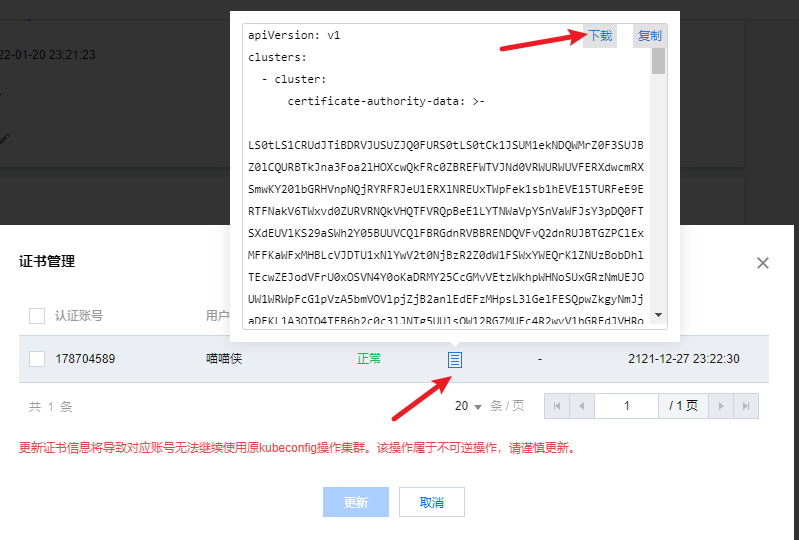
Click certificate management to download the certificate. The certificate here is actually the kubeconfig file.
macOS or Linux: download the kubeconfig configuration file locally and execute the following instructions to merge the configurations of multiple clusters (where ~ / downloads / CLS - ***** - config needs to be replaced with the actual address after you download the kubeconfig locally):
KUBECONFIG=~/.kube/config:~/Downloads/cls-****-config kubectl config view --merge --flatten > ~/.kube/config
export KUBECONFIG=~/.kube/config
Windows: download the kubeconfig configuration file locally and execute the following instructions to merge the configurations of multiple clusters (where ~ / downloads / CLS - ***** - config needs to be replaced with the actual address after you download the kubeconfig locally):
$Env:KUBECONFIG=("$HOME\.kube\config;$HOME\.kube\c1.kubeconfig")
echo $Env:KUBECONFIG
Connecting EKS using kubectl
After configuration, you can view the cloud environment
kubectl config view         #Displays the merged kubeconfig settings or the specified kubeconfig configuration file.
kubectl config get-contexts #View the environment in kubeconfig

Switch to cloud environment
kubectl config use-context cls-****-context-default #Switch to cloud K8s cluster
kubectl config use-context minikube   #Switch to local cluster
kubectl config use-context cls-****-context-default #Switch back to cloud cluster

After switching, you can see the prompt:
Switched to context "cls-6khzid9a-****-context-default".
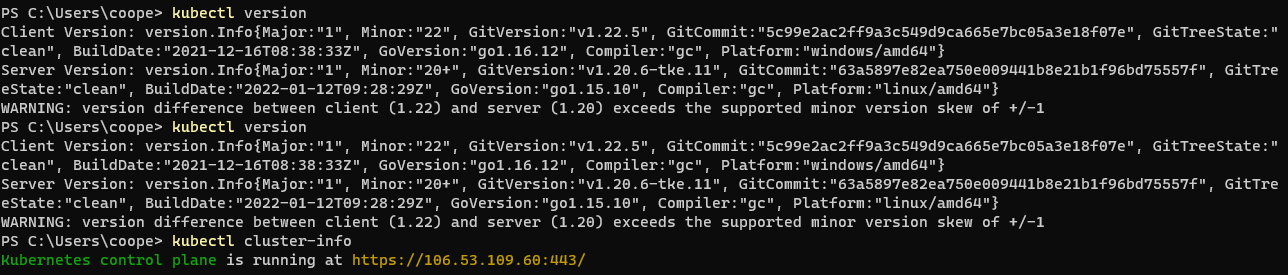
To know the version information of Kubernetes cluster, you can use the following command
kubectl version
kubectl cluster-info
client version refers to the version of the local kubectl command line tool, while server version refers to the version of EKS or minicube kubernetes.
Note: using kubectl cluster info, an IP address will appear, which is the IP of Tencent cloud, and a control panel will appear. If you can't access it, it may be the problem of IP address white list. You need to https://www.ip138.com/ On this website, check the current local ip address.
My computer is connected with an agent, and the ip has become Hong Kong, China, so access is 403 Forbidden.
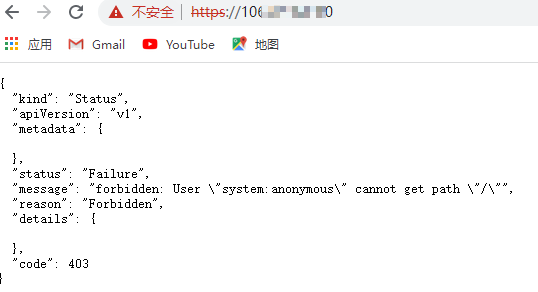
Then I add a proxy IP to the cluster APIServer. (in fact, browser access is prohibited)
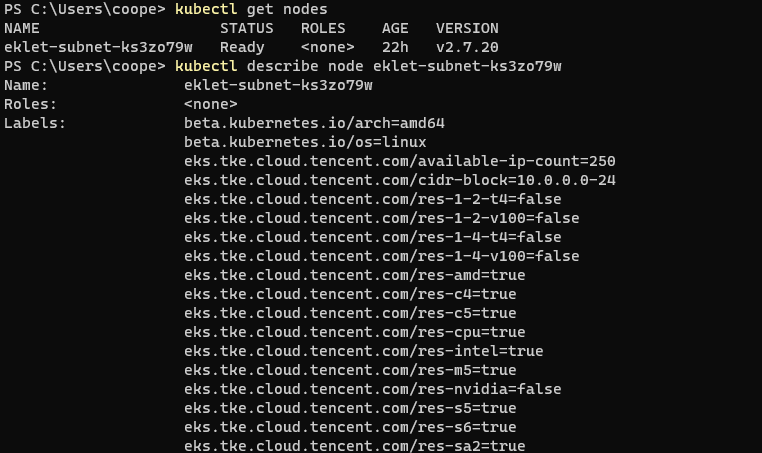
Test whether the cluster can be accessed normally
kubectl get node
View cluster content manager
kubectl get pods --all-namespaces
Dashboard and command line
About Node
kubectl get nodes                   #Get node list
kubectl describe node <node Name of>  #Understand all States of nodes
kubectl top node <node Name of>       #Understand the memory and CPU usage of the node
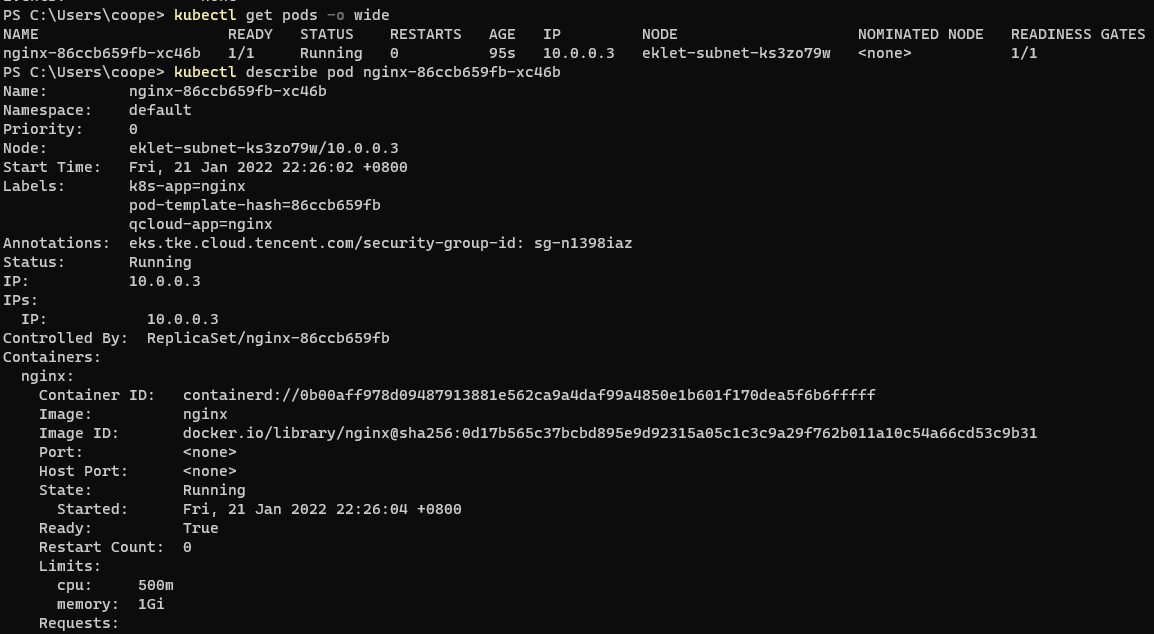
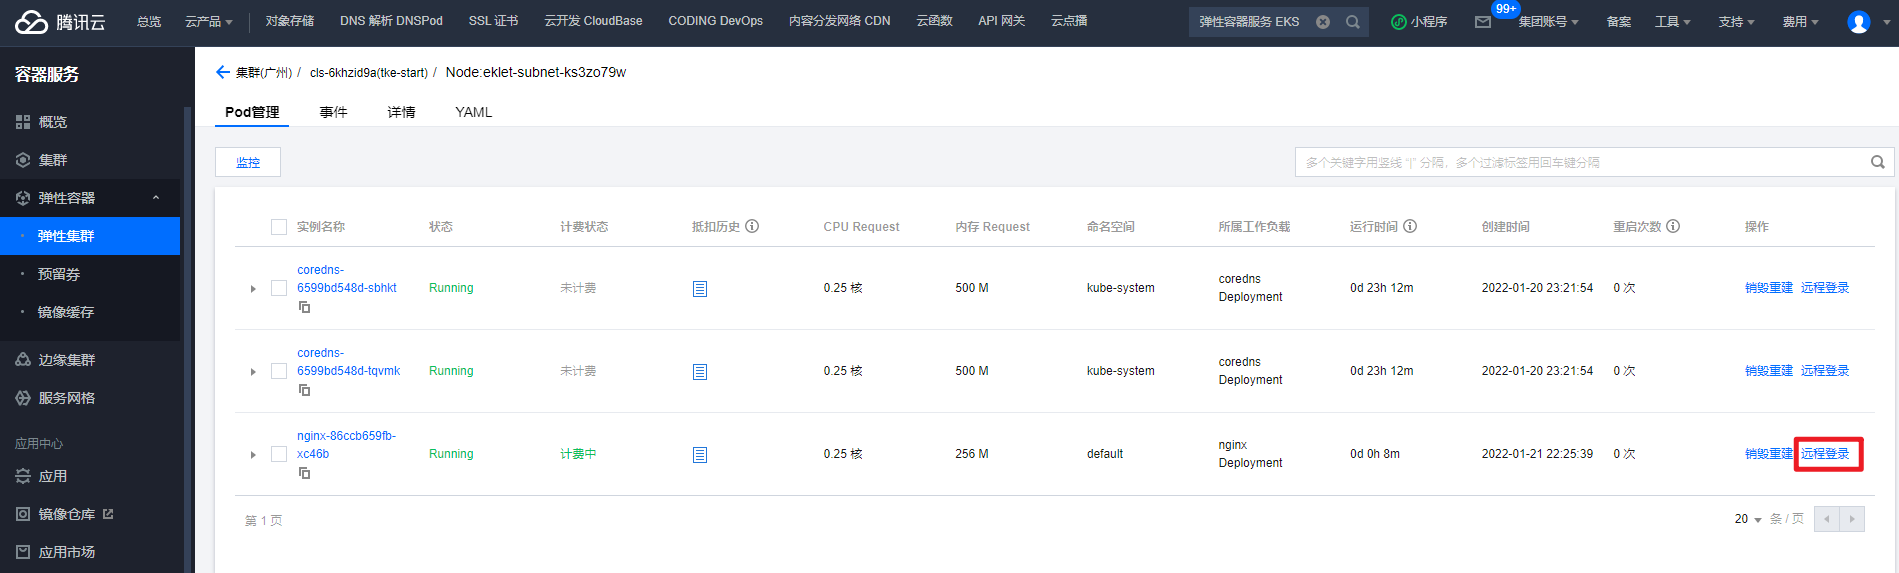
About Pod
Tencent cloud console view Pod
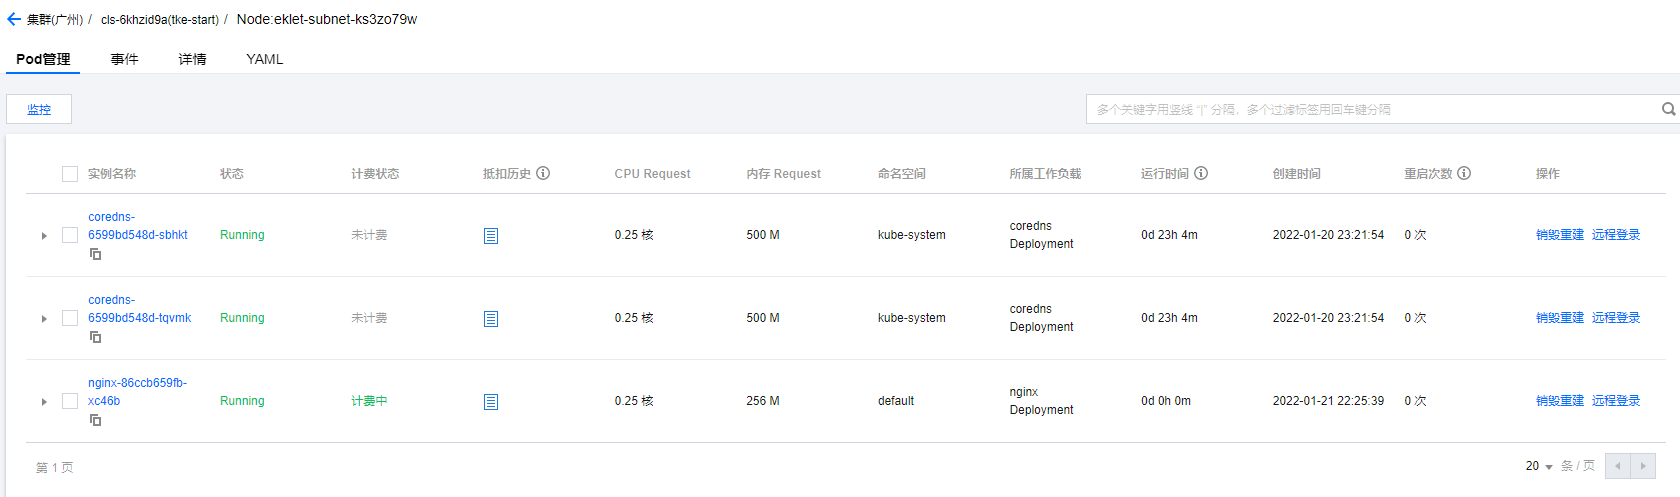
kubectl get pods -o wide          #Show Pod list
kubectl describe pod <pod Name of>  #View Pod details
kubectl top pod <pod Name of>

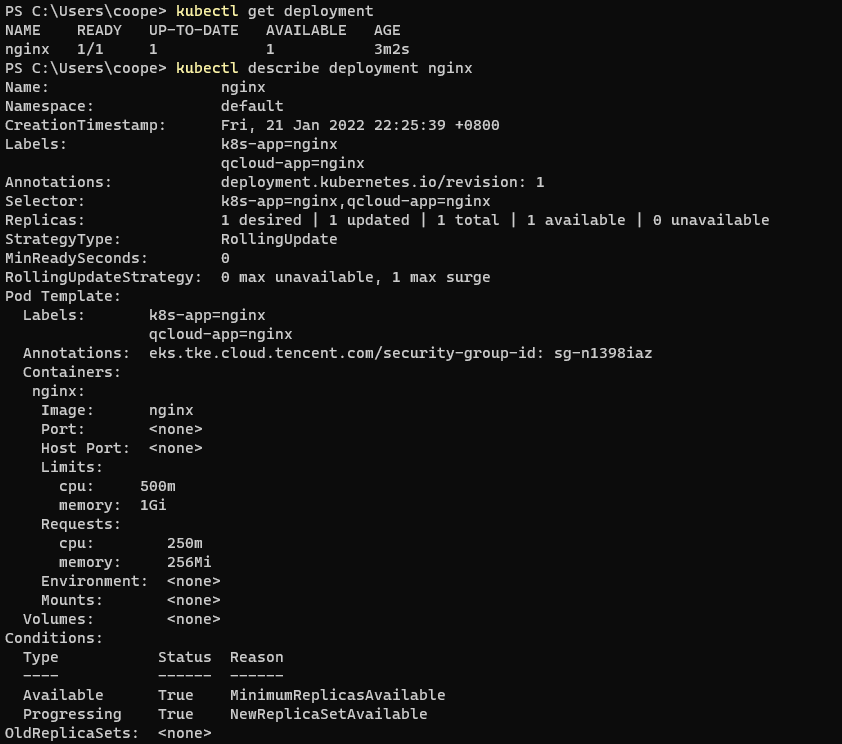
About workload Deployment
kubectl get deployment   #Get all deployments
kubectl describe deployment <deployment Name of>
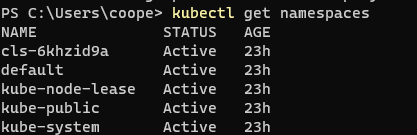
About Namespace
Similar to folders, the objects in them will be destroyed after deletion. Each Kubernetes cluster will have a default namespace by default.
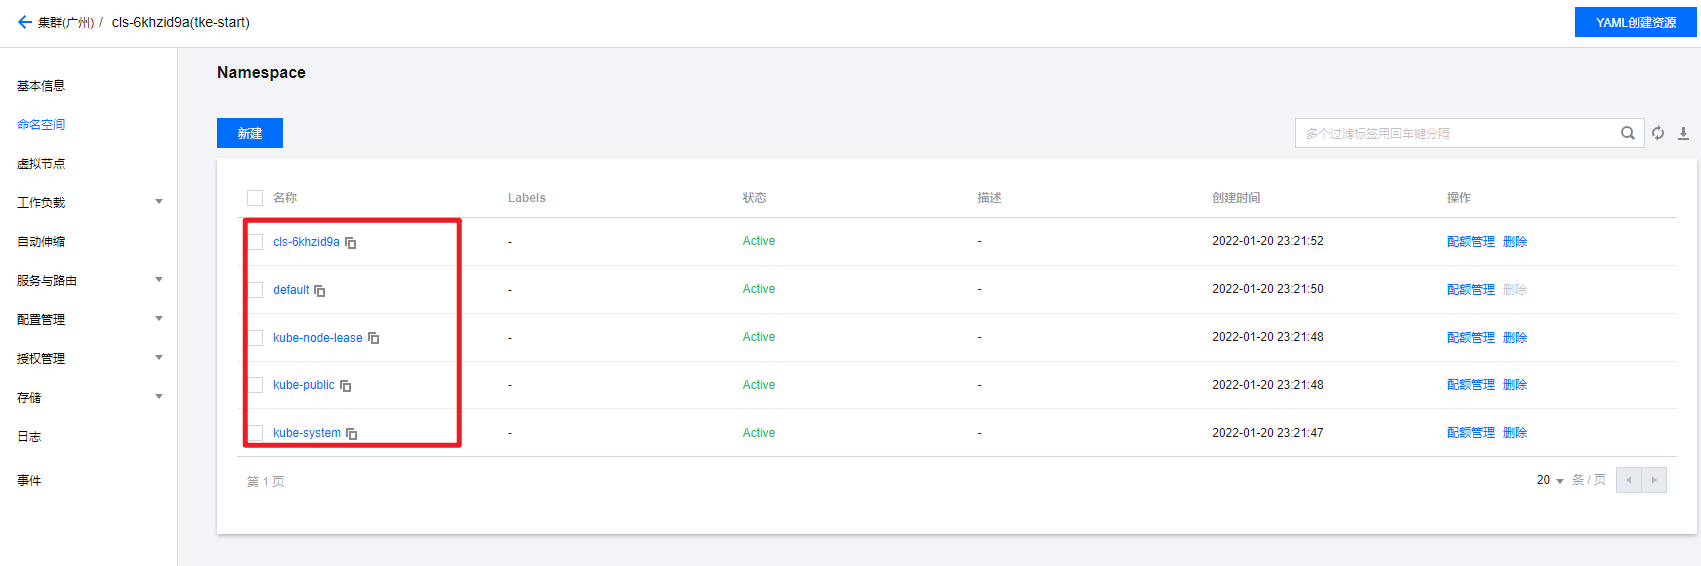
kubectl get namespaces
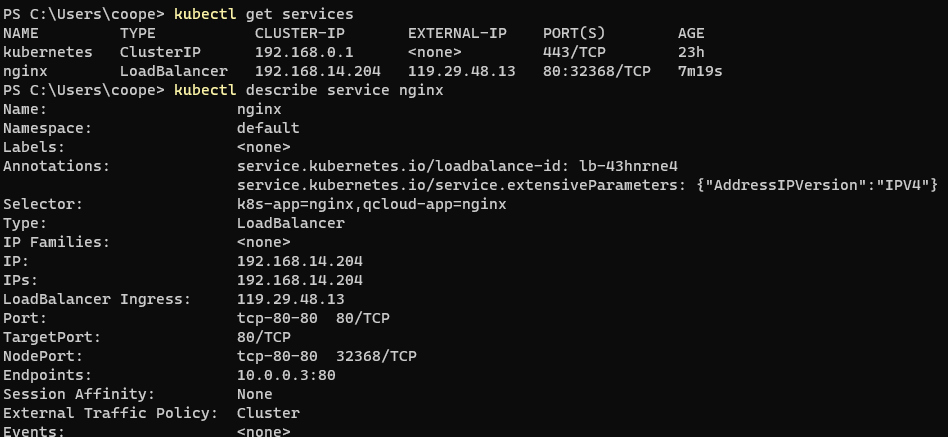
service
kubectl get services
kubectl describe service <service Name of>
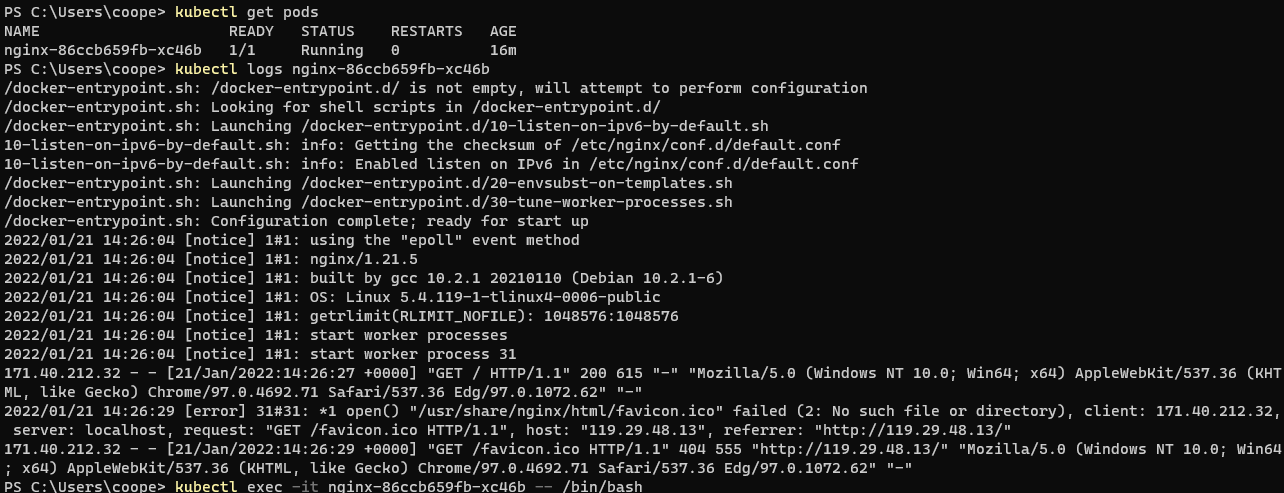
Manage running pods
Note: kubectl tool also needs to be installed in the cloud, otherwise the command cannot be used.
Understand the operation of Pod container
kubectl get pods
kubectl logs <pod Name of>
kubectl exec -it <pod Name of> -- /bin/bash
# Kubectl exec -- stdin -- TTY < pod name > -- / bin / sh, bash is recommended
summary
Today, I mainly learned the installation and command use of kubectl tool, and had a general understanding of Kubernetes. The cluster Pod and Service were deleted yesterday and re created today. In that case, I'll learn the content of Chapter 6 by the way.