Tuesday, 08. October 2019 11:01 am
Initial preparation:
1. jdk installation
Do the following on all three machines (depending on the number of machines you have):
1) you can install jdk through apt get, execute whereis java on the command line to get the installation path of java, or download the installation package of jdk manually for installation
2) add the following parameters to ~ /. bashrc file or / etc/profile file
export JAVA_HOME=your_path
export CLASSPATH=.:${JAVA_HOME}/lib:${JRE_HOME}/lib export PATH=${JAVA_HOME}/bin:$PATH
3) execute source ~/.bashrc or source /etc/profile on the command line to make the parameters take effect (corresponding to the file you modified). 4) finally, execute java version to determine whether the Java installation is successful.

2. ssh password free login
You also need to perform the following operations on three machines: 1) switch to the root directory, cd ~ 2) execute SSH keygen in this directory,
-
You can send the secret key to the specified machine through SSH copy ID:
ssh-copy-id -i ~/.ssh/id_rsa.pub -p 22 root@172.16.22.132,
-
You can also send the secret key to the target machine through scp, and then create an authorized "keys" on the target machine to copy the secret key to the file:
scp id_rsa.pub root@172.16.22.132:/root/.ssh cd /root/.ssh/ cat id_rsa.pub >> authorized_keys

Part I: hadoop cluster building
Reference link: https://www.cnblogs.com/charles1ee/p/11239375.html
hadoop version: 2.7.7
This is a fully distributed version of hadoop, with one master node and two slave nodes
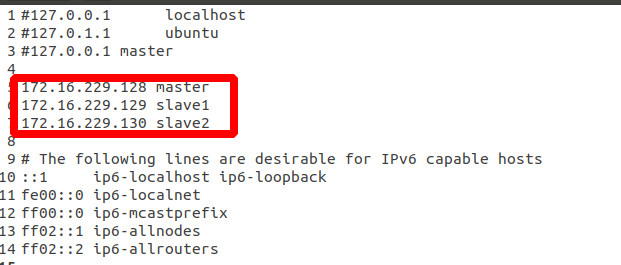
1. Modify the / etc/hostname file to master, slave1 and slave2, and restart the machine after modification and saving;
2. Modify the / etc/hosts file on the master machine to match the domain name and ip address, as shown in the following figure. After the modification, slave1 and slave2 are copied on each machine, or added on the original basis, as shown in the following figure:
3. Create a new workspace in the document directory, where all the following components are placed. Extract hadoop-2.7.7.tar.gz and rename it Hadoop. Execute sudo chown-r 777 Hadoop 4. Modify the master configuration file
-
Modify hadoop-env.sh file export Java? Home = your? Path
-
Modify the hdfs-site.xml file
<configuration>
                                <property>
                                <name>dfs.replication</name>
                                <value>2</value>
                                </property>
                                <property>
                                <name>dfs.namenode.name.dir</name>
                                <value>file:/data/hadoop_data/hdfs/namenode</value>
                                </property>
                                <property>
                                 <name>dfs.datanode.data.dir</name>
                                <value>file:/data/hadoop_data/hdfs/datanode</value>
                                </property>
                                #Set secondaryNode to slave1 machine
                                <property>
                                <name>dfs.namenode.secondary.http-address</name>
                                <value>slave1:50090</value>
                                </property>
                            </configuration>
-
Modify the core-site.xml file
 <configuration>
                                <property>
                                    <name>fs.defaultFS</name>
                                    <value>hdfs://master:9000</value>
                                </property>
                                <property>
                                    <name>hadoop.tmp.dir</name>
                                    <value>/data/hadoop_data/hadoop_tmp</value>
                                </property>
                            </configuration>
-
Modify mapred-site.xml file
<configuration>
                                <property>
                                    <name>mapreduce.framework.name</name>
                                    <value>yarn</value>
                                </property>
                            </configuration>
-
Modify the yarn-site.xml file
  <configuration>
                                <property>
                                <name>yarn.resourcemanager.hostname</name>
                                <value>master</value>
                                </property>
                                <property>
                                <name>yarn.nodemanager.aux-services</name>
                                <value>mapreduce_shuffle</value>
                                </property>
                                <property>
                                <name>yarn.nodemanager.aux-services.mapreduce.shuffle.class</name>
                                <value>org.apache.hadoop.mapred.ShuffleHandler</value>
                                </property>
                                <property>
                                <name>yarn.resourcemanager.address</name>
                                <value>master:8050</value>
                                </property>
                                <property>
                                <name>yarn.resourcemanager.scheduler.address</name>
                                <value>master:8030</value>
                                </property>
                                <property>
                                <name>yarn.resourcemanager.resource-tracker.address</name>
                                <value>master:8025</value>
                                </property>
                                #When running pyspark with hadoop yarn, the following two parameters will not be added and an error will be reported
                                <property>
                                <name>yarn.nodemanager.pmem-check-enabled</name>
                                <value>false</value>
                                </property>
                                <property>
                                <name>yarn.nodemanager.vmem-check-enabled</name>
                                <value>false</value>
                                </property>
                                #The following three parameters are that when azkaban is configured, the timing task is always preparing, because the machine memory is not enough
                                <property>
                                <name>yarn.scheduler.maximum-allocation-mb</name>
                                <value>12240</value>
                                </property>
                                <property>
                                <name>yarn.scheduler.minimum-allocation-mb</name>
                                <value>100</value>
                                </property>
                                <property>
                                <name>yarn.nodemanager.resource.memory-mb</name>
                                <value>12240</value>
                                </property>
                            </configuration>
5. Modify the configuration file of the slave. The configuration of the slave node and the master node is roughly the same, but the mapred-site.xml file is not the same as the master node. The configuration is
-
Modify mapred-site.xml file
 <configuration>
                                <property>
                                <name>mapred.job.tracker</name>
                                <value>master:54311</value>
                                </property>
                            </configuration>
6. Modify the log file, execute the hadoop command, report the WARNING solution vim log4j.properties, add: log4j.logger.org.apache.hadoop.util.NativeCodeLoader=ERROR
7. After installation and configuration, return to the master node to format the namenode
cd /data/hadoop_data/hdfs/namenode
hadoop namenode -format
Executing commands on the master node
Start all.sh / / start
Stop all.sh / / close
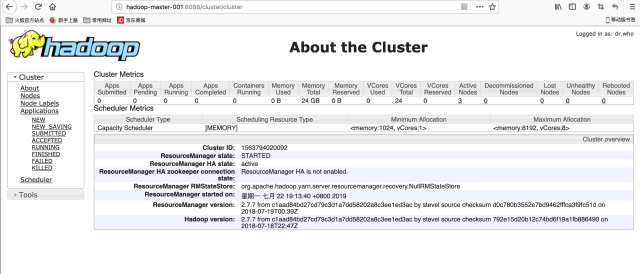
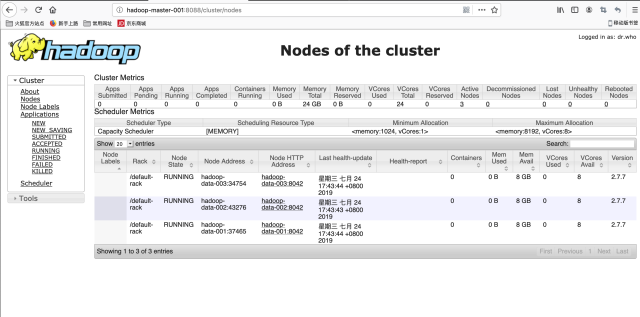
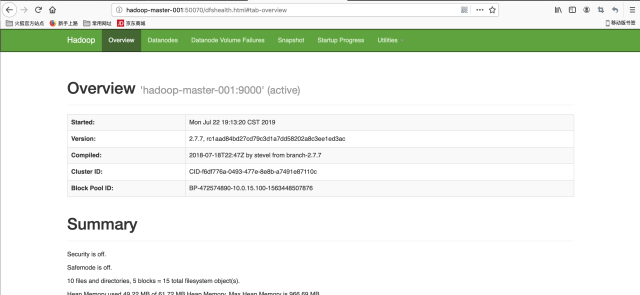
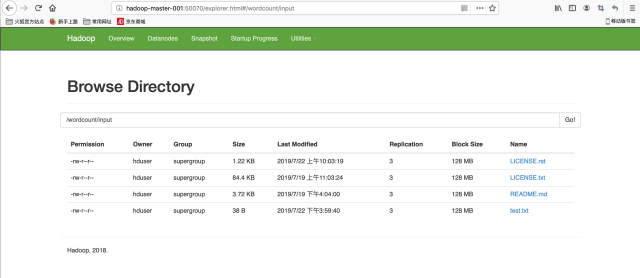
8. The following is the interface diagram (Note: when entering the url, change hadoop-master-001 to the domain name master of the host above us)
Part II: spark cluster construction
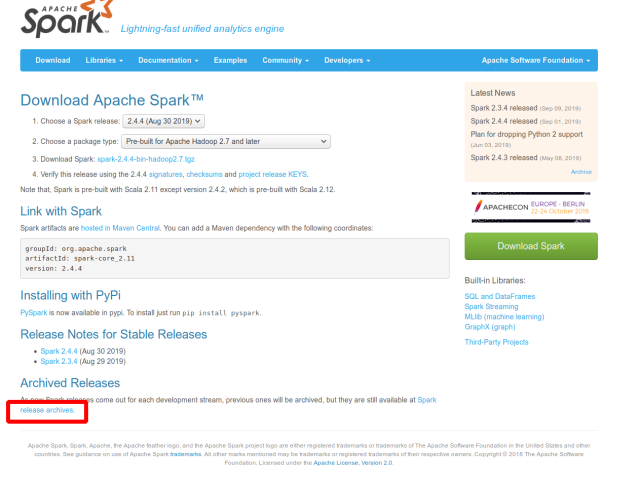
The spark component can be obtained by compiling the source code and downloading it directly from the official website (http://spark.apache.org/downloads). Click the link in the box below to find the version you need.
The version used in this construction is 2.1.0 reference link: http://dblab.xmu.edu.cn/blog/1086-2/spark construction steps:
-
The spark version that supports hive is compiled with source code;
-
Enter the download directory and execute the command tar -zxvf spark-2.1.0.tar.gz to extract the spark package
-
Enter the root directory of spark, execute the command. / dev / make distribution.sh -- name 2.7.3 -- tgz - pyarn - phadop-2.7 - dhadop. Version = 2.7.7 - phadop provided - phive - phive thriftserver - dskiptests. This command starts compiling the source code of spark, and finally generates a tgz package spark-2.1.0-bin-2.7.3.tgz
-
The parameters are explained as follows:
-
-DskipTests, do not execute the test case, but compile the test case class to generate the corresponding class file under target / test classes.
-
-hadoop.version and - phadop: the version number of hadoop on the local machine. Without this parameter, the version of hadoop is 1.0.4.
-
-Pyarn: whether to support Hadoop YARN. It is not supported without parameters.
-
-Phive and - phive thriftserver: whether hive is supported in Spark SQL. Hive is not supported without this parameter.
-
– with Tachyon: whether the memory file system Tachyon is supported. Without this parameter, Tachyon is not supported.
-
– tgz: generate spark-$VERSION-bin.tgz in the root directory. Without this parameter, no tgz file will be generated. Only the / dist directory will be generated.
-
– NAME: in combination with – tgz, the deployment package of spark - $version Bin - $NAME.tgz can be generated. Without this parameter, the NAME is the version number of hadoop
-
-
-
Copy the spark-2.1.0-bin-2.7.3.tgz package to one of the machines and unzip it. The unzipped folder will be renamed spark. Enter the / conf folder under the directory. Here are all the configuration file directories of spark. You need to modify three files here, namely, the slaves, hive-site.xml and spark-env.sh files;
-
Modify ~ /. bashrc
-
        export SPARK_HOME=/home/benhairui/Documents/workspace/spark
        export PATH=$PATH:$SPARK_HOME/bin
2. Modify the slaves configuration file. Add the slave node at the end of the file. Here are slave1 and slave2
        slave1
        slave2
-
Modify spark-env.sh file
#The ip address bound to the master instance, for example, the ip address bound to a public network
                             export SPARK_MASTER_HOST=master
                             #Port bound by master instance (default is 7077)
                             export SPARK_MASTER_PORT=7077
                             #scala installation path
                             export SCALA_HOME=/usr/share/scala-2.11
                             #java installation path
                             export JAVA_HOME=/usr/lib/jvm/java-8-openjdk-amd64
                             #Installation path of hadoop
                             export HADOOP_HOME=/home/benhairui/Documents/workspace/hadoop
                             #Profile path of hadoop
                             export HADOOP_CONF_DIR=/home/benhairui/Documents/workspace/hadoop/etc/hadoop
                             #Official explanation of this parameter: Spark uses the libraries of hadoop client to access HDFS and yarn, and the spark package of "hadoop free" after spark 1.4 allows users to
                             #Connect to any hadoop version cluster. In order to use this version, you need to modify spark ﹣ dist ﹣ classpath in spark-env.sh, including hadoop jar package
                             #https://spark.apache.org/docs/latest/hadoop-provided.html, the link has a detailed parameter explanation
                             export SPARK_DIST_CLASSPATH=$(/home/benhairui/Documents/workspace/hadoop/bin/hadoop classpath)
After the spark test, the installation of spark is finished. You can simply verify whether the installation is successful through the following methods:
1. Start the hadoop cluster through the command line, start-all.sh
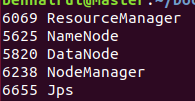
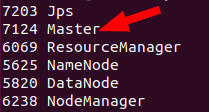
2. Start the spark cluster through the command line. After start-all.sh spark is started, the master node has one more "master" ID than that under jps that is not started, as follows:
The slave node has an additional "worker" ID, as follows:
In subsequent tests, you can connect spark cluster through spark shell and access hdfs data to further confirm
./spark-shell --master spark://master:7077
Part 3: build hive (non cluster, only configured on the master node of hadoop)
Reference: https://blog.csdn.net/dante_/article/details/72867493
The version of hive is 2.3.6
Because hive on spark interacts with spark cluster, some configuration files of spark need to be modified, mainly involving hive-site.xml and spark-env.sh.
-
Copy the scala-library-2.11.8.jar, spark network-common-2.11-2.1.1.jar, spark core-2.11-2.1.1.jar package in spark to the lib folder of hive; download MySQL jdbc connection package mysql-connector-java-5.1.38.jar and put it into the lib package of hive.
-
Modify hive-site.xml and copy it to the conf directory of spark
<configuration> <!--jdbc --> <property> <name>javax.jdo.option.ConnectionURL</name> <value>jdbc:mysql://192.168.5.111:3306/hive2?createDatabaseIfNotExist=true&useUnicode=true&characterEncoding=UTF-8</value> </property> <property> <name>javax.jdo.option.ConnectionDriverName</name> <value>com.mysql.jdbc.Driver</value> </property> <property> <name>javax.jdo.option.ConnectionUserName</name> <value>benhairui</value> </property> <property> <name>javax.jdo.option.ConnectionPassword</name> <value>Mahairui123**</value> <description>password to use against metastore database</description> </property> <!--spark engine --> <property> <name>hive.execution.engine</name> <value>spark</value> </property> <property> <name>hive.enable.spark.execution.engine</name> <value>true</value> </property> <!--sparkcontext --> <property> <name>spark.master</name> <value>yarn-cluster</value> </property> <property> <name>spark.serializer</name> <value>org.apache.spark.serializer.KryoSerializer</value> </property> <!--The following configuration is based on the actual situation --> <property> <name>spark.executor.instances</name> <value>3</value> </property> <property> <name>spark.executor.cores</name> <value>4</value> </property> <property> <name>spark.executor.memory</name> <value>10240m</value> </property> <property> <name>spark.driver.cores</name> <value>2</value> </property> <property> <name>spark.driver.memory</name> <value>4096m</value> </property> <property> <name>spark.yarn.queue</name> <value>default</value> </property> <property> <name>spark.app.name</name> <value>myInceptor</value> </property> <!--Transactional correlation --> <property> <name>hive.support.concurrency</name> <value>true</value> </property> <property> <name>hive.enforce.bucketing</name> <value>true</value> </property> <property> <name>hive.exec.dynamic.partition.mode</name> <value>nonstrict</value> </property> <property> <name>hive.txn.manager</name> <value>org.apache.hadoop.hive.ql.lockmgr.DbTxnManager</value> </property> <property> <name>hive.compactor.initiator.on</name> <value>true</value> </property> <property> <name>hive.compactor.worker.threads</name> <value>1</value> </property> <property> <name>spark.executor.extraJavaOptions</name> <value>-XX:+PrintGCDetails -Dkey=value -Dnumbers="one two three" </value> </property> <!--Other --> <property> <name>hive.server2.enable.doAs</name> <value>false</value> </property> <!-- Appoint hive Port exposed by service, default is 10000,Sometimes it doesn't work. You can directly display the specified <property> <name>hive.server2.thrift.port</name> <value>11000</value> </property> <property> <name>hive.server2.thrift.bind.host</name> <value>localhost</value> </property> --> </configuration>
-
Modify hiv-env.sh
    export HADOOP_HOME=/home/benhairui/Documents/workspace/hadoop
    export HIVE_CONF_DIR=/home/benhairui/Documents/workspace/hive/conf
    export HIVE_AUX_JARS_PATH=/home/benhairui/Documents/workspace/hive/lib
-
Modify ~ /. bashrc
    export HIVE_HOME=/home/benhairui/Documents/workspace/hive
    export PATH=$PATH:$HIVE_HOME/bin
-
Modify spark env.sh of spark, and add the following configuration in spark env.sh
    export HIVE_CONF_DIR=/home/benhairui/Documents/workspace/hive/conf
    export SPARK_CLASSPATH=$SPARK_CLASSPATH:/home/benhairui/Documents/workspace/hive/lib/mysql-connector-java-5.1.40-bin.jar
Initialize database
/opt/hive/bin/schematool -initSchema -dbType mysql
When the following message appears, the initialization is successful
Starting metastore schema initialization to 2.0.0
Initialization script hive-schema-2.0.0.mysql.sql
Initialization script completed schemaTool completed
Hive test start hive, execute command
hiveserver2 (./hive --service hiveserver2)
Connect hive2 with beeline
beeline -u jdbc:hive2://localhost:10000
After entering the command line, you can use the command of hive to create and query tables. Here are my query statements and results:

Of course, you can also go to the mysql database where the meta information is located to check the meta store information.
Part IV: azkaban building (non cluster)
Reference: https://blog.csdn.net/weixin_/article/details/79327996
azkaban is a task scheduling system, which is also a stand-alone version of azkaban.
-
First, from the source code of clone azkaban on GitHub: git clone https://github.com/azkaban/azkaban.git
-
azkaban is managed by gradle. Therefore, use gradle to compile and package the source code, enter the root directory, and execute the following command:. / gradle clean. / gradle disttar. In this way, you can see each release package under build/distribution in several folders under the root directory
-
Copy the tar package under Azkaban exec server and Azkaban web server to the target folder, extract it, rename it to executor and server respectively, and copy the SQL file under. / Azkaban dB / build / SQL folder Azkaban depends on relational database, so find a mysql and execute the following commands: enter mysql > create database Azkaban; mysql > use Azkaban; database changed mysql > source / home / Hadoop / azkaban-2.5.0/create-all-sql-2.5.0.sql;
-
Create ssl configuration command: keytool -keystore keystore -alias jetty -genkey -keyalg RSA
-
After running this command, you will be prompted to enter the password and corresponding information of the currently generated keystor e. Please remember the entered password as follows: enter the new password again:
What is your first and last name?
[Unknown]:
What is the name of your organizational unit?
[Unknown]:
What is the name of your organization?
[Unknown]:
What is the name of your city or area?
[Unknown]:
What is the name of your state or province?
[Unknown]:
What is the two letter country code for the unit
[Unknown]: CN
Is CN=Unknown, OU=Unknown, O=Unknown, L=Unknown, ST=Unknown, C=CN correct?
[no]:y
Entered master password
(if the password is the same as keystore, press enter):
Enter the new password again:
After the above work is completed, the keystore certificate file will be generated in the current directory, and the keystore will be transferred to the bin directory in the root directory of the azkaban web server, such as cp keystore azkaban/server/bin
Profile
Note: first, configure the time zone on the server node
1. Use the interactive command tzselect to create the time zone configuration file Asia/Shanghai
2. Copy the time zone file and overwrite the local time zone configuration of the system -
Enter the executor/conf directory and modify azkaban.properties:
# Azkaban Personalization Settings
                    #Server name
                    azkaban.name=Test
                    azkaban.label=My Local Azkaban
                    azkaban.color=#FF3601
                    azkaban.default.servlet.path=/index
                    #Default root
                    web.resource.dir=web/
                    default.timezone.id=Asia/Shanghai
                    # Azkaban UserManager class
                    user.manager.class=azkaban.user.XmlUserManager
                    user.manager.xml.file=conf/azkaban-users.xml
                    # Loader for projects
                    executor.global.properties=conf/global.properties
                    azkaban.project.dir=projects
                    # Velocity dev mode
                    velocity.dev.mode=false
                    # Azkaban Jetty server properties.
                    jetty.use.ssl=true
                    jetty.maxThreads=25
                    jetty.port=8081
                    # Where the Azkaban web server is located
                    azkaban.webserver.url=http://master:8081
                    # mail settings
                    mail.sender=
                    mail.host=
                    # User facing web server configurations used to construct the user facing server URLs. They are useful when there is a reverse proxy between Azkaban web servers and users.
                    # enduser -> myazkabanhost:443 -> proxy -> localhost:8081
                    # when this parameters set then these parameters are used to generate email links.
                    # if these parameters are not set then jetty.hostname, and jetty.port(if ssl configured jetty.ssl.port) are used.
                    # azkaban.webserver.external_hostname=myazkabanhost.com
                    # azkaban.webserver.external_ssl_port=443
                    # azkaban.webserver.external_port=8081
                    job.failure.email=
                    job.success.email=
                    lockdown.create.projects=false
                    cache.directory=cache
                    # JMX stats
                    jetty.connector.stats=true
                    executor.connector.stats=true
                    # Azkaban plugin settings
                    azkaban.jobtype.plugin.dir=plugins/jobtypes
                    # Azkaban mysql settings by default. Users should configure their own username and password.
                    database.type=mysql
                    mysql.port=3306
                    mysql.host=192.168.5.111
                    mysql.database=azkaban
                    mysql.user=benhairui
                    mysql.password=Mahairui123**
                    mysql.numconnections=100
                    # Azkaban Executor settings
                    executor.maxThreads=50
                    executor.flow.threads=30
                    executor.port=12321
6. Enter the server/conf directory and modify azkaban.properties:
# Azkaban Personalization Settings
					azkaban.name=Test
					azkaban.label=My Local Azkaban
					azkaban.color=#FF3601
					azkaban.default.servlet.path=/index
					web.resource.dir=web/
					default.timezone.id=Asia/Shanghai
					# Azkaban UserManager class
					user.manager.class=azkaban.user.XmlUserManager
					user.manager.xml.file=conf/azkaban-users.xml
					# Loader for projects
					executor.global.properties=conf/global.properties
					azkaban.project.dir=projects
					# Velocity dev mode
					velocity.dev.mode=false
					# Azkaban Jetty server properties.
					jetty.use.ssl=true
					jetty.maxThreads=25
					jetty.port=8081
					jetty.ssl.port=8443
					jetty.keystore=keystore
					jetty.password=mahairui
					jetty.keypassword=mahairui
					jetty.truststore=keystore
					jetty.trustpassword=mahairui
					# Azkaban Executor settings
					executor.port=12321
					# mail settings
					mail.sender=
					mail.host=
					# User facing web server configurations used to construct the user facing server URLs. They are useful when there is a reverse proxy between Azkaban web servers and users.
					# enduser -> myazkabanhost:443 -> proxy -> localhost:8081
					# when this parameters set then these parameters are used to generate email links.
					# if these parameters are not set then jetty.hostname, and jetty.port(if ssl configured jetty.ssl.port) are used.
					# azkaban.webserver.external_hostname=myazkabanhost.com
					# azkaban.webserver.external_ssl_port=443
					# azkaban.webserver.external_port=8081
					job.failure.email=
					job.success.email=
					lockdown.create.projects=false
					cache.directory=cache
					# JMX stats
					jetty.connector.stats=true
					executor.connector.stats=true
					# Azkaban mysql settings by default. Users should configure their own username and password.
					database.type=mysql
					mysql.port=3306
					mysql.host=192.168.5.111
					mysql.database=azkaban
					mysql.user=benhairui
					mysql.password=Mahairui123**
					mysql.numconnections=100
					#Multiple Executor
					azkaban.use.multiple.executors=true
					#azkaban.executorselector.filters=StaticRemainingFlowSize,MinimumFreeMemory,CpuStatus
					azkaban.executorselector.filters=StaticRemainingFlowSize,CpuStatus
					azkaban.executorselector.comparator.NumberOfAssignedFlowComparator=1
					azkaban.executorselector.comparator.Memory=1
					azkaban.executorselector.comparator.LastDispatched=1
					azkaban.executorselector.comparator.CpuUsage=1
Note: azkaban.executorselector.filters parameter, in which the MinimumFreeMemory filter will check whether the free memory of the executor host will be greater than 6G. If it is less than 6G, the web server will not submit the task to the host for execution, and it can be removed
7. User configuration, modify the azkaban-users.xml file under the web/conf directory. You can add users for it, but you can also add no users.
<azkaban-users>
						<user username="azkaban" password="azkaban" roles="admin" groups="azkaban" />
						<user username="metrics" password="metrics" roles="metrics"/>
						#Add the line below
						<user username="admin" password="admin" roles="admin,metrics" />
						<role name="admin" permissions="ADMIN" />
						<role name="metrics" permissions="METRICS"/>
					</azkaban-users>
8. Start up test
Execute under web
./bin/start-web.sh
Execute under executor
./bin/start-exec.sh
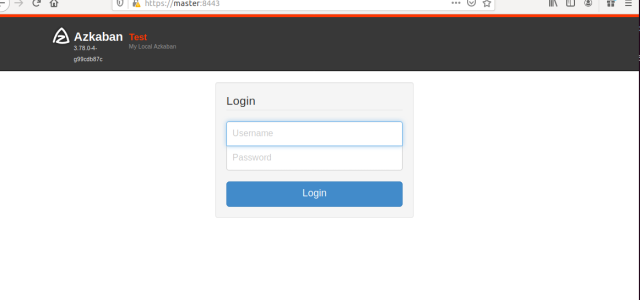
After startup, enter: https: / / server address (this is master):8443 in the browser to access. The following picture:
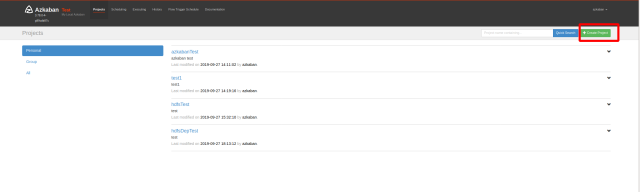
Then enter the user name and password, that is, the user name and password in azkaban-users.xml above, to access After entering, you can upload your own scheduling tasks, as shown in the following figure:
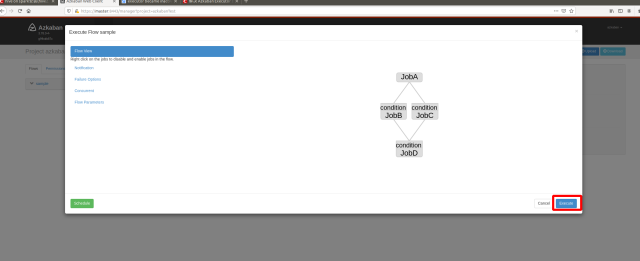
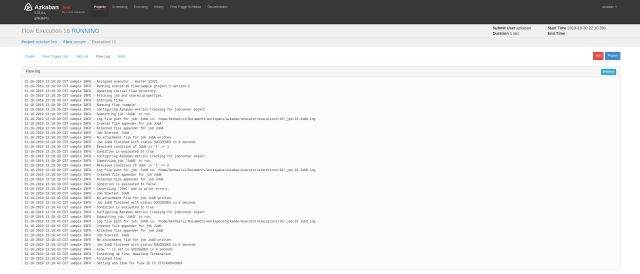
Finally, click "Execute flow" directly to perform your own dependent tasks. At the same time, you can see the relevant DAG chart and the log after the direct completion, as shown in the following figure:
Note: during task scheduling, there may be an error of "executor became inactive before setting up the flow 11". This is an official bug. We need to activate the executor manually and execute the following command at the command line:
curl http://${executorHost}:${executorPort}/executor?action=activate
End
So far, the construction of related components has ended. If you have any questions, you can leave a message directly. Thank you very much for watching!