The beginning of everything
How to become a yard farmer is a problem.
Generally speaking, to become a programmer, the first thing to do is to choose. People's energy is limited. Not many people can make great achievements in multiple directions at the same time. Of course, except the big guy. For us mortals, we always say that if we want to do things well, we have to confirm our direction. This is the choice.
The choice basically determines the future direction. For example, people often say that engaging in c + + will lead to baldness, engaging in java will reduce life, and so on. Few people can choose another path after deciding the direction, which requires people to have enough courage to jump out of their comfort zone and seek the unknown future. It's really difficult for mortals like me.
Therefore, for most people, choice is very important. For those who don't want to step into the sea of java suffering, it's enough to see here.
vue+springboot
Java is a very popular language and one of the most used programming languages in the world. This makes the Java extension library very powerful. Such a huge expansion library makes Java development convenient and greatly reduces the time to realize a function. But at the same time, it also makes the writing of Java programs more repetitive and regular. Using java to implement functions is no longer scratching your head trying to figure out how to implement a function, but instead searching the Internet for errors when you encounter problems.
At the same time, java learning has become more than just learning the Java language itself. As far as the current environment is concerned, it is difficult to find a job if you only know Java but know nothing about other extension libraries. In a sense, java learning has been linked to various extended libraries.
Here, this project will use vue+springboot as the core expansion library.
development tool
idea.
What novices should do before that
1. Install jdk.
Steps: https://www.runoob.com/java/java-environment-setup.html.
2. Install node.
Steps: https://www.runoob.com/nodejs/nodejs-install-setup.html.
3. Install mysql.
Steps: https://www.runoob.com/mysql/mysql-install.html.
4. Install Vue cli.
Steps: https://cli.vuejs.org/zh/guide/installation.html.
Create front end project
Enter cmd. (windows key + r, enter cmd, enter)
Jump to the target location through cmd command, that is, the location where you want the front-end project to be.
Enter Vue create Hello world to execute.
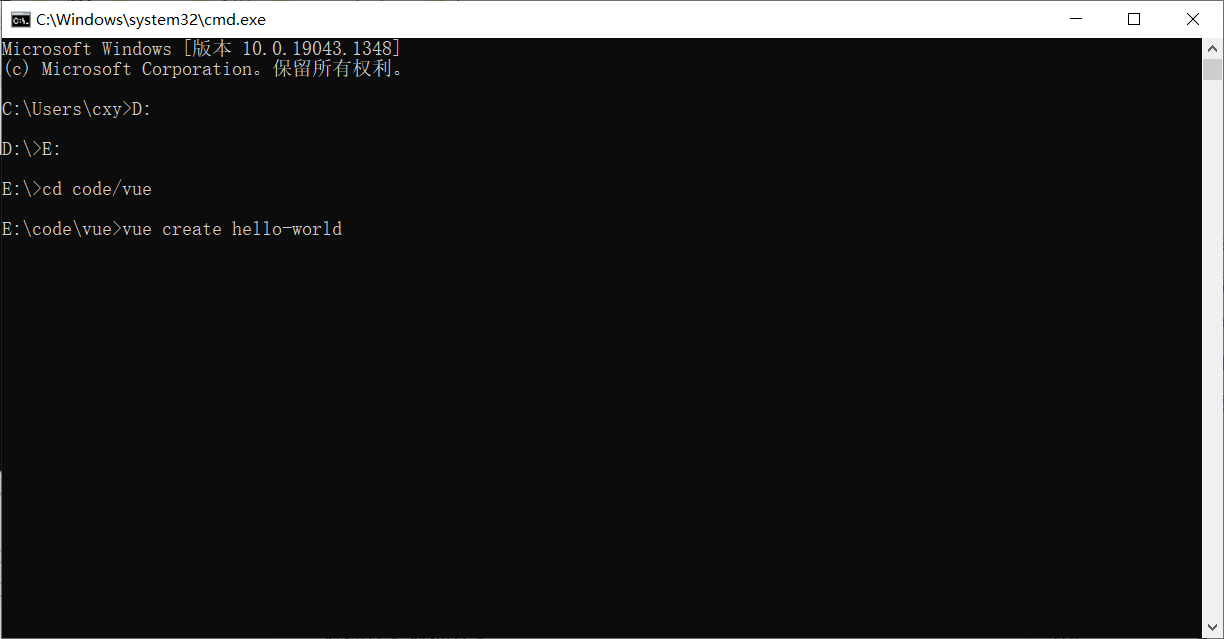
Select Default carriage return when encountered. When the project is created, idea opens the project.
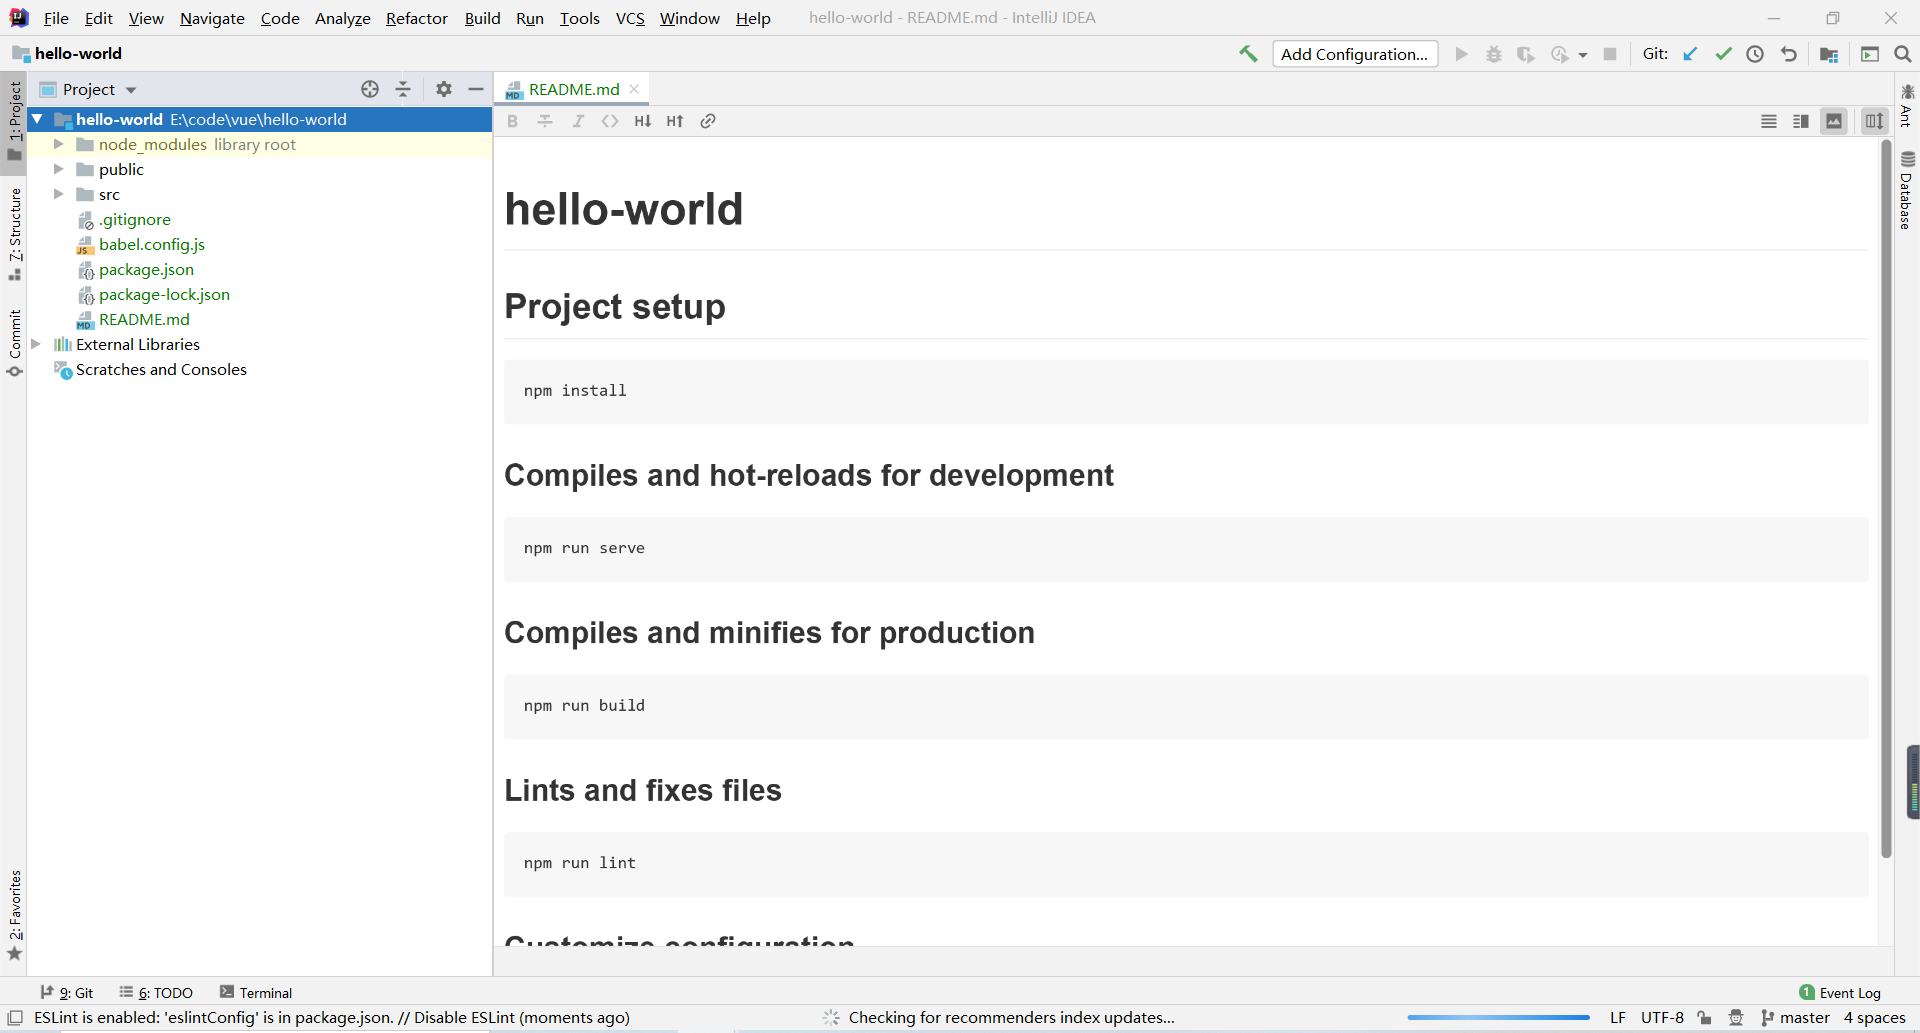
Click terminal below, enter npm run serve, and execute.
Open a browser and enter localhost:8080 at the address.
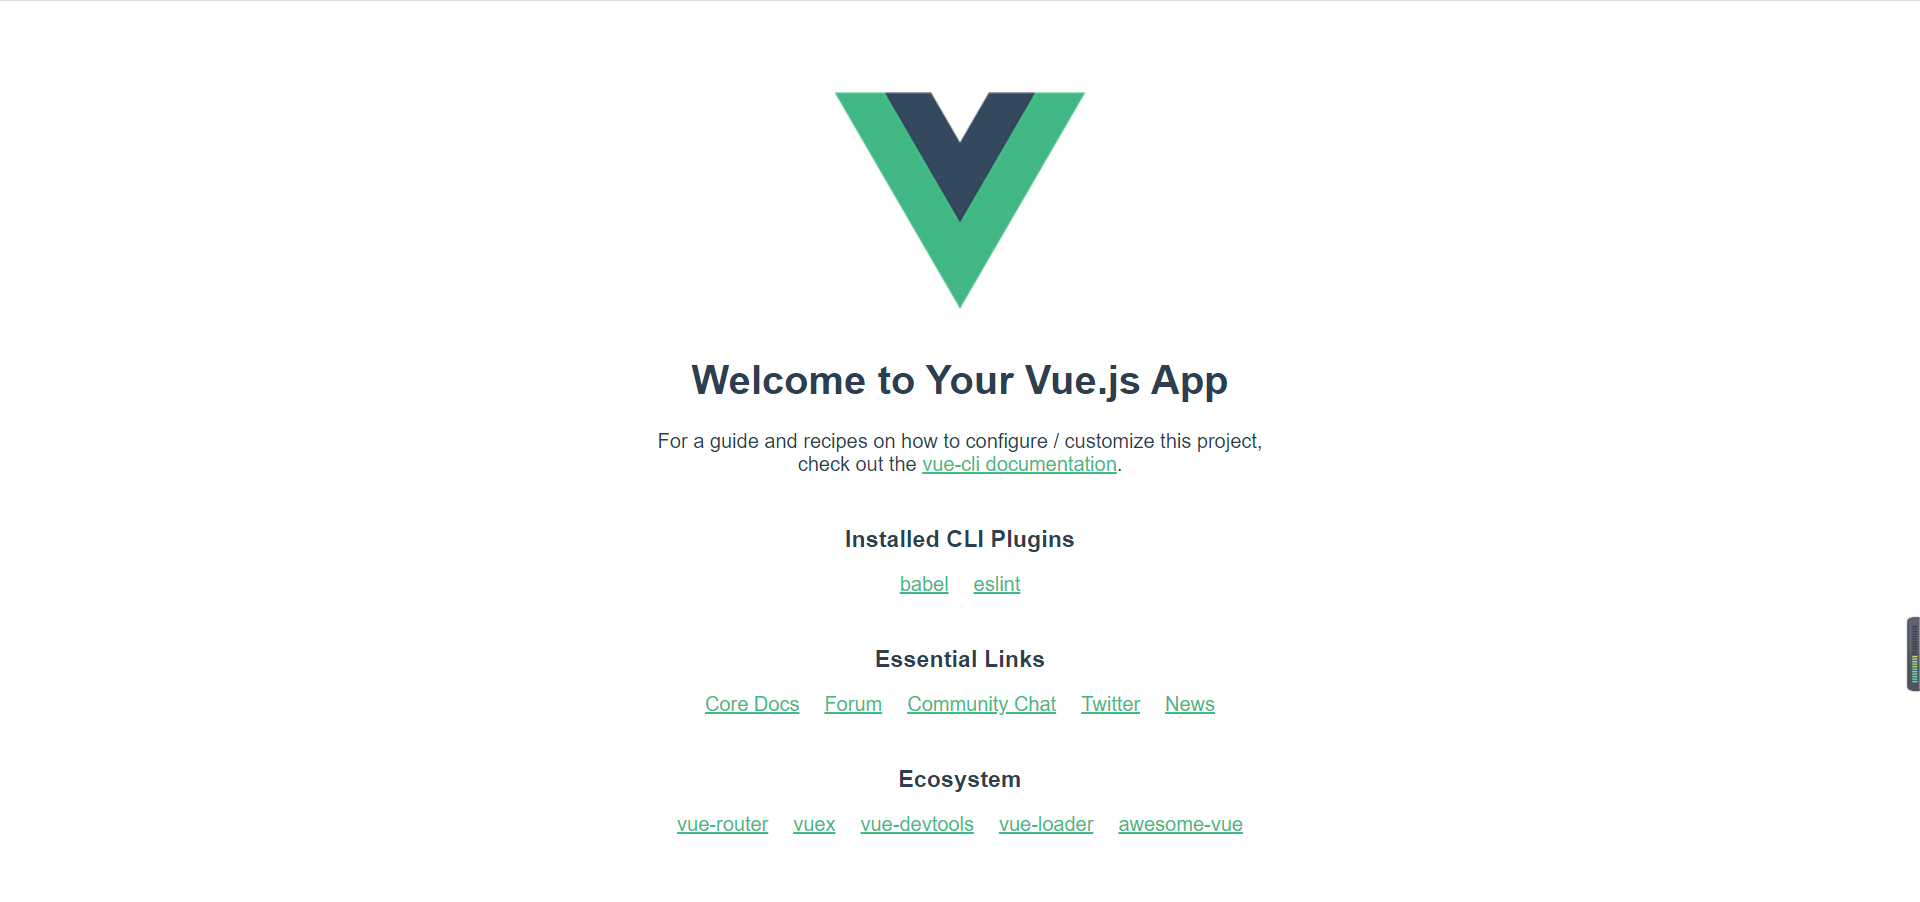
You can see that such a style appears on the page. It's worth celebrating that half of all the work has been completed (but it's not).
Create backend project
idea click file new project to create a new project
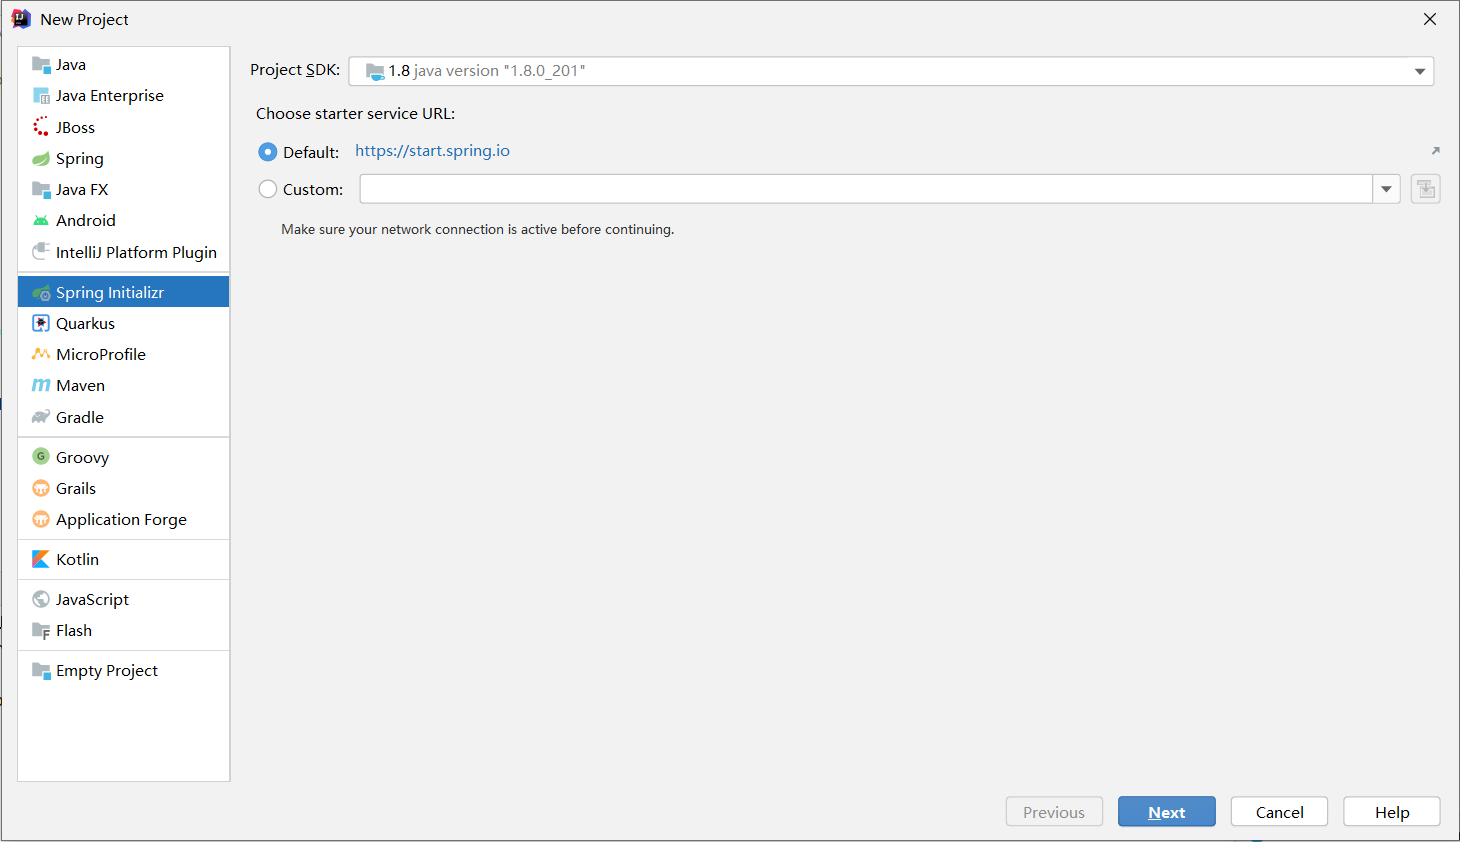
next
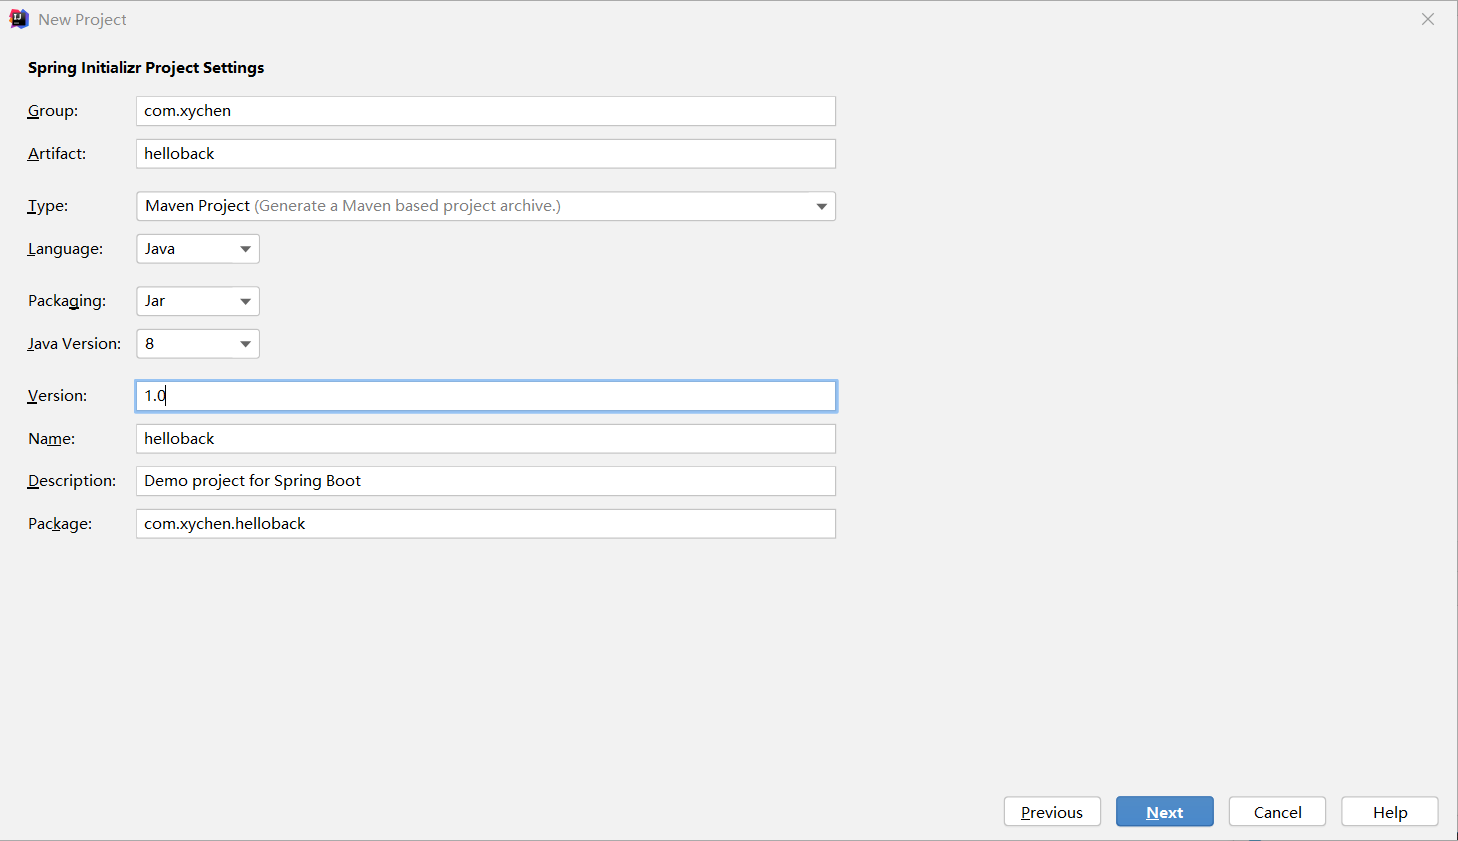
Change the package name, project name, etc. according to your own meaning, and then continue to next
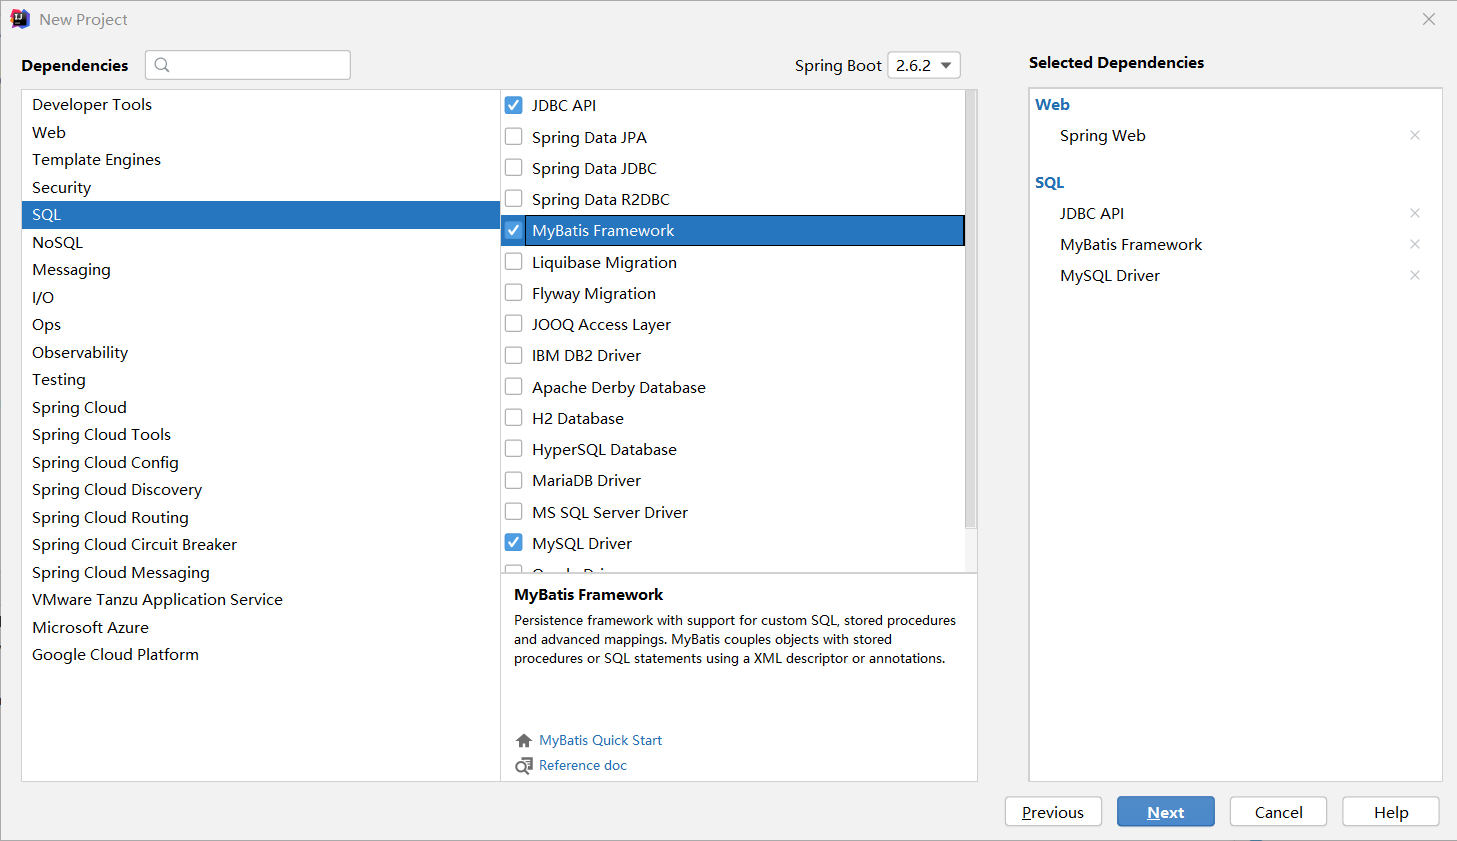
springboot integrates a lot of quickStart, which eliminates a lot of dependency. It can be added here when creating a project.
Continue to next.
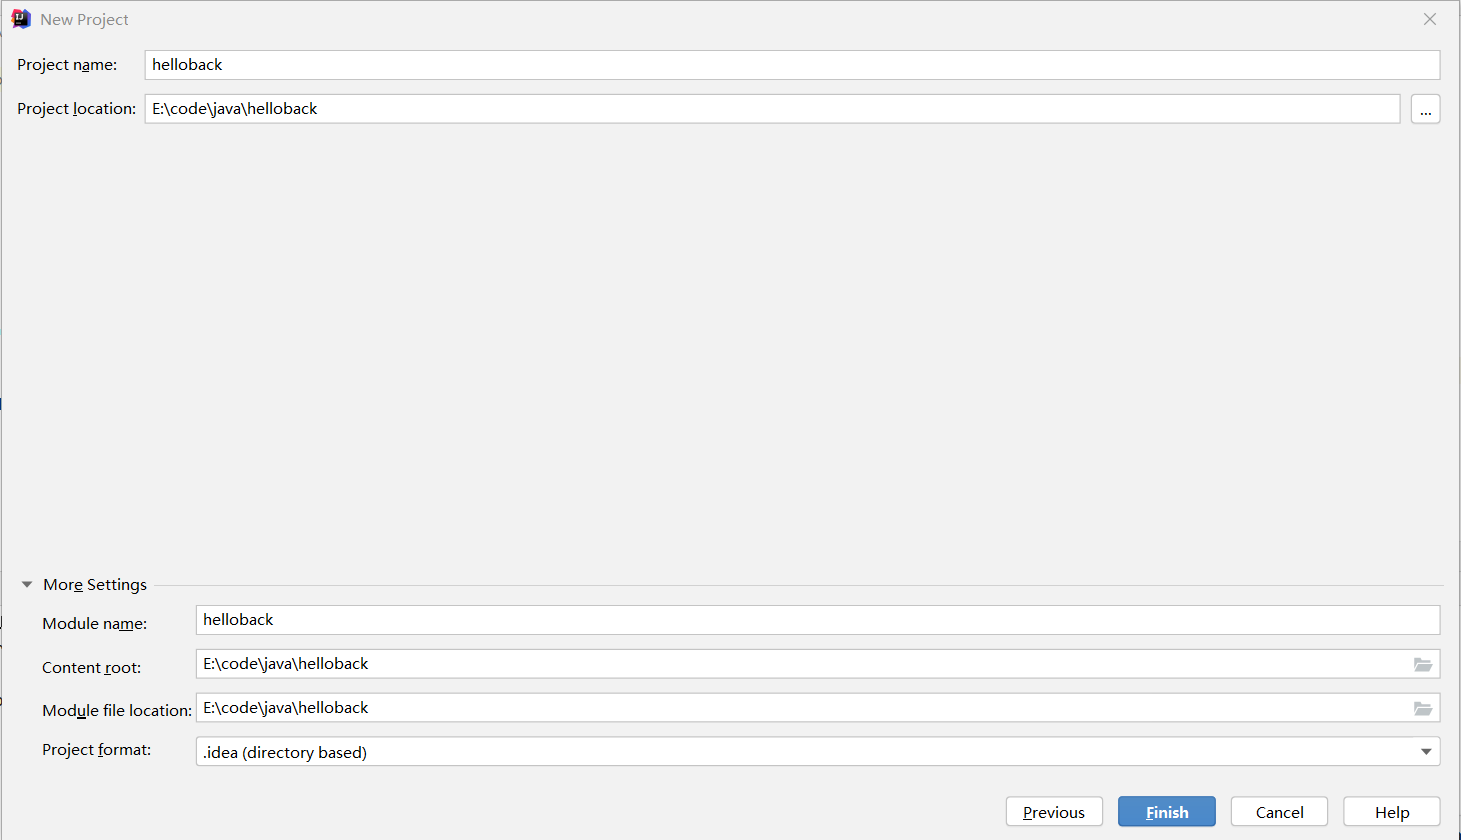
Select the path. finish!
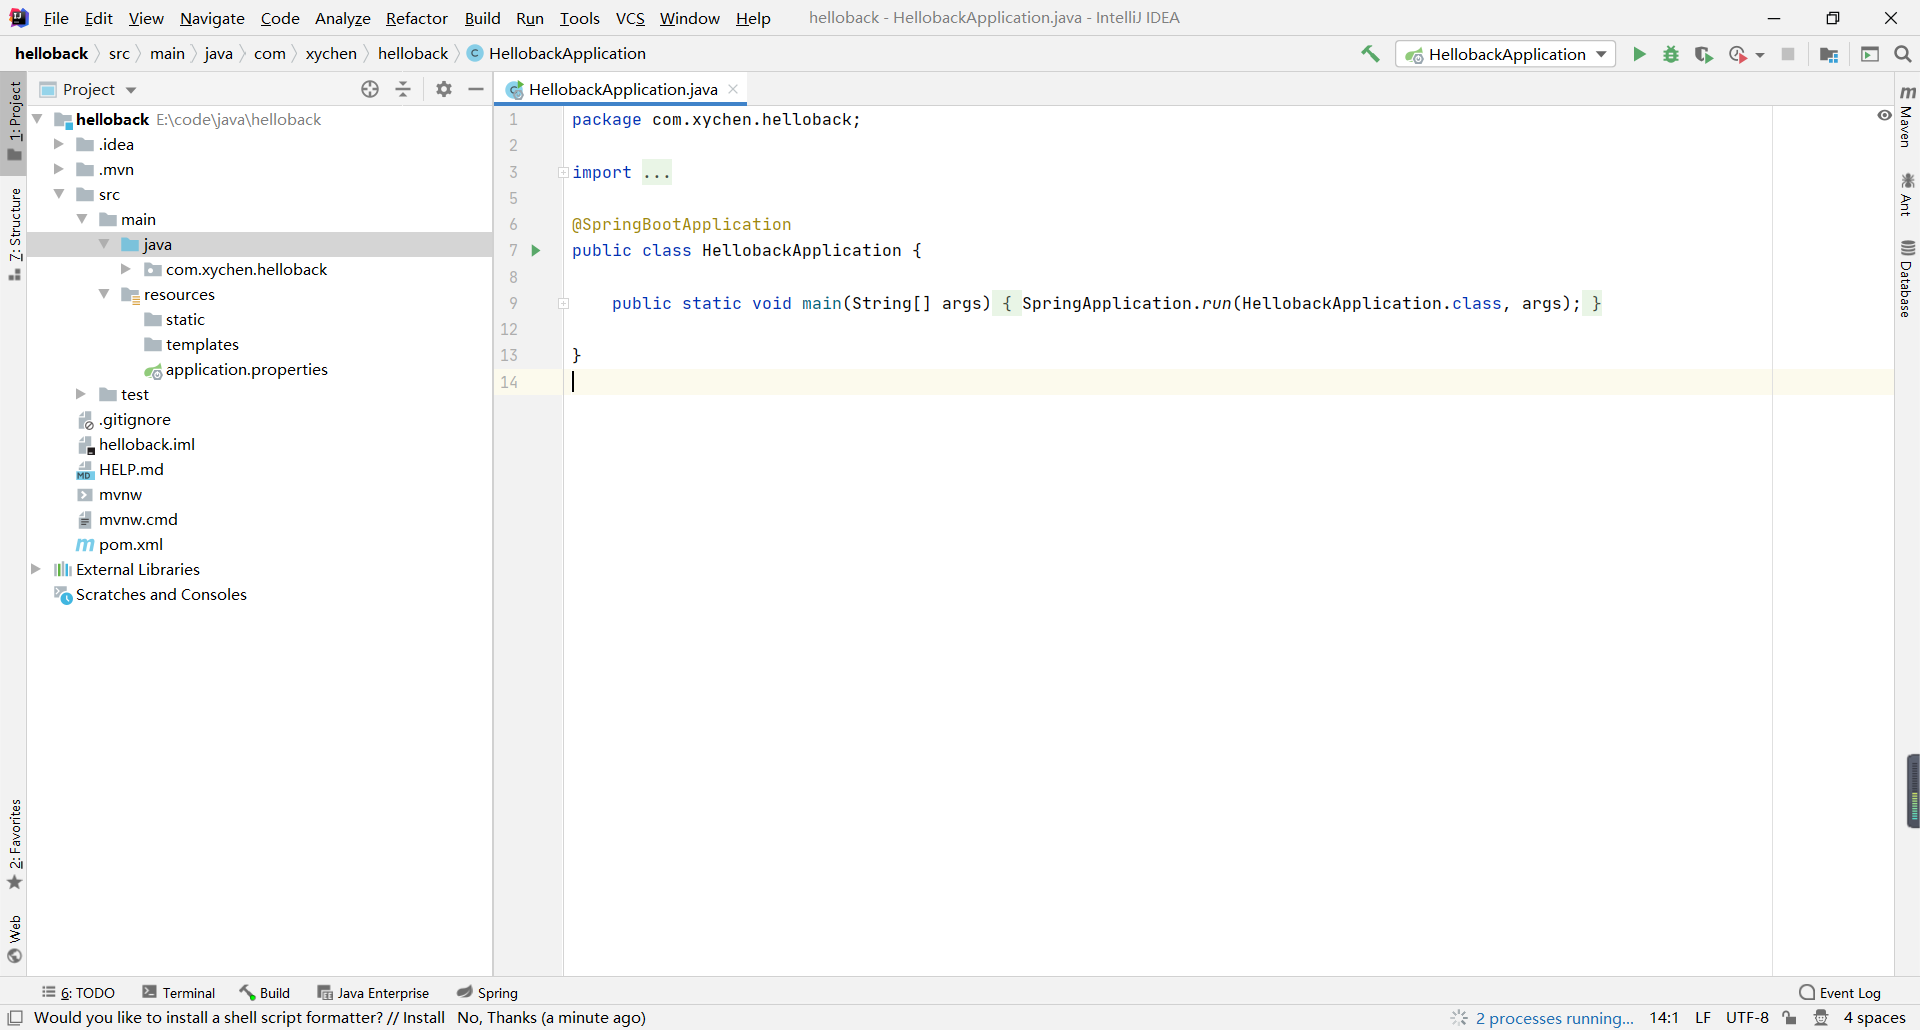
Backend project creation completed. Congratulations, vue+springboot has been created! (but not)
Configure maven
We still have some work to do before we really start writing code.
The first is to configure maven.
idea click file settings
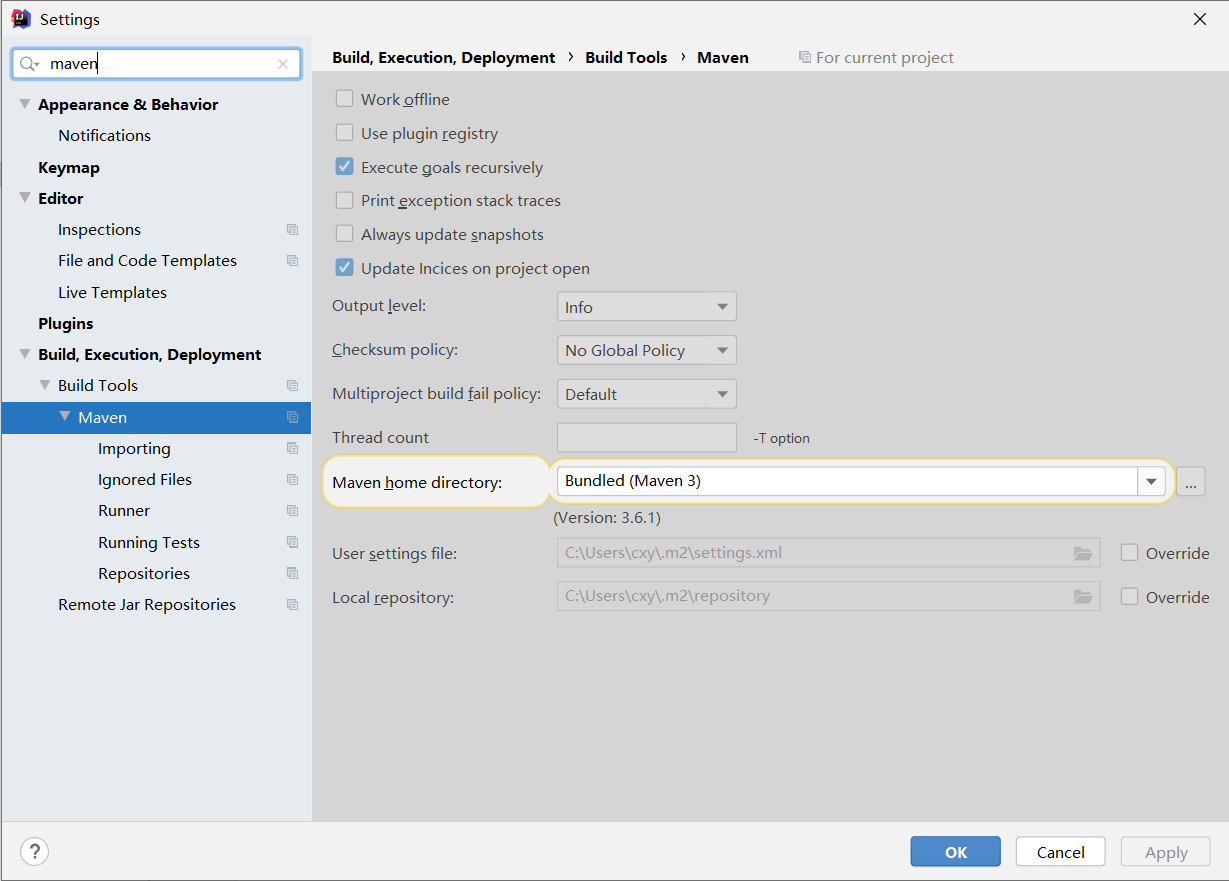
Then enter maven in the search box to find the maven configuration page.
Although idea integrates maven itself, it is not suitable for our needs in many cases. For example, after entering the company, different project groups have different maven settings, and even the connection addresses are different.
Or the maven version used by the company is not like 3.6.1.
In a word, let's make a maven for ourselves.
First, this is the address: maven
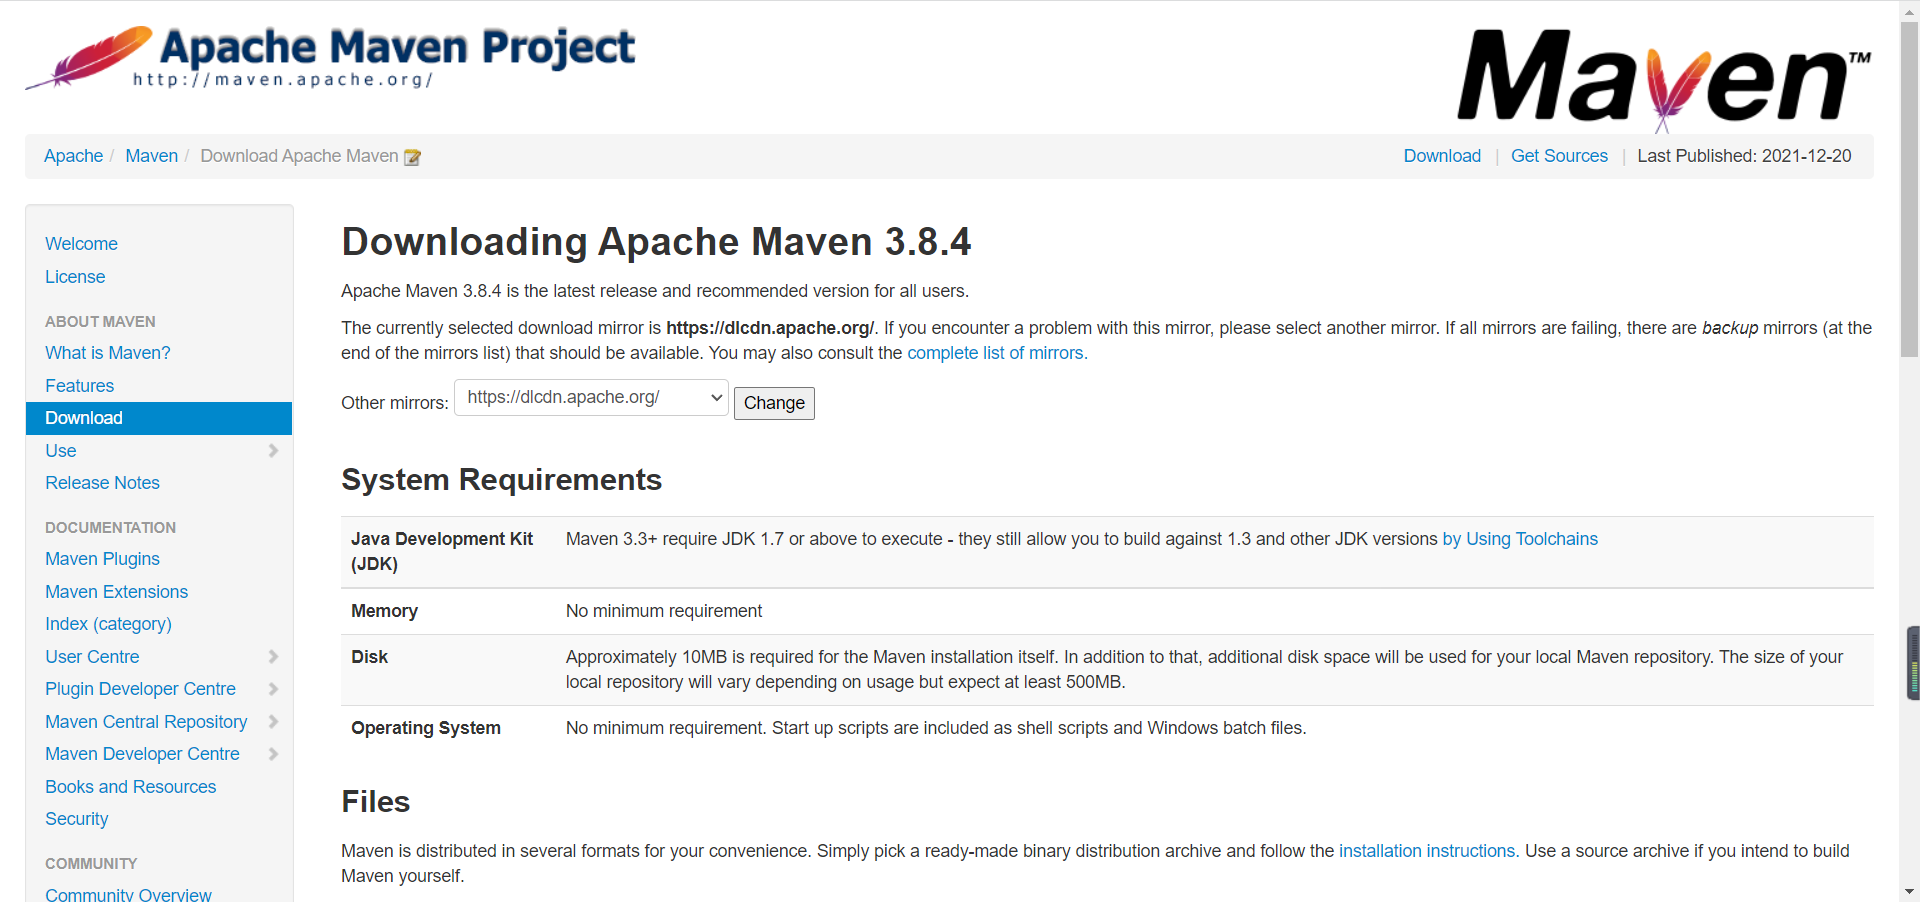
After entering the website, drop down to the bottom, find Maven Releases History, click archives on the right to download the historical version. Of course, if you want to use the latest version, you can also click to download it directly.
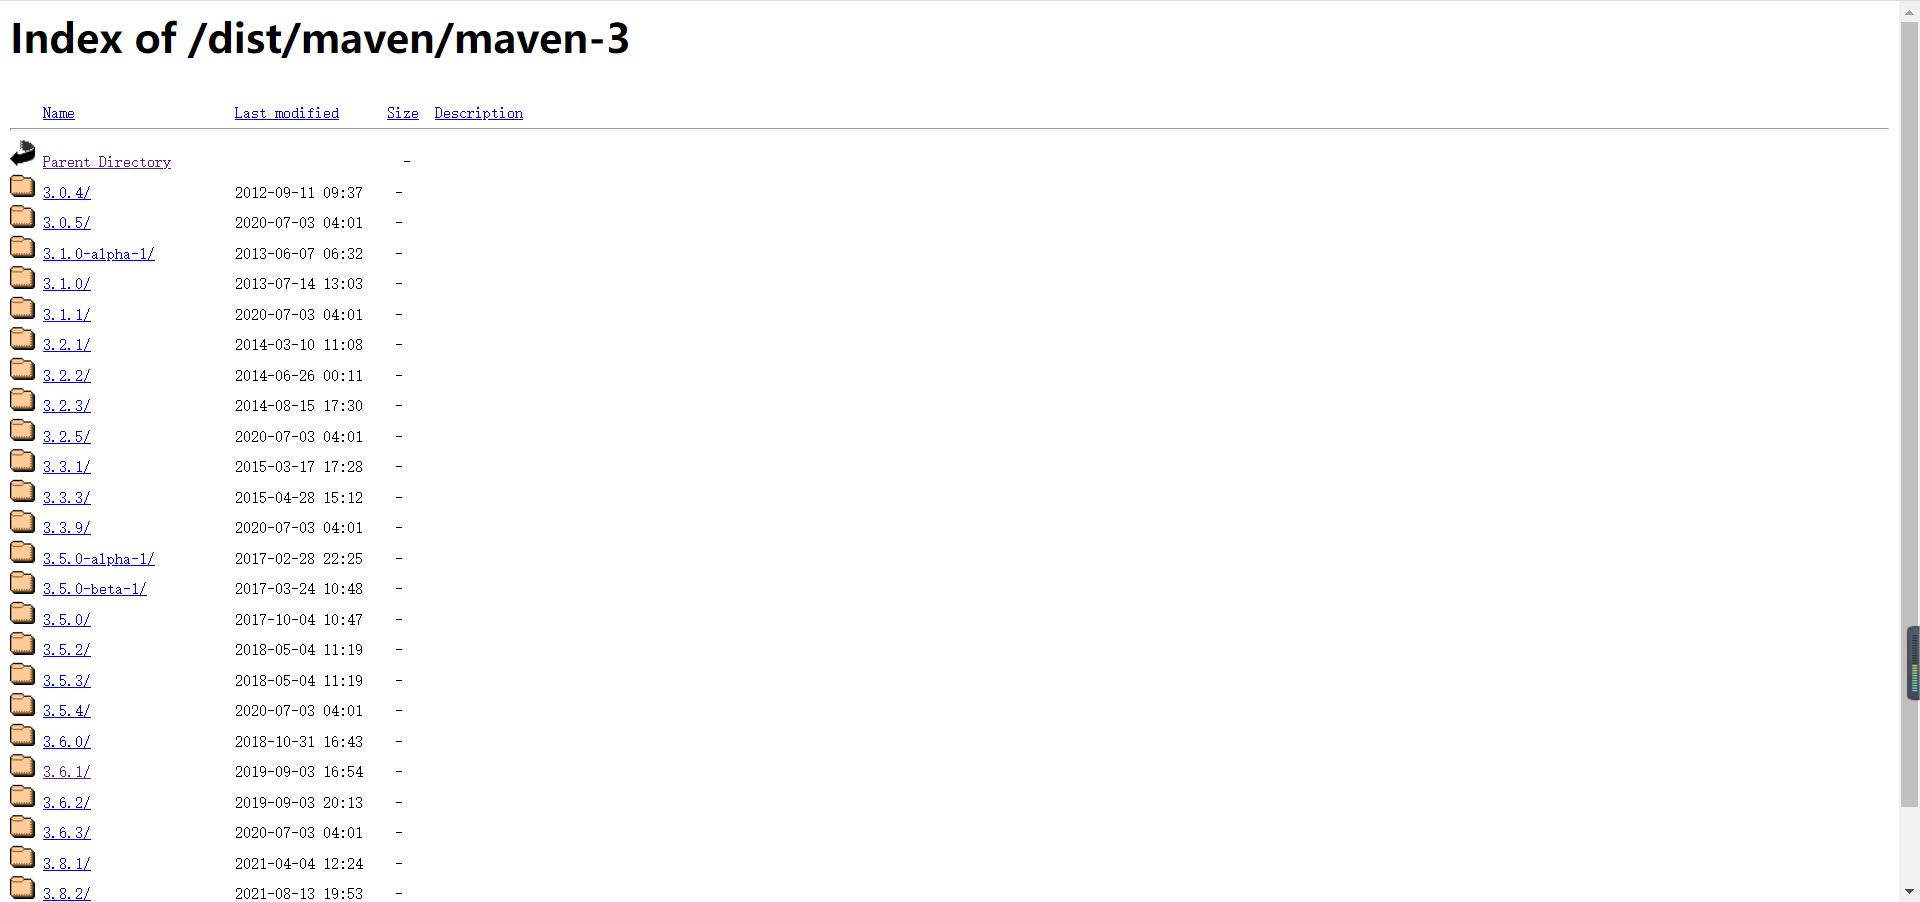
Click 3.6.1-binaries / - apache-maven-3.6.1-bin Zip Download
After downloading, unzip the compressed file to a suitable location.
Then, you can enter the extracted maven folder, open the conf folder, and then open the setting file. (to mention, setting file, an xml file, can be opened with notepad + +, which is a very convenient small software.)
stay
<mirros></mirros>
Middle plus
<mirror>
    <id>nexus-aliyun</id>
     <mirrorOf>central</mirrorOf>
    <name>Nexus aliyun</name>
    <url>http://maven.aliyun.com/nexus/content/groups/public</url>
    </mirror>
What's this for? You can tell from the name. This is alicloud. Many websites that rely on connecting to foreign countries will download slowly, and connecting to domestic alicloud will be much faster.
In addition, you can ctrl+f to search the localRepository.
<localRepository>e:/project/maven/repository</localRepository>
Modify it, or add a new one if it has been annotated.
This address can be modified according to your own needs.
So what's this for?
This is maven's warehouse. Of course, the downloaded dependencies will not be placed on the desktop. This address is the location where the dependencies are stored.
The maven configuration has been changed almost and can be hooked up with our project.
Back to the idea project.
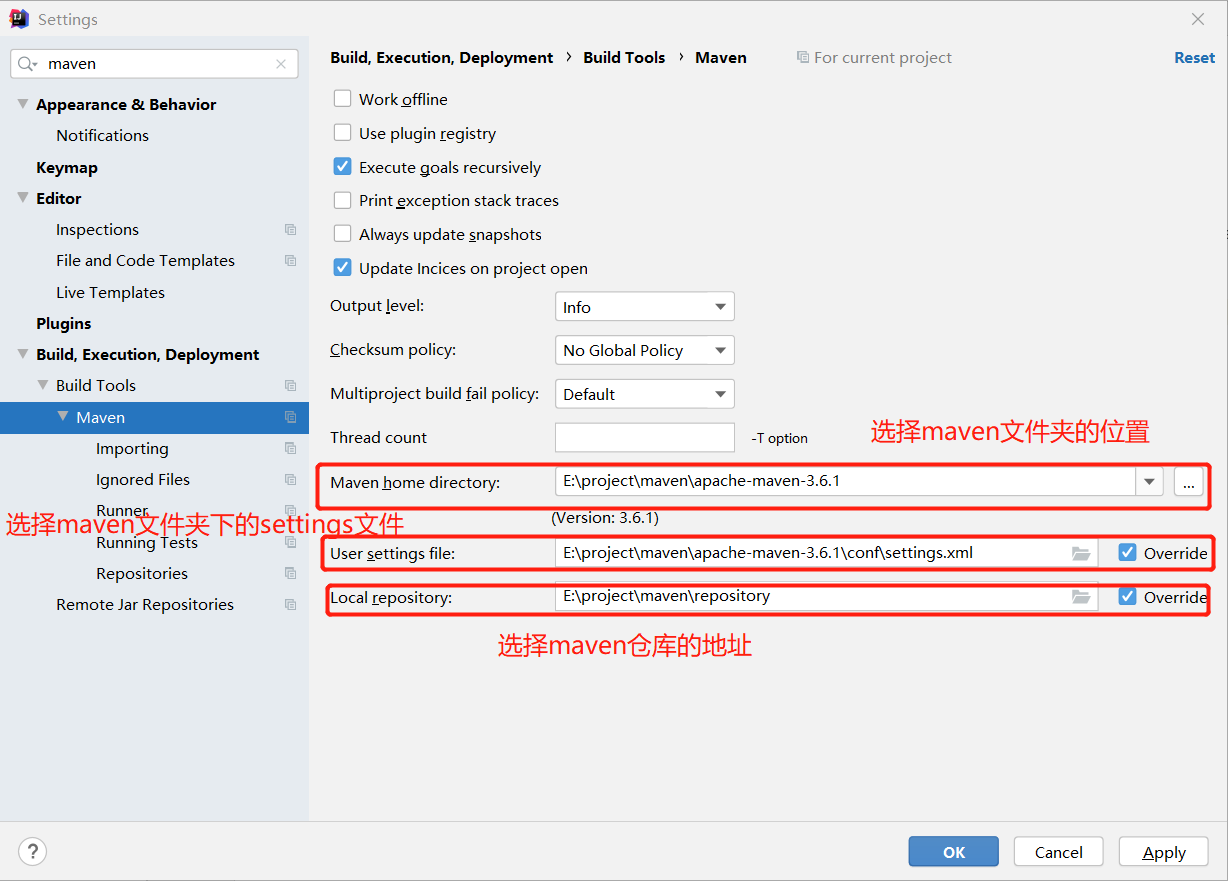
Configure maven. ok~!
database
It seems that our preparations are perfect. (but not)
As a complete project, we need persistent data. We need a database to store the data of our project!
So let me do it.
Select mysql as our database.
As a qualified yard farmer, we must learn to be lazy. Code farmers who are not lazy are unqualified.
At the first moment when we encounter a problem, what we should think in our mind is whether there is any way to be lazy.
So of course, if I'm allowed to create a table or insert into something, I'm naturally unwilling. There's a way to be lazy. Why don't I use it? Of course, some people think that writing sql is conducive to stabilizing knowledge. Rest assured, for the students who really enter the work, crud can often write that you want to vomit. Now let's be lazy.
nvicat is undoubtedly a good software. Navicat Premium is also a good software. We often only need a simple Baidu to find learning resources. Well, the Internet is really a good thing.
In short, open our nvicat!
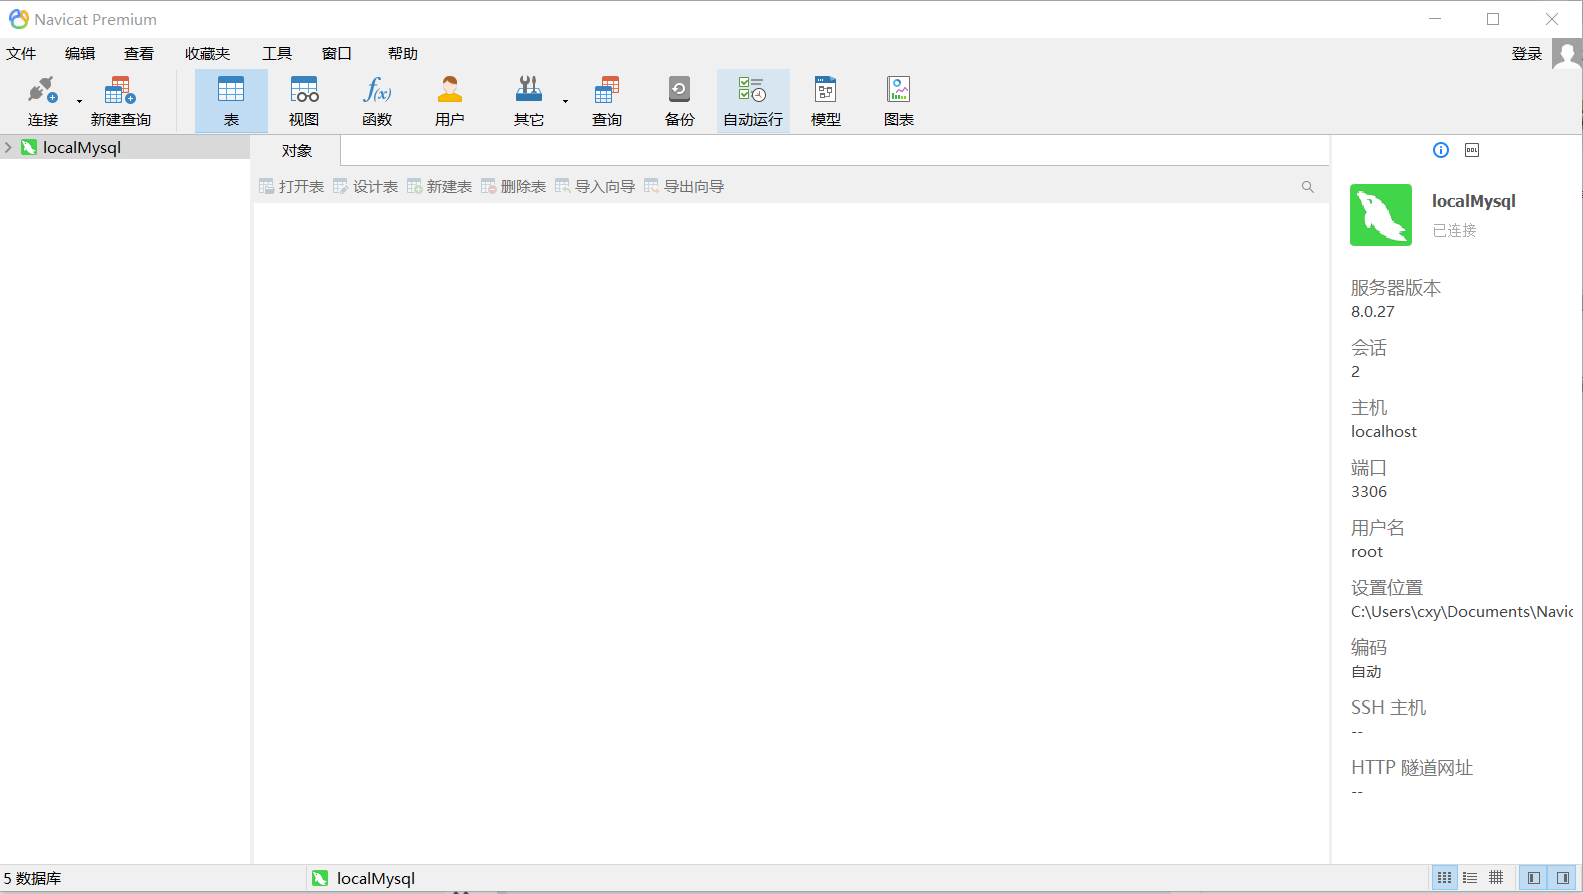
Click: connect mysql
After connecting, you can see the connection in the left field.
Click in and right-click to create a new database.
Then create a new table immediately.
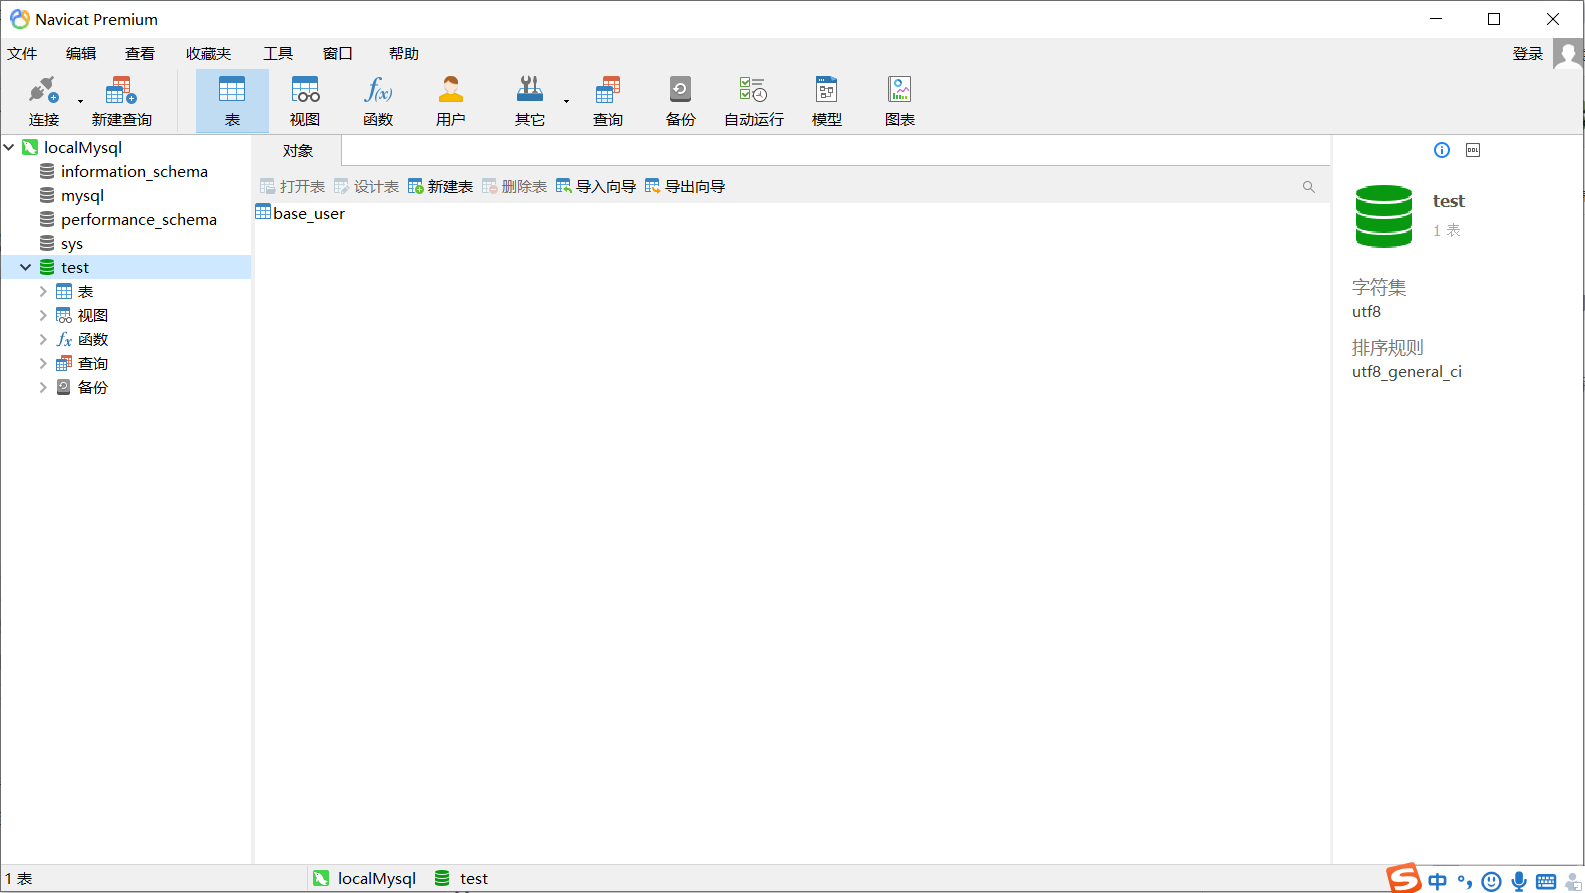
Our database is so simple.
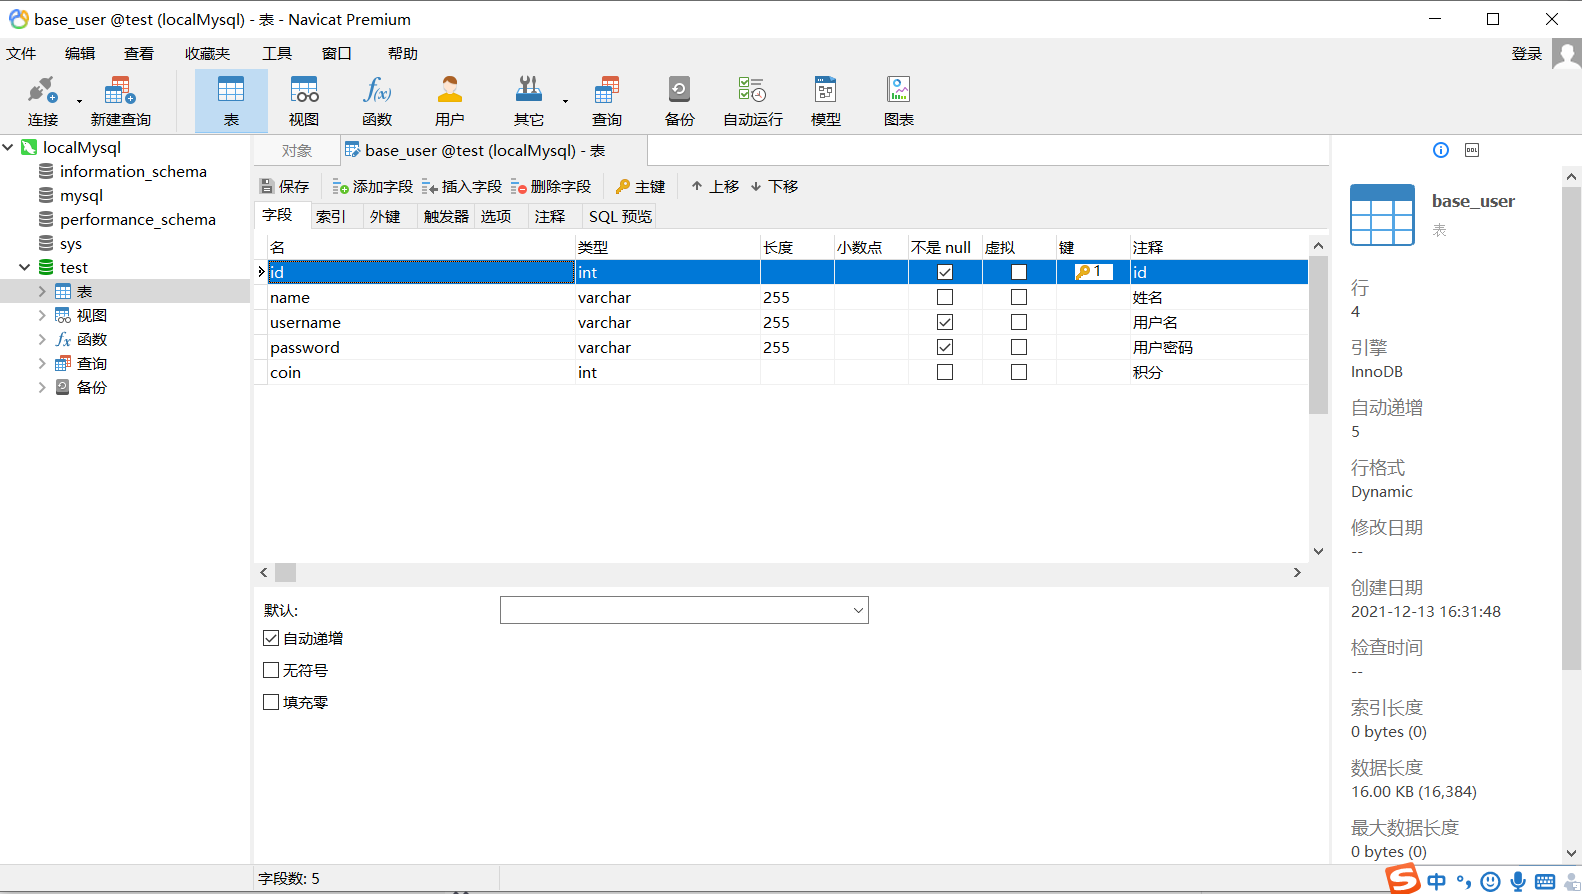
id can be set to automatically increment, which can save some effort.
Backend configuration
By now, some people may ask: coach, can we start writing code?
There's no need to be busy with things like code.
In fact, in a sense, code is the simplest content in java. After all, a lot of repeated operations will make your code more and more proficient. After writing for a year and a half, it's no problem to write code with your eyes closed.
However, project construction, configuration modification and so on. Because the frequency used in actual work is very low, it will be more prone to errors.
What's more, after you actually enter the work, you don't have many opportunities to build the project. It's not a bad thing how familiar we are when we do it ourselves.
First of all, the back-end project we built should be as follows:
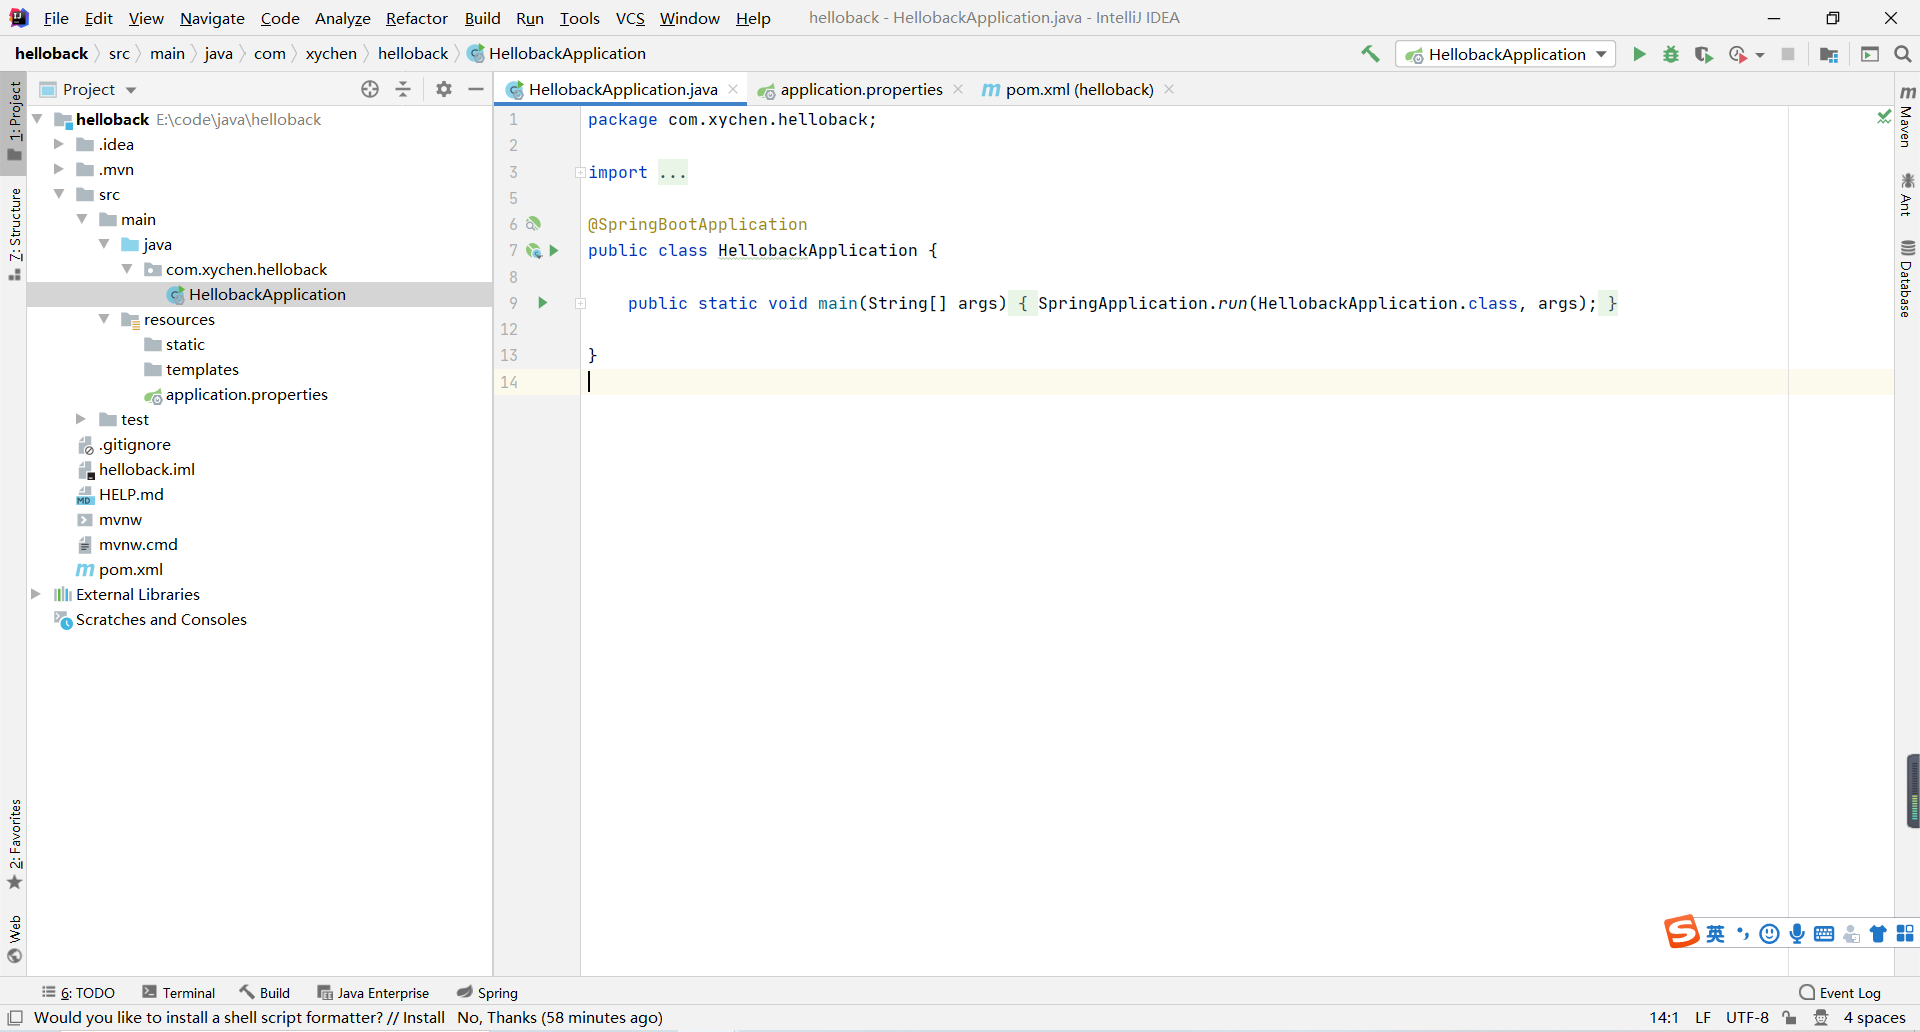
Find application properties
Then change it to yml. There are some differences between the YML file format and the properties file format. But it does not affect the configuration. It's just that the YML file format feels better.
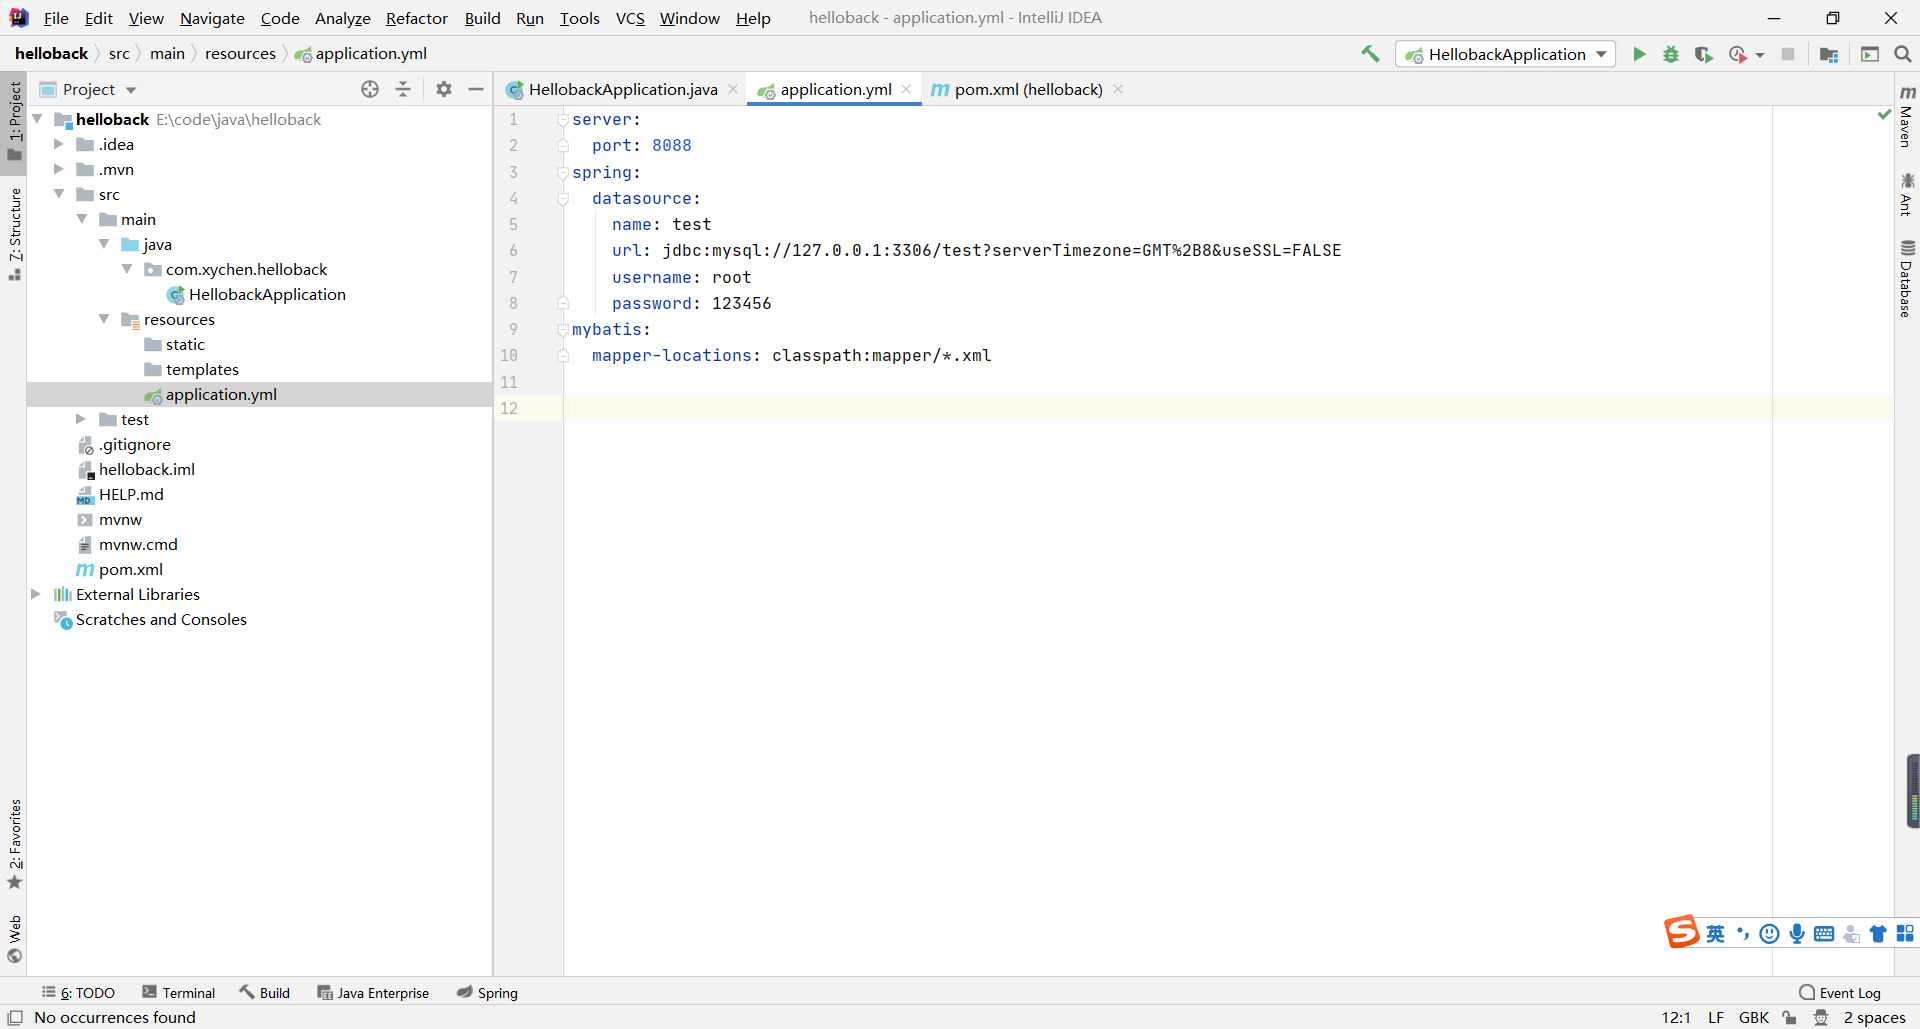
Add configuration.
server:
  port: 8088
spring:
  datasource:
    name: test
    url: jdbc:mysql://127.0.0.1:3306/test?serverTimezone=GMT%2B8&useSSL=FALSE
    username: root
    password: 123456
mybatis:
  mapper-locations: classpath:mapper/*.xml
server is a service and port is a port. This configuration means that the port of our project service is 8088. Remember to send a message to the port if you want to access.
Spring is a spring framework, and datasource represents the data source, that is, the database. name needs no explanation. url is the path to access the database.
Where jdbc:mysql://127.0.0.1:3306 Is the access address, / test is the name of the database to be accessed. The database we just created.? The content after is the configuration of this access.
mybatis configuration, and mapper locations configuration is the location of mapper.
classpath is equivalent to application The path of YML itself, mapper / * xml represents the file with xml as the file name suffix in the mapper folder of the same level directory of the configuration file.
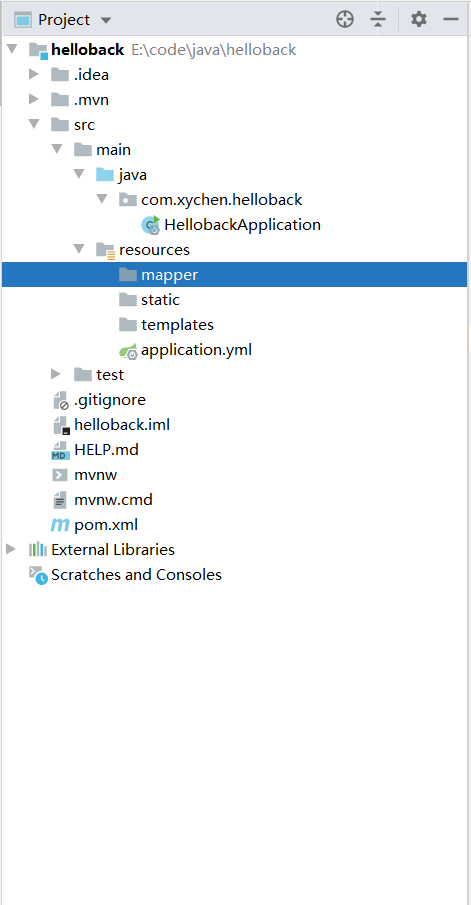
Therefore, our mapper file should be placed in this location and directly create a mapper folder.
Front end coding
Next, we will add 'dependence' to the front end!
As a programmer, I often think about whether others have a solution to the problem at the first moment. Then you don't have to repeat it complicated.
Of course, as a coder, we certainly won't spend time and effort writing html and css such as button and table.
Why write it yourself if you can use what you already have?
So let's introduce element UI, er, or Ant Design Vue.
It has to be said that as two front-end frameworks that are easy to use, both are good choices. It seems that the popularity of element UI is higher in China. But personally, ant design Vue seems a little easy to use. For example, on the form component, ant design has a label col, and wrapper col can be used to adjust the display scale of form item.
However, ant design Vue only supports vue3 0 Now, there may be more cases of using 2.0.
So let's use element UI first.
Install the element UI.
https://element.eleme.cn/#/zh-CN/component/installation
Execute NPM I element UI - s in terminal
Then in main JS plus
import ElementUI from 'element-ui';
import 'element-ui/lib/theme-chalk/index.css';

Vue.use(ElementUI);
It's that simple. The element UI has been installed.
Next, we continue to add 'dependence'.
Axios.
Axios is a promise based HTTP library. Its function is very simple, that is, to communicate with the back end.
After all, our front-end project and back-end project are two projects, and there is no direct connection between them. If you want to connect the two projects, you naturally need a method of communication. The http method is the most suitable method for our web development.
axios integrates our http into a highly available component. Using axios can completely save a lot of http operations.
Execute npm install axios in terminal.
In main JS add the following.
import Axios from "axios";

Vue.prototype.$axios = Axios
Axios.defaults.baseURL = '/api'
There is a problem in the use of Axios, cross domain.
What is cross domain?
When a browser requests the resources of another domain name from the web page of one domain name, the domain name, port and protocol are all cross domain.
It is obviously impossible for our front-end projects and back-end projects to register on the same port. Therefore, cross domain exists naturally.
What happens across domains?
1. Unable to read cookies, LocalStorage and IndexedDB of non homologous web pages
2. The DOM of a non homologous web page cannot be contacted
3. Unable to send AJAX request to non origin address (it can be sent, but the browser will refuse to accept the response)
Therefore, our axios post request or get request will be rejected.
So, how to solve the cross domain problem?
In fact, there are many methods, such as modifying the header to allow access from all sources, allowing post and get access, or modifying the address of the request.
Like what we use now.
Axios.defaults.baseURL = '/api'
Add baseURL on axios request: '/ api'.
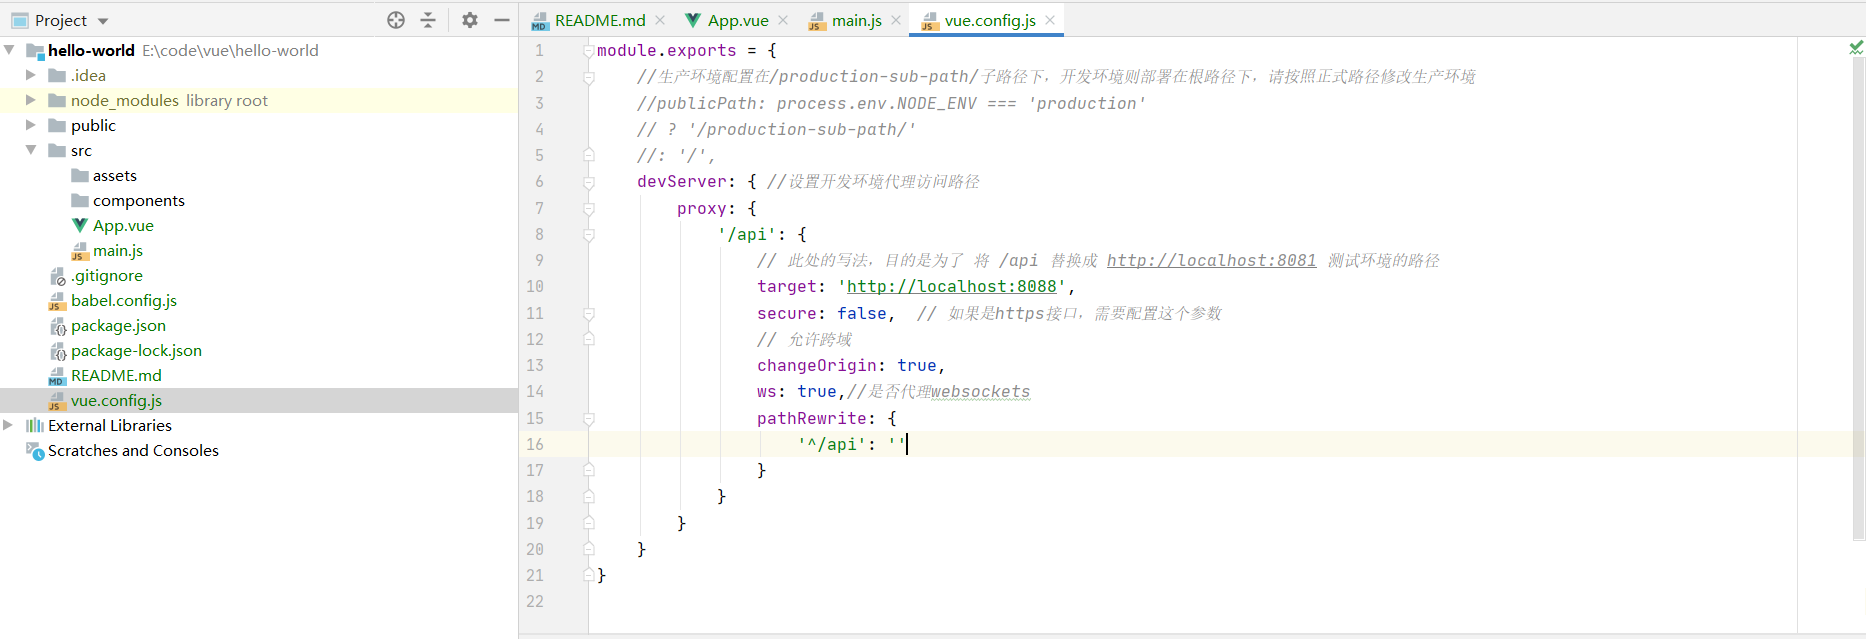
Then add a configuration file in the front-end root directory: Vue config. js.
module.exports = {
    devServer: {
        proxy: {
            '/api': {
                // The purpose of writing here is to replace / api with http://localhost:8088
                target: 'http://localhost:8088',
                secure: false,  // If it is an https interface, this parameter needs to be configured
                // Allow cross domain
                changeOrigin: true,
                ws: true,//Proxy websockets
                pathRewrite: {
                    '^/api': ''
                }
            }
        }
    }
}
In this way, a virtual server will be created locally, and then the requested data will be sent and received at the same time. In this way, the data interaction between the server and the server will not have cross domain problems.
The configuration of "dependency" has basically come to an end, and then there is happy code time.
First, delete the original vue code.
Add data and methods.
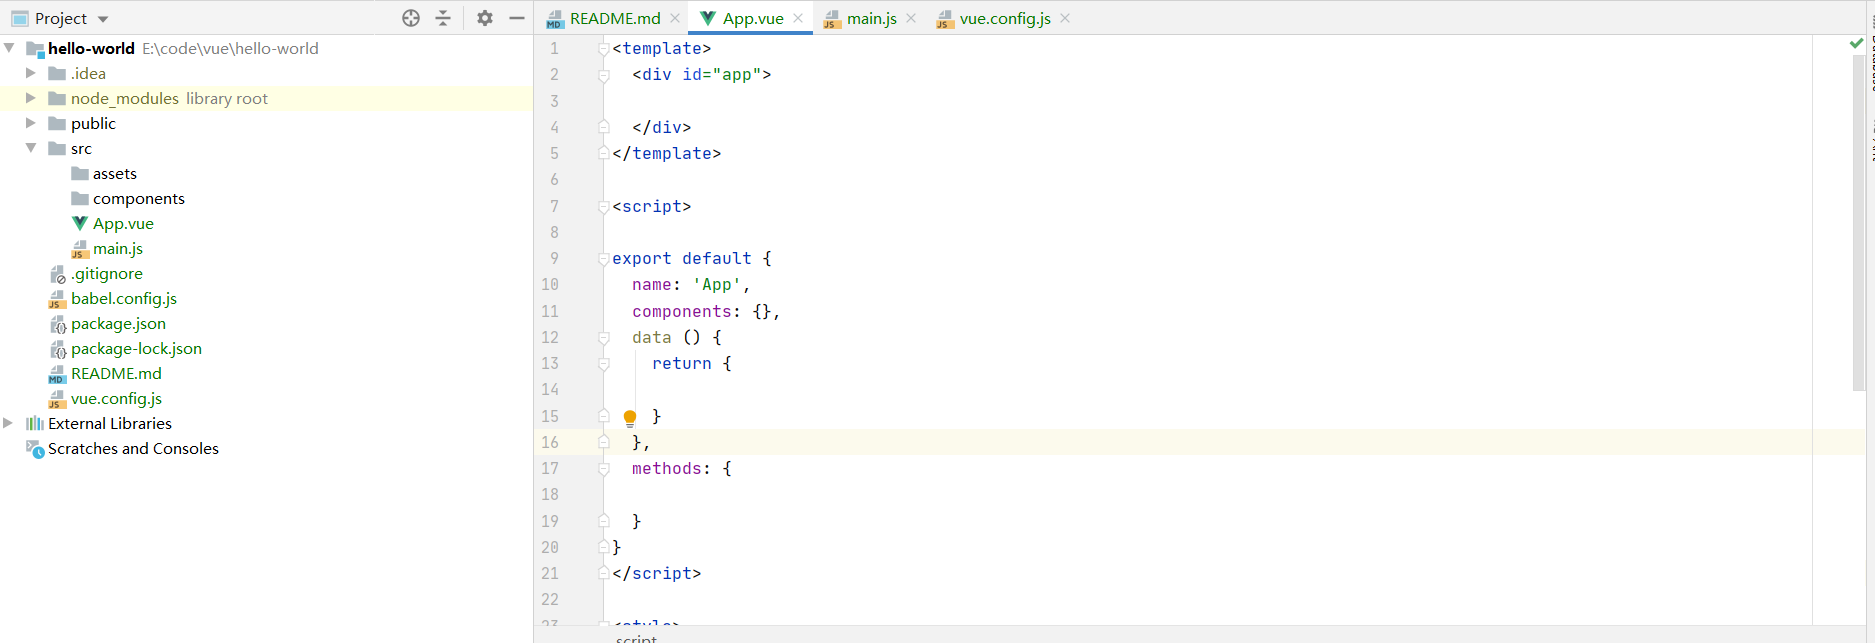
data, which is described in the api document of vue as follows:
The data object of the Vue instance. Vue will recursively convert the property of data into getter/setter, so that the property of data can respond to data changes. The object must be a pure object (containing zero or more key/value pairs): for the native object created by the browser API, the property on the prototype will be ignored. Generally speaking, data should only be data - it is not recommended to observe objects with state behavior.
Once observed, you cannot add a responsive property to the root data object. Therefore, it is recommended to declare all root level responsive properties before creating an instance.
After the instance is created, you can vm.$data Access the original data object. Vue Instances are also proxied data All on object property,So visit vm.a Equivalent to access vm.$data.a.
With_ Properties starting with or $will not be proxied by Vue instances because they may conflict with Vue's built-in properties and API methods. You can use, for example, VM$ data._ property to access these properties.
When a component is defined, data must be declared as a function that returns an initial data object, because the component may be used to create multiple instances. If data is still a pure object, all instances will share and reference the same data object! By providing the data function, each time a new instance is created, we can call the data function to return a new copy of the initial data.
If necessary, you can use VM$ Data is passed into JSON Parse (JSON. Stringify (...)) gets a deep copy of the original data object.
The above may seem complicated, but in short, it is better to put some data in data. The data under data can be called directly by vue instances because it recursively generates getter s and setter s for these data objects.
As for components, they can be regarded as interfaces in java or multiple inheritance in c + +. The data in the parent class is equivalent to the data declared in the component. However, this data is static data, and the same data will be called in multiple inheritance classes. To deal with this problem, we need to set the data object in data as a function. Just like the data(){return {}} we use. In this way, each instance of the calling component will call the function to generate a new object, and the static data will become non-static.
If you are a student with poor java foundation, you don't need to care too much about these problems. You can have time to study them slowly later. (after all, they are basically the same in practical work.)
Go on, next are methods.
Methods is where ordinary functions are stored. The methods declared in methods can be accessed directly through vue instances.
In other words, if a component is registered, it is equivalent to declaring a class. You can directly call the function in the component or the function in the class through the instance of the component or the instance of the class.
Does it feel like something similar? In fact, many languages basically have the same design ideas. As long as you learn a programming language, you will get twice the result with half the effort.
Then add some simple front-end functions with element UI.
The first is a form.
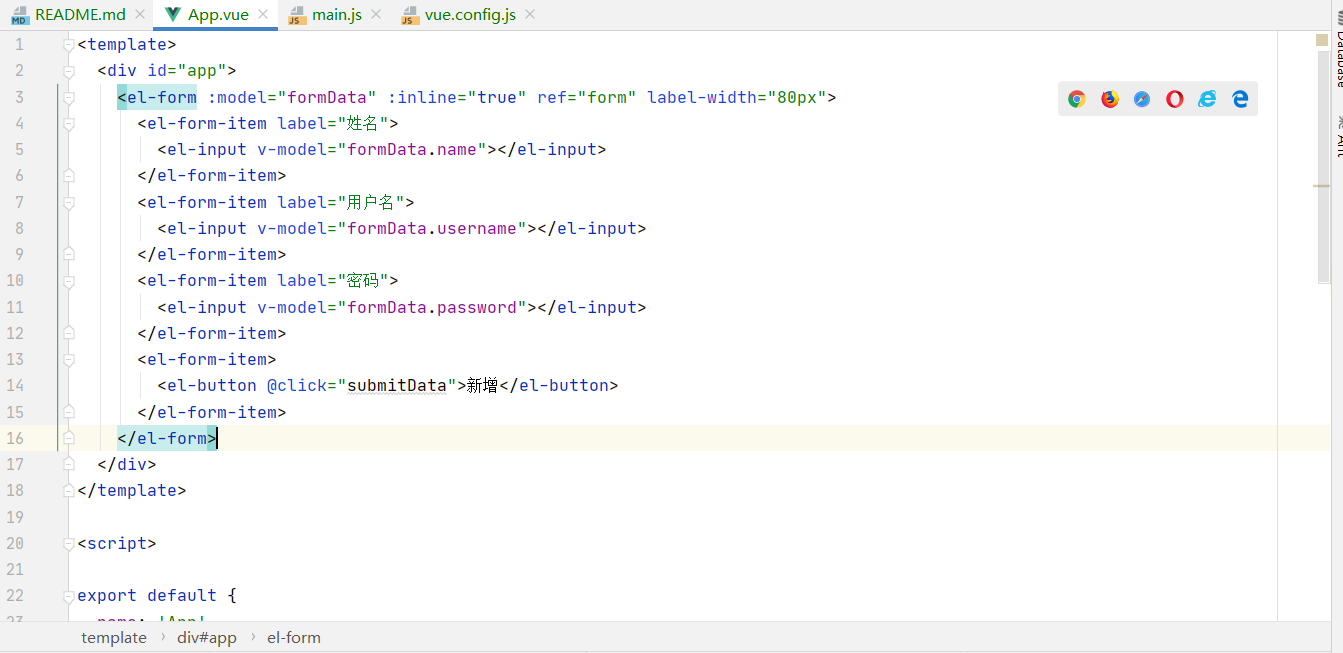
Form is an important component that is often used, and many functions will use form. It is mainly used to submit data. Of course, this is all in terms of demand. The specific use needs to be determined according to the actual situation.
In script, the corresponding data and method should also be added accordingly.
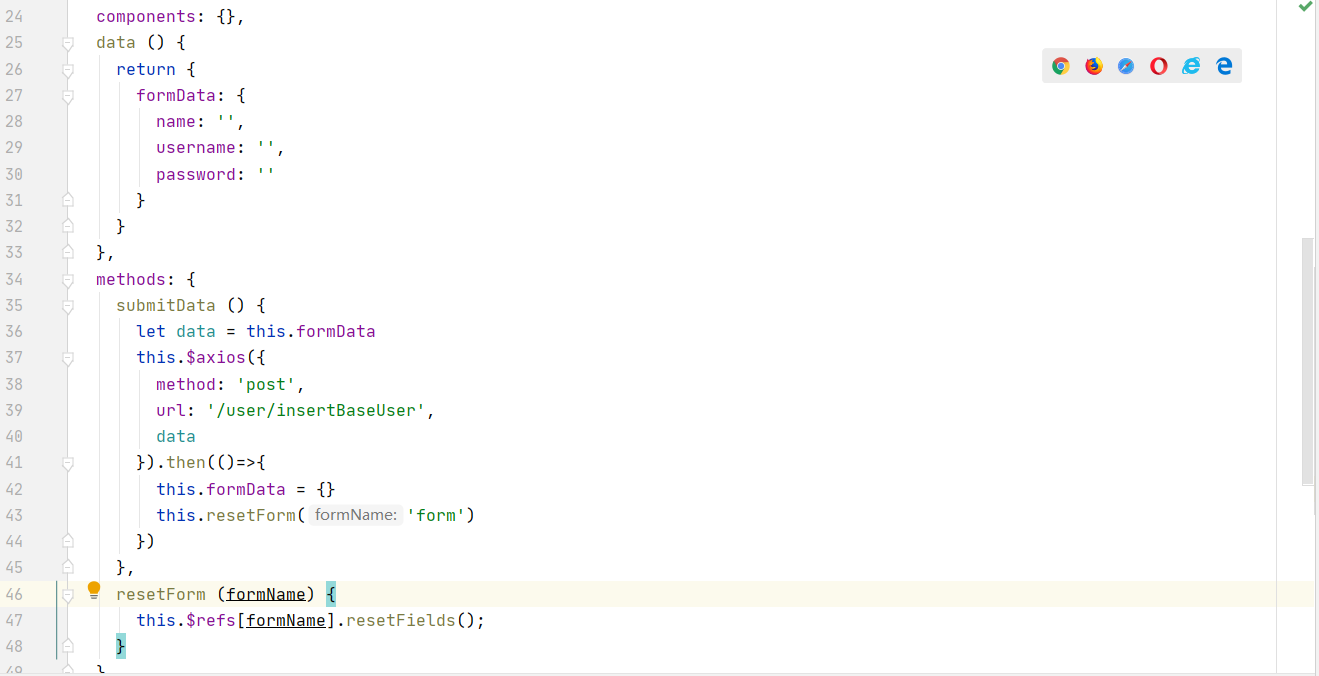
formData corresponds to the bound in the form. The submitData method uses axios to pass the data in formData to the back end.
resetForm clears the data filled in the form.
formData doesn't need much explanation. Data is written in this way.
axios method needs to explain one or two.
First, before main JS, we added a line of code:
Vue.prototype.$axios = Axios
The meaning of this line of code is to assign axios to the attribute of vue instance and name it $axios.
In this way, we can use Axios directly in vue's instance.
submitData () {
      let data = this.formData    // Write data to variable
      this.$axios({             // Call the axios method to launch the http request
        method: 'post',      // Access method post
        url: '/user/insertBaseUser',     // Access path
        data              // Access data
      }).then(()=>{
        this.formData = {}     // Clear the data in formData after access
        this.resetForm('form')    // Empty form data
      })
    },
    resetForm (formName) {  // Element UI provides a method to empty the form
      this.$refs[formName].resetFields();
    }
In addition to the new data, we should at least show the data so that we can see whether the new data is successful.
So we add a table.
    <el-form :model="searchFormData" inline ref="searchForm" label-width="80px">
      <el-form-item label="user name">
        <el-input v-model="searchFormData.username"></el-input>
      </el-form-item>
      <el-form-item>
        <el-button @click="searchData">query</el-button>
      </el-form-item>
    </el-form>
    <el-table
            :data="tableData"
            style="width: 100%">
      <el-table-column
              prop="name"
              label="full name"
              width="180">
      </el-table-column>
      <el-table-column
              prop="username"
              label="user name"
              width="180">
      </el-table-column>
      <el-table-column
              prop="coin"
              label="integral">
      </el-table-column>
    </el-table>
The previous searchForm captures the query conditions. searchFormData is bound, which is similar to the previous addition.
table is used in the format of element to bind data tableData.
In terms of script, declare the data format for searchFormData and tableData:
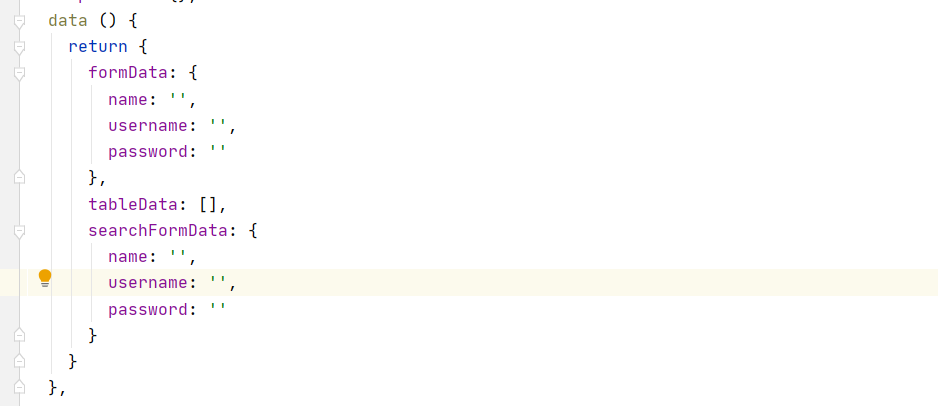
Then add the response function of click click event to send the request to the back end.
    searchData () {
      let data = this.searchFormData
      this.$axios({
        method: 'post',
        url: '/user/queryBaseUser',
        data
      }).then(res=>{
        this.tableData = res.data
      })
    },
promise accepts the data returned from the back end and assigns it to tableData.
At this point, the front end has realized the most basic function, and the corresponding support of the back end can also be realized.
Back end coding
The back-end code is written in a hierarchical format.
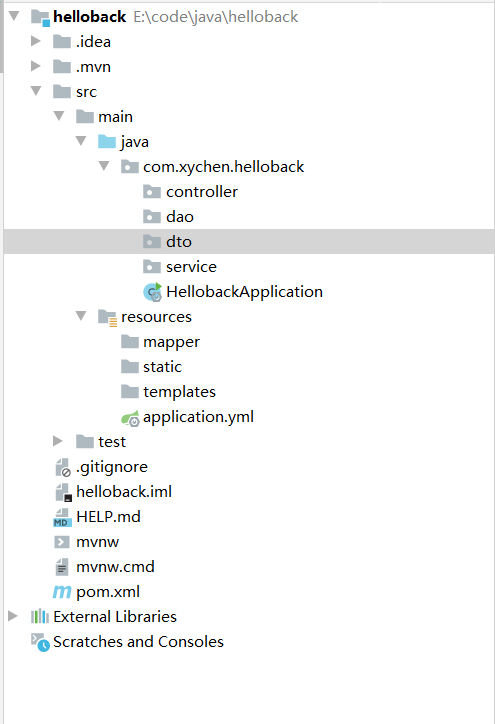
First, create folders such as controller, service, dao and dto on the same layer of the application file.
This is the layered design of spring MVC. Specifically, you can go down and search for it yourself.
First, create a baseuser dto file in the dto folder.
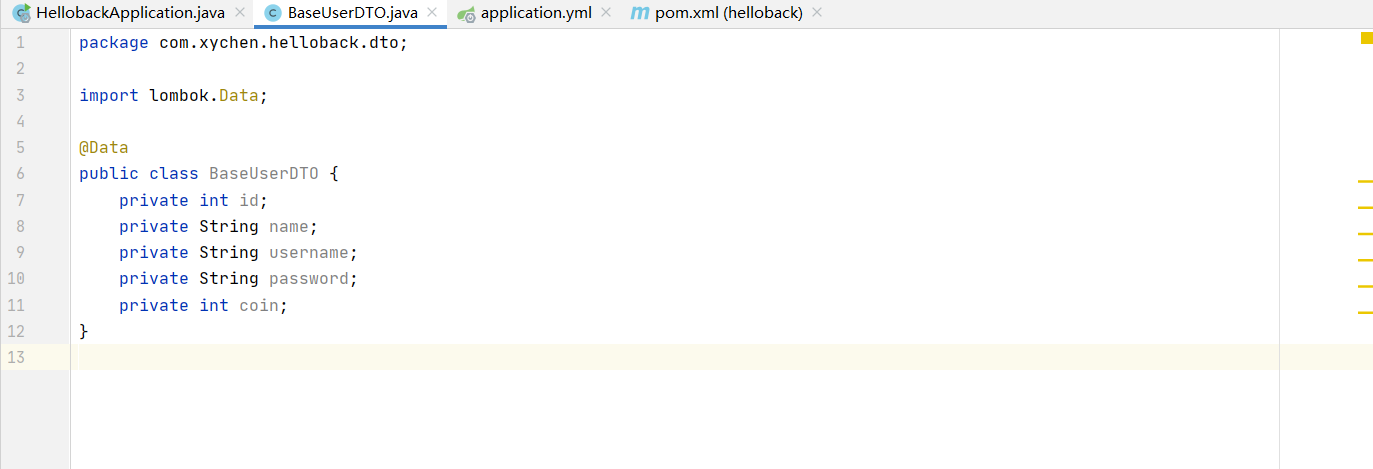
In this file, we will move the data structure of the database to java. In addition, you also need to add corresponding private elements for this class, and add corresponding getter s and setter s. The use of lombok is omitted here.
To use lombok, you need to add corresponding dependencies to the pom file.
        <dependency>
            <groupId>org.projectlombok</groupId>
            <artifactId>lombok</artifactId>
            <version>1.16.18</version>
            <scope>provided</scope>
        </dependency>
Next, create a mapper in the mapper folder of the resource xml: BaseUserMapper.
<?xml version="1.0" encoding="UTF-8" ?>
<!DOCTYPE mapper PUBLIC "-//mybatis.org//DTD Mapper 3.0//EN" "http://mybatis.org/dtd/mybatis-3-mapper.dtd" >
<!--The above two lines are constraint dependencies. Just copy them-->
<!--The following is the place to write it yourself-->
<!--write mapper The first step of the configuration file is to write<mapper></mapper>label-->
<!--<mapper></mapper>The label contains various CURD Operational SQL sentence-->
<mapper namespace="com.xychen.helloback.dao.BaseUserMapper">
    <!--Define a named BaseResultMap Return type of-->
    <resultMap id="BaseResultMap" type="com.xychen.helloback.dto.BaseUserDTO">
        <id column="id" property="id" jdbcType="INTEGER"></id>
        <result column="name" property="name" jdbcType="VARCHAR"></result>
        <result column="username" property="username" jdbcType="VARCHAR"></result>
        <result column="password" property="password" jdbcType="VARCHAR"></result>
        <result column="coin" property="coin" jdbcType="INTEGER"></result>
    </resultMap>

    <!--Insert statement-->
    <!--id To be with UserMapper The file indicates that the inserted function names are consistent, parameterType Represents the type of the input parameter to the function-->
    <insert id="insertBaseUser" parameterType="com.xychen.helloback.dto.BaseUserDTO">
        insert into base_user(id,name,username,password,coin)
        values (#{id,jdbcType=INTEGER},
                #{name,jdbcType=VARCHAR},
                #{username,jdbcType=VARCHAR},
                #{password,jdbcType=VARCHAR},
                #{coin,jdbcType=INTEGER})
    </insert>

    <!--Find statement-->
    <!--resultMap Represents the type returned by the function-->
    <select id="selectUser" parameterType="com.xychen.helloback.dto.BaseUserDTO" resultMap="BaseResultMap">
       select * from base_user where
       1 = 1
       <if test="id != null and id != 0">
            and id = #{id,jdbcType=INTEGER}
       </if>
        <if test="name != null and name != ''">
            and name = #{name,jdbcType=VARCHAR}
        </if>
        <if test="username != null and username != ''">
            and username = #{username,jdbcType=VARCHAR}
        </if>
        <if test="password != null and password != ''">
            and password = #{password,jdbcType=VARCHAR}
        </if>
    </select>

</mapper>
The query sql in mapper is the dynamic sql of mybatis. The sql conditions are changed according to different input parameters. where 1=1 here can also be replaced by:
<where>
</where>
mapper. After the xml file is created, create dao and BaseUserMapper in the dao folder of java. Has the same name as the previous xml file.
@Mapper
public interface BaseUserMapper {
    int insertBaseUser(BaseUserDTO baseUserDTO);

    List<BaseUserDTO> selectUser(BaseUserDTO baseUserDTO);
}
Use @ mapper annotation.
Then create the service interface and its implementation class under the service folder.
service interface:
public interface BaseUserService {
    public int insertBaseUser(BaseUserDTO baseUserDTO);
    public List<BaseUserDTO> queryBaseUser(BaseUserDTO baseUserDTO);
}
service implementation class:
@Service("BaseUserService")
public class BaseUserServiceImpl implements BaseUserService {

    @Autowired
    private BaseUserMapper baseUserDAO;

    @Override
    public int insertBaseUser(BaseUserDTO baseUserDTO) {
        return baseUserDAO.insertBaseUser(baseUserDTO);
    }

    @Override
    public List<BaseUserDTO> queryBaseUser(BaseUserDTO baseUserDTO) {
        return baseUserDAO.selectUser(baseUserDTO);
    }
}
Use the service annotation to write the service name as well. Use autowired to bring dao into use.
Then create the controller file in the controller folder.
@RestController
@RequestMapping("/user")
public class BaseUserController {

    @Autowired
    private BaseUserService baseUserService;

    @RequestMapping("/insertBaseUser")
    public int insertBaseUser(@RequestBody BaseUserDTO baseUserDTO) {
        int i = baseUserService.insertBaseUser(baseUserDTO);
        return i;
    }

    @RequestMapping("/queryBaseUser")
    public List<BaseUserDTO> queryBaseUser(@RequestBody BaseUserDTO baseUserDTO) {
        List<BaseUserDTO> baseUserDTOS = baseUserService.queryBaseUser(baseUserDTO);
        return baseUserDTOS;
    }

}
Run project
So far, the project has realized the basic functions.
Start both projects and have a try.
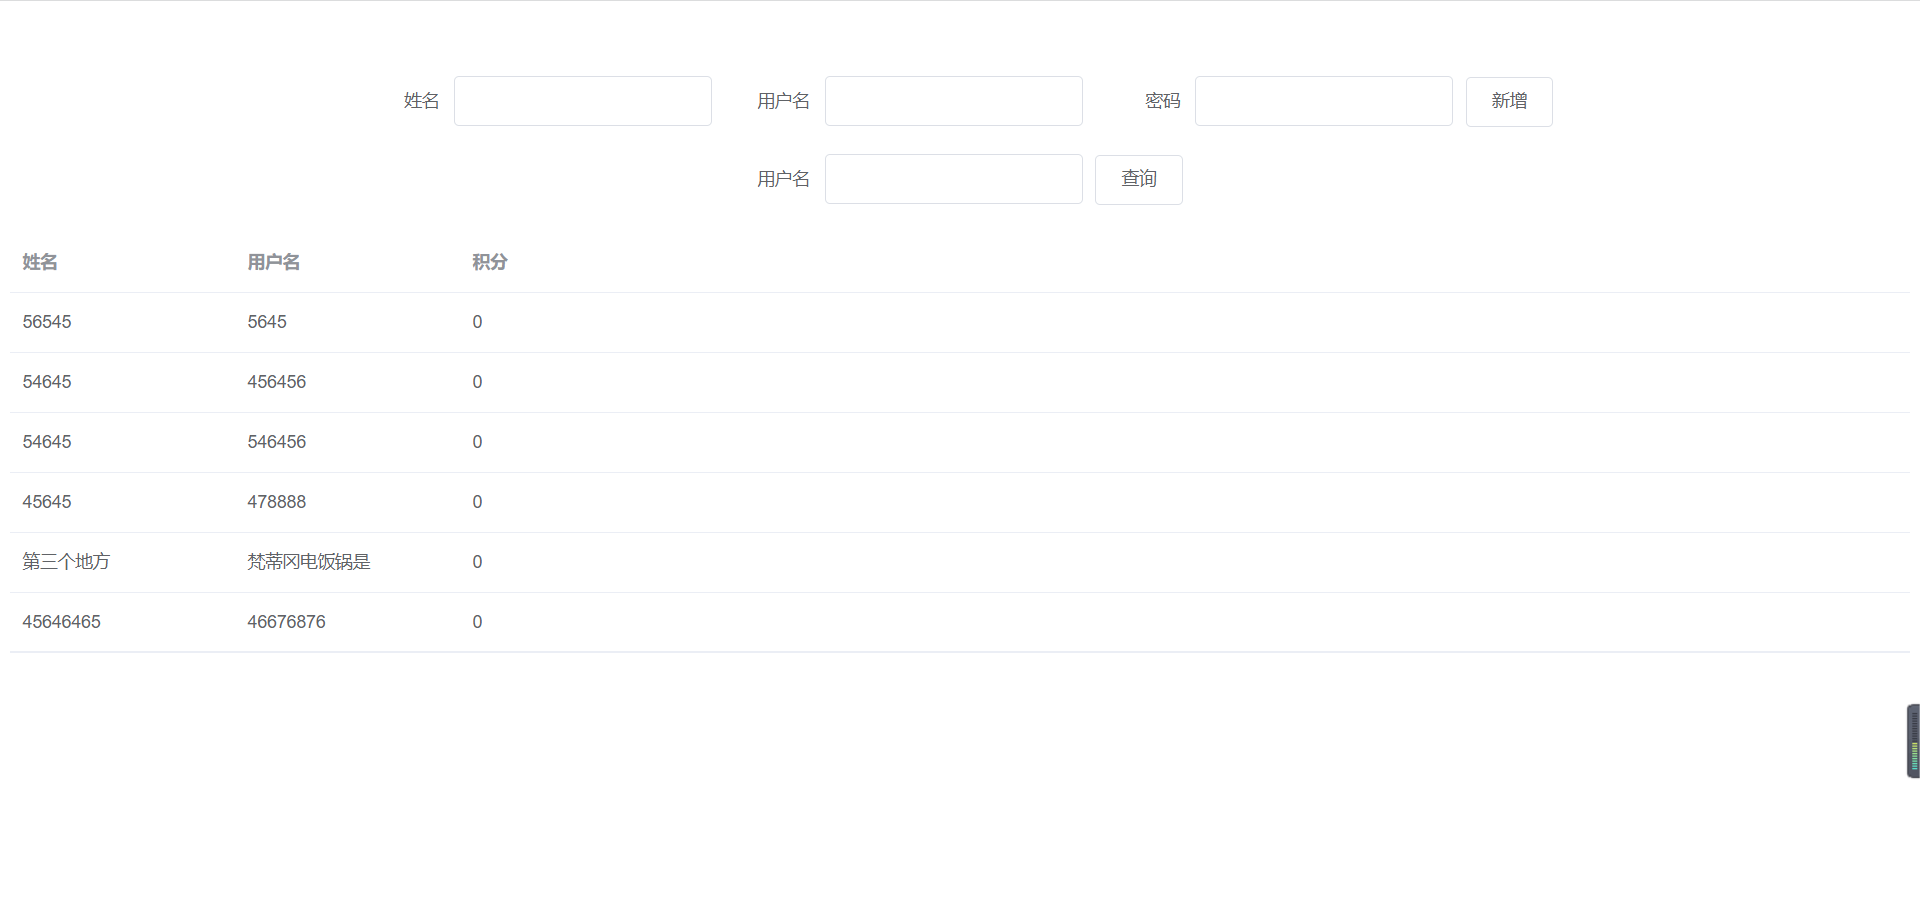
It can be seen that the results can still be used. It may be more complex in real projects, and the front end also needs to be optimized, but the overall foundation is similar. So so far, at least we have mastered some basic knowledge needed by a coder. In the future, we will continue to add bricks and tiles.