Introduction to Codis
codis cluster
Codis is a distributed Redis solution. For upper tier applications, there is no obvious difference between connecting to the Codis Proxy and connecting to the native Redis Server (unsupported command list). Upper tier applications can be used like stand-alone Redis. The lower tier of Codis will handle request forwarding, non-stop data migration, and everything behind, It is transparent to the front client. You can simply think that the back connected is a Redis service with unlimited memory
Basic architecture
codis-proxy
CODIS proxy is a Redis proxy service connected by the client. CODIS proxy implements the Redis protocol and is no different from a native Redis (like tweetproxy). For a business, multiple CODIS proxies can be deployed, and CODIS proxy itself is stateless
codis-config
Codis config is a management tool of Codis. It supports operations such as adding / deleting Redis nodes, adding / deleting Proxy nodes, and initiating data migration. Codis config also comes with an http server and will start a dashboard. Users can directly observe the running status of Codis cluster on the browser
codis-server
Codis server is a Redis branch maintained by the Codis project. It is developed on the basis of 2.8.13 and adds slot support and atomic data migration instructions. Codis proxy and Codis config on the upper layer of Codis can only interact with this version of Redis to run normally
ZooKeeper
Codis relies on ZooKeeper to store the meta information of data routing table and Codis proxy node. The commands initiated by Codis config will be synchronized to each surviving Codis proxy through ZooKeeper
Codis stores the slot relationship in zk and provides a Dashboard to observe and modify the slot relationship. When the slot relationship changes, Codis Proxy will listen to the change and resynchronize the slot relationship, so as to realize multiple slot relationships
Codis is a distributed Redis solution. For upper tier applications, there is no obvious difference between connecting to the Codis Proxy and connecting to the native Redis Server (unsupported command list). Upper tier applications can be used like stand-alone Redis. The lower tier of Codis will handle request forwarding, non-stop data migration, and everything behind, It is transparent to the front client. You can simply think that the back connected is a Redis service with unlimited memory
Software required to build codis cluster
(1) go codis depends on language packs
Go1.9.1.linux-amd64.tar.gz (download address: https://studygolang.com/dl/golang/go1.9.1.linux-amd64.tar.gz )
(2) CODIS cluster Suite
codis-release3.2.zip
(3) jdk zookeeper dependent language pack
jdk-8u121-linux-x64.rpm
(4) zookeeper is used to store data configuration routing tables
http://archive.apache.org/dist/zookeeper/zookeeper-3.4.14/zookeeper-3.4.14.tar.gz
Codis cluster deployment
Installing the codis cluster tool
Unzip go and codis
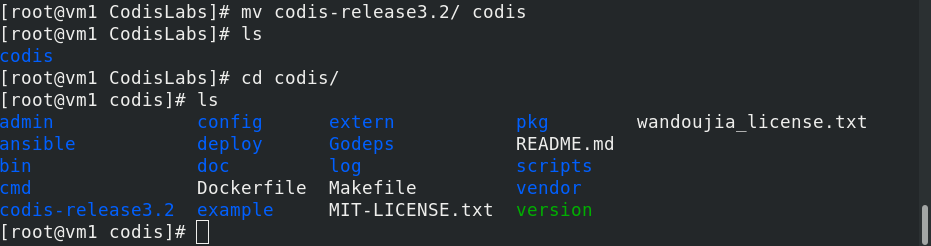
tar zxf go1.9.1.linux-amd64.tar.gz -C /usr/local/   /decompression
cd /usr/local
[root@vm1 ~]# mkdir -p $GOPATH/src/github.com/CodisLabs
[root@vm1 ~]# yum install unzip -y
[root@vm1 ~]# unzip codis-release3.2.zip -d  $GOPATH/src/github.com/CodisLabs
[root@vm1 ~]# cd $GOPATH/src/github.com/CodisLabs
[root@vm1 CodisLabs]# mv codis-release3.2/ codis
Configure environment variables
vim /etc/profile          Configure environment variables
77 export GOROOT=/usr/local/go
78 export GOPATH=/usr/local/codis
79 export PATH=$PATH:/usr/local/go/bin
source /etc/profile
Compile and install codis
[root@vm1 codis]#  pwd
[root@vm1 codis]# yum install gcc git autoconf -y
/usr/local/codis/src/github.com/CodisLabs/codis
[root@vm1 codis]# make

Install jdk and unzip zookeeper
[root@vm1 ~]# yum install jdk-8u201-linux-x64.rpm -y
[root@vm1 ~]# tar zxf zookeeper-3.4.14.tar.gz -C /usr/local/
[root@vm1 ~]# cd /usr/local/
[root@vm1 local]# ls
[root@vm1 local]# mv zookeeper-3.4.14/ zookeeper

Configure environment variables
[root@vm1 local]# vim /etc/profile
 77 export GOROOT=/usr/local/go
 78 export GOPATH=/usr/local/codis
 79 export ZOOKEEPER_HOME=/usr/local/zookeeper
 80 export PATH=$PATH:/usr/local/go/bin:$ZOOKEEPER_HOME/bin
[root@vm1 local]# source /etc/profile
Configure zookeeper
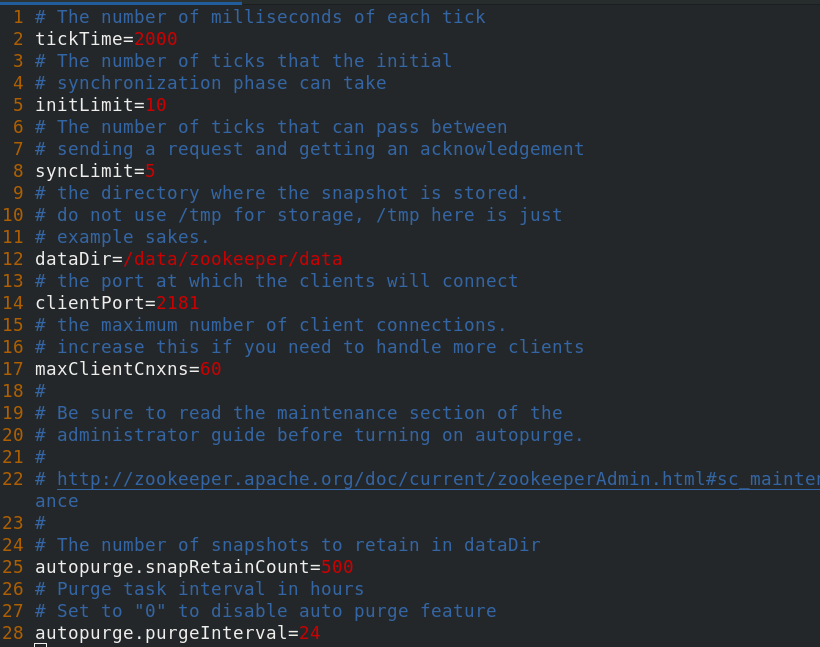
Modify the configuration file of zookeeper
[root@server3 ~]# cp /usr/local/zookeeper/conf/zoo_sample.cfg /usr/local/zookeeper/conf/zoo.cfg
[root@server3 ~]# cd /usr/local/zookeeper/conf/
[root@server3 conf]# vim zoo.cfg
Set myid and start zk
Set myid and create a myid file under the directory specified by the dataDir configured by us. The content in the file is a number (the value range of the number is 1-255) to identify the current host
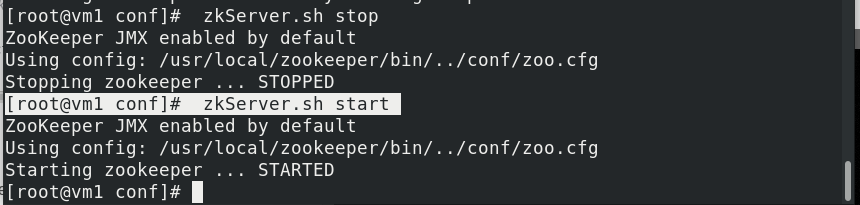
[root@vm1 conf]# mkdir /data/zookeeper/data -p
[root@vm1 conf]#echo "1" > /data/zookeeper/data/myid
[root@vm1 conf]#  zkServer.sh start start zookeeper
Configure codis and start the components of codis
[root@vm1 conf]# vim /usr/local/codis/config.ini

  1 zk=localhost:2181    //zookeeper's address
  2 product=test         //Product name
  3 proxy_id=proxy_1     //The proxy will read and mark the name of the proxy
  4 net_timeout=5         //Detection status interval
  5 dashboard_addr=localhost:18087   //Address of dashboard service
  6 coordinator=zookeeper     //If you use etcd, replace zookeeper with etcd
Start the components of codis
[root@vm1 conf]# cd $GOPATH/src/github.com/CodisLabs/codis/admin
[root@vm1 admin]# . / codis-dashboard-admin.sh start starts the CODIS dashboard component
[root@vm1 admin]# . / codis-proxy-admin.sh start starts the CODIS proxy component
[root@vm1 admin]# . / codis-fe-admin.sh start starts the CODIS Fe component
[root@vm1 admin]#  . / codis-server-admin.sh start starts the CODIS server component
netstat -antuple

Configure vm2:
Decompress go and codis (same as vm1)
Configuring environment variables (same as vm1)
Compile codis (same as vm1)
Configure and start codis:
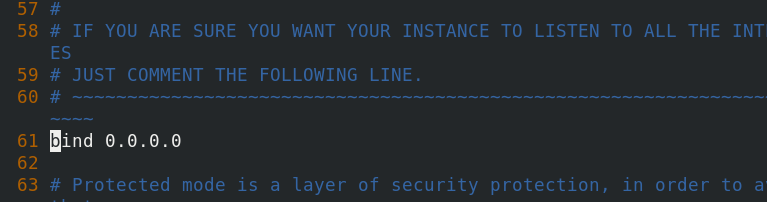
[root@vm2 CodisLabs]# cd /usr/local/codis/src/github.com/CodisLabs/codis/config/
[root@vm2 config]# ls
dashboard.toml  proxy.toml  redis.conf  sentinel.conf
[root@vm2 config]# vim redis.conf
[root@vm2 config]#
[root@vm2 config]# cd /usr/local/codis/src/github.com/CodisLabs/codis/admin
[root@vm2 admin]# ./codis-server-admin.sh start


Configure vm3:
The configuration process is the same as vm2
Verify the experimental results
Enter 192.168.1.1:9090 on the browser
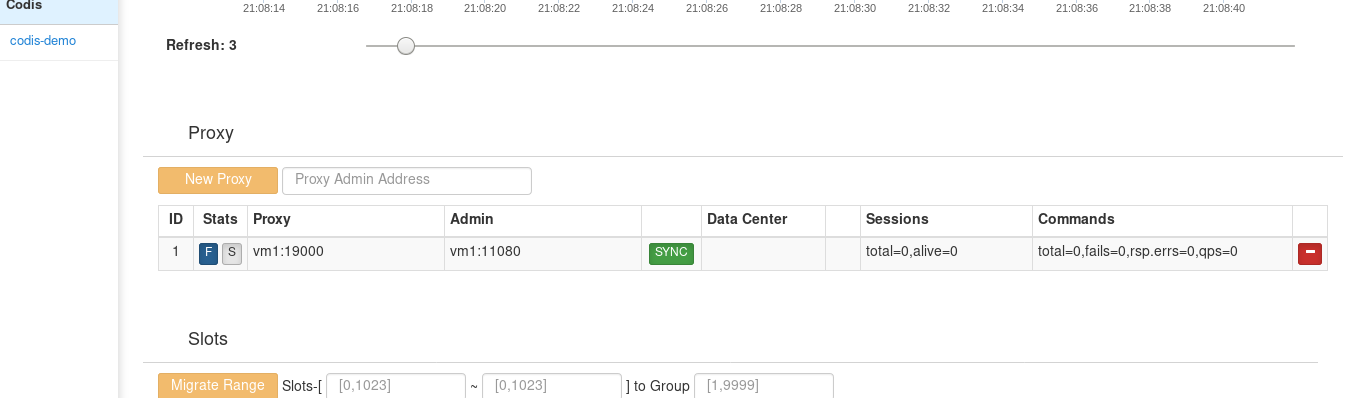
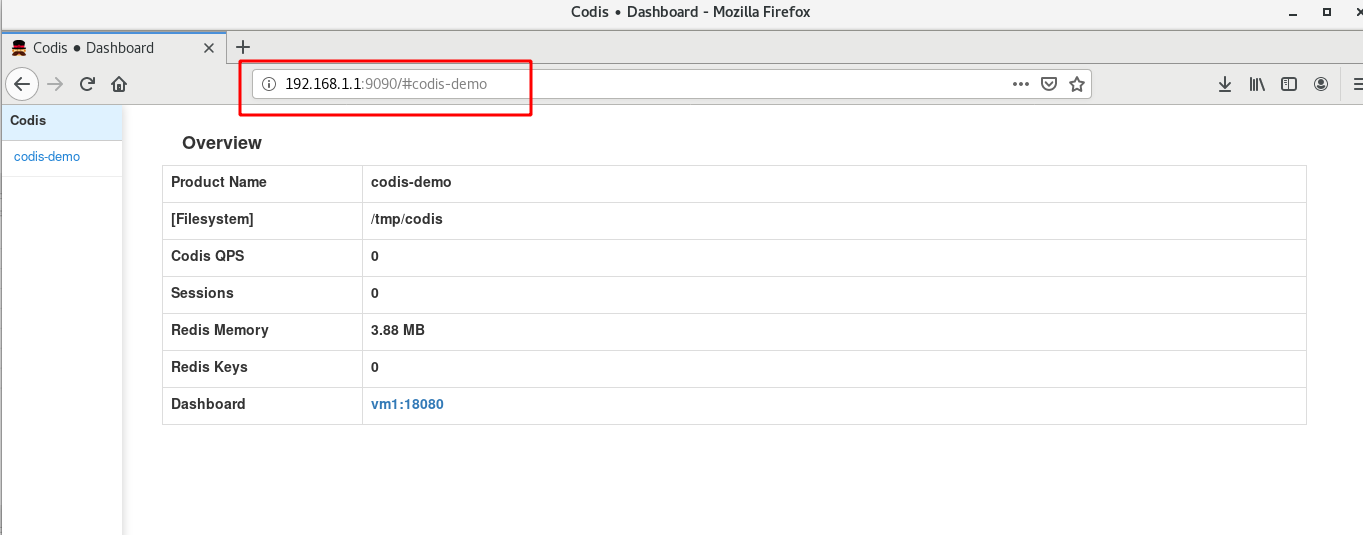 Indicates that CODIS proxy has been activated
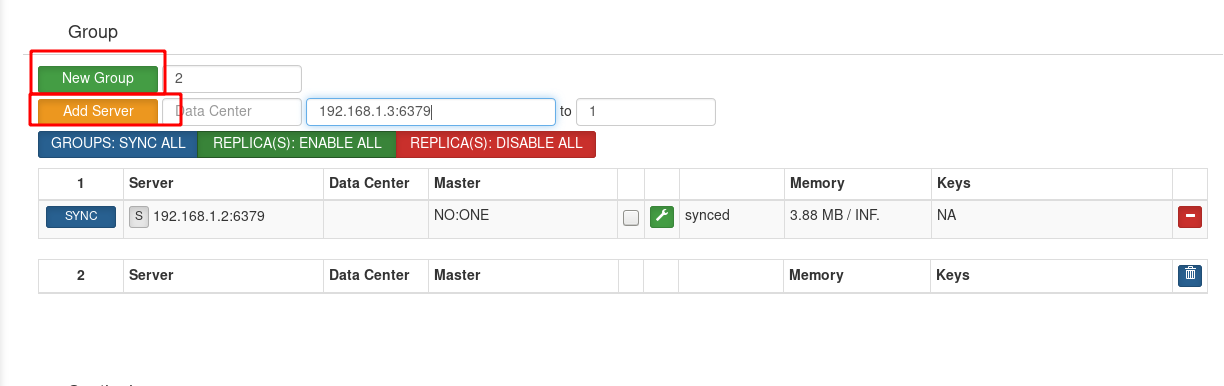
Add groups and servers