KVM Migration
Static Migration (Cold Migration)
For static migration, you can save a snapshot of the completed client image on the host, shut down or pause the client in the host, copy the client's image file to another host, and start the copied image using the command when the client is started in the source host.
Dynamic Migration (Thermal Migration)
If the host and destination host share the storage system, only the vCPU execution state, in-memory content, and virtual machine device state of the client need to be sent over the network to the destination host.Shared memory system refers to the directory of mirrored files of the source and destination virtual machine that is on a shared storage.
When based on shared storage systems, the specific process of KVM dynamic migration is:
- 1. At the beginning of the migration, the client is still running on the host while the client's memory pages are transferred to the destination host.
- 2. QEMU/KVM monitors and records any changes made to all transferred memory pages during the migration process and starts transferring changes made to the memory pages in the previous process once all the memory pages have been transferred.
- 3. QEMU/KVM estimates the transfer speed during migration. When the remaining amount of memory data can be transferred within a set time period (default 30 milliseconds), QEMU/KVMClients on the source host are shut down, the remaining data is transferred to the destination host, and the final transferred memory restores the running state of the client on the destination host.
- 4. At this point, the dynamic migration of KVM is completed.Migrated clients are as consistent as possible as they were before the migration unless some configuration, such as a network bridge, is missing on the destination host.
Note that the dynamic migration process is not complete when the memory usage in the client is very high and changes frequently, and the data in memory is constantly being modified faster than the memory that KVM can transfer. Only static migration can occur at this time.
Migration considerations:
1. Server cpu brand best migrated
2. 64-bit can only migrate between 64-bit hosts, 32-bit can migrate 32-bit and 64-bit hosts
3. Virtual machine names in hosts cannot conflict
4. Destination host and source host software configurations are as same as possible, such as having the same bridged network card, resource pool, etc.
5. The settings of the two migrated hosts cat/proc/cpuinfo |grep NX are the same.
One, Static Migration
Environment description:
| host name | IP Address | operating system |
|---|---|---|
| kvm01 | 172.16.1.30 | centos7 |
| kvm02 | 172.16.1.40 | centos7 |
1. Preparations
1) Install KVM on kvm01 and kvm02 hosts
Environmental requirements:
1. If you are a physical server, you need to turn on Virtualization Technology in the BIOS, which is turned on by default by most servers.
2. If you are experimenting with VMware Workstation, the CPU of the virtual machine you are building should check the virtualization function so that the virtual machine can support KVM virtualization.
#Verify that the cpu supports virtualization:
#Install virtualization software:
[root@kvm01 ~]# yum -y install qemu-kvm qemu-kvm-tools qemu-img libvirt virt-install virt-manager  bridge-utils
Role of each toolkit:
qemu-kvm  //KVM Core Modules
qemu-kvm-tools //KVM debugging tool, optional installation
qemu-img  //Create, transform, and modify mirrors to handle all mirroring formats supported by qemu
libvirt //Toolkit for managing virtual machines
virt-install  //Command-line tools for libvirt libraries to build new virtual machines
virt-manager //Graphical Interface Management Virtual Machine
 bridge-utils //Configure linux Ethernet Bridge
#If the installation is minimized, you also need to install the GNOME desktop environment, yum-y groupinstall, GNOME Desktop.
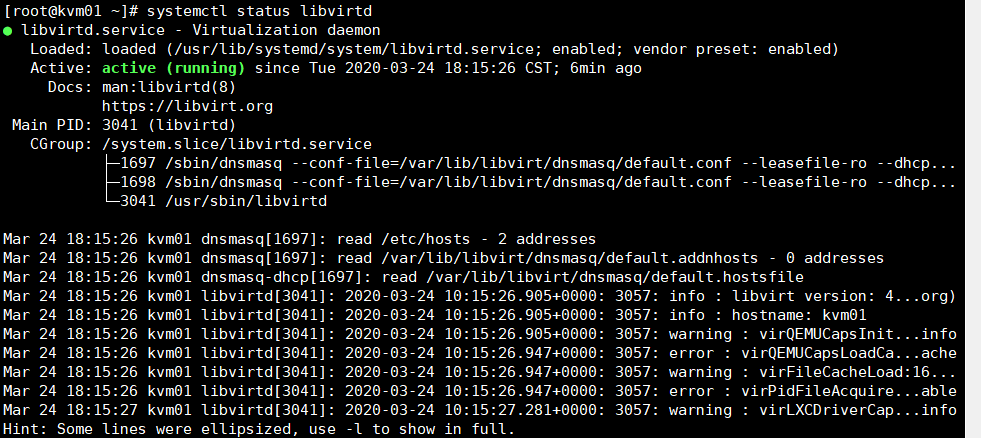
 #Start the libvirtd tool:
 [root@kvm01 ~]# systemctl start libvirtd
[root@kvm01 ~]# systemctl status libvirtd
The kvm02 host operation is the same as above.
2) Create a virtual machine (that is, create a kvm01 host)
#Create a directory to store disk files and centos images:
[root@kvm01 ~]# mkdir /kvm-vm
[root@kvm01 ~]# mkdir /iso
[root@kvm01 ~]# ls /iso/
CentOS-7-x86_64-DVD-1708.iso    #Upload centos image
#kvm command line installation:
[root@kvm01 ~]# virt-install --os-type=linux --os-variant centos7.0 --name web01 --ram 1024 --vcpus 1 --disk /kvm-vm/web01.qcow2,format=qcow2,size=10 --location /iso/CentOS-7-x86_64-DVD-1708.iso --network network=default --graphics vnc,listen=0.0.0.0 --noautoconsole

Starting install...
Retrieving file .treeinfo...                                                       |  354 B  00:00:00
Retrieving file vmlinuz...                                                         | 5.6 MB  00:00:00
Retrieving file initrd.img...                                                      |  46 MB  00:00:00
Allocating 'web01.qcow2'                                                           |  10 GB  00:00:00
Domain installation still in progress. You can reconnect to
the console to complete the installation process.
Explanation of parameters:
Create and install a new virtual machine using the virt-install command
 --os-type= linux #System type is linux
 --os-variant= #Specify operating system version
 --name #Specify virtual machine name
 --ram #Memory allocated in MB for client events
 --vcpus #Number of virtual CPUs (vcpus) to configure virtual machines
 --disk #Specifies the storage location of the virtual machine, format and size of disk files (in GB)
 --location #Select installation source
 --network #Configure the client network interface
 --graphics #Configure virtual machine display settings (vnc)
 Listen=0.0.0 #means that all segments can connect to the virtual machine
 --noautoconsole #Execution exits regardless of deployment success, and if not, will remain stuck in the terminal
After successful installation, type virt-manager on the command line to open the kvm graphical management interface as follows: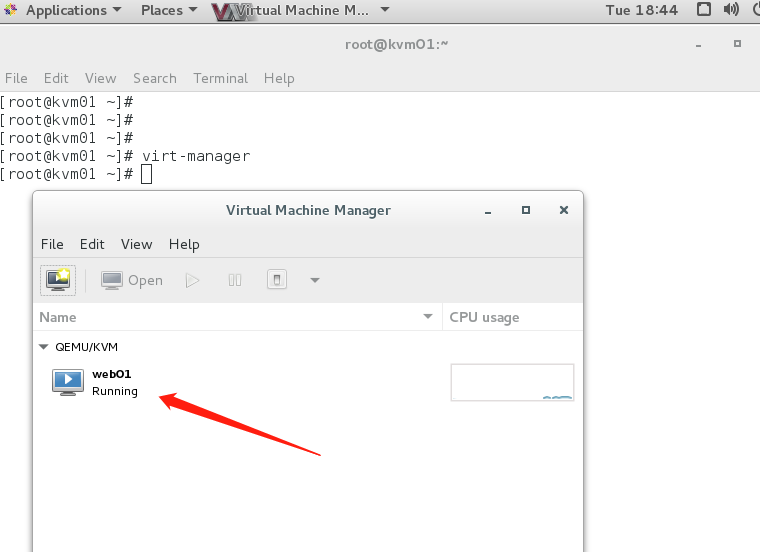
Click to install centos system.After the installation is complete, view a state of the virtual machine:
[root@kvm01 ~]# virsh list --all
 Id    Name                           State
----------------------------------------------------
 -     web01                          shut off     #Keep closed by default after installation is complete
Configure the kvm virtual machine to be a bridged network (enabling it to access the external network):
#Turn off the host's network console:
[root@kvm01 ~]# systemctl stop NetworkManager
#Create br0 (Bridge Network Card) on the host machine:
[root@kvm01 ~]# virsh iface-bridge ens33 br0
Created bridge br0 with attached device ens33
Bridge interface br0 started
#Modify the configuration file for the instance:
[root@kvm01 ~]# virsh edit web01
     69     <interface type='bridge'>    #Modify Network Card Type to Bridge
     70       <mac address='52:54:00:dc:0f:d0'/>
     71       <source bridge='br0'/>   #Specify Bridged Network Card

#Start an instance:
[root@kvm01 ~]# virsh start web01
Domain web01 started

[root@kvm01 ~]# virsh list
 Id    Name                           State
----------------------------------------------------
 2     web01                          running
Configure the network configuration information of the web01 host and test the ping outbound network:
2, Static Migration
Static migration is divided into two main steps:
1) Copy mirror files and virtual machine configuration files
2) Redefine this virtual machine
1)Turn off or suspend the virtual machine:
[root@kvm01 ~]# virsh shutdown web01
Domain web01 is being shutdown
[root@kvm01 ~]# virsh list
 Id    Name                           State
----------------------------------------------------
2) Copy the mirror file and configuration file to the kvm02 host:
#Prepare the environment on the kvm02 host before copying, so you won't have to modify the configuration file parameters later (troublesome).
[root@kvm02 ~]# Mkdir/kvm-vm //Create corresponding mirror file directory
[root@kvm02 ~]# systemctl stop NetworkManager
[root@kvm02 ~]# virsh iface-bridge ens33 br0 //Create bridged network card
Created bridge br0 with attached device ens33
Bridge interface br0 started
#Copies:
[root@kvm01 ~]# scp /kvm-vm/web01.qcow2 172.16.1.40:/kvm-vm/
[root@kvm01 ~]# scp /etc/libvirt/qemu/web01.xml  172.16.1.40:/etc/libvirt/qemu/
3) Define the virtual machine on the kvm02 host:
[root@kvm02 ~]# virsh define /etc/libvirt/qemu/web01.xml
Domain web01 defined from /etc/libvirt/qemu/web01.xml

#Start the virtual machine:
[root@kvm02 ~]# virsh start web01
Domain web01 started

[root@kvm02 ~]# virsh list --all
 Id    Name                           State
----------------------------------------------------
 1     web01                          running

[root@kvm02 ~]#
Successfully completed the static migration.
Dynamic migration (thermal migration)
Dynamic migration is divided into five main steps:
1, Create shared storage
2, two machines mount shared storage (manual mount; use resource pool)
3, Start dynamic migration
4. Create a migrated virtual machine profile
5, Redefine Virtual Machine
Environment description:
| host name | IP Address | operating system |
|---|---|---|
| nfs | 172.16.1. 10 | centos7 |
| kvm01 | 172.16.1.30 | centos7 |
| kvm02 | 172.16.1.40 | centos7 |
1)First step, shut down all hosts selinux(Must close) and firewall;
[root@kvm01 ~]# vim /etc/selinux/config
SELINUX=disabled
[root@kvm01 ~]# reboot  #Restart takes effect

[root@kvm01 ~]# systemctl stop firewalld
Note: Do not use setenforce 0 (temporary shutdown), otherwise errors will be reported during migration.
2) Deploy nfs (on the nfs server)
[root@nfs ~]# yum -y install nfs-utils
[root@nfs ~]# vim /etc/exports
/nfs-share 172.16.1.0/24(rw,sync,no_root_squash)
[root@nfs ~]# mkdir /nfs-share
[root@nfs ~]# systemctl start rpcbind
[root@nfs ~]# systemctl start nfs-server
[root@nfs ~]# systemctl enable nfs-server
#kvm01 and kvm02 test whether remote mounting is possible
[root@kvm01 ~]# showmount -e 172.16.1.10
Export list for 172.16.1.10:
/nfs-share 172.16.1.0/24
[root@kvm02 ~]# showmount -e 172.16.1.10
Export list for 172.16.1.10:
/nfs-share 172.16.1.0/24
3) Set hostname, /etc/hosts resolve with each other, and two kvm hosts configure secret-free login
[root@kvm01 ~]# vim /etc/hosts
127.0.0.1   localhost localhost.localdomain localhost4 localhost4.localdomain4
::1         localhost localhost.localdomain localhost6 localhost6.localdomain6
172.16.1.10 nfs
172.16.1.30 kvm01
172.16.1.40 kvm02
#Copy to another host:
[root@kvm01 ~]# for i in 10 40; do scp /etc/hosts 172.16.1.$i:/etc/; done
#Configure Secret-Free Login:
[root@kvm01 ~]# ssh-keygen -t rsa
[root@kvm01 ~]# ssh-copy-id kvm02
[root@kvm01 ~]# ssh kvm02 hostname
kvm02
4) Two kvm hosts mount shared storage:
#The mirror file on kvm01 needs to be copied to the shared directory of nfs:
[root@kvm01 ~]# scp /kvm-vm/web01.qcow2  nfs:/nfs-share
[root@nfs ~]# ls /nfs-share/
web01.qcow2
kvm01:
[root@kvm01 ~]# vim /etc/fstab
//Add the following:
172.16.1.10:/nfs-share          /kvm-vm                 nfs     defaults        0 0
[root@kvm01 ~]# Mount-a //reload
[root@kvm01 ~]# ls /kvm-vm/
web01.qcow2

kvm02:
[root@kvm02 ~]# mkdir /kvm-vm
[root@kvm02 ~]# vim /etc/fstab
172.16.1.10:/nfs-share          /kvm-vm                 nfs     defaults        0 0
[root@kvm02 ~]# mount -a
[root@kvm02 ~]# ls /kvm-vm/
web01.qcow2
#Create a bridged network:
[root@kvm02 ~]# systemctl stop NetworkManager
[root@kvm02 ~]# virsh iface-bridge ens33 br0
Created bridge br0 with attached device ens33
Bridge interface br0 started
4) Dynamic migration:
#Simulate the normal functioning of the web01 virtual machine before dynamic migration: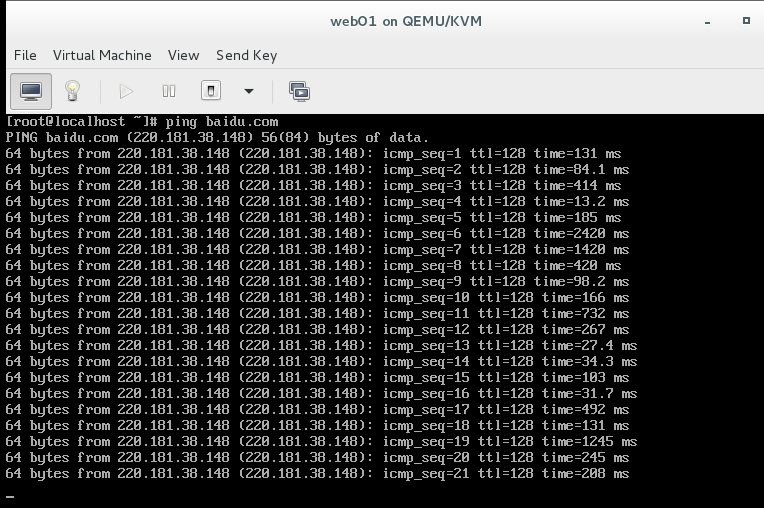
kvm Migration tools are available migrate:
[root@kvm01 ~]# virsh migrate --live --unsafe --verbose web01 qemu+ssh://172.16.1.40/system
Migration: [100 %]     #Migration successful
Explanation of parameters:
--live #thermal migration
--unsafe #Force migration even if unsafe
--verbose #Shows the migration process
web01 represents the current domain name (virtual machine), followed by the address of the target host.
#After successful migration, view the virtual machine status on the kvm02 host:
[root@kvm02 ~]# virsh list
 Id    Name                           State
----------------------------------------------------
 2     web01                          running
You can see that the state of the virtual machine is running.
#Log on to the virtual machine to see if it works uninterrupted: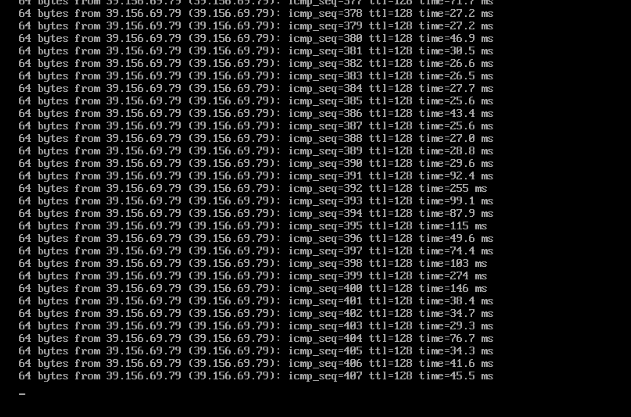
You can see that through thermal migration, the virtual machine keeps working without losing data, and QEMU/KVM shuts down the clients on the source host and transfers the remaining data to the destination host.At this point, the migration goal has been achieved.
In a production environment, we can then choose an appropriate time to redefine the virtual machine:
#Copy the virtual machine's configuration file to the new machine (or create your own):
[root@kvm01 ~]# scp /etc/libvirt/qemu/web01.xml kvm02:/etc/libvirt/qemu/
web01.xml                                                               100% 4047     4.0KB/s   00:00
[root@kvm02 ~]# ls /etc/libvirt/qemu  #View on web02
networks  web01.xml
#Redefine virtual machine:
[root@kvm02 ~]# virsh shutdown web01
Domain web01 is being shutdown

[root@kvm02 ~]# virsh define /etc/libvirt/qemu/web01.xml
Domain web01 defined from /etc/libvirt/qemu/web01.xml

[root@kvm02 ~]# virsh start web01   #Start Virtual Machine
Domain web01 started

[root@kvm02 ~]# virsh list --all
 Id    Name                           State
----------------------------------------------------
 3     web01                          running

[root@kvm02 ~]#
Thermal migration is now complete.
Common errors:
1. Description of errors encountered during migration:
# virsh migrate centos --live qemu+ssh://192.168.30.132/system
error: unable to connect to server at 'KVM-2:49152': No route to host
Reason: Your secret login was unsuccessful
 Solution: Redo the secret-free login
 2. Storage errors during migration:
# virsh migrate centos --live qemu+ssh://192.168.30.132/system
 error: Failed to open file '/mnt/CentOS6.8.qcow2': Input/output error
 Reason: Storage did not mount successfully
 Solution: mount-o remount/dev/sdb/mnt
 3. FQDN error during migration:
# virsh migrate centos --live qemu+ssh://192.168.30.132/system
 error: internal error hostname on destination resolved to localhost, but migration requires an FQDN
 Reason: Host name could not be resolved by both hosts
 Solution: Reconfigure host name and ip resolution
 4. Grammatical errors during migration:
# virsh migrate centos --live qemu+ssh://192.168.30.132:/system
error: internal error Unable to parse URI qemu+ssh://192.168.30.132:/system
 Reason: qemu+ssh grammar is written incorrectly
 The correct solution is: virsh migrate centos --live qemu+ssh://192.168.30.132/system