Color and moving object recognition system
1. Development tools
Python version: Anaconda's Python environment version 3.8
Development software: pycham Community Edition
Recognition model: deep learning model, general learning model
Related modules: opencv python = 3.4.8.29 module
2. Environmental construction
Install Anaconda and add the path to the environment variable, install pychar and add the path to the environment variable, and use pip to install the required related modules.
3. Procedure flow
1, Color recognition system
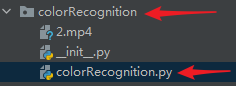
1) Open pycharm and create a folder and a py file
2) Import two libraries, cv2 and numpy

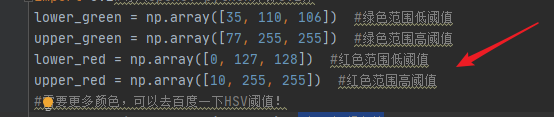
3) Set the high and low thresholds for green and red
4) Judge whether the video is opened normally

5) Read each frame and when the read frame is normal

6) Turn the picture gray

7) Filter red and green based on color range

8) Median filter processing

9) Process the two colors to find the green and red range

10) Draw a square in the Green area and display "Green"

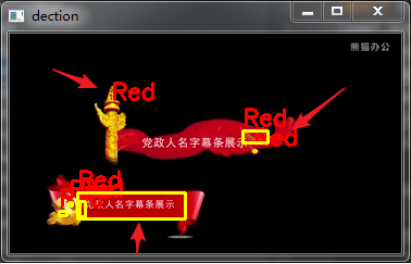
11) Draw a square in the Red area and display "Red"

12) Display each frame, wait for playback, and press "q" to interrupt

13) If the video is played, it will automatically jump out of the loop and the window will close

14) Release the video and destroy all created windows

15) Runtime example screenshot
Source code display
import numpy as np  # Import numpy Library
import cv2  # Import opencv Python library, i.e. cv2 Library

lower_green = np.array([35, 110, 106])  # Green range low threshold
upper_green = np.array([77, 255, 255])  # Green range high threshold
lower_red = np.array([0, 127, 128])  # Red range low threshold
upper_red = np.array([10, 255, 255])  # Red range high threshold
# Need more colors, you can go to Baidu HSV threshold!
cap = cv2.VideoCapture("2.mp4")  # Open video file
num = 0
while (cap.isOpened()):  # Open video normally
    ret, frame = cap.read()  # Read every frame
    if ret == True:  # When judging that the read frame is correct
        hsv_img = cv2.cvtColor(frame, cv2.COLOR_BGR2HSV)  # Turn the picture gray for later processing
        mask_green = cv2.inRange(hsv_img, lower_green, upper_green)  # Filter Green by color range
        mask_red = cv2.inRange(hsv_img, lower_red, upper_red)  # Filter red by color range
        mask_green = cv2.medianBlur(mask_green, 7)  # median filtering
        mask_red = cv2.medianBlur(mask_red, 7)  # median filtering
        mask = cv2.bitwise_or(mask_green, mask_red)  # Process two colors
        mask_green, contours, hierarchy = cv2.findContours(mask_green, cv2.RETR_EXTERNAL,
                                                           cv2.CHAIN_APPROX_NONE)  # Looking for green range
        mask_red, contours2, hierarchy2 = cv2.findContours(mask_red, cv2.RETR_EXTERNAL, cv2.CHAIN_APPROX_NONE)  # Look for the red range
        for cnt in contours:
            (x, y, w, h) = cv2.boundingRect(cnt)
            cv2.rectangle(frame, (x, y), (x + w, y + h), (0, 255, 255), 2)
            cv2.putText(frame, "Green", (x, y - 5), cv2.FONT_HERSHEY_SIMPLEX, 0.7, (0, 255, 0), 2)
            # Draw a square in the Green area and display Green
        for cnt2 in contours2:
            (x2, y2, w2, h2) = cv2.boundingRect(cnt2)
            cv2.rectangle(frame, (x2, y2), (x2 + w2, y2 + h2), (0, 255, 255), 2)
            cv2.putText(frame, "Red", (x2, y2 - 5), cv2.FONT_HERSHEY_SIMPLEX, 0.7, (0, 0, 255), 2)
            # Draw a square in the red area and display Green
        cv2.imshow("dection", frame)  # Display each frame
        if cv2.waitKey(20) & 0xFF == ord("q"):  # Similar to the key to interrupt playback, press q to jump out of the loop and terminate playback
            break
    else:
        break
cap.release()  # Release video
cv2.destroyAllWindows()  # Destroy all created windows
2, Moving object recognition system
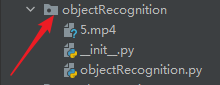
1) Open pycharm and create a folder and a py file
2) Import cv2 library. The system only needs one cv2 library

3) Path to read video

4) Find out the length and width of the video and output it

5) Assign a variable to the ellipse and a value to the background

6) Determine whether the video stream can be read correctly

7) Read the video and judge whether the video is over

8) The frame is preprocessed, first converted to gray, and then Gaussian filtering

9) Sets the first frame as the background for the entire input
10) For each frame read from the background, the difference between it and the background is calculated and a difference graph is obtained

11) Apply the threshold to get a black-and-white image, and expand the image through the following code to normalize the holes and defects

12) Displays a rectangular box for moving objects

13) Play the video and press "q" to exit the video
14) If the video playback ends. Jump out of the loop and close the window
15) Release the video and destroy all created windows

16) Screenshot of running example

Source code display
import cv2 # Import opencv Python library, i.e. cv2 Library
camera = cv2.VideoCapture("5.mp4") # Read video path
size = (int(camera.get(cv2.CAP_PROP_FRAME_WIDTH)), int(camera.get(cv2.CAP_PROP_FRAME_HEIGHT))) # Find the length and width of the video and assign it to the variable
print('size:' + repr(size)) # The length and width of the output picture
es = cv2.getStructuringElement(cv2.MORPH_ELLIPSE, (9, 4)) # Draw points as ellipses and assign them to variables
background = None # Give the background the initial value None
while (camera.isOpened()): # Can the video stream be read correctly
grabbed, frame_lwpCV = camera.read()
if grabbed == True:
gray_lwpCV = cv2.cvtColor(frame_lwpCV, cv2.COLOR_BGR2GRAY) # The frame is preprocessed, first converted to gray image, and then Gaussian filtering.
gray_lwpCV = cv2.GaussianBlur(gray_lwpCV, (21, 21),0) # Gaussian filter is used for fuzzy processing. The reason for processing: each input video will produce noise due to natural vibration, illumination change or camera itself. The purpose of smoothing noise is to avoid detecting it during motion and tracking.
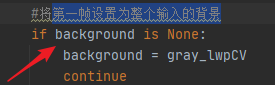
# Sets the first frame as the background for the entire input
if background is None:
background = gray_lwpCV
continue
# For each frame read from the background, the difference between it and the background is calculated and a different map is obtained.
# You also need to apply the threshold to get a black-and-white image, and dilate the image through the following code to normalize the hole and defect
diff = cv2.absdiff(background, gray_lwpCV)
diff = cv2.threshold(diff, 148, 255, cv2.THRESH_BINARY)[1] # Binarization threshold processing
diff = cv2.dilate(diff, es, iterations=2) # Morphological expansion
image, contours, hierarchy = cv2.findContours(diff.copy(), cv2.RETR_EXTERNAL,
cv2.CHAIN_APPROX_SIMPLE) # This function calculates the contour of the target in an image
# Show rectangle
for c in contours:
if cv2.contourArea(c) < 15: # For rectangular areas, only contours larger than the given threshold are displayed, so some small changes will not be displayed. For cameras with constant illumination and low noise, the threshold of the minimum size of the contour may not be set
continue
(x, y, w, h) = cv2.boundingRect(c) # This function computes the bounding box of a rectangle
cv2.rectangle(frame_lwpCV, (x, y), (x + w, y + h), (0, 255, 0), 2) # Draw a rectangle with moving objects
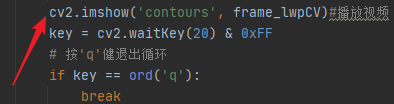
cv2.imshow('contours', frame_lwpCV) # Play video
key = cv2.waitKey(20) & 0xFF
# Press the 'q' key to exit the cycle
if key == ord('q'):
break
else:
break
camera.release() # Release video
cv2.destroyAllWindows() # Destroy all created windows