🎁 Introduction:
Hello, Hello, Xiaobian, I'm sure you've seen many countdown posters before activities or product launch in social media and circle of friends.
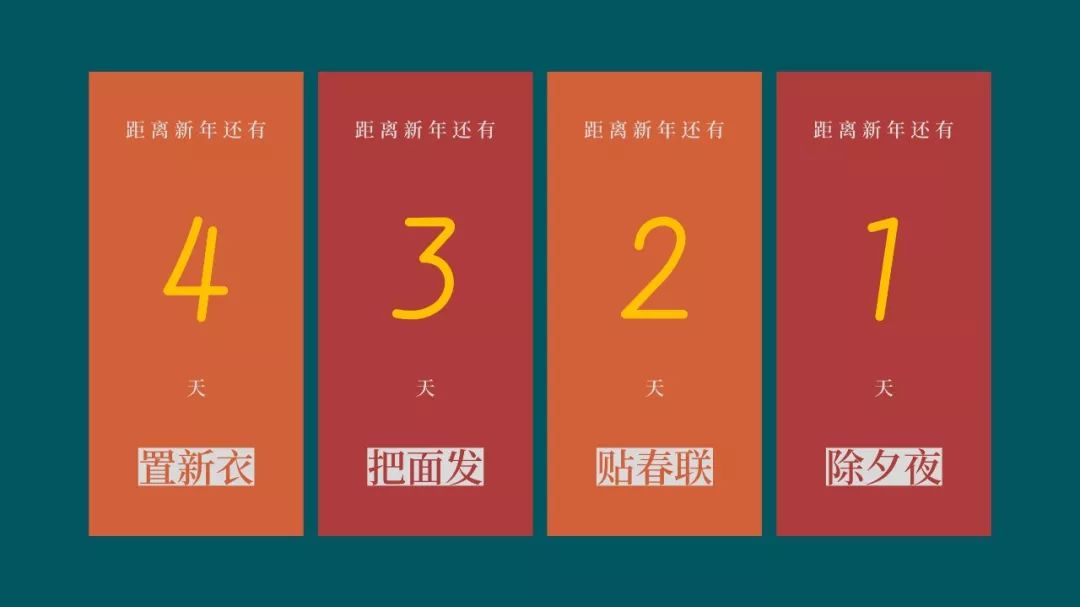
At the beginning of the new year, the Spring Festival is coming soon. Today we will use python to make a group of New Year Countdown posters.
🎁 Text:
Effect preview

1, Create image 🎁
RGBA value is a set of numbers,
Red, green, blue and alpha (transparency)
An integer representing 0 (none at all) to 255 (highest)
In the pilot,
RGBA values are represented as tuples of four integer values. For example, red indicates (255, 0, 0255)
This color has the largest value of red, no green and blue, and the largest alpha value, which means it is completely opaque.
Green: (0255, 0255)
Blue: (0, 0255255)
White is a combination of colors: (255255255255)
Black has no color: (0, 0, 0255)

Pilot provides imagecolor Getcolor() function,
So you don't have to remember the RGBA value of the color you want to use.
This function takes the color name string as the first parameter,
String 'RGBA' as the second parameter,
Returns an RGBA tuple.
from PIL import ImageColor
ImageColor.getcolor('red', 'RGBA')

Operation results:
(255, 0, 0, 255)
Image size and color in this example:
Size: 1000 * 2160
Color: (174,60,58255)
Relevant codes are as follows:
from PIL import Image, ImageDraw, ImageFont
import os

#Create an image and set the size and color
im = Image.new('RGBA', (1000, 2160), (174,60,58,255))
draw = ImageDraw.Draw(im)
2, Set font 🎁
To set the font and size, we first save the folder name in fontsfoldere.
Then call ImageFont.. Truetype(), pass in the font we want TTF file, followed by an integer representing the font size.
Add imagefont The Font object returned by TrueType () is saved in a variable such as arialFont, and then the variable is passed into text() as the last keyword parameter.
#Font and size used
fontsFolder = 'D:/05.python_code/00.py_projects/new_year_last'
font1 = ImageFont.truetype(os.path.join(fontsFolder, 'wenzangshufang.ttf'), 580)
font2 = ImageFont.truetype(os.path.join(fontsFolder, 'SourceHanSerifCN-SemiBold.otf'), 90)
font3 = ImageFont.truetype(os.path.join(fontsFolder, 'SourceHanSerifCN-SemiBold.otf'), 180)
3, Draw rectangle 🎁
rectangle(xy, fill, outline) method
Draw a rectangle
The xy parameter is a rectangular tuple,
The form is (left,top, right, bottom).
The left and top values specify the x and y coordinates of the upper left corner of the rectangle,
Right and bottom specify the lower right corner of the rectangle.
The optional fill parameter is color, which fills the inside of the rectangle.
The optional outline parameter is the color of the rectangular outline.
#Draw rectangle
left = pos_x_3
top = 1750
right = pos_x_3 + txtSize_3[0]
bottom = 1700 + txtSize_3[1]
draw.rectangle((left, top, right, bottom), fill=(217, 217, 217, 255))
4, Draw text 🎁
The ImageDraw object also has a text() method,
Used to draw text on an image.
The text() method has four parameters:
The xy parameter is a tuple of two integers, specifying the upper left corner of the text area
The text parameter is the text string you want to write
The optional parameter fill is the color of the text
The optional parameter font is an ImageFont object,
Used to set the font and size of text
#Calculate the placement position of each text
txtSize_1 = draw.textsize('distance leave new year still have', font2)
pos_x_1 = (1000 - txtSize_1[0]) / 2
txtSize_2 = draw.textsize('day', font2)
pos_x_2 = (1000 - txtSize_2[0]) / 2

wenhou = ["New year's Eve", "post new year's scrolls", "Hair the face", "Buy new clothes"]
txtSize_3 = draw.textsize(wenhou[i-1], font3)
pos_x_3 = (1000 - txtSize_3[0]) / 2

#Set text placement, centered
draw.text((pos_x_1, 200), 'distance leave new year still have', fill=(217, 217, 217, 255), font=font2)
draw.text((pos_x_2, 1400), 'day', fill=(217, 217, 217, 255), font=font2)
draw.text((pos_x_3, 1700), wenhou[i-1], fill=im_color[i-1], font=font3)

#Set variable text properties
txtSize_4 = draw.textsize(str(i), font1)
pos_x_4 = (1000 - txtSize_4[0]) / 2
draw.text((pos_x_4, 600), str(i), fill=(255, 192, 0, 255), font=font1)
5, Save image to local 🎁
Save image to current directory
Named: dayx png
#Save image
filename = 'day' + str(i) + '.png'
im.save(filename)
🎁 ending:
Well, that's all for today's sharing. Just like it!
If you need a complete source code of the project or if there is anything unclear, please send me a screenshot or click This line is blue!