Configuring eclipse development environment with hadoop
1, Foreword
Due to the learning needs of my junior year and the vagueness of the online tutorials, I have taken a lot of detours. Therefore, I write this blog. This article is for reference only. If there are deficiencies, I hope to point out.
2, Install eclipse
1. Download eclipse jee neon
A download link is attached here. Of course, you can also go to the official website to download by yourself:
http://www.eclipse.org/downloads/download.php?file=/technology/epp/downloads/release/neon/1a/eclipse-jee-neon-1a-linux-gtk-x86_64.tar.gz
2. Unzip and install eclipse
Command line decompression command. I choose to unzip it to the home directory:
tar -zxvf eclipse-jee-neon-1a-linux-gtk-x86_64.tar.gz -C /home
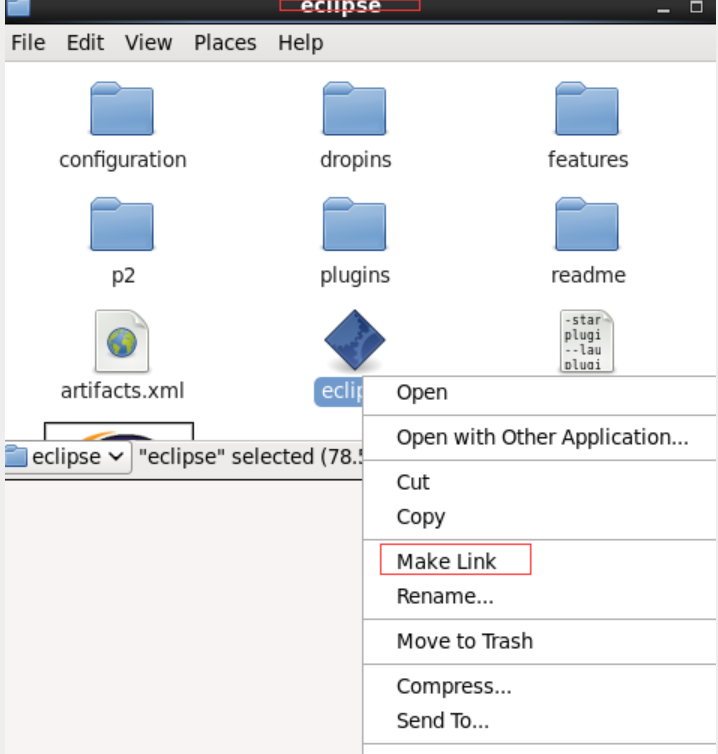
After decompression, you can create shortcuts on the desktop as needed. The method is as follows:
The eclipse files here are in the home directory, so open the eclipse folder in the home directory, select eclipse and make link, and the created shortcut can be moved to the desktop.
3. Download the jar package with eclipse
-
The downloaded jar package must be consistent with the Linux system, hadoop version and eclipse. Here, I installed eclipse version 2.6.0. After downloading, move the jar package to the plugins directory of eclipse. We can directly use the command line:
cp hadoop-eclipse-plugin-2.6.0.jar /home/eclipse/plugins
-
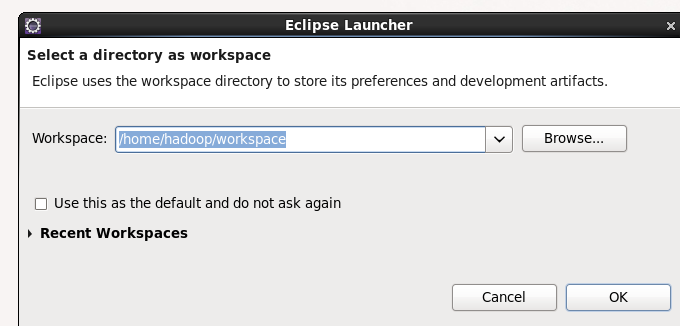
Now you can open eclipse. I open eclipse and a startup option pops up. Let's click ok
-
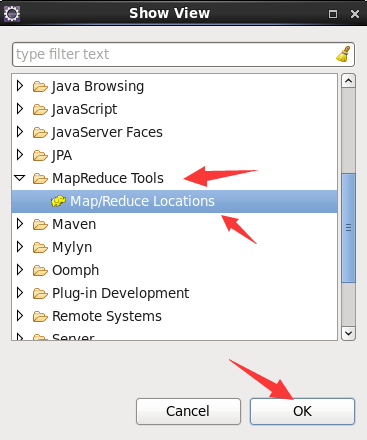
In the eclipse graphical interface, click Windows toolbar - > show view - > others on the menu in the upper left corner, as shown in the figure:
-
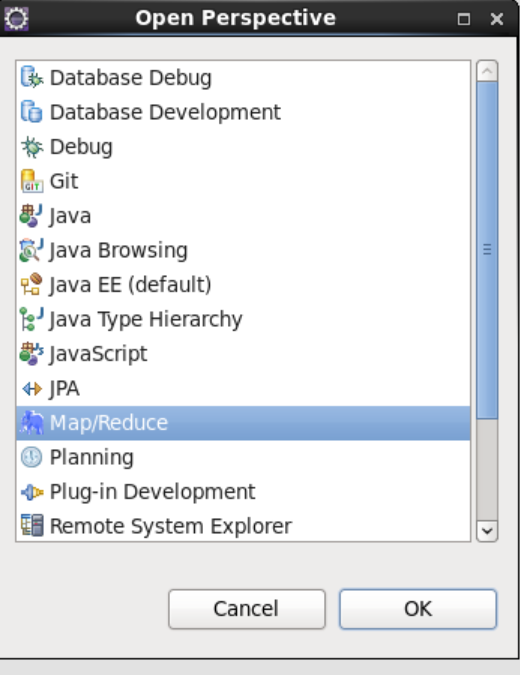
(1) Click window - > perspective - > open perspective and select Map/Reduce
-
After completing the above operations, we can get the following interface: we click the elephant in the lower right corner, new hadoop location
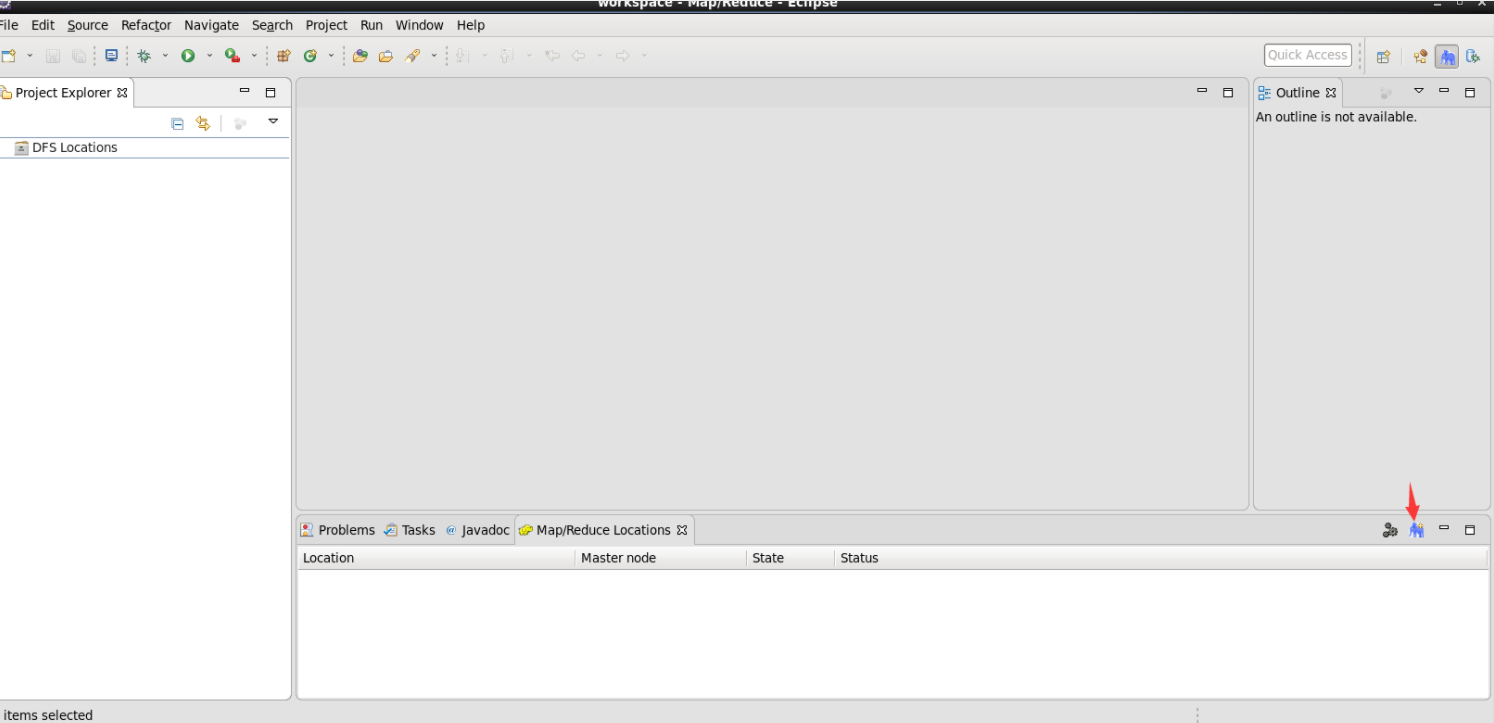
-
The next steps are more important. I stepped on a hole here. In the final analysis, some tutorials are vague and did not explain the meaning of the following configuration. I roughly sorted it out here. location name: fill in a name. I fill in exam1 host: the IP address of the primary node. The port on the left defaults, The port on the right fills in the hdfs port number in the core-site.xml file. I set 8020 here
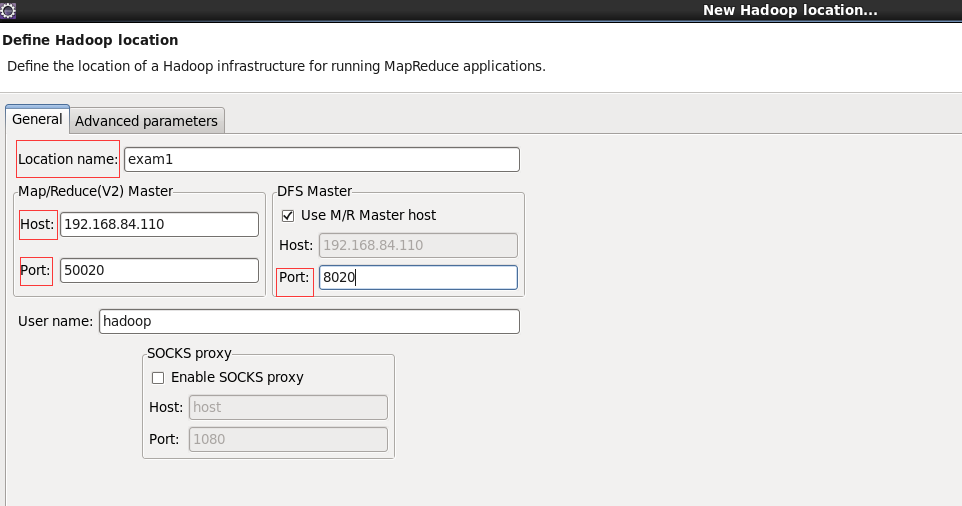
-
After creation, we will see the following interface. Click the folded parts in turn:
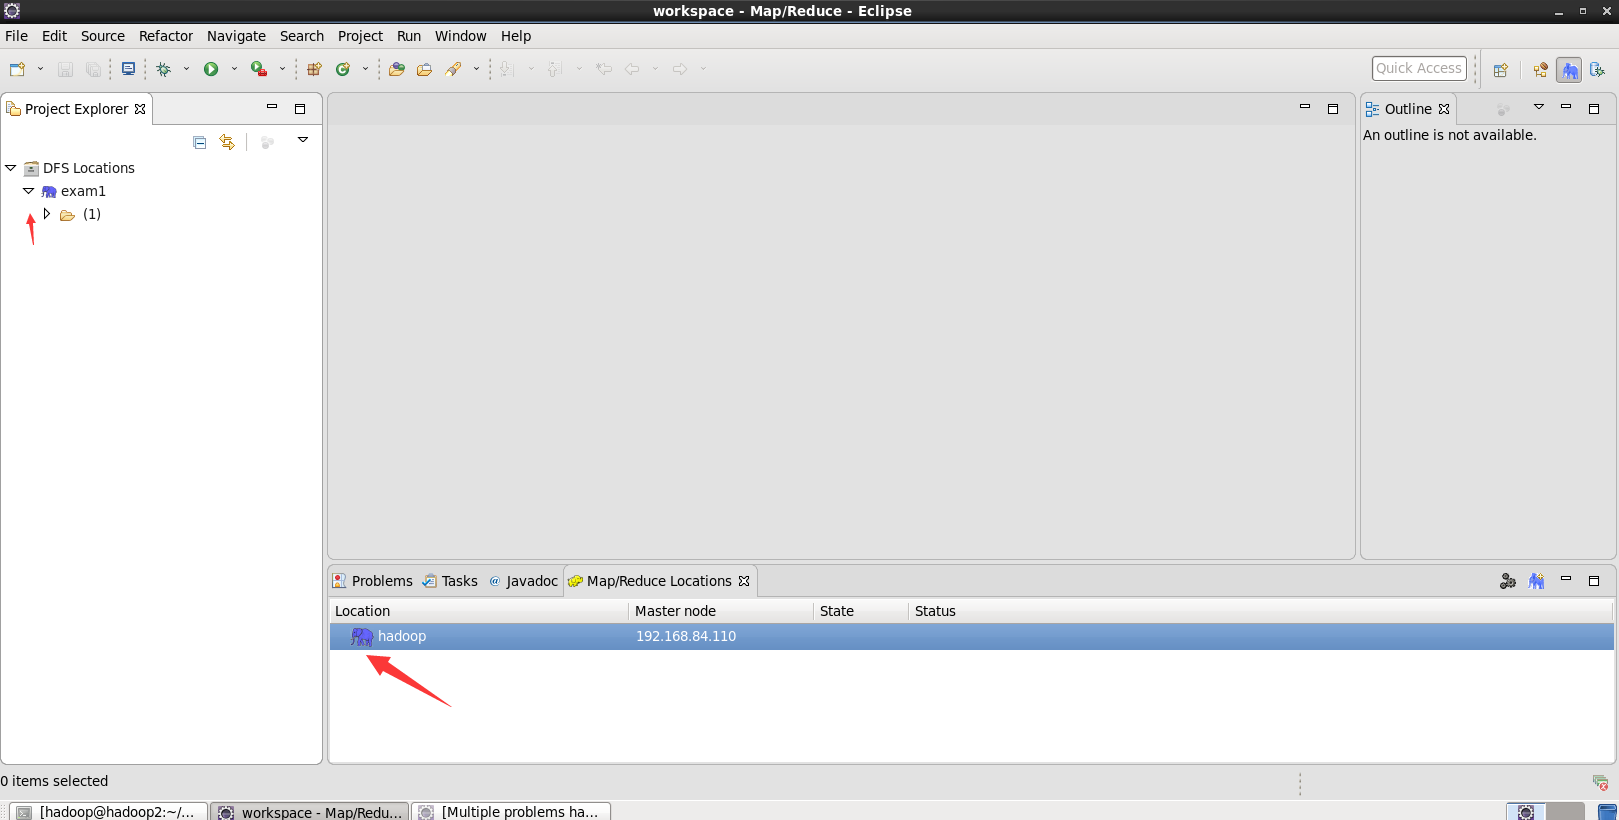
-
Then create the project, map/reduce project
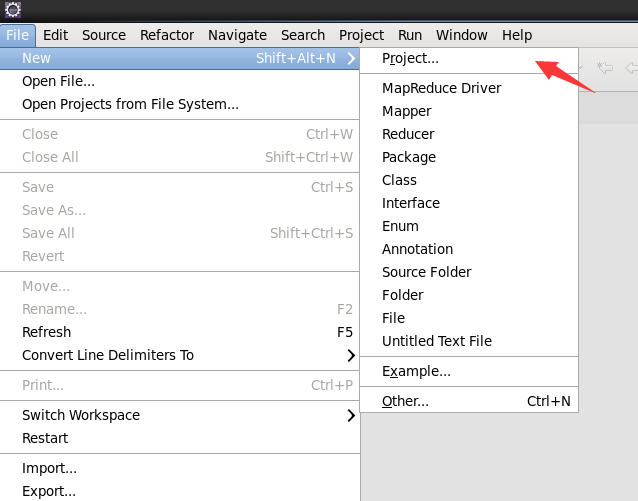
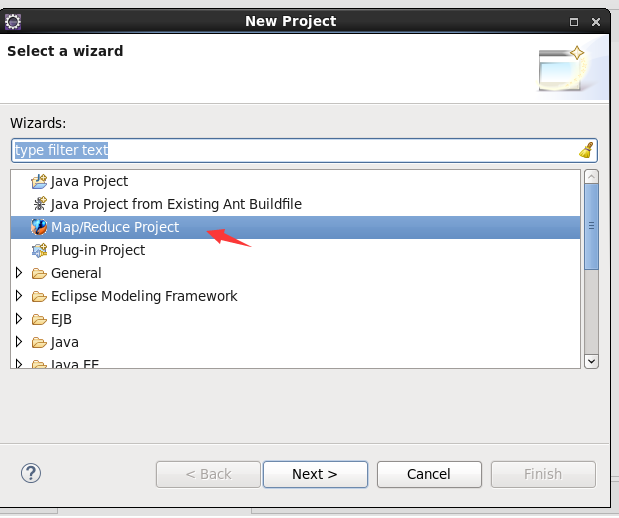
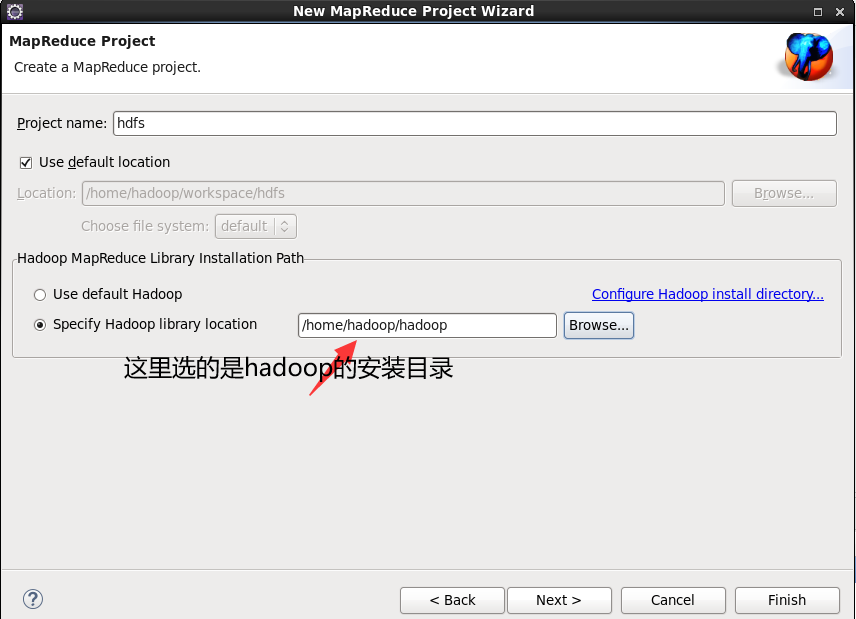
-
We can see that the corresponding packages have also been imported here, but we still have some hdfs packages that have not been imported. We then import the hdfs operation packages as follows:
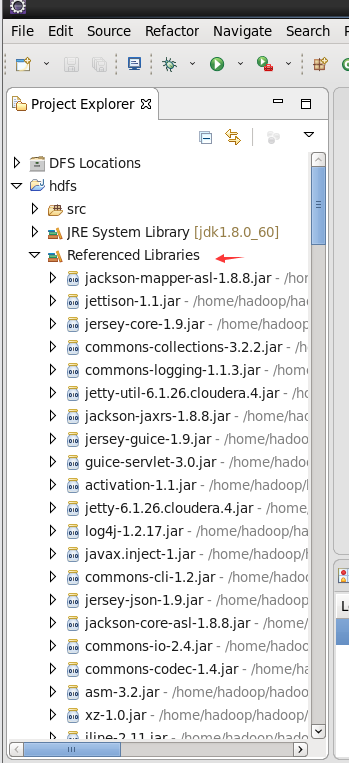
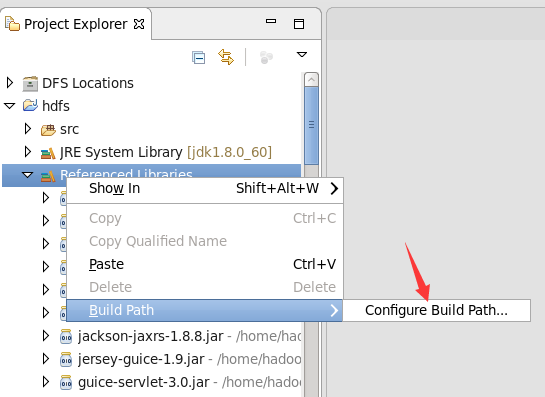
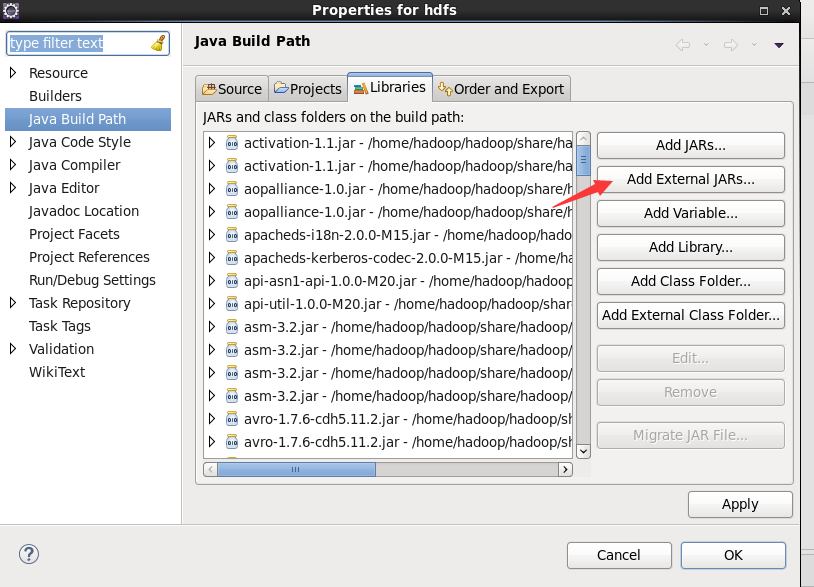
-
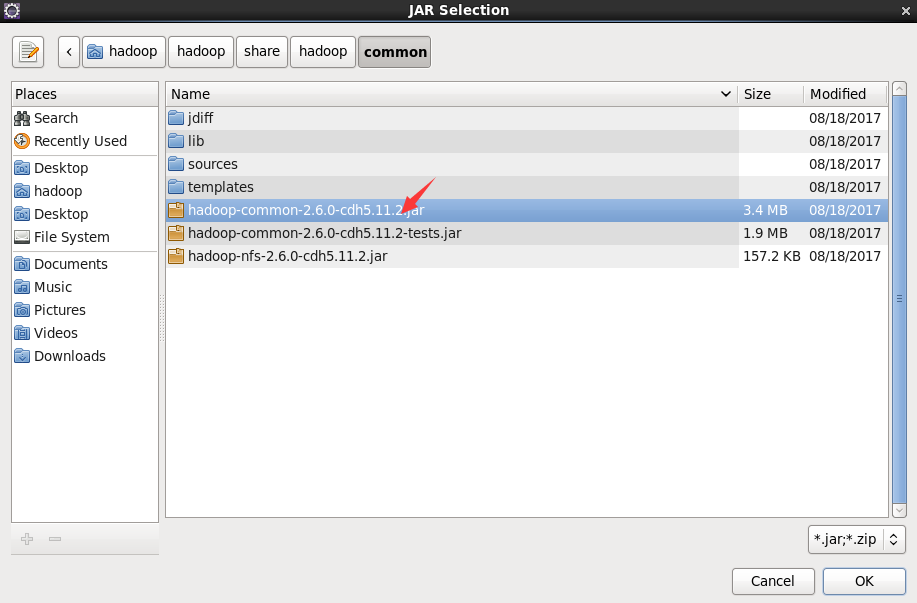
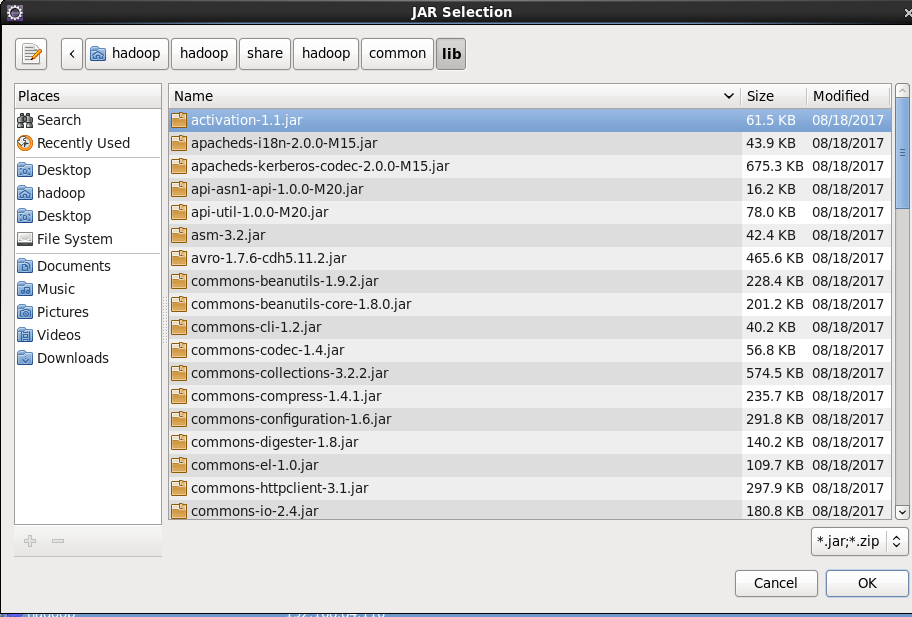
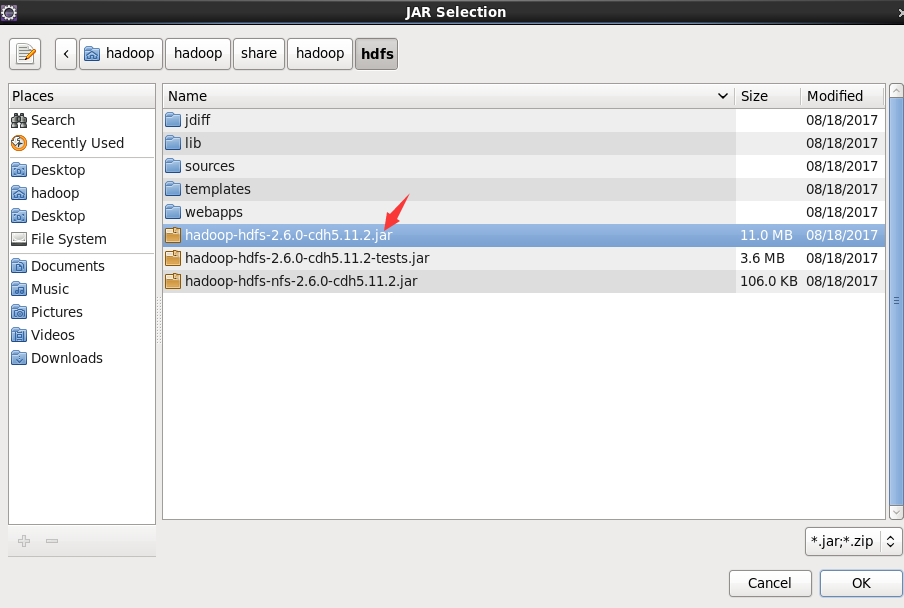
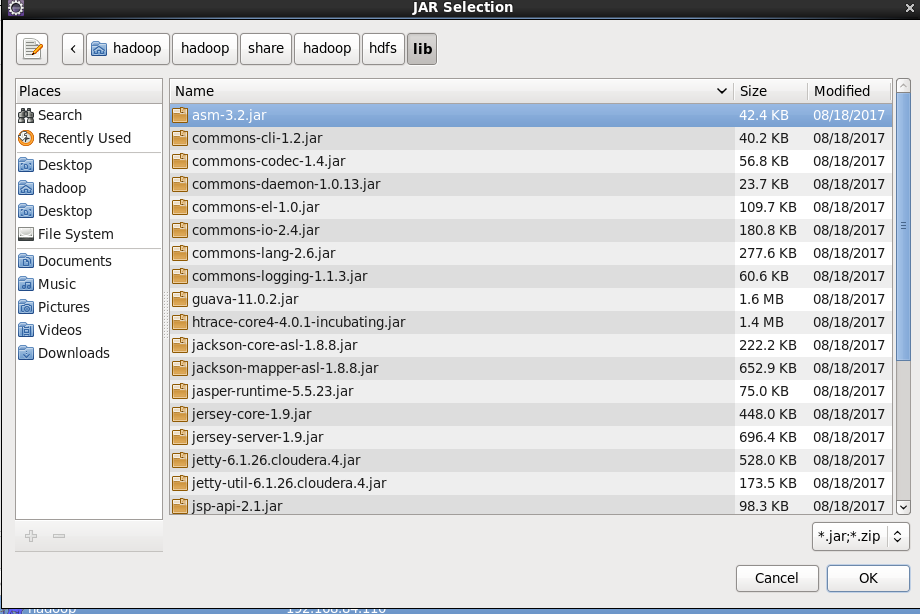
Click the following directory to import the package, / home/hadoop/hadoop/share/hadoop/common, and import the first package/ home/hadoop/hadoop/share/hadoop/common/lib import all packages/ A package of home/hadoop/hadoop/share/hadoop/hdfs, as shown in the figure/ All packages of home/hadoop/hadoop/share/hadoop/hdfs/lib. Remember to apply after importing all the packages.
3, Operation and experiment of eclipse
1. Read words
Configure the input and output in the operation to reach the directory of the test
1) Next, I'll give you this Code: note that my package here is hdfs and the class name is HdfsDemo. The functions of this code are as follows: count words and display them at last.
package hdfs;

import java.io.IOException;
import java.util.*;
import org.apache.hadoop.fs.Path;
import org.apache.hadoop.conf.*;
import org.apache.hadoop.io.*;
import org.apache.hadoop.mapred.*;
import org.apache.hadoop.util.*;

public class HdfsDemo {
	public static class Map extends MapReduceBase implements Mapper<LongWritable, Text, Text, IntWritable> {

		private final static IntWritable one = new IntWritable(1);
		private Text word = new Text();
		public void map(LongWritable key, Text value, OutputCollector<Text, IntWritable> output, Reporter reporter)
				throws IOException {
			String line = value.toString();
			StringTokenizer tokenizer = new StringTokenizer(line);
			while (tokenizer.hasMoreTokens()) {
				word.set(tokenizer.nextToken());
				output.collect(word, one);
			}
		}
	}

	public static class Reduce extends MapReduceBase implements Reducer<Text, IntWritable, Text, IntWritable> {
		public void reduce(Text key, Iterator<IntWritable> values, OutputCollector<Text, IntWritable> output,
				Reporter reporter) throws IOException {
			int sum = 0;
			while (values.hasNext()) {
				sum += values.next().get();
			}
			output.collect(key, new IntWritable(sum));
		}
	}

	public static void main(String[] args) throws Exception {

		JobConf conf = new JobConf(HdfsDemo.class);
		conf.setJobName("wordcount");

		conf.setOutputKeyClass(Text.class);
		conf.setOutputValueClass(IntWritable.class);

		conf.setMapperClass(Map.class);
		conf.setReducerClass(Reduce.class);

		conf.setInputFormat(TextInputFormat.class);
		conf.setOutputFormat(TextOutputFormat.class);

		FileInputFormat.setInputPaths(conf, new Path(args[0]));
		FileOutputFormat.setOutputPath(conf, new Path(args[1]));

		JobClient.runJob(conf);
	}
}
2) We can select run configurations when running, and then configure which input file is. The output file must be a new directory defined by ourselves, or an error will be reported.
[the external chain image transfer fails. The source station may have an anti-theft chain mechanism. It is recommended to save the image and upload it directly (img-sckjtaen-163300770421) (C: / users / February / appdata / roaming / typora / typora user images / image-20210930190916705. PNG)]
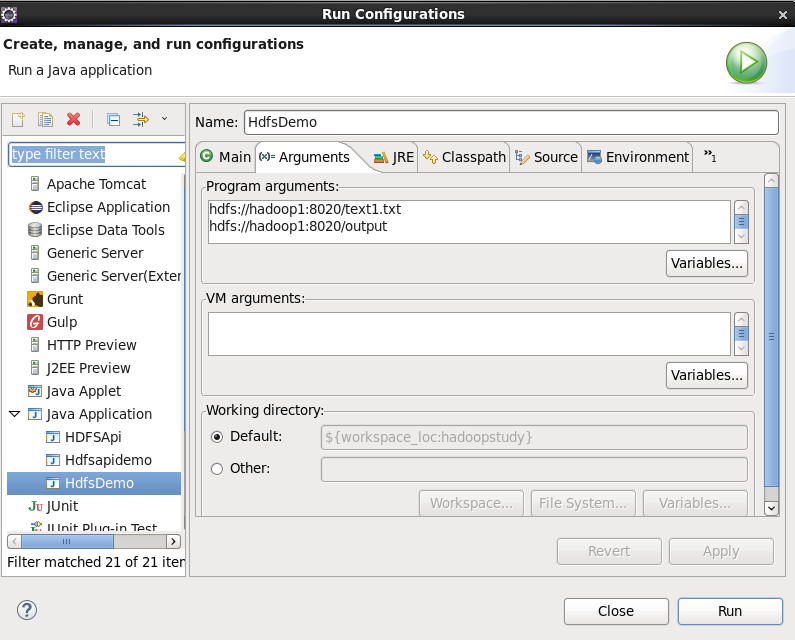
3) Here, my text1.txt file bit is the same as the root directory of the hdfs file system. The contents are as follows:

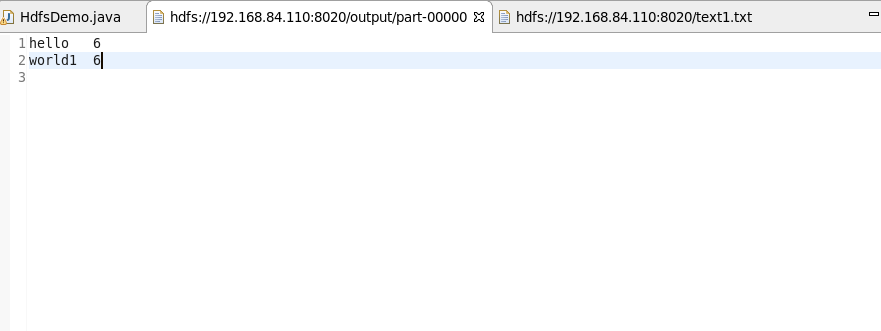
4) Refresh the whole exam after running. We can see that an output directory appears in the root directory, which contains two files. Click the file beginning with part, and we can see:
OK, the eclipse configuration is complete.
4, End
The above is our eclipse configuration process. If you don't understand anything, you can leave a message in the comment area.
The next blog will introduce the java Api operation of hdfs, and I will summarize it with my experimental homework as an example.