The operating system version for this article is CentOS-8.Ubuntu is the same.
Install go
[zy@study ~]$ cat /proc/version
Linux version 4.18.0-305.12.1.el8_4.x86_64 (mockbuild@kbuilder.bsys.centos.org) (gcc version 8.4.1 20200928 (Red Hat 8.4.1-1) (GCC)) #1 SMP Wed Aug 11 01:59:55 UTC 2021
Download go installation files

Select the package for the linux corresponding schema.
For example, if it is an intel and AMD CPU computer, the download suffix is amd64.tar.gz file.
This article downloads go1.17.linux-amd64.tar.gz
With normal users, non-root users, create an environment folder (any location, any name) in your personal user directory specifically for the installation environment under which go and python are stored.
[zy@study ~]$ mkdir environment
[zy@study ~]$ cd environment
Directory: /home/zy/environment
Unzip the downloaded installation package into this folder. (This article places the installation package under the environment/installation package folder.)
[zy@study environment]$ tar zxf /home/zy/environment/Installation package/go1.17.linux-amd64.tar.gz
When the decompression is complete, there is a go folder under the environment folder, which is the installation directory of go.GOROOT is also mentioned later
Then create a folder under the environment folder as the installation directory of the go third-party library, which is the GOPATH mentioned later. The file name can be taken at will. This article takes the name gopath.
[zy@study environment]$ mkdir gopath
Directory structure:
[zy@study ~]$ tree /home/zy/environment -L 1
/home/zy/environment
├── Installation package
├── go
├── gopath

4 directories, 0 files
Configuring go environment variables
Use root privileges to enter the root user (you can also not enter the root user, if you do not enter the root user, then the modified file is/home/zy/.bashrc, with the same modifications)
Modify file/etc/bashrc
[root@study ~]# vim /etc/bashrc
Press the keyboard i key to edit and add the following to the end of the file
# Go
export GOROOT=/home/zy/environment/go
export PATH=$GOROOT/bin:$PATH
export GOPATH=/home/zy/environment/gopath
export GO111MODULE=auto
export GOPROXY=https://goproxy.cn,direct
export PATH=$PATH:$GOROOT/bin:$GOPATH/bin
Among them, GOROOT is the installation directory of go mentioned earlier, that is, the unzipped directory.GOPATH is the installation directory for third-party libraries, as mentioned earlier.
Then press esc and enter: wq to save the changes and exit.
Enter source/etc/bashrc after the command to reload bashrc.
[root@study ~]# source /etc/bashrc
[root@study ~]# exit
Enter the command exit to exit the root user.Continue using regular users.
Enter the go version command to see the go installation version and check if the installation was successful.
[zy@study ~]$ go version
go version go1.17 linux/amd64
Install third-party libraries necessary for go to run.Especially the galleries on the bloody golang.org website.
In the previous section, when modifying the contents of the / etc/bashrc file, a proxy has been added with the following code:
export GO111MODULE=auto
export GOPROXY=https://goproxy.cn,direct
If no proxy is added, the library on golang.org cannot be downloaded.If you do not add this code, if you can use the root user, modify the / etc/bashrc file with the root user and add it at the end.If the root user is not available and only the normal user is available, modify the.Bashrc file in the normal user directory.For example, if the user name is zy, modify the file to/home/zy/.bashrc
Open vs Code (recommended vs code, open source), install Chinese in the extension (self-Baidu), install go
Then create a new go code file, main.go
//main.go
package main

import "fmt"

func main() {
	fmt.Println("hello world")
}
Save, and then vs code automatically pops up the missing third-party library error warning in the lower right corner.
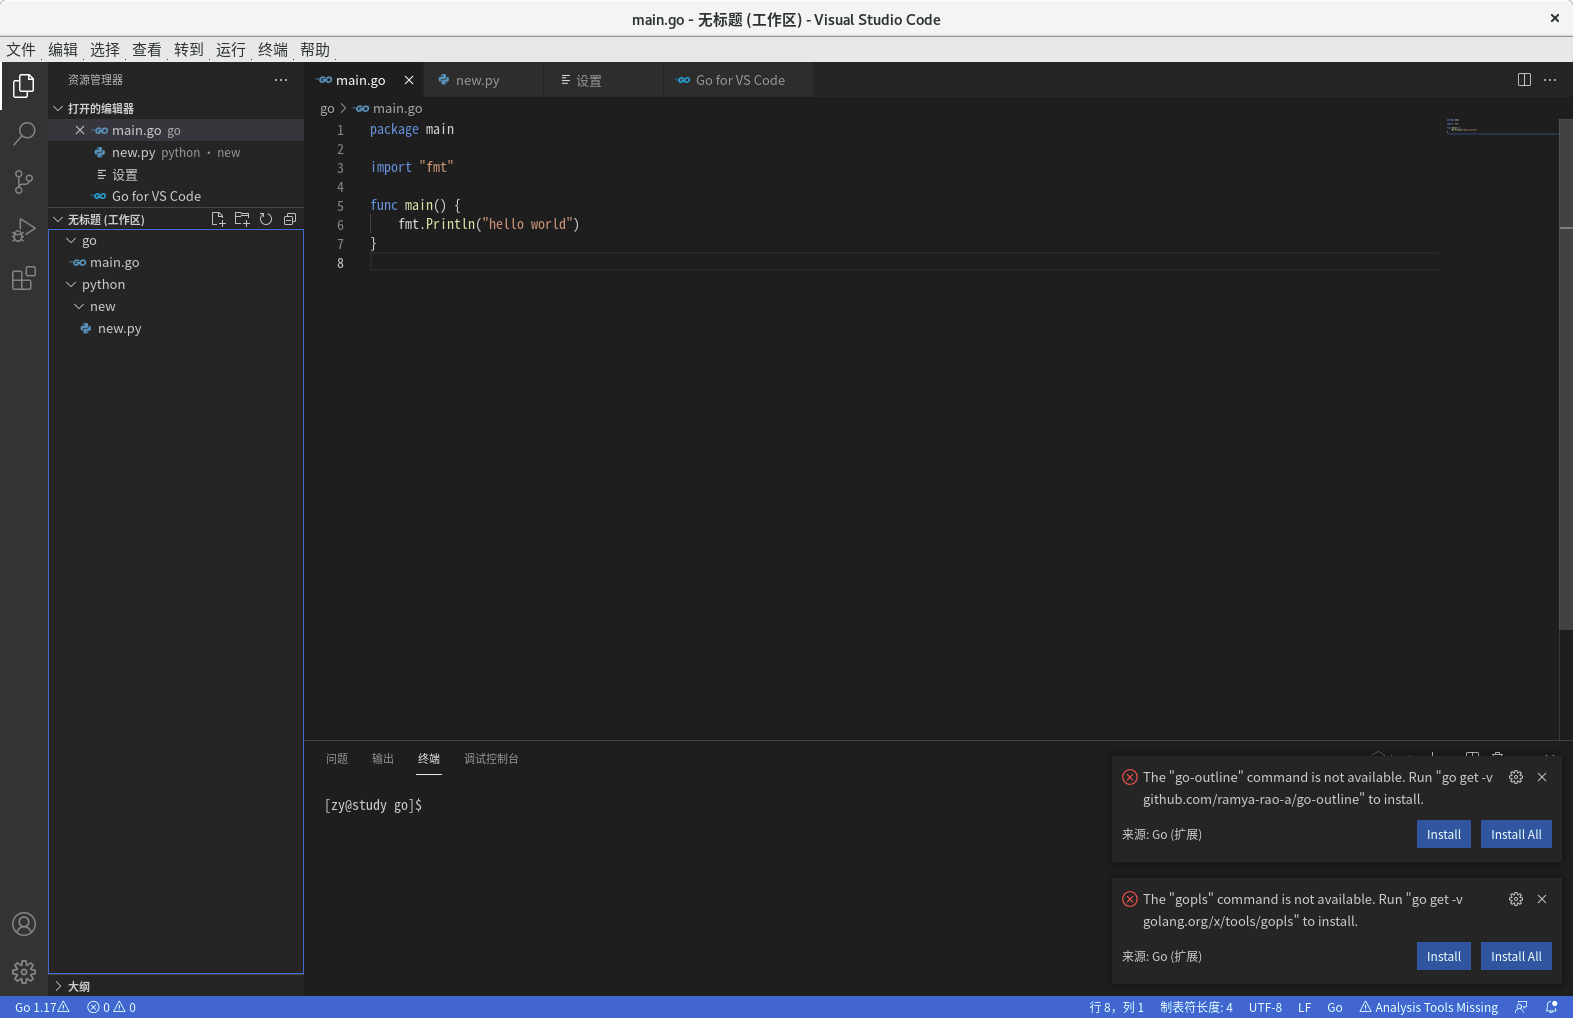
Click install all in the lower right corner.
Automatically install all missing packages.If you set up the proxy in the previous step, an error will occur and you will not be able to connect to the network.
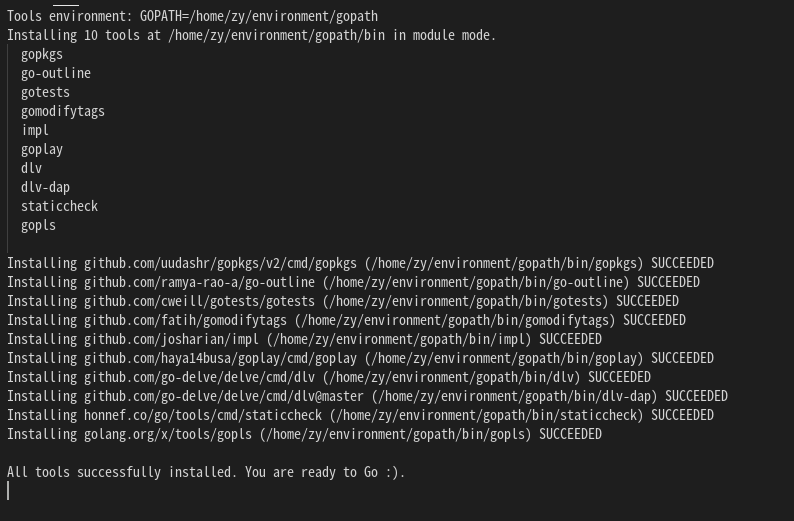
All installation is complete, keyboard F5 runs code.

Run Successfully!