background
As we all know, front-end anomaly monitoring is becoming more and more important in the actual production environment. By connecting the website to the front-end anomaly monitoring system, we can obtain the following benefits:
- Collect page error information
- Auxiliary positioning code error location
- Find the problem before the user reports the failure
This is of great significance to improve the quality of online system and reduce the number of online faults. Compared with waiting for the user to feed back the fault, by accessing the anomaly monitoring system, it can turn the passive into active and shorten the process and time of online fault handling.
Front end anomaly monitoring scheme
- badjs
- fundebug
- Sentry
At present, there are several popular exception monitoring schemes, but considering the ease of use, free or not, and whether the project is open source, I think Sentry is a very good choice. The server deployment is also very simple. Of course, the server can also directly use the ones provided by sentry, The website client can monitor page script exceptions by introducing sentry sdk and inserting the code to initialize sentry.
Sentry deployment
Install Docker
sudo yum remove docker  docker-common docker-selinux docker-engine
sudo yum install -y yum-utils device-mapper-persistent-data lvm2
sudo yum-config-manager --add-repo https://download.docker.com/linux/centos/docker-ce.repo
yum list docker-ce --showduplicates | sort -r
sudo yum install docker-ce
sudo systemctl start docker
sudo systemctl enable docker
Docker installation Sentry
- Pull Sentry warehouse
git clone https://github.com/getsentry/onpremise.git
- Create Sentry service
cd onpremise
New docker local database
docker volume create --name=sentry-data &&
docker volume create --name=sentry-postgres &&
docker volume create --name=sentry-redis &&
docker volume create --name=sentry-zookeeper &&
docker volume create --name=sentry-kafka &&
docker volume create --name=sentry-clickhouse &&
docker volume create --name=sentry-symbolicator
Create env profile
cp -n .env.example .env
COMPOSE_PROJECT_NAME=sentry_onpremise
SENTRY_EVENT_RETENTION_DAYS=90
# You can either use a port number or an IP:PORT combo for SENTRY_BIND
# See https://docs.docker.com/compose/compose-file/#ports for more
SENTRY_BIND=9000
SENTRY_IMAGE=getsentry/sentry:nightly
SNUBA_IMAGE=getsentry/snuba:nightly
RELAY_IMAGE=getsentry/relay:nightly
SYMBOLICATOR_IMAGE=getsentry/symbolicator:nightly
WAL2JSON_VERSION=latest
Build service
docker-compose build
If the error "- bash: docker compose: command not found" is reported, you need to install docker compose:
yum -y install epel-release
yum -y install python-pip
pip install docker-compose
Generate secret key
docker-compose run --rm web config generate-secret-key
...
Digest: sha256:de277fb0489fa674e28ce44a790840ece63dbacd696c990b95abdf0135ae5283
Status: Downloaded newer image for getsentry/sentry:nightly
4ghk9%xzwzg#e9yv5(w@rabcq626y&n*fygk=tzah%d!*la!1l
The last line is the generated secret key. Add the generated secret key to the Sentry of env_ SECRET_ KEY
COMPOSE_PROJECT_NAME=sentry_onpremise
SENTRY_EVENT_RETENTION_DAYS=90
SENTRY_SECRET_KEY="4ghk9%xzwzg#e9yv5(w@rabcq626y&n*fygk=tzah%d!*la!1l"
# You can either use a port number or an IP:PORT combo for SENTRY_BIND
# See https://docs.docker.com/compose/compose-file/#ports for more
SENTRY_BIND=9000
SENTRY_IMAGE=getsentry/sentry:nightly
SNUBA_IMAGE=getsentry/snuba:nightly
RELAY_IMAGE=getsentry/relay:nightly
SYMBOLICATOR_IMAGE=getsentry/symbolicator:nightly
WAL2JSON_VERSION=latest
Create a database and a super administrator as the account for logging into sentry. Follow the prompts step by step in the creation process
./install.sh
After installation, start all services with the following command:
docker-compose up -d
Then open http: / / server ip:9000 in the browser to see Sentry's server login interface.

Website access Sentry
<script src="${staticDomain}/statics/lib/sentry/bundle.tracing.min.js?v=1.0" crossorigin="anonymous"></script>
<script>
    Sentry.init({
        dsn: "http://054e5400ae8d407eb8927804f0011e70@192.168.4.60:9000/2",
        // this assumes your build process sets "npm_package_version" in the env
        // release: "my-project-name@" + process.env.npm_package_version,
        integrations: [new Sentry.Integrations.BrowserTracing()],

        // We recommend adjusting this value in production, or using tracesSampler
        // for finer control
        // tracesSampleRate: 1.0,
        release: "0.0.1",
    });
</script>
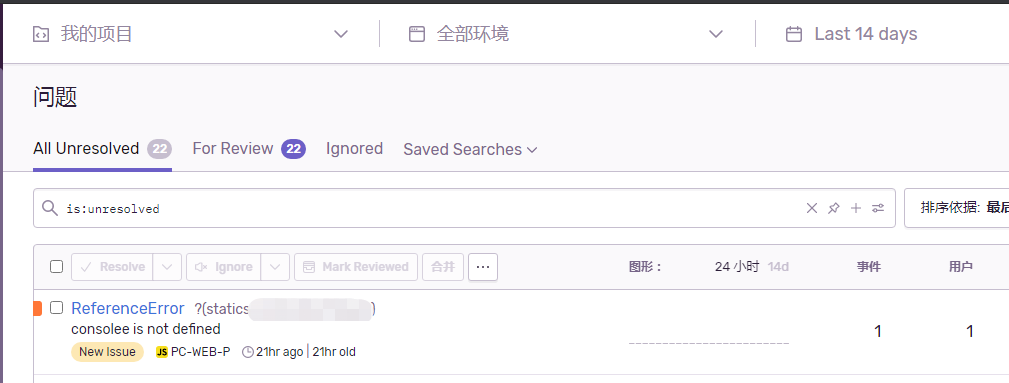
A line of test exception code can be written on the page to verify whether Sentry can receive errors. The exception report received normally is like this
Although abnormal script errors can be monitored here, the code we usually publish to the production environment is compressed and confused. If we want to monitor which line of code causes script errors, we need to upload sourcemaps to Sentry server.
Sentry upload sourcemaps
Sentry uploads sourcemaps in two ways, one through the webpack plug-in and the other through sentry cli. Neither configuration is complicated
, it depends on what construction tools your project uses. If your project is packaged with webpack, it will be easier to upload using webpack plug-in. If you use gulp and other construction tools, it will be easier to use sentry cli.
- Upload sourcemaps from webpack plug-in
Install @ sentry / webpack plugin and clean webpack plugin
npm install @sentry/webpack-plugin clean-webpack-plugin -D
Get authToken
API keys -> Auth Tokens -> Create New Token
In webpack config. JS add the following code:
const SentryWebpackPlugin = require("@sentry/webpack-plugin");
const { CleanWebpackPlugin } = require('clean-webpack-plugin');
module.exports = {
  plugins: [
      new SentryWebpackPlugin({
          url: "http://192.168.4.60:9000/",
          authToken: "9d332444a2804384b38cce5d11664294c9eea7a41aea4e71ae2daaa4c9b5bd7f",
          org: "sentry",
          project: "pc-web",
          // Directory of local sourcemap
          include: ".",
          // js access path. If cdn is used, you need to write the complete domain name and path
          urlPrefix: "http://src.test.com/statics/js/dist"
      }),
  ],
};
- sentry cli upload sourcemaps
Installing sentry cli
npm install @sentry/cli@16.7.1 -D
If the installation fails, the following error is reported:
Downloading from https://downloads.sentry-cdn.com/sentry-cli/1.67.1/sentry-cli-Windows-x86_64.exe Error: Unable to download sentry-cli binary from https://downloads.sentry-cdn.com/sentry-cli/1.67.1/sentry-cli-Windows-x86_64.exe. Error code: ECONNRESET
You can modify the pull address to Taobao image address:
npm config set sentrycli_cdnurl https://npm.taobao.org/mirrors/sentry-cli/
Sourcemaps are generated when configuring code packaging. My project is packaged based on gulp, so use gulp sourcemaps plug-in to generate sourcemaps:
var sourcemaps = require('gulp-sourcemaps');
// Omit other codes
pump([
    gulp.src(path.join(build_path, paths.optimize + '/' + dir + '/' + versiondir + '/*.js')),
    sourcemaps.init(),
    babel(),
    concat(versiondir + '.js'),
    uglify(),
    sourcemaps.write('./'),
    gulp.dest(distPath)
])
// Omit other codes
After performing the build task, the sourcemap file will be generated in the dist directory at the same time.
Upload Sourcemaps to Sentry, and first create a new one in the root directory of the project sentryclirc file, the code is as follows:
[defaults]
url = http://192.168.4.60:9000/
org = sentry
project = pc-web

[auth]
token = 9d332444a2804384b38cce5d11664294c9eea7a41aea4e71ae2daaa4c9b5bd7f
Then add the command to upload sourcemaps in the production packaged script:
gulp js --env pro // Production packaging
sentry-cli releases -o sentry -p pc-web new 0.0.1
sentry-cli releases files 0.0.1 upload-sourcemaps statics/js/dist --url-prefix http://src.test.com/statics/js/dist
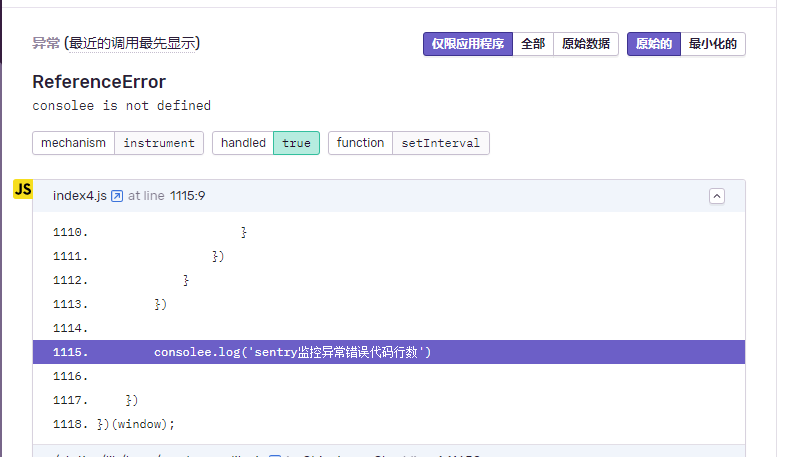
One thing to note here is that the version number of sourcemaps (0.0.1 in the previous example) must be consistent with the release parameter when the website initializes sentry, otherwise sentry monitors that the error reporting script cannot locate the specific source code.
Let's take a look at the effect of monitoring script error reporting:
epilogue
Here, we have completed the access of the website front-end exception monitoring system Sentry. This paper only demonstrates the most basic functions of Sentry. There are other advanced usage plans to be gradually introduced in the future, including website 404 page monitoring, interface performance monitoring, etc.