The interviewer gave a dead order: three servers and build a MySQL master-slave architecture. Can you handle it?
I saw that there were 20 minutes before the next interview.
OK, I'll finish it for you in 10 minutes and write the document.
1, System experiment environment
[root@itlaoxin162 ~]# uname -r
3.10.0-1062.12.1.el7.x86_64
 The kernel is 3.10.0
[root@itlaoxin162 ~]# cat /etc/redhat-release
CentOS Linux release 7.7.1908 (Core)
The system version is centos 7.7
master: 192.168.1.162
slave1; 192.168.1.163
slave2: 192.168.1.71
2, Install MySQL 5.7
1) Download MySQL source
[root@itlaoxin162 ~]# wget https://dev.mysql.com/get/mysql57-community-release-el7-9.noarch.rpm
2) repo installation
[root@itlaoxin162 ~]# rpm -ivh mysql57-community-release-el7-9.noarch.rpm
Warning: mysql57-community-release-el7-9.noarch.rpm: head V3 DSA/SHA1 Signature, secret key ID 5072e1f5: NOKEY
 In preparation...                          ################################# [100%]
Upgrading/install...
   1:mysql57-community-release-el7-9  ################################# [100%]
Delete old MySQL
[root@itlaoxin162 ~]# rpm  -qa |grep mysql
php-mysql-5.4.16-48.el7.x86_64
mysql57-community-release-el7-9.noarch
[root@itlaoxin162 ~]# rpm -e php-mysql-5.4.16-48.el7.x86_64
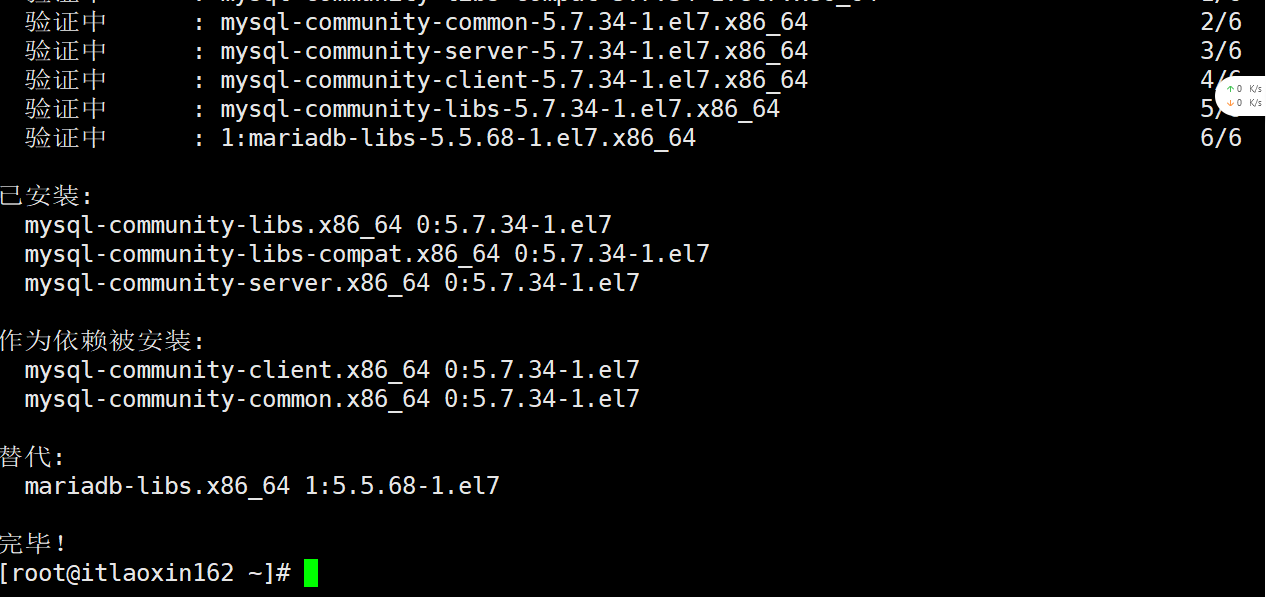
3) Start installing MySQL
[root@itlaoxin162 ~]# yum -y install mysql-community-server
4) Start MySQL
[root@itlaoxin162 ~]# systemctl start  mysqld.service
[root@itlaoxin162 ~]# systemctl status mysqld.service

5) View version:
[root@itlaoxin162 ~]# mysql -V
mysql  Ver 14.14 Distrib 5.7.34, for Linux (x86_64) using  EditLine wrapper
6) Set new password:
MySQL
[root@itlaoxin162 ~]# mysql
Welcome to the MySQL monitor.  Commands end with ; or \g.
Your MySQL connection id is 5
Server version: 5.7.34 MySQL Community Server (GPL)

Copyright (c) 2000, 2021, Oracle and/or its affiliates.
Change the password to ITlaoxin123
mysql> alter user 'root'@'localhost' identified by 'ITlaoxin123' ;
Query OK, 0 rows affected (0.01 sec)
At this point, MySQL 5.7 is installed on the 192.168.1.162 server.
Similarly, we need to install the database on the slave servers 192.168.1.63 and 192.168.1.71.
The database installation method is the same as that of the master. It is omitted here. Please refer to the database installation method of the master.
After the three MySQL are built, you need to turn on the time synchronization and turn off the firewall:
7) Synchronize master server:
Turn off firewalls and selinux
[root@itlaoxin-163 ~]# setenforce 0
[root@itlaoxin-163 ~]# systemctl stop firewalld
 Synchronization server:
[root@itlaoxin-163 ~]# /usr/sbin/ntpdate 192.168.1.162
25 Apr 18:50:18 ntpdate[75307]: no server suitable for synchronization found
[root@itlaoxin-163 ~]#
3, Configure MySQL master master server
1.) modify or add the following contents in / etc/my.cnf
[root@itlaoxin162 ~]# tail -n 3 /etc/my.cnf
server-id = 11
log-bin=master-bin
log-slave-updates=true
[root@itlaoxin162 ~]#
2) Restart MySQL service
[root@itlaoxin162 ~]# systemctl restart mysqld
3) Log in to the MySQL program and authorize the server
#### Authorize the server
mysql> grant replication slave on *.* to 'myslave'@'192.168.1.%' identified by 'ZMedu123456';
Query OK, 0 rows affected, 1 warning (0.01 sec)
Refresh
mysql> flush privileges;
Query OK, 0 rows affected (0.01 sec)
To view the status of the primary server:
mysql> show master status;
+-------------------+----------+--------------+------------------+-------------------+
| File              | Position | Binlog_Do_DB | Binlog_Ignore_DB | Executed_Gtid_Set |
+-------------------+----------+--------------+------------------+-------------------+
| master-bin.000001 |      602 |              |                  |                   |
+-------------------+----------+--------------+------------------+-------------------+
1 row in set (0.00 sec)
The file column shows the log name, and the position column shows the offset
4, Configure slave server
1) Modify or add the following contents in / etc/my.cnf:
[root@itlaoxin-163 ~]# tail -n 3 /etc/my.cnf
server-id = 22   ## The ID here cannot be the same as the primary server
relay-log=relay-log-bin  ## Synchronize logs from the primary server to the local
relay-log-index=slave-relay-bin.index  ## Define the location and name of the relay log
[root@itlaoxin-163 ~]#
2) Restart MySQL from the server
Log in to MySQL
[root@itlaoxin-163 ~]# mysql -uroot -p
Enter password:
3) Configure synchronization
Change the following master according to the results of the master server_ log_ File and master_ log_ Parameters of post
mysql> change master to master_host='192.168.1.162',master_user='myslave',master_password='ZMedu123456',master_log_file='master-bin.000001',master_log_pos=602;
Query OK, 0 rows affected, 2 warnings (0.02 sec)
4) Start synchronization
mysql> start slave;
Query OK, 0 rows affected (0.35 sec)

mysql>
5) Check the slave and make sure both values are yes
mysql> show slave status \G
*************************** 1. row ***************************
               Slave_IO_State: Waiting for master to send event
                  Master_Host: 192.168.1.162
                  Master_User: myslave
                  Master_Port: 3306
                Connect_Retry: 60
              Master_Log_File: master-bin.000001
          Read_Master_Log_Pos: 602
               Relay_Log_File: relay-log-bin.000002
                Relay_Log_Pos: 321
        Relay_Master_Log_File: master-bin.000001
             Slave_IO_Running: Yes
            Slave_SQL_Running: Yes
5, Verify master-slave replication results:
1) Create database on primary server
192.168.1.62 master server
mysql> create database db_test;
Query OK, 1 row affected (0.00 sec)
2) Check whether the databases of the master and slave servers are synchronized
Primary server:
mysql> show databases;
+--------------------+
| Database           |
+--------------------+
| information_schema |
| db_test            |
| mysql              |
| performance_schema |
| sys                |
| test               |
+--------------------+
6 rows in set (0.00 sec)
slave1:
mysql> show databases;
+--------------------+
| Database           |
+--------------------+
| information_schema |
| db_test            |
| mysql              |
| performance_schema |
| sys                |
+--------------------+
5 rows in set (0.00 sec)
slave 2 server
mysql> show databases;
+--------------------+
| Database           |
+--------------------+
| information_schema |
| db_test            |
| mysql              |
| performance_schema |
| sys                |
+--------------------+
5 rows in set (0.00 sec)
You can see that the master-slave synchronization has been realized.
follow-up
Ten minutes later, the interviewer was blindfolded and asked how to do it, so I told him this technique:
In xshell, as long as one build is started, the three can execute commands together:
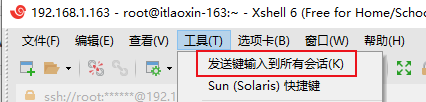
The effort to build one, and MySQL has been installed on all three;
No matter how many servers there are, when operating on one server, all commands will be sent to other servers for synchronous execution. You just need to check whether the execution is successful
The interviewer is going to take me to the subway station again. I really won't go this time!