Original Link: https://mrhelloworld.com/posts/spring/spring-cloud/consul-service-registry/
Netflix Eureka 2.X https://github.com/Netflix/eureka/wiki officially announced the suspension of development, but it has little impact on domestic users. On the one hand, Eureka 1.X series is mostly used in China, and the official is actively maintaining 1.X https://github.com/Netflix/eureka/releases.
The existing open source work on eureka 2.0 is discontinued. The code base and artifacts that were released as part of the existing repository of work on the 2.x branch is considered use at your own risk.
Eureka 1.x is a core part of Netflix's service discovery system and is still an active project.
Translation:
Existing open source work on eureka 2.0 has stopped.Code libraries and artifacts published on the 2.x branch as part of the existing working database are considered at your own risk.
Eureka 1.x is a core part of the Netflix service discovery system and remains an active project.
Although Eureka, Hystrix, and others no longer continue to develop or maintain, it does not affect usage for now. Thank you for Open Source anyway, and salute Netflix for Open Source.
On the other hand, Spring Cloud supports software for many service discoveries, including Eureka, the protagonist we're going to talk about today, Consul.Below is a comparison of the service discovery software and features supported by Spring Cloud.
Common registries
- Netflix Eureka
- Alibaba Nacos
- HashiCorp Consul
- Apache ZooKeeper
- CoreOS Etcd
- CNCF CoreDNS
| Characteristic | Eureka | Nacos | Consul | Zookeeper |
|---|---|---|---|---|
| CAP | AP | CP + AP | CP | CP |
| Health examination | Client Beat | TCP/HTTP/MYSQL/Client Beat | TCP/HTTP/gRPC/Cmd | Keep Alive |
| Avalanche protection | Yes | Yes | nothing | nothing |
| Auto Logoff Instance | Support | Support | I won't support it | Support |
| access protocol | HTTP | HTTP/DNS | HTTP/DNS | TCP |
| Monitoring Support | Support | Support | Support | Support |
| Multiple Data Centers | Support | Support | Support | I won't support it |
| Synchronization across registries | I won't support it | Support | Support | I won't support it |
| SpringCloud integration | Support | Support | Support | Support |
Introduction to Consul
Consul is an open source tool introduced by HashiCorp for service discovery and configuration of distributed systems.With other distributed service registration and discovery scenarios, Consul's scenario is more "one-stop". It has built-in service registration and discovery framework, distributed consistency protocol implementation, health check, Key/Value storage, multi-data center scenario, no longer needs to rely on other tools (such as ZooKeeper), and is easier to use.
Consul is written in the Go language and therefore is naturally portable (supports Linux, Windows, and Mac OS); the installation package contains only one executable file for easy deployment and seamless fit with lightweight containers such as Docker.
Consul Feature
Raft algorithm
- Service Discovery
- Health examination
- Key/Value Storage
- Multiple Data Centers
- Supports http and dns protocol interfaces
Official web administration interface
Consul Role
- client: client, stateless, forwards HTTP and DNS interface requests to the server-side cluster within the LAN.
- Server: server, save configuration information, highly available clusters, the recommended number of servers per data center is 3 or 5.
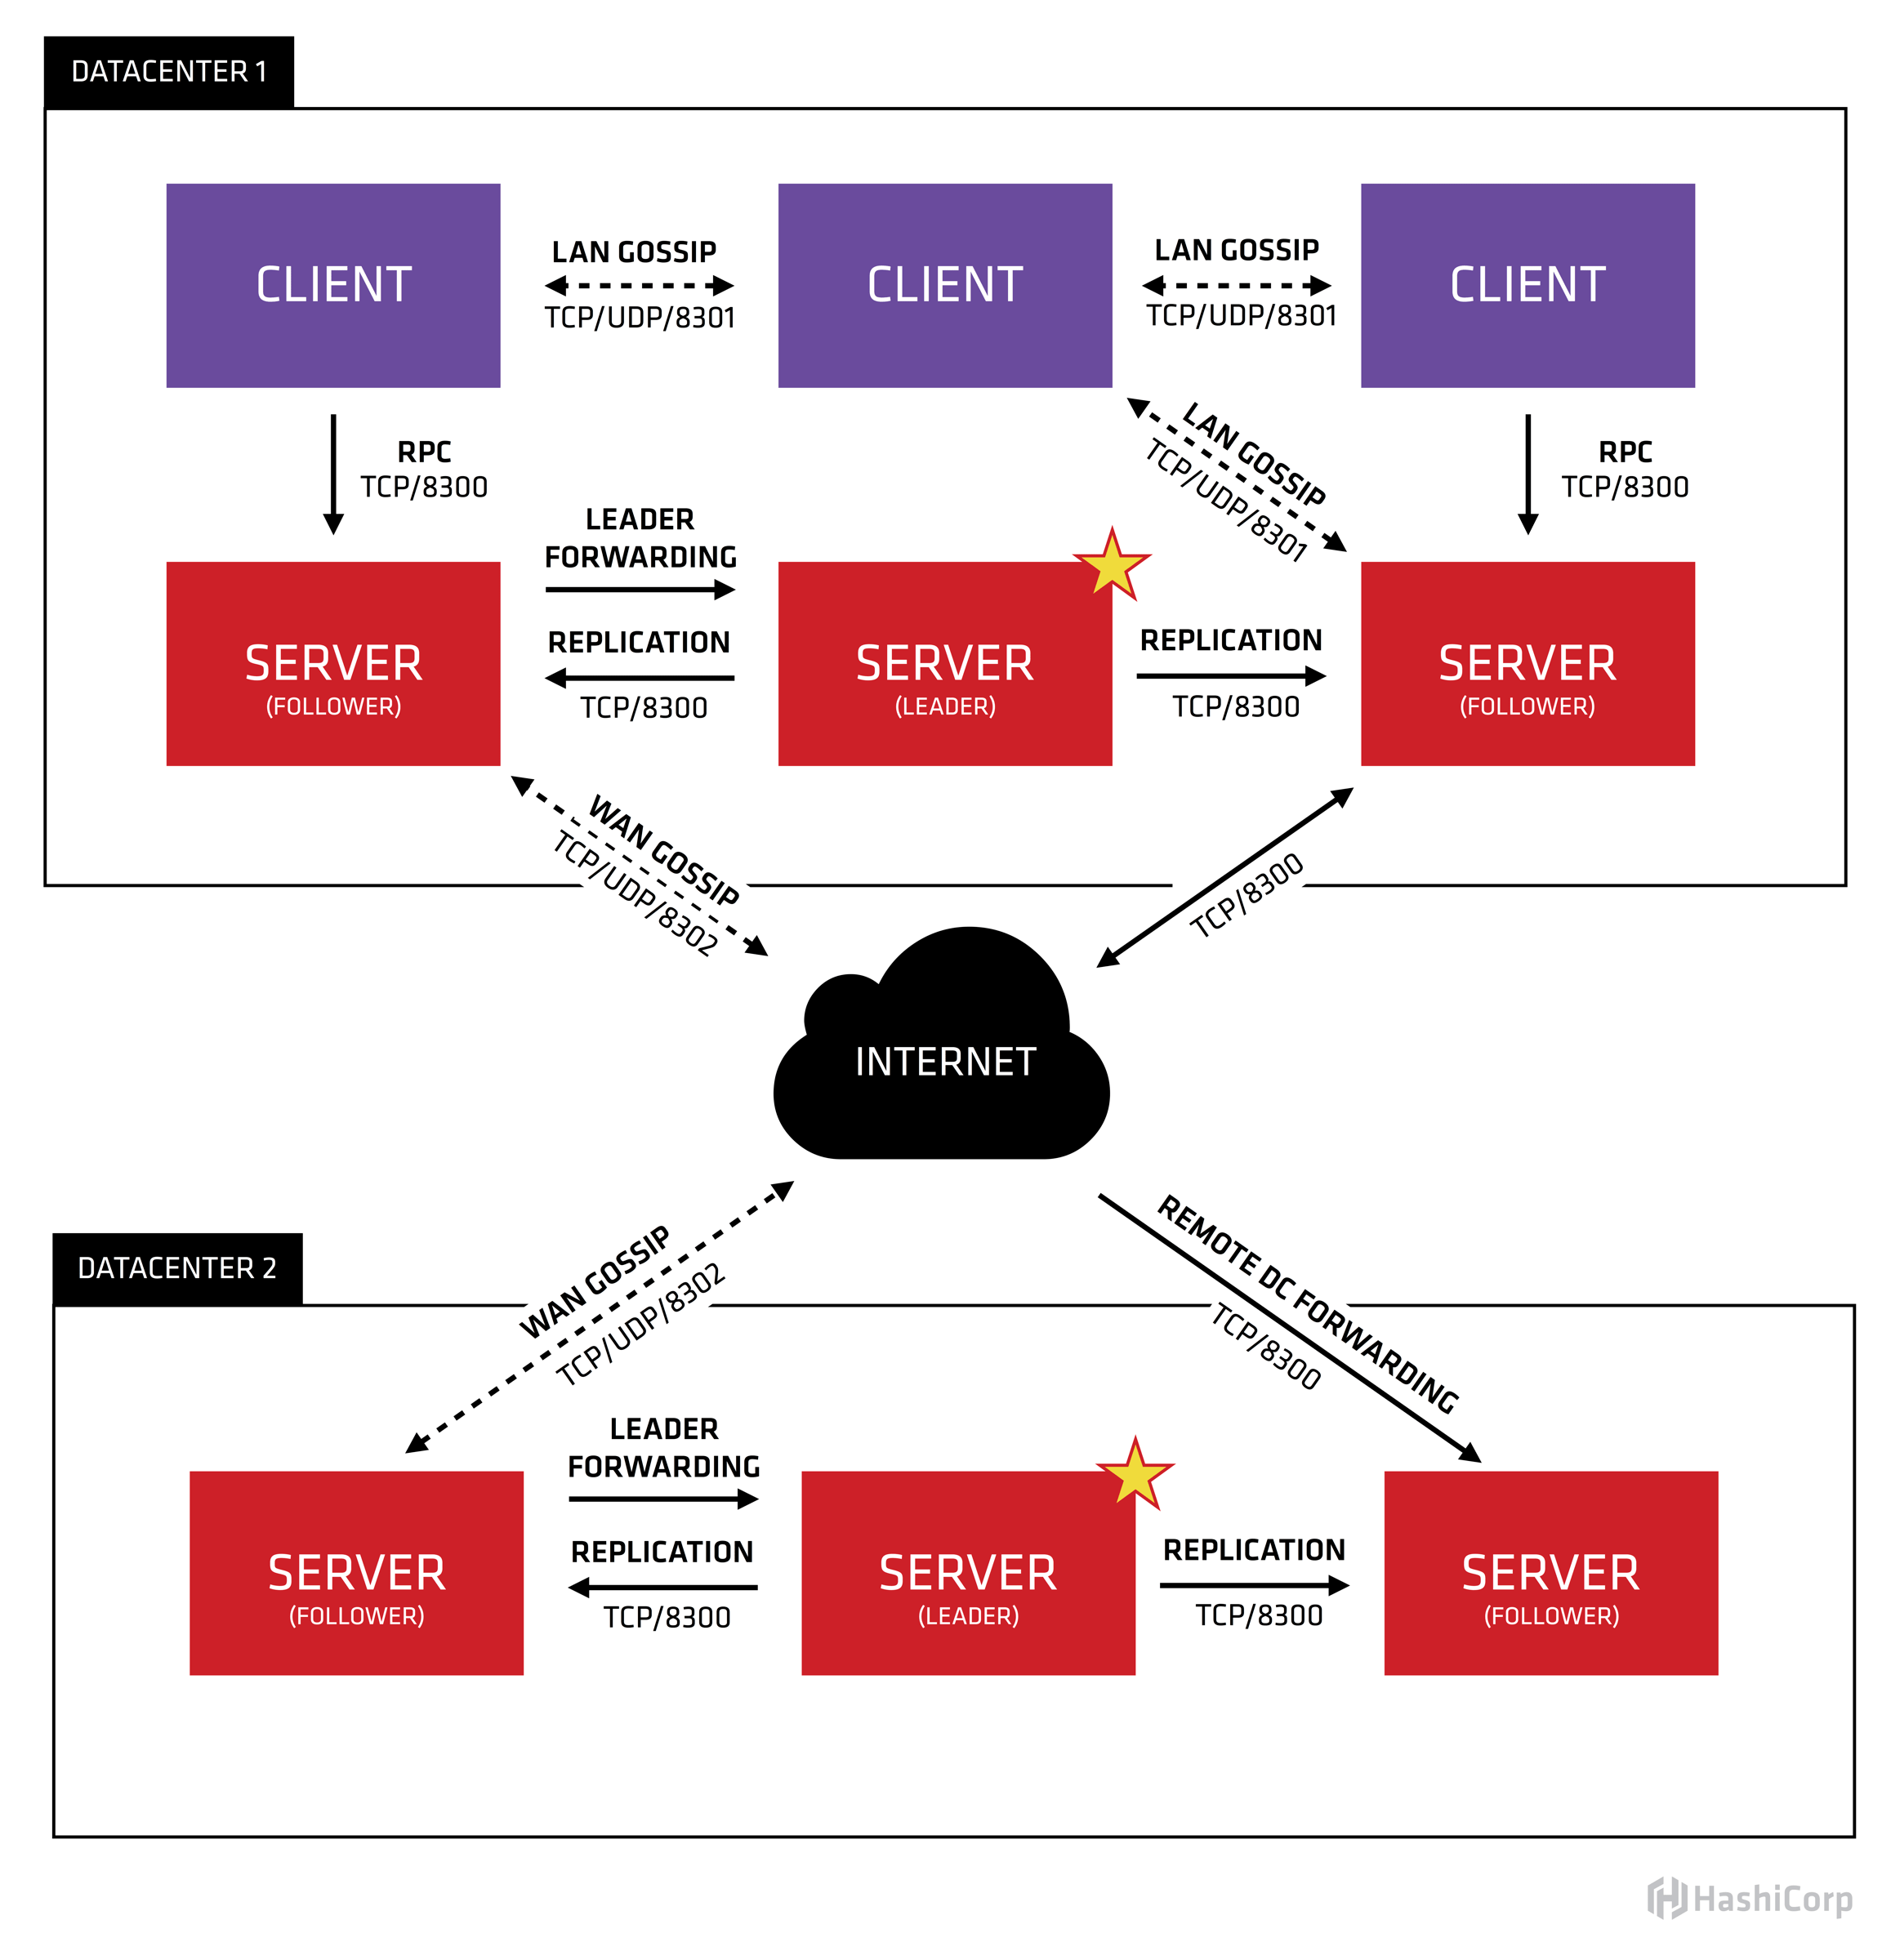
First, there are two data centers in the diagram, Datacenter1 and Datacenter2.Consul is very good at supporting multiple data centers, with clients and servers inside each data center, and servers typically between 3 and 5. This balances stability and performance because more machines can slow data synchronization.However, there is no limit to the number of clients, which can be tens of thousands.
All nodes in the data center will join the Gossip protocol.This means there is a Gossip pool containing all the nodes in this data center.Clients do not need to configure server address information, and discovery of services is done automatically.Detecting failure nodes is not server-side, but distributed; this makes failure detection more scalable than localized heartbeat mechanisms.Data centers are used as message layers to broadcast messages when selecting leader s as an important event.
The servers in each data center are part of a node set in a single Raft.This means they work together and choose a single leader - a selected server with additional responsibilities.Leader handles all queries and things.Things must also be copied to all nodes in the node set as part of the synchronization protocol.Because of this requirement, when a non-leader server receives an RPC request, it forwards the request to the cluster leader.
Server-side nodes are also part of the WAN Gossip pool. Unlike WAN pools and LAN pools, they are optimized for high network latency and contain only the nodes of other Consul servers.The purpose of this pool is to allow data centers to discover each other with minimal consumption.Starting a new data center is as easy as joining an existing WAN Gossip.Because these servers are running in this pool, it also supports cross-data center requests.When a server receives a request for a different data center, it forwards it to a random server in the correct data center.That server might be forwarded to the local leader.
This results in very low data center coupling.However, cross-data center requests are relatively fast and reliable due to fault detection, connection caching, and reuse.
Overall, data is not replicated between different data centers.When a request is received for a resource in another data center, the local Consul server sends an RPC request to the remote Consul server and returns the result.If the remote data center is unavailable, the resource will also be unavailable, but this will not affect the local data center.In some special cases, limited datasets are copied and backed up across data centers, such as Consul's built-in ACL replication capabilities or external tools such as consul-replicate.
How Consul works
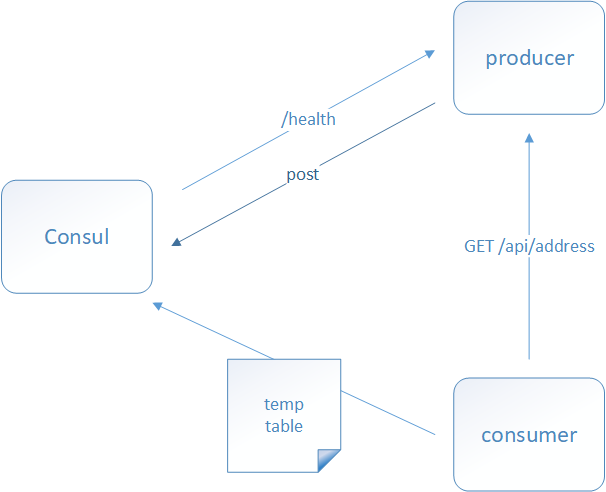
Service Discovery and Registration
When the service Producer starts, it will inform Consul of its Ip/host information by sending a request. After Consul receives the registration information for Producer, it will send a health check request to Producer every 10 seconds (default) to check whether the Producer is healthy.
Service Calls
When a Consumer requests a Product, it first gets a temporary table (temp table) from Consul that stores the IP and Port of the Product service, chooses one of the Producer's IP and Port from the temp table table table table, and then sends an access request based on that IP and Port; the temp table only contains the Producer information that has passed the health check and is updated every 10s (default).
Consul Installation
Eureka is actually a Servlet program running in the Servlet container; Consul is a third-party tool written in go language that needs to be installed and used separately.
download
Visit Consul's website: https://www.consul.io to download the latest version of Consul.
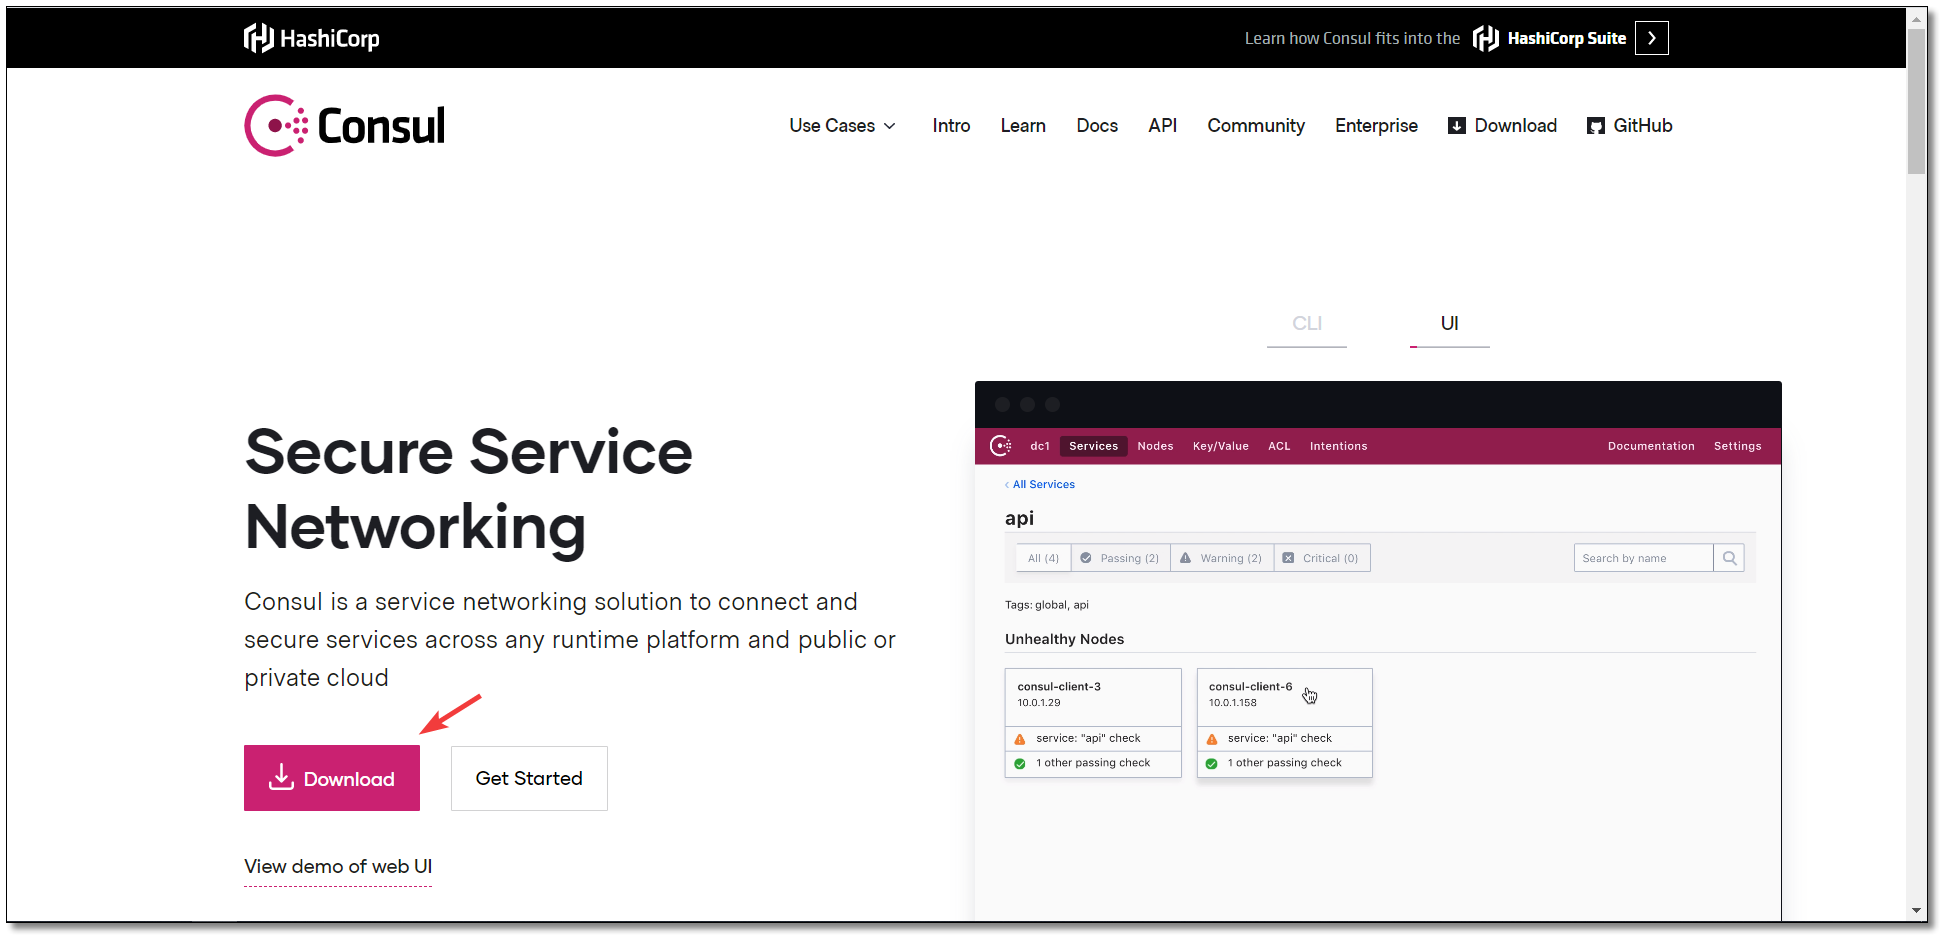
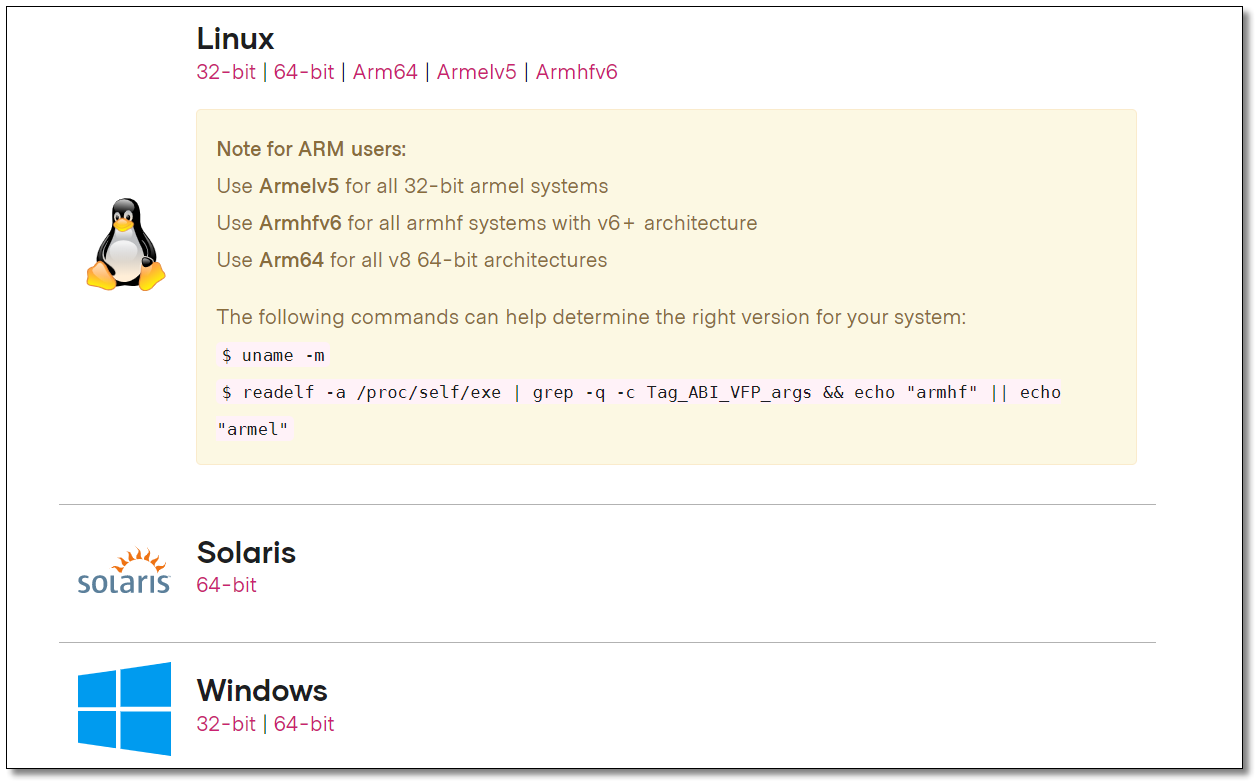
Multiple environment installations are supported, only some of them are shown in the screenshot.
install
To let you learn about installations in different environments, we install a single node on Windows and a clustered environment on Linux.
Single Node
There is only one consul.exe execution file in the compressed package.

cd to the corresponding directory, use cmd to start Consul
# -dev means development mode runs, and-server means service mode runs
consul agent -dev -client=0.0.0.0
For startup convenience, you can also create a script to start under the consul.exe sibling directory, as follows:
consul agent -dev -client=0.0.0.0
pause
Access management background: http://localhost:8500/Seeing the following image means that our Consul service started successfully.
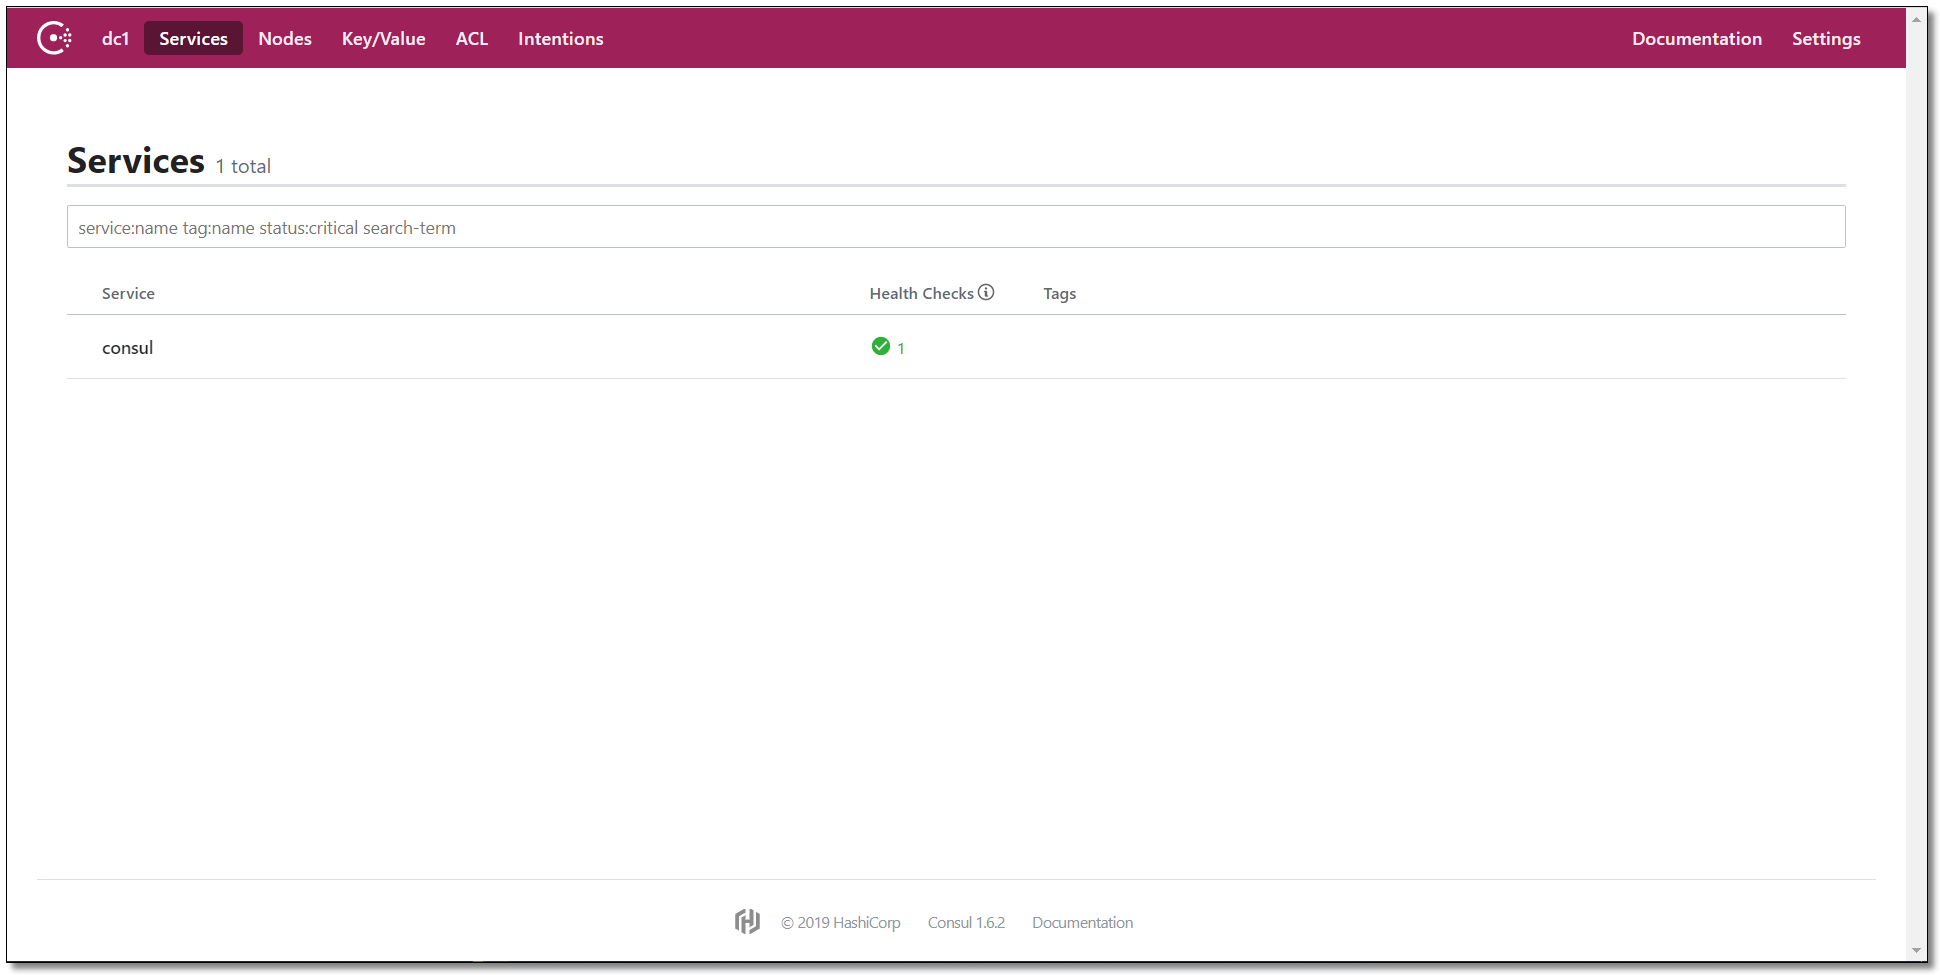
Starter Consul Cases
Create Project
We create an aggregate project to explain Consul, starting with a pom parent project.
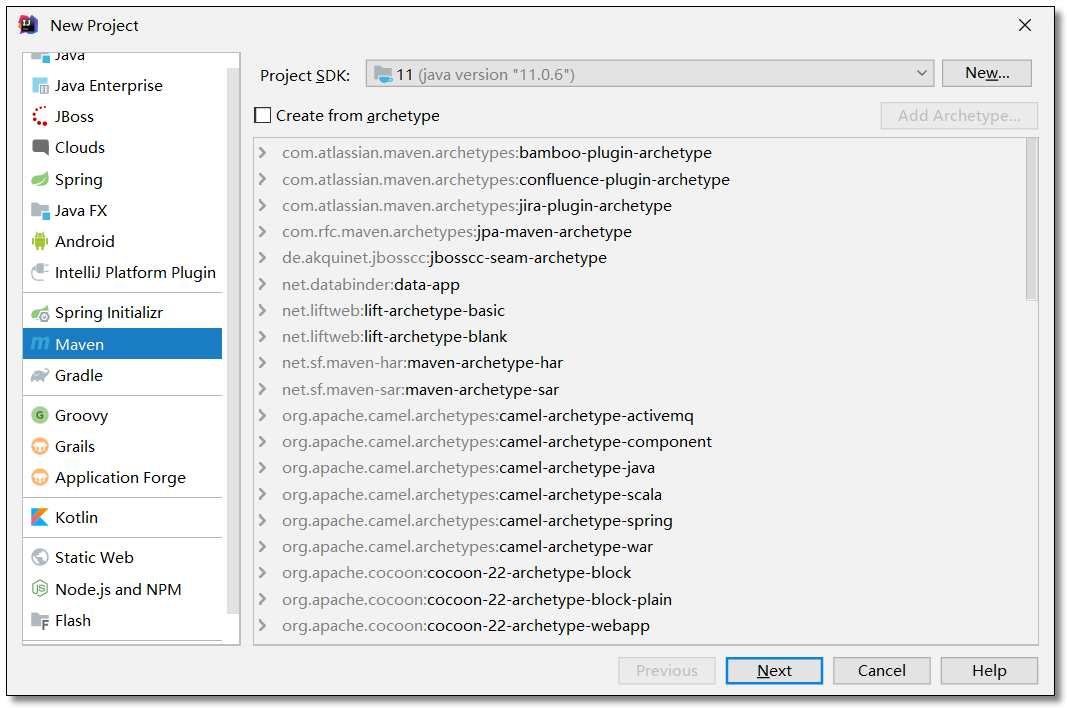
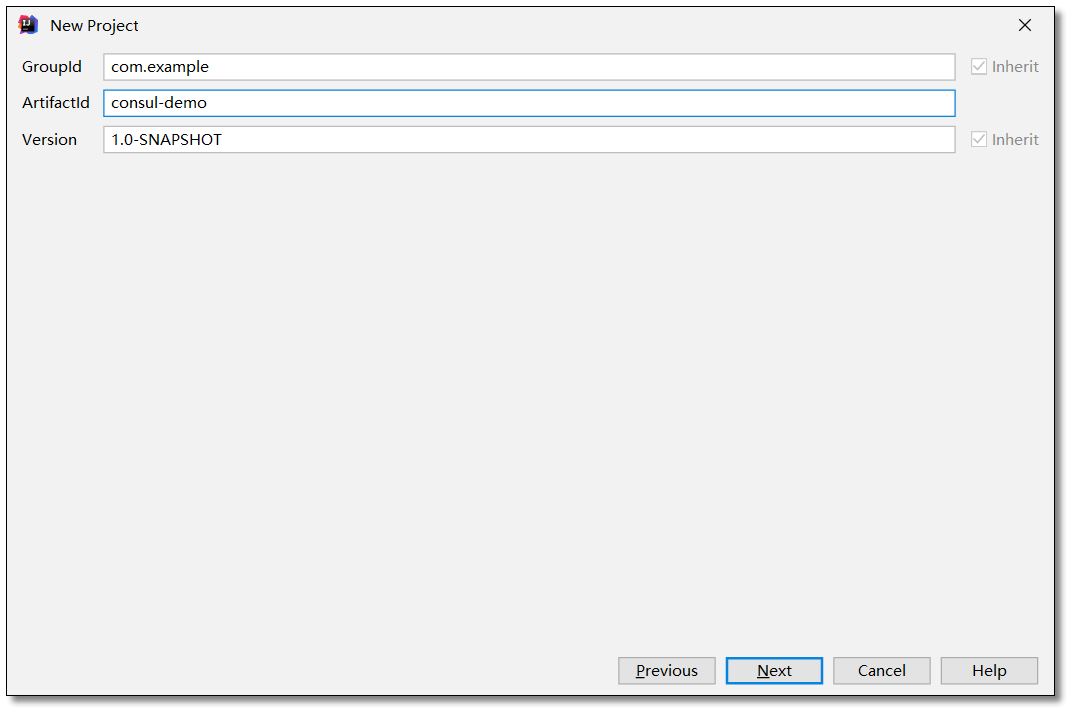
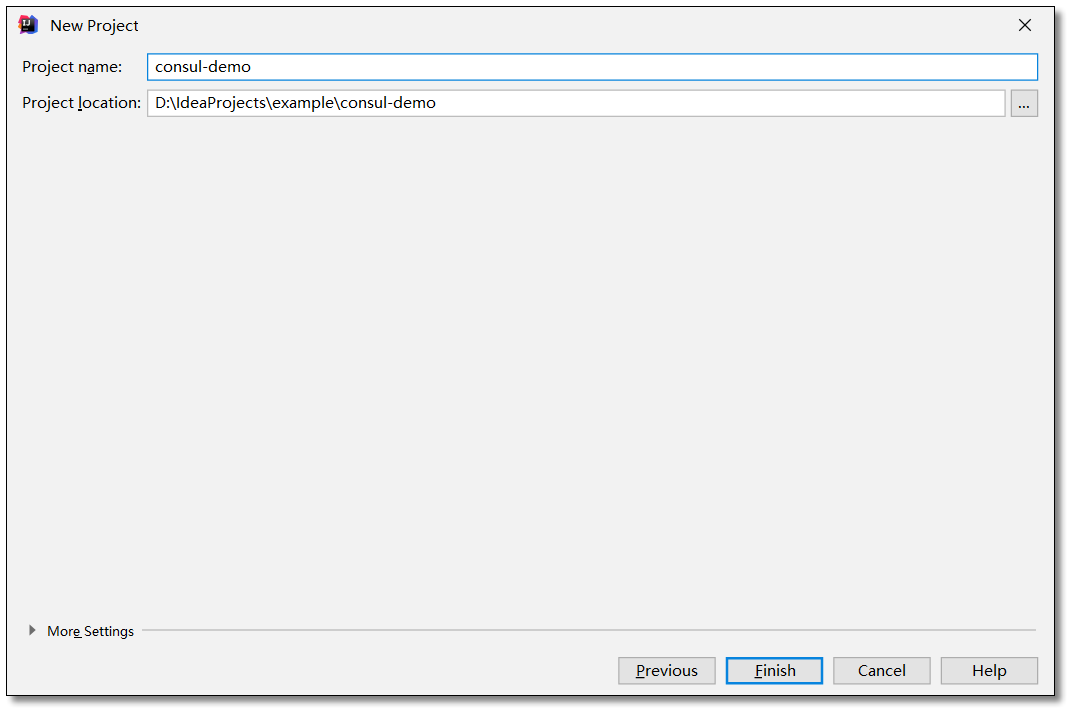
Add Dependency
pom.xml
<?xml version="1.0" encoding="UTF-8"?>
<project xmlns="http://maven.apache.org/POM/4.0.0"
         xmlns:xsi="http://www.w3.org/2001/XMLSchema-instance"
         xsi:schemaLocation="http://maven.apache.org/POM/4.0.0 http://maven.apache.org/xsd/maven-4.0.0.xsd">
    <modelVersion>4.0.0</modelVersion>

    <!-- Item coordinate address -->
    <groupId>com.example</groupId>
    <!-- Project module name -->
    <artifactId>consul-demo</artifactId>
    <!-- Project Version Name Snapshot Version SNAPSHOT,Official Version RELEASE -->
    <version>1.0-SNAPSHOT</version>

    <!-- inherit spring-boot-starter-parent rely on -->
    <!-- Use the inheritance method to achieve reuse, which can be used if the inheritance matches -->
    <parent>
        <groupId>org.springframework.boot</groupId>
        <artifactId>spring-boot-starter-parent</artifactId>
        <version>2.2.4.RELEASE</version>
    </parent>

    <!--
        Dependent component version numbers are defined centrally, but not introduced.
        When declared dependencies are used in a subproject, you can use an independent version number.
        This unifies the management of dependent versions used in projects
     -->
    <properties>
        <!-- Spring Cloud Hoxton.SR1 rely on -->
        <spring-cloud.version>Hoxton.SR1</spring-cloud.version>
    </properties>

    <!-- Project Dependency Manage Parent Projects Only Declare Dependencies, Sub Projects Need to Indicate Required Dependencies(Version information can be omitted) -->
    <dependencyManagement>
        <dependencies>
            <!-- spring cloud rely on -->
            <dependency>
                <groupId>org.springframework.cloud</groupId>
                <artifactId>spring-cloud-dependencies</artifactId>
                <version>${spring-cloud.version}</version>
                <type>pom</type>
                <scope>import</scope>
            </dependency>
        </dependencies>
    </dependencyManagement>

</project>
Service Provider service-provider
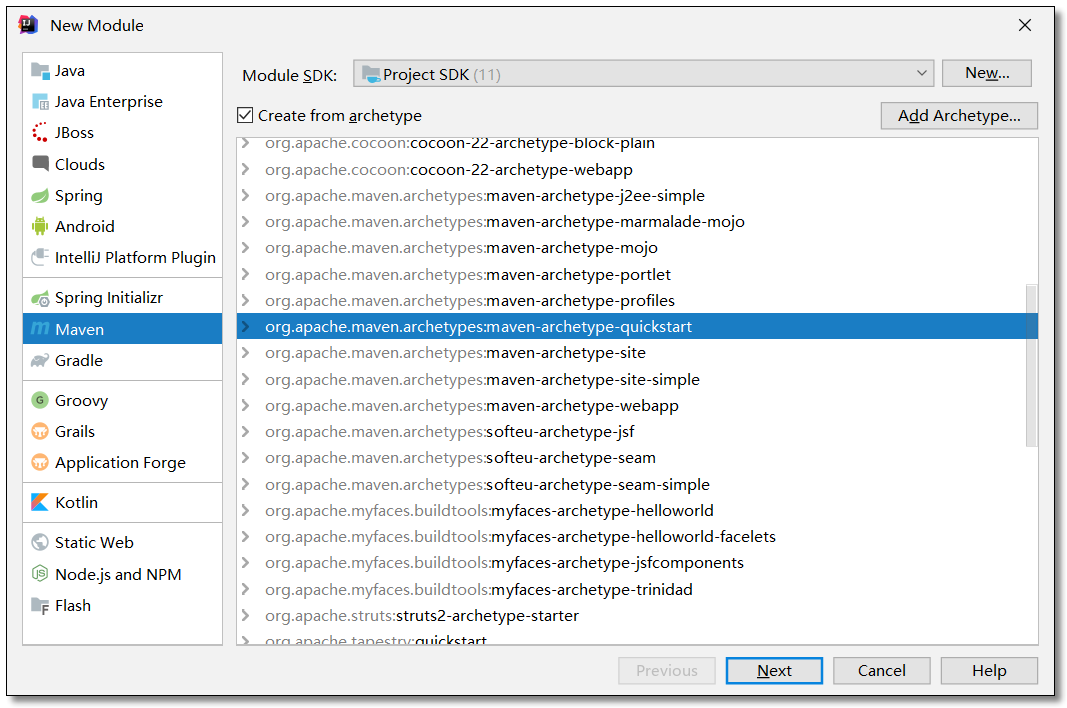
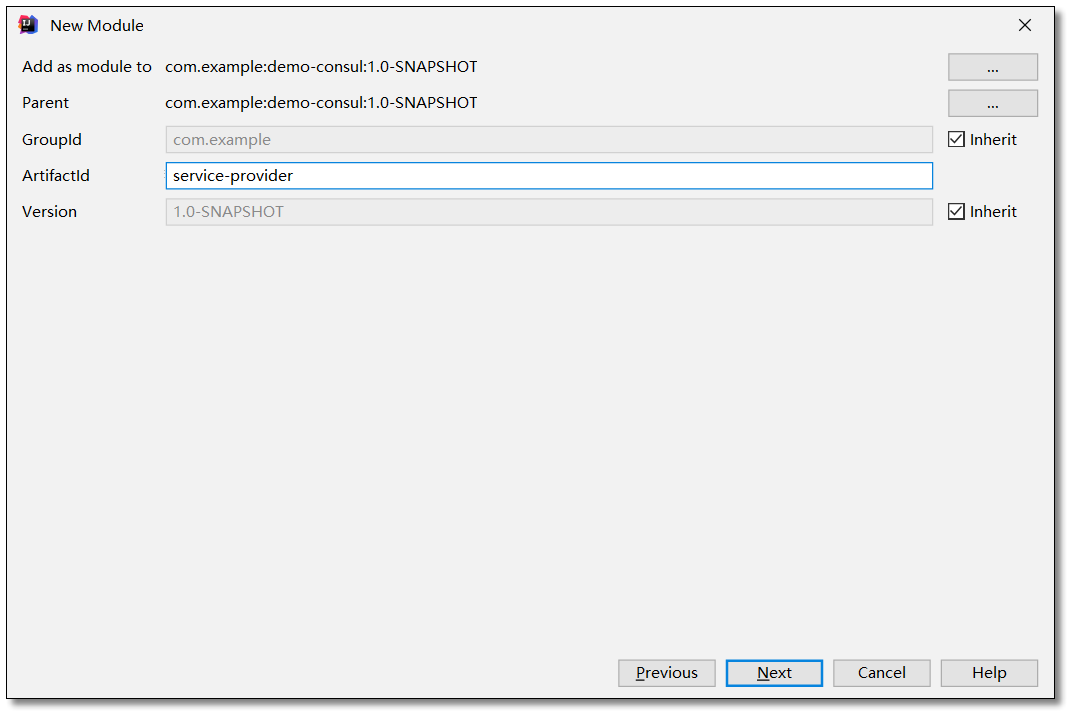
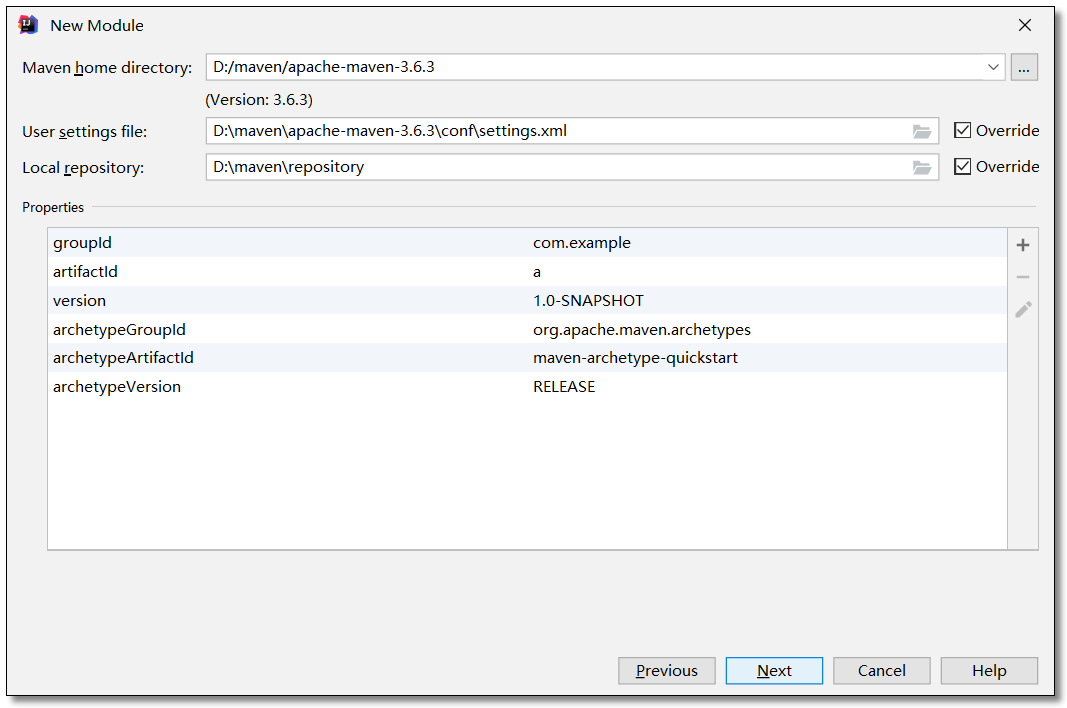
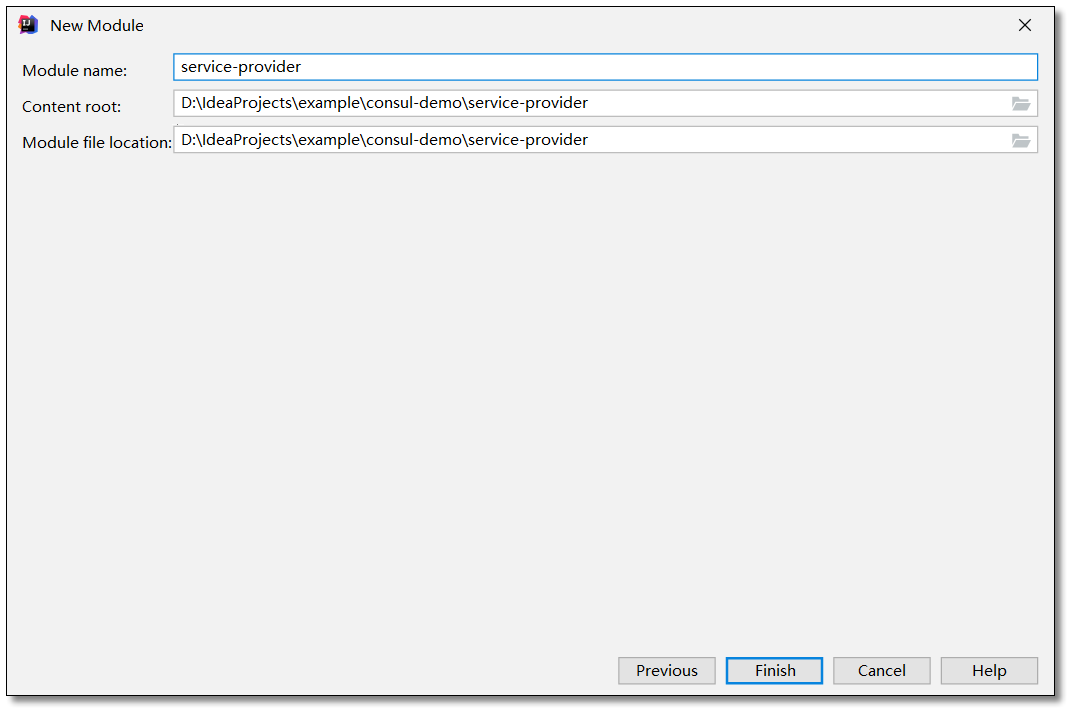
Create Project
Create a service-provider service provider project under the parent project you just created.

Add Dependency
pom.xml
<?xml version="1.0" encoding="UTF-8"?>

<project xmlns="http://maven.apache.org/POM/4.0.0" xmlns:xsi="http://www.w3.org/2001/XMLSchema-instance"
         xsi:schemaLocation="http://maven.apache.org/POM/4.0.0 http://maven.apache.org/xsd/maven-4.0.0.xsd">
    <modelVersion>4.0.0</modelVersion>

    <groupId>com.example</groupId>
    <artifactId>service-provider</artifactId>
    <version>1.0-SNAPSHOT</version>

    <!-- Inherit Parent Dependency -->
    <parent>
        <groupId>com.example</groupId>
        <artifactId>consul-demo</artifactId>
        <version>1.0-SNAPSHOT</version>
    </parent>

    <!-- Project Dependency -->
    <dependencies>
        <!-- spring cloud consul rely on -->
        <dependency>
            <groupId>org.springframework.cloud</groupId>
            <artifactId>spring-cloud-starter-consul-discovery</artifactId>
        </dependency>
        <!-- spring boot actuator rely on -->
        <dependency>
            <groupId>org.springframework.boot</groupId>
            <artifactId>spring-boot-starter-actuator</artifactId>
        </dependency>
        <!-- spring boot web rely on -->
        <dependency>
            <groupId>org.springframework.boot</groupId>
            <artifactId>spring-boot-starter-web</artifactId>
        </dependency>
        <!-- lombok rely on -->
        <dependency>
            <groupId>org.projectlombok</groupId>
            <artifactId>lombok</artifactId>
            <scope>provided</scope>
        </dependency>

        <!-- spring boot test rely on -->
        <dependency>
            <groupId>org.springframework.boot</groupId>
            <artifactId>spring-boot-starter-test</artifactId>
            <scope>test</scope>
            <exclusions>
                <exclusion>
                    <groupId>org.junit.vintage</groupId>
                    <artifactId>junit-vintage-engine</artifactId>
                </exclusion>
            </exclusions>
        </dependency>
    </dependencies>

</project>
configuration file
application.yml
server:
  port: 7070 # port

spring:
  application:
    name: service-provider # apply name
  # Configure Consul Registry
  cloud:
    consul:
      # Access address of the registry
      host: localhost
      port: 8500
      # Service Provider Information
      discovery:
        register: true                                # Is registration required
        instance-id: ${spring.application.name}-01    # Register instance id (must be unique)
        service-name: ${spring.application.name}      # Service Name
        port: ${server.port}                          # Service Port
        prefer-ip-address: true                       # Whether to register using ip address
        ip-address: ${spring.cloud.client.ip-address} # Service Request ip
Entity Class
Product.java
package com.example.pojo;

import lombok.AllArgsConstructor;
import lombok.Data;
import lombok.NoArgsConstructor;

import java.io.Serializable;

@Data
@NoArgsConstructor
@AllArgsConstructor
public class Product implements Serializable {

    private Integer id;
    private String productName;
    private Integer productNum;
    private Double productPrice;

}
Writing services
ProductService.java
package com.example.service;

import com.example.pojo.Product;

import java.util.List;

/**
 * Commodity Services
 */
public interface ProductService {

    /**
     * Query commodity list
     *
     * @return
     */
    List<Product> selectProductList();

}
ProductServiceImpl.java
package com.example.service.impl;

import com.example.pojo.Product;
import com.example.service.ProductService;
import org.springframework.stereotype.Service;

import java.util.Arrays;
import java.util.List;

/**
 * Commodity Services
 */
@Service
public class ProductServiceImpl implements ProductService {

    /**
     * Query commodity list
     *
     * @return
     */
    @Override
    public List<Product> selectProductList() {
        return Arrays.asList(
                new Product(1, "Huawei Mobile Phone", 1, 5800D),
                new Product(2, "Lenovo notebook", 1, 6888D),
                new Product(3, "Mi Pad", 5, 2020D)
        );
    }

}
Control Layer
ProductController.java
package com.example.controller;

import com.example.pojo.Product;
import com.example.service.ProductService;
import org.springframework.beans.factory.annotation.Autowired;
import org.springframework.web.bind.annotation.GetMapping;
import org.springframework.web.bind.annotation.RequestMapping;
import org.springframework.web.bind.annotation.RestController;

import java.util.List;

@RestController
@RequestMapping("/product")
public class ProductController {

    @Autowired
    private ProductService productService;

    /**
     * Query commodity list
     *
     * @return
     */
    @GetMapping("/list")
    public List<Product> selectProductList() {
        return productService.selectProductList();
    }

}
The project can be tested by unit tests or by using postman or browser directly through url.
Startup Class
ServiceProviderApplication.java
package com.example;

import org.springframework.boot.SpringApplication;
import org.springframework.boot.autoconfigure.SpringBootApplication;

@SpringBootApplication
public class ServiceProviderApplication {

    public static void main(String[] args) {
        SpringApplication.run(ServiceProviderApplication.class, args);
    }

}
Visit
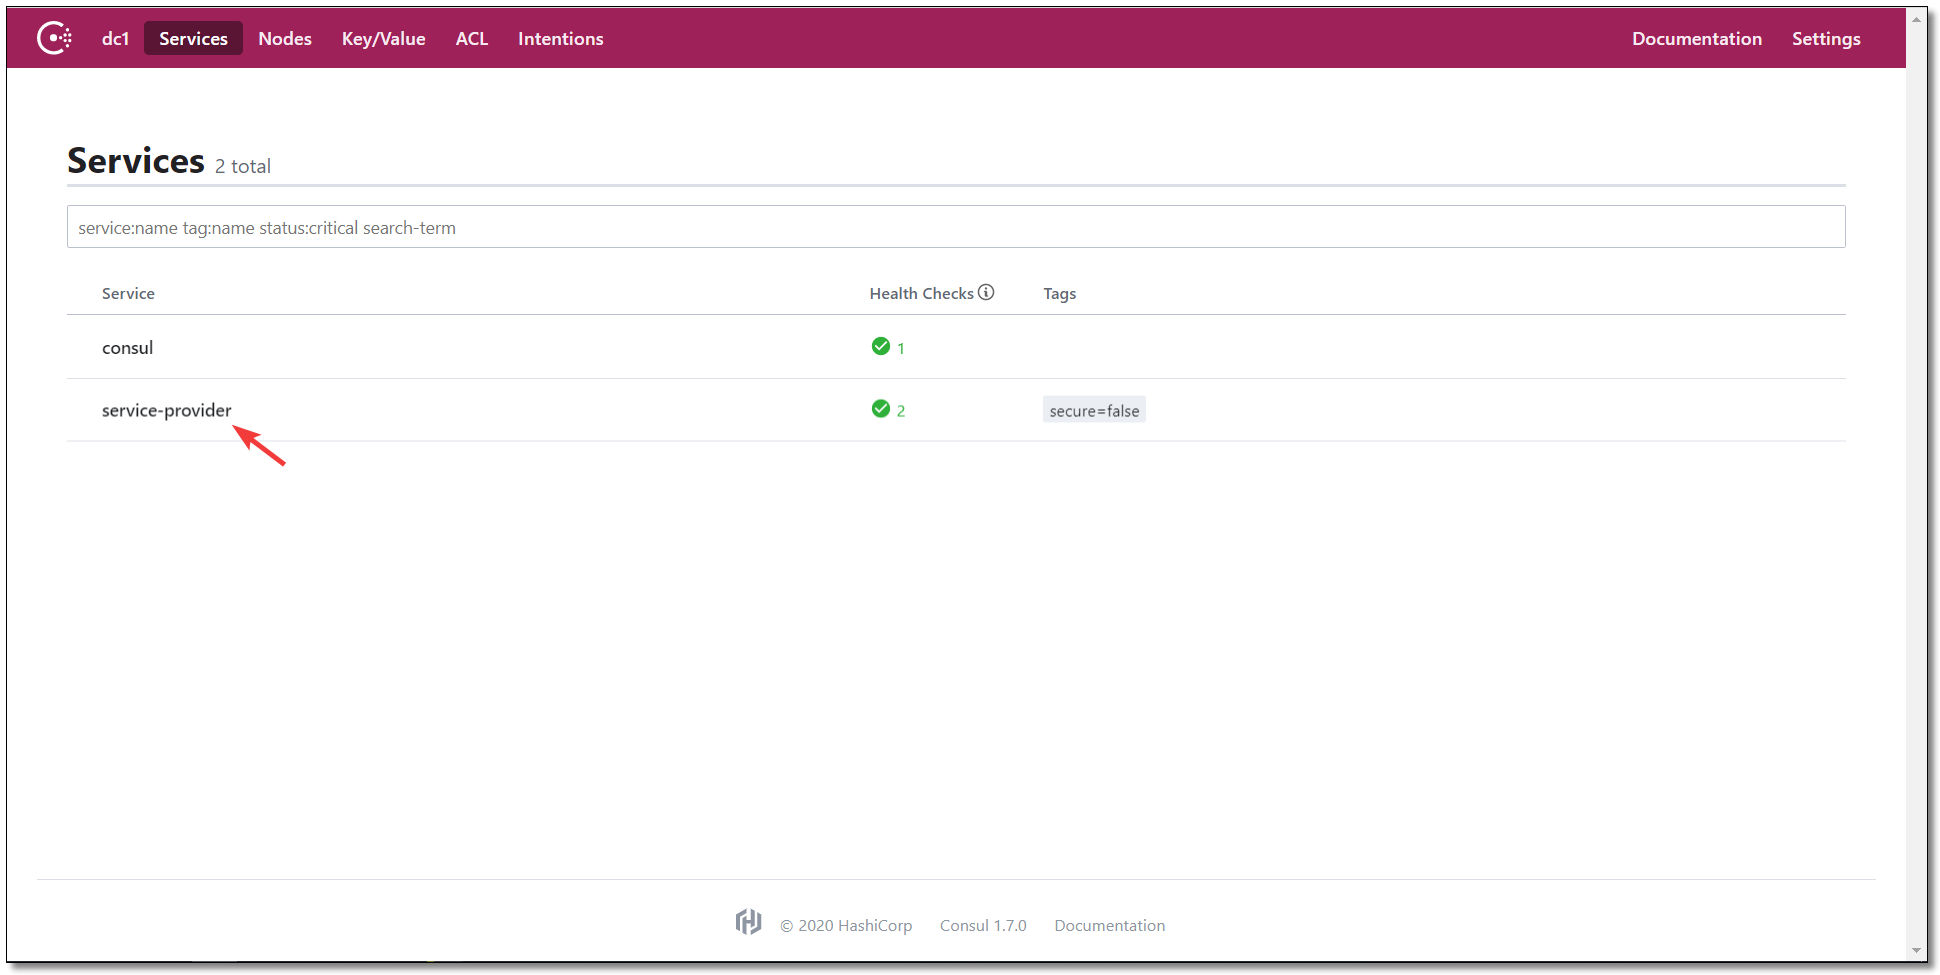
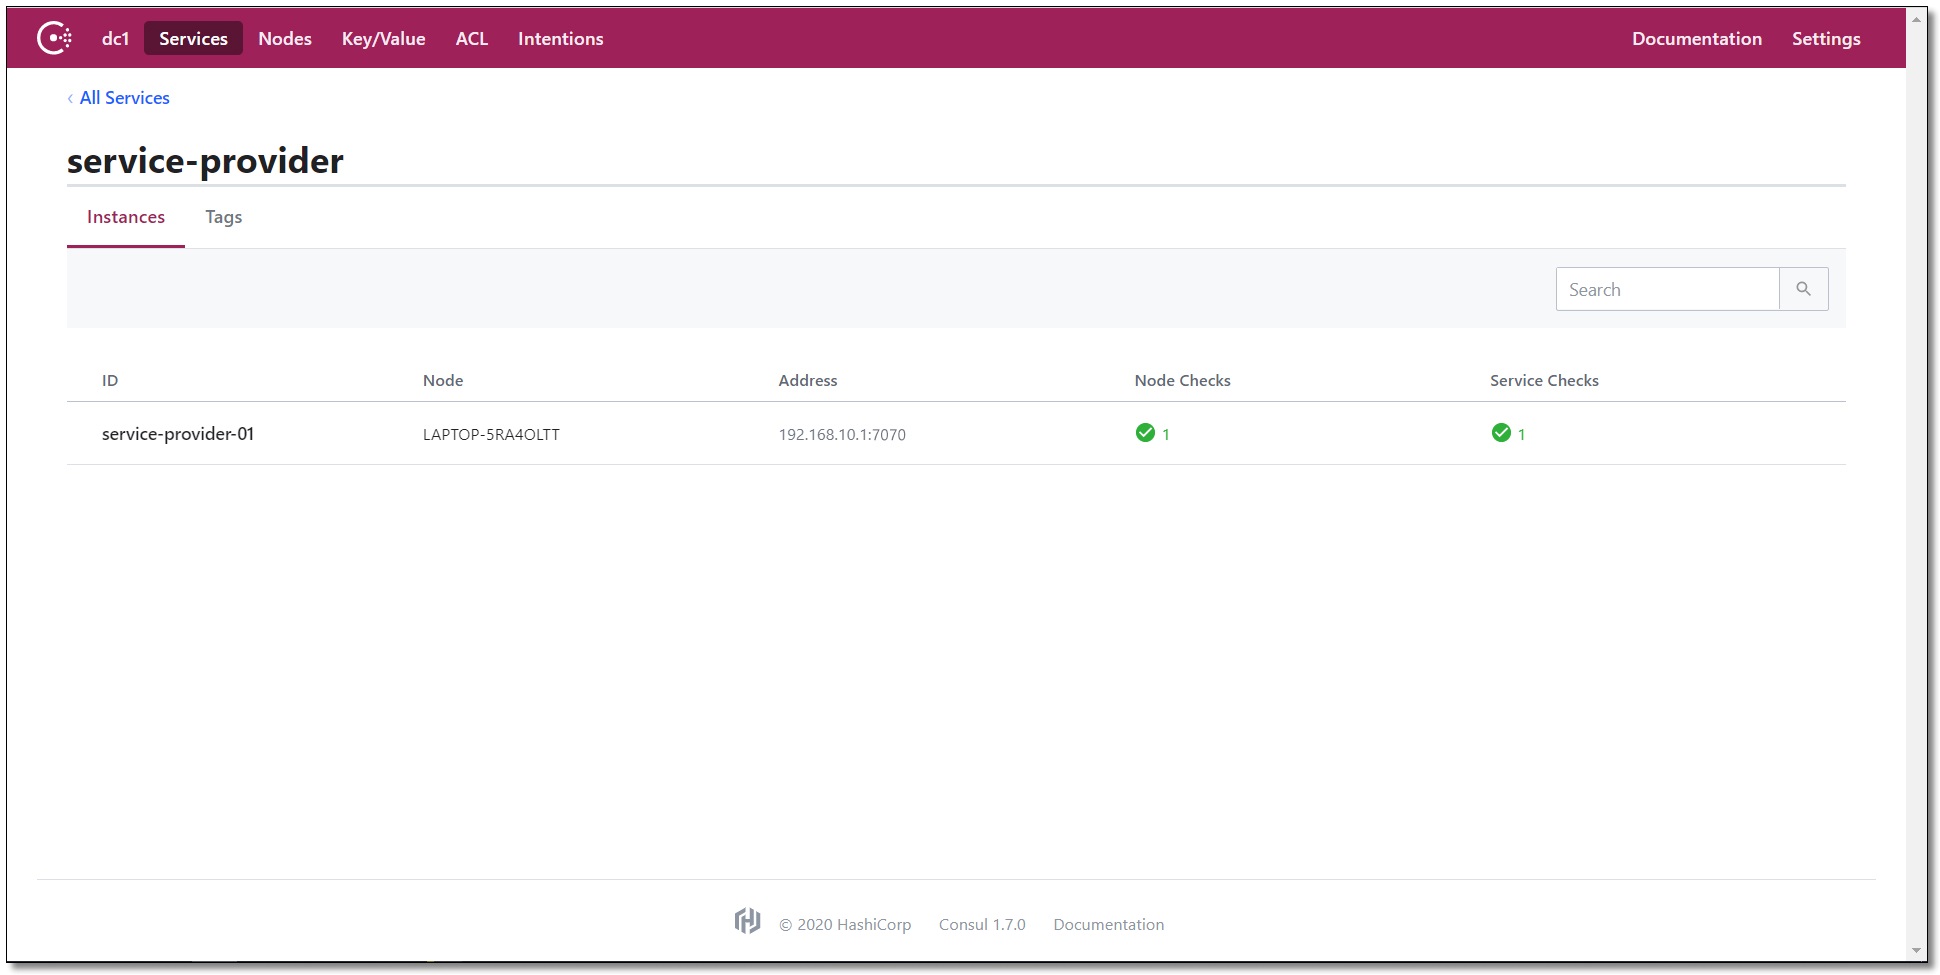
Access management background: http://localhost:8500/Seeing the following image means that our service is registered with the registry.
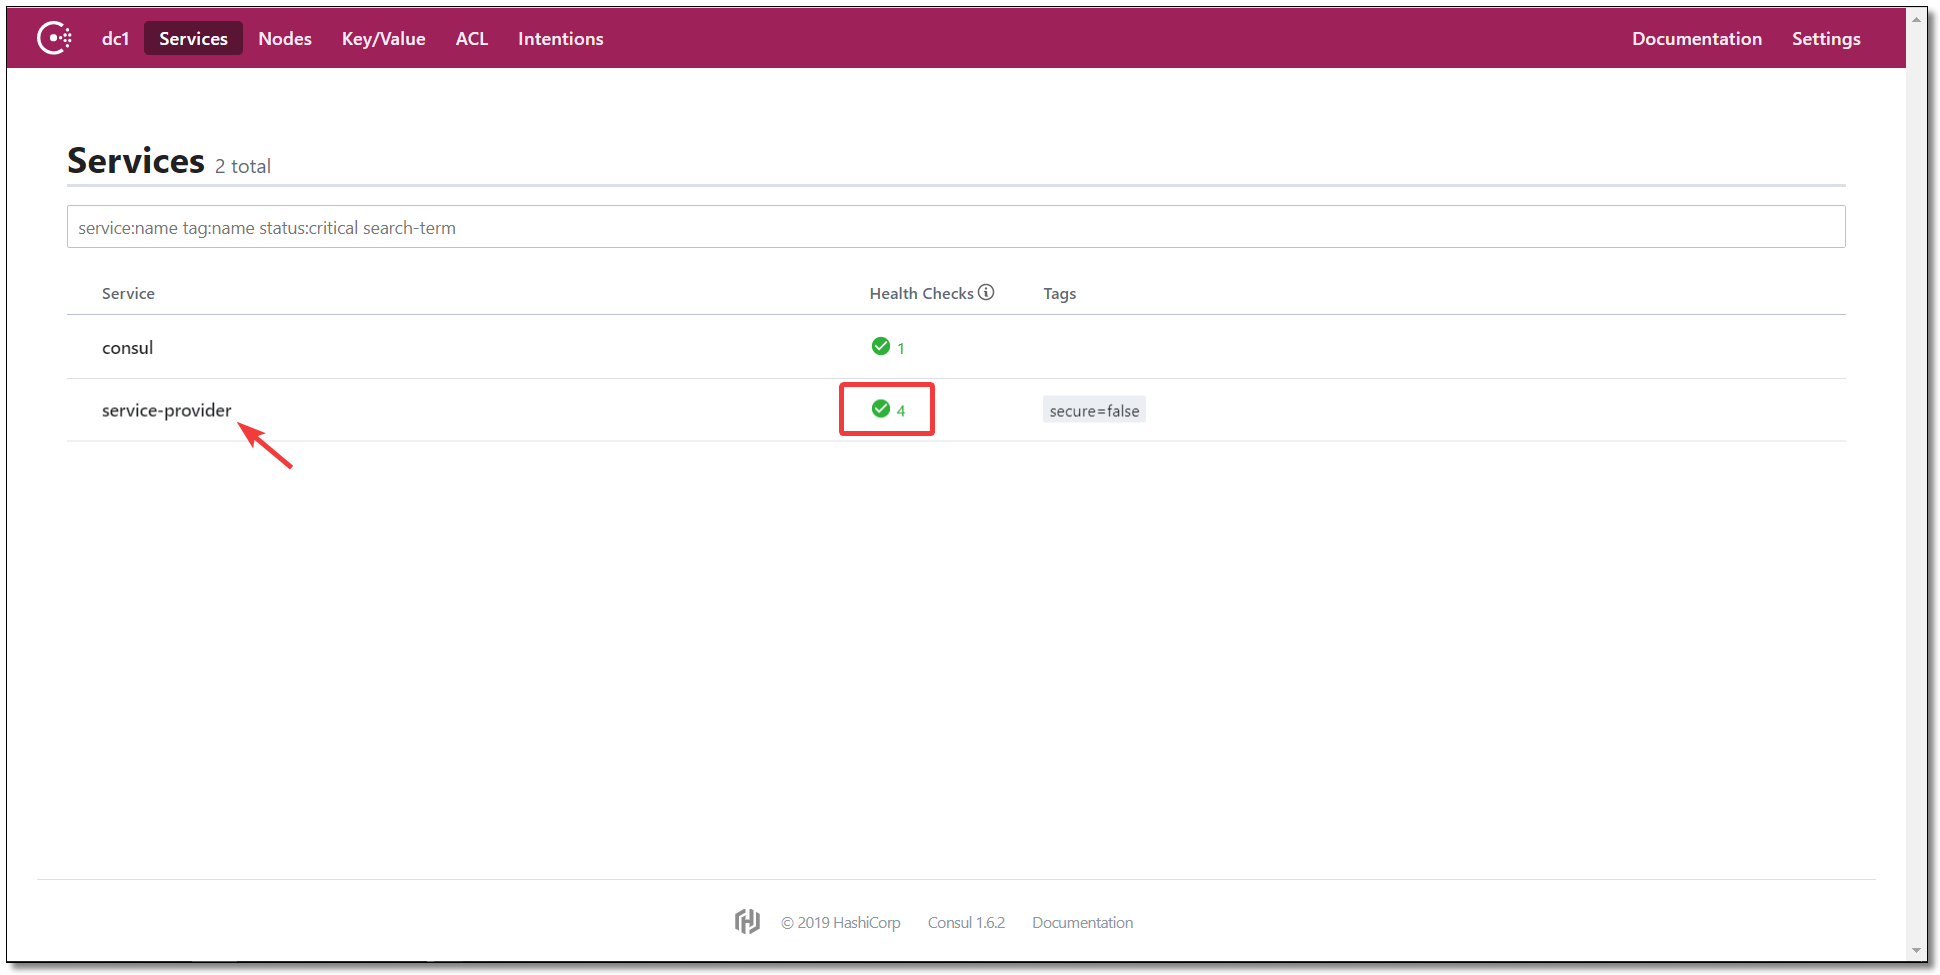
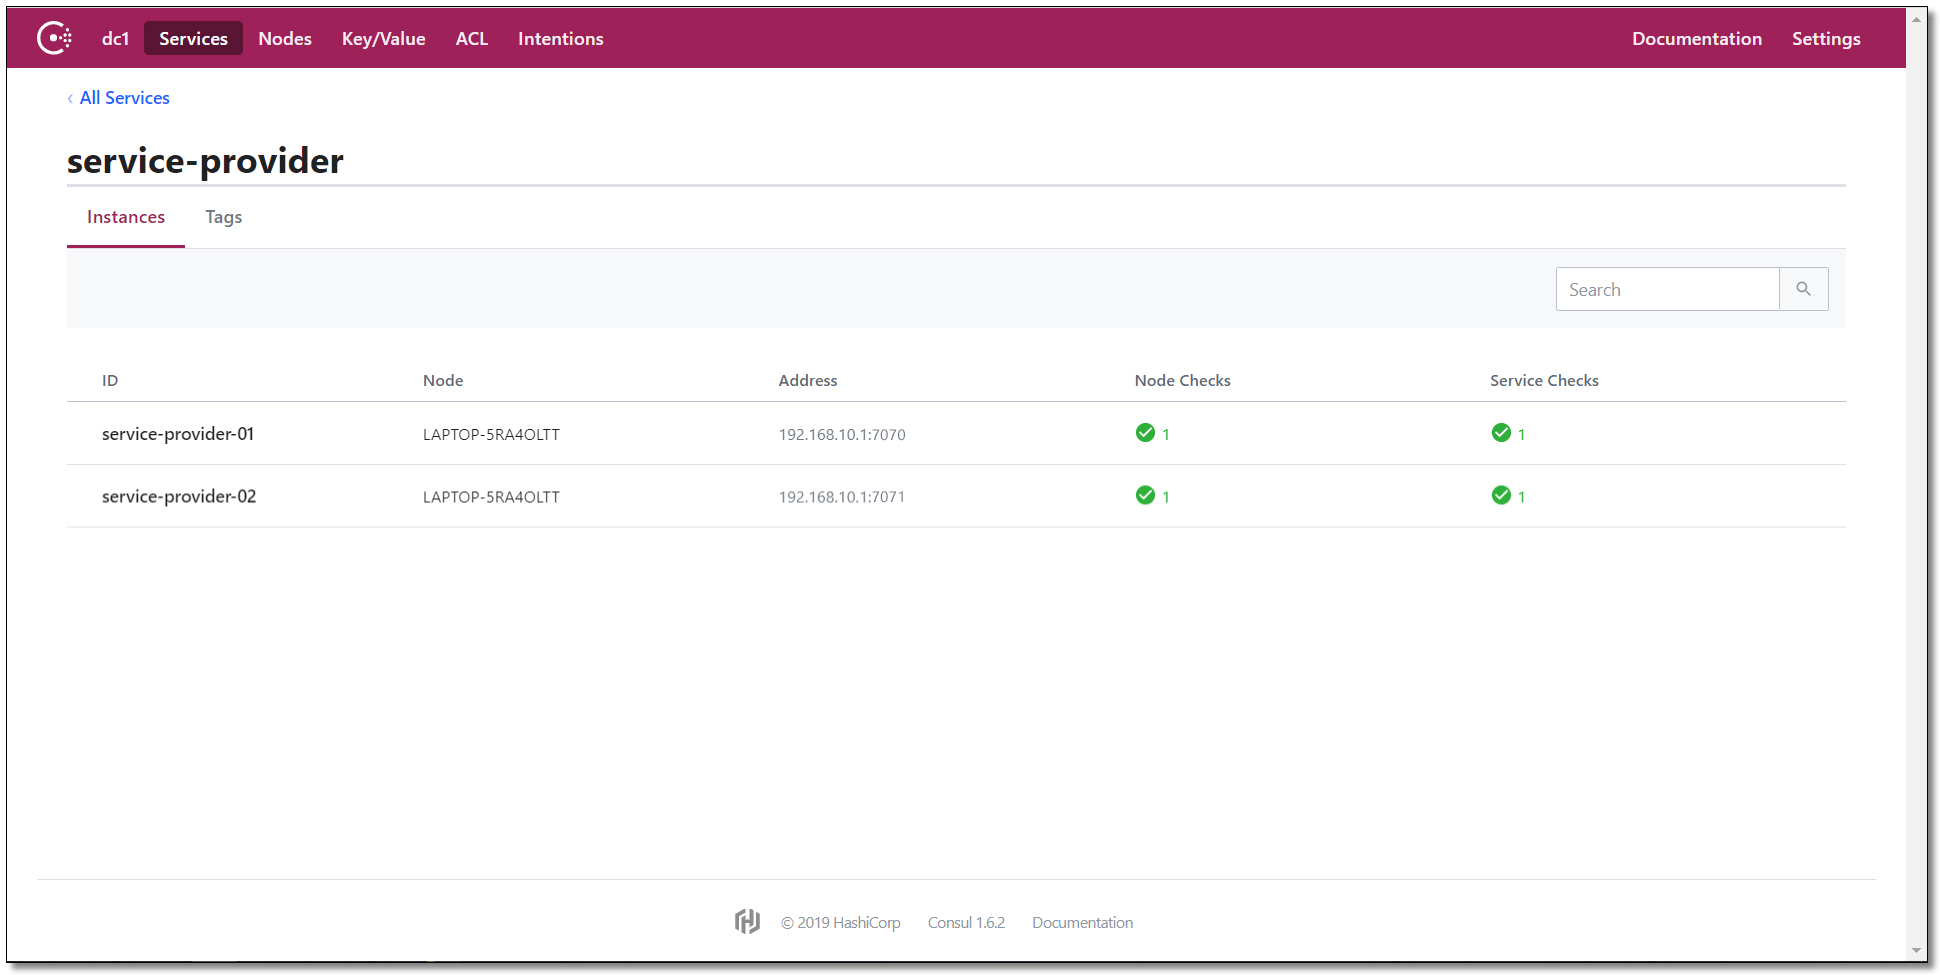
Copy the service-provider project with a modified port of 7071 and a registered instance id of 02.
spring:
  application:
    name: service-provider # apply name
  # Configure Consul Registry
  cloud:
    consul:
      # Access address of the registry
      host: localhost
      port: 8500
      # Service Provider Information
      discovery:
        register: true                                # Is registration required
        instance-id: ${spring.application.name}-02    # Register instance id (must be unique)
        service-name: ${spring.application.name}      # Service Name
        port: ${server.port}                          # Service Port
        prefer-ip-address: true                       # Whether to register using ip address
        ip-address: ${spring.cloud.client.ip-address} # Service Request ip

# port
server:
  port: 8602
The result of starting service-provider02 is as follows:
Service consumer service-consumer
Create Project
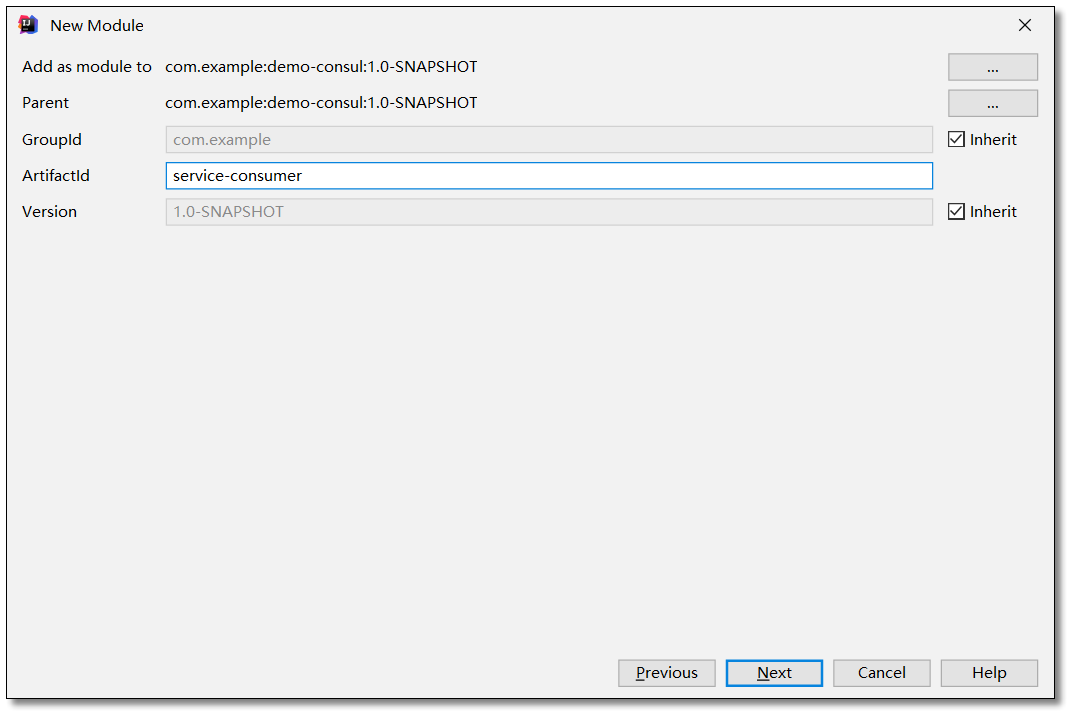
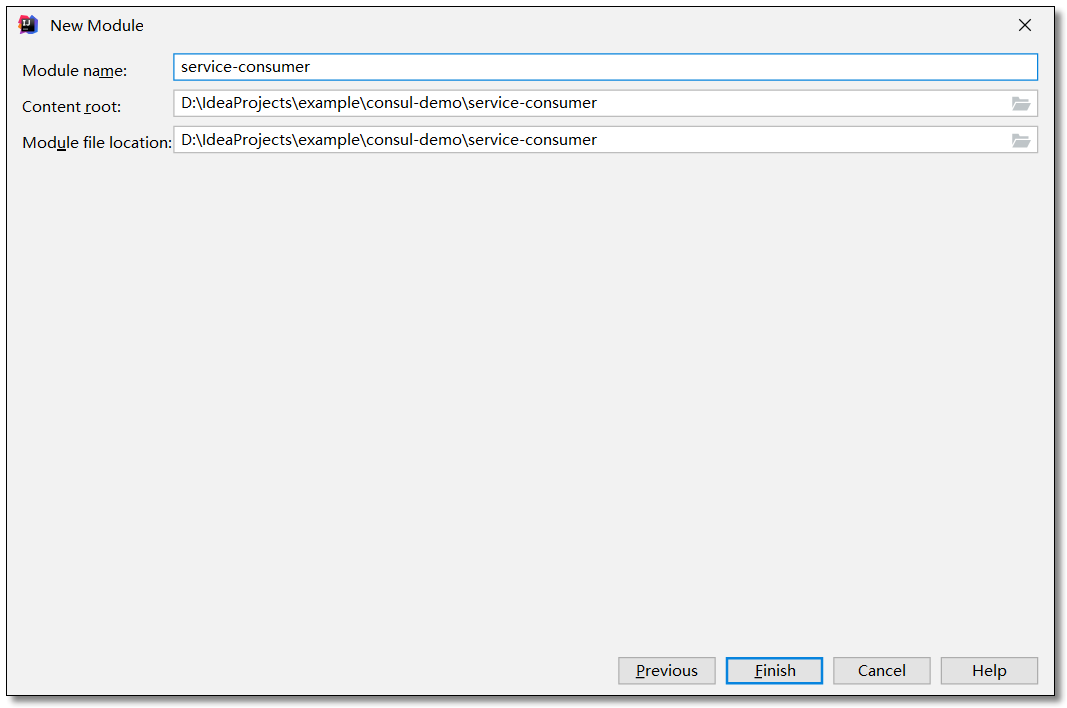
Create a service-consumer service consumer project under the parent project you just created.



Add Dependency
pom.xml
<?xml version="1.0" encoding="UTF-8"?>

<project xmlns="http://maven.apache.org/POM/4.0.0" xmlns:xsi="http://www.w3.org/2001/XMLSchema-instance"
         xsi:schemaLocation="http://maven.apache.org/POM/4.0.0 http://maven.apache.org/xsd/maven-4.0.0.xsd">
    <modelVersion>4.0.0</modelVersion>

    <groupId>com.example</groupId>
    <artifactId>service-consumer</artifactId>
    <version>1.0-SNAPSHOT</version>

    <!-- Inherit Parent Dependency -->
    <parent>
        <groupId>com.example</groupId>
        <artifactId>consul-demo</artifactId>
        <version>1.0-SNAPSHOT</version>
    </parent>

    <!-- Project Dependency -->
    <dependencies>
        <!-- spring cloud consul rely on -->
        <dependency>
            <groupId>org.springframework.cloud</groupId>
            <artifactId>spring-cloud-starter-consul-discovery</artifactId>
        </dependency>
        <!-- spring boot actuator rely on -->
        <dependency>
            <groupId>org.springframework.boot</groupId>
            <artifactId>spring-boot-starter-actuator</artifactId>
        </dependency>
        <!-- spring boot web rely on -->
        <dependency>
            <groupId>org.springframework.boot</groupId>
            <artifactId>spring-boot-starter-web</artifactId>
        </dependency>
        <!-- lombok rely on -->
        <dependency>
            <groupId>org.projectlombok</groupId>
            <artifactId>lombok</artifactId>
            <scope>provided</scope>
        </dependency>

        <!-- spring boot test rely on -->
        <dependency>
            <groupId>org.springframework.boot</groupId>
            <artifactId>spring-boot-starter-test</artifactId>
            <scope>test</scope>
            <exclusions>
                <exclusion>
                    <groupId>org.junit.vintage</groupId>
                    <artifactId>junit-vintage-engine</artifactId>
                </exclusion>
            </exclusions>
        </dependency>
    </dependencies>

</project>
configuration file
application.yml
server:
  port: 9090 # port

spring:
  application:
    name: service-consumer # apply name
  # Configure Consul Registry
  cloud:
    consul:
      # Access address of the registry
      host: localhost
      port: 8500
      # Service Provider Information
      discovery:
        register: false                               # Is registration required
        instance-id: ${spring.application.name}-01    # Register instance id (must be unique)
        service-name: ${spring.application.name}      # Service Name
        port: ${server.port}                          # Service Port
        prefer-ip-address: true                       # Whether to register using ip address
        ip-address: ${spring.cloud.client.ip-address} # Service Request ip
Entity Class
Product.java
package com.example.pojo;

import lombok.AllArgsConstructor;
import lombok.Data;
import lombok.NoArgsConstructor;

import java.io.Serializable;

@Data
@NoArgsConstructor
@AllArgsConstructor
public class Product implements Serializable {

    private Integer id;
    private String productName;
    private Integer productNum;
    private Double productPrice;

}
Order.java
package com.example.pojo;

import lombok.AllArgsConstructor;
import lombok.Data;
import lombok.NoArgsConstructor;

import java.io.Serializable;
import java.util.List;

@Data
@NoArgsConstructor
@AllArgsConstructor
public class Order implements Serializable {

    private Integer id;
    private String orderNo;
    private String orderAddress;
    private Double totalPrice;
    private List<Product> productList;

}
Consumer Services
OrderService.java
package com.example.service;

import com.example.pojo.Order;

public interface OrderService {

    /**
     * Query orders based on primary key
     *
     * @param id
     * @return
     */
    Order selectOrderById(Integer id);

}
OrderServiceImpl.java
package com.example.service.impl;

import com.example.pojo.Order;
import com.example.pojo.Product;
import com.example.service.OrderService;
import org.springframework.beans.factory.annotation.Autowired;
import org.springframework.core.ParameterizedTypeReference;
import org.springframework.http.HttpMethod;
import org.springframework.http.ResponseEntity;
import org.springframework.stereotype.Service;
import org.springframework.web.client.RestTemplate;

import java.util.List;

@Service
public class OrderServiceImpl implements OrderService {

    @Autowired
    private RestTemplate restTemplate;

    /**
     * Query orders based on primary key
     *
     * @param id
     * @return
     */
    @Override
    public Order selectOrderById(Integer id) {
        return new Order(id, "order-001", "China", 22788D,
                selectProductListByLoadBalancerAnnotation());
    }

    private List<Product> selectProductListByLoadBalancerAnnotation() {
        // ResponseEntity: Encapsulated return data
        ResponseEntity<List<Product>> response = restTemplate.exchange(
                "http://service-provider/product/list",
                HttpMethod.GET,
                null,
                new ParameterizedTypeReference<List<Product>>() {
                });
        return response.getBody();
    }

}
Control Layer
OrderController.java
package com.example.controller;

import com.example.pojo.Order;
import com.example.service.OrderService;
import org.springframework.beans.factory.annotation.Autowired;
import org.springframework.web.bind.annotation.GetMapping;
import org.springframework.web.bind.annotation.PathVariable;
import org.springframework.web.bind.annotation.RequestMapping;
import org.springframework.web.bind.annotation.RestController;

@RestController
@RequestMapping("/order")
public class OrderController {

    @Autowired
    private OrderService orderService;

    /**
     * Query orders based on primary key
     *
     * @param id
     * @return
     */
    @GetMapping("/{id}")
    public Order selectOrderById(@PathVariable("id") Integer id) {
        return orderService.selectOrderById(id);
    }

}
Startup Class
ServiceConsumerApplication.java
package com.example;

import org.springframework.boot.SpringApplication;
import org.springframework.boot.autoconfigure.SpringBootApplication;
import org.springframework.cloud.client.loadbalancer.LoadBalanced;
import org.springframework.context.annotation.Bean;
import org.springframework.web.client.RestTemplate;

@SpringBootApplication
public class ServiceConsumerApplication {

    @Bean
    @LoadBalanced
    public RestTemplate restTemplate() {
        return new RestTemplate();
    }

    public static void main(String[] args) {
        SpringApplication.run(ServiceConsumerApplication.class, args);
    }

}
Visit
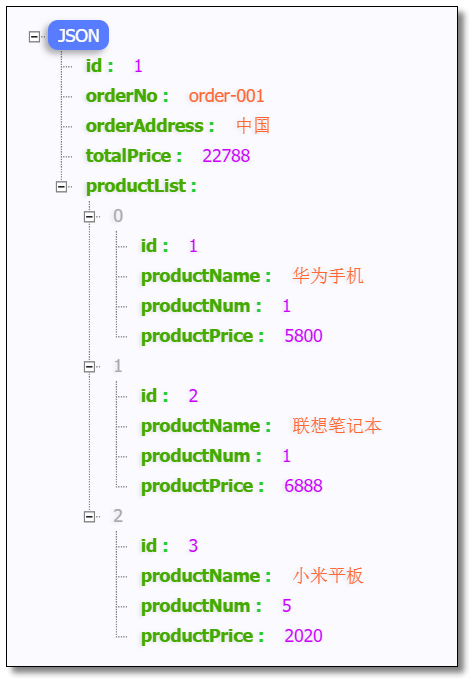
Access: http://localhost:9090/order/1 The results are as follows:
Consul Cluster

The diagram above is a simple Consul Cluster architecture with Server and Client roles.Whether Server or Client, collectively referred to as Agent, Consul Client is relatively stateless and has little overhead of forwarding RPCs to Server resources.Server is a proxy with an extended set of capabilities including participating in Raft elections, maintaining cluster status, responding to RPC queries, interacting with other data centers on WAN Gossip, and forwarding queries to leader s or remote data centers.
For each data center, Client and Server are mixed.It is generally recommended that you have 3-5 servers.This is a trade-off between availability and performance in case of failure, because the more machines join, the slower consensus will be reached, and a Leader will be elected between Servers.However, there is no limit to the number of Clients. It is generally recommended that a service correspond to one Client, which can easily be extended to thousands or tens of thousands.At development time, we can just bind a set of clients in the service registry.
Environmental preparation
| Server IP | Consul Type | Node Node |
|---|---|---|
| 192.168.10.101 | server | server-01 |
| 192.168.10.102 | server | server-02 |
| 192.168.10.103 | server | server-03 |
| 192.168.10.1 | client | client-01 |
install
Upload the installation package to the server.
Install the unzip command, create a consul directory, and unzip the consul to the specified directory.
yum -y install unzip                                        # Install unzip
mkdir -p /usr/local/consul                                  # Create consul directory
unzip consul_1.7.0_linux_amd64.zip -d /usr/local/consul/    # Unzip to consul directory
mkdir -p /usr/local/consul/data                             # Create consul data directory
start-up
Registry Server
Run three registries in server service mode.
# node-01
./consul agent -server -bind=192.168.10.101 -client=0.0.0.0 -ui -bootstrap-expect=3 -data-dir=/usr/local/consul/data/ -node=server-01
# node-02
./consul agent -server -bind=192.168.10.102 -client=0.0.0.0 -ui -bootstrap-expect=3 -data-dir=/usr/local/consul/data/ -node=server-02
# node-03
./consul agent -server -bind=192.168.10.103 -client=0.0.0.0 -ui -bootstrap-expect=3 -data-dir=/usr/local/consul/data/ -node=server-03
The meaning of the parameter is as follows:
- -server: Start as a server (registry)
-bind: indicates to which ip to bind
- -client: Specifies the ip accessed by the client, 0.0.0 means unlimited client ip
-ui: Open web interface access
- -bootstrap-expect=3: indicates that the minimum number of nodes in the server cluster is 3, below which it will not work properly (Note: like ZooKeeper, the number of clusters is usually odd for elections, and Consul uses the Raft algorithm)
- -data-dir: Represents the directory where the specified data is stored (the directory must exist and need to be created in advance)
-node: Represents the name of the node as it appears in the web ui
Registry Client
consul agent -client=0.0.0.0 -bind=192.168.10.1 -data-dir=D:\Example\consol\data -node=client-01
Associated Clusters
Enter the following commands in the server-02 and server-03 and client-01 nodes to establish a cluster relationship.
./consul join 192.168.10.101

Cluster state
Enter the following command on any server to view all node information in the cluster.
./consul members

Visit
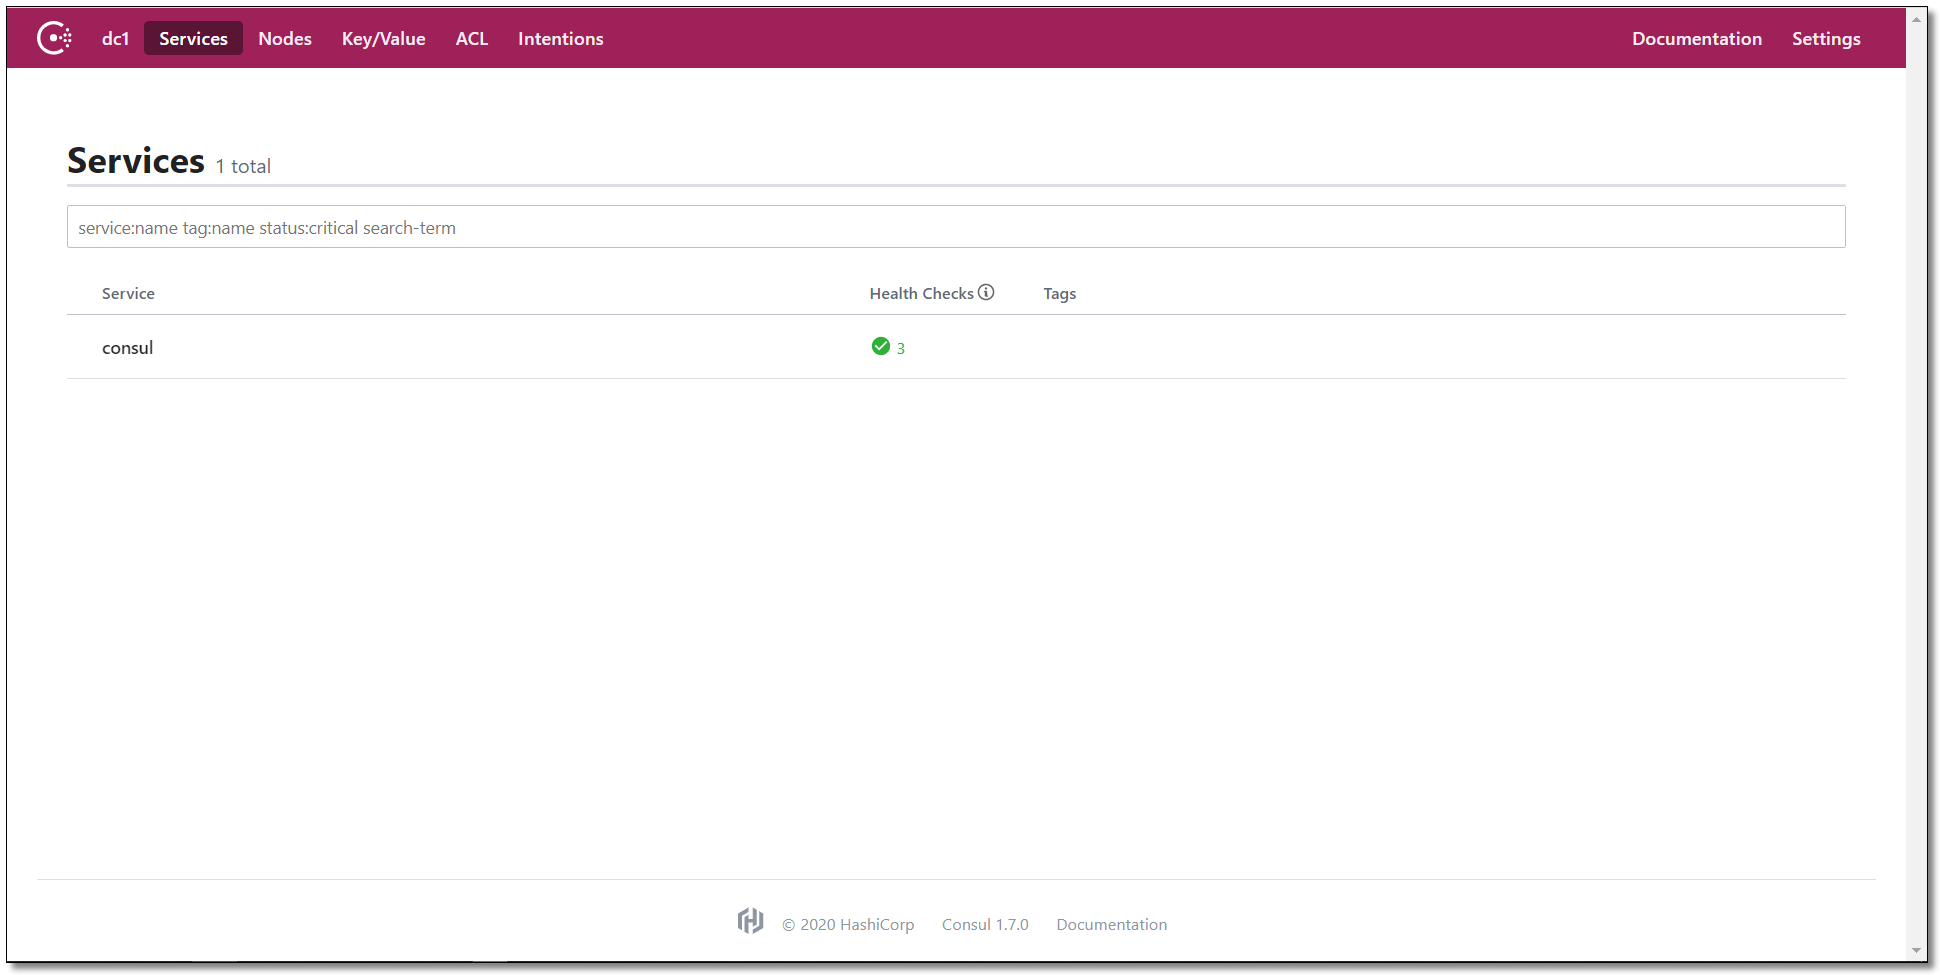
Access: http://192.168.10.101:8500/or http://192.168.10.102:8500/or http://192.168.10.103:8500/Cluster Any node can see the following interface indicating that the cluster environment has been successfully built.
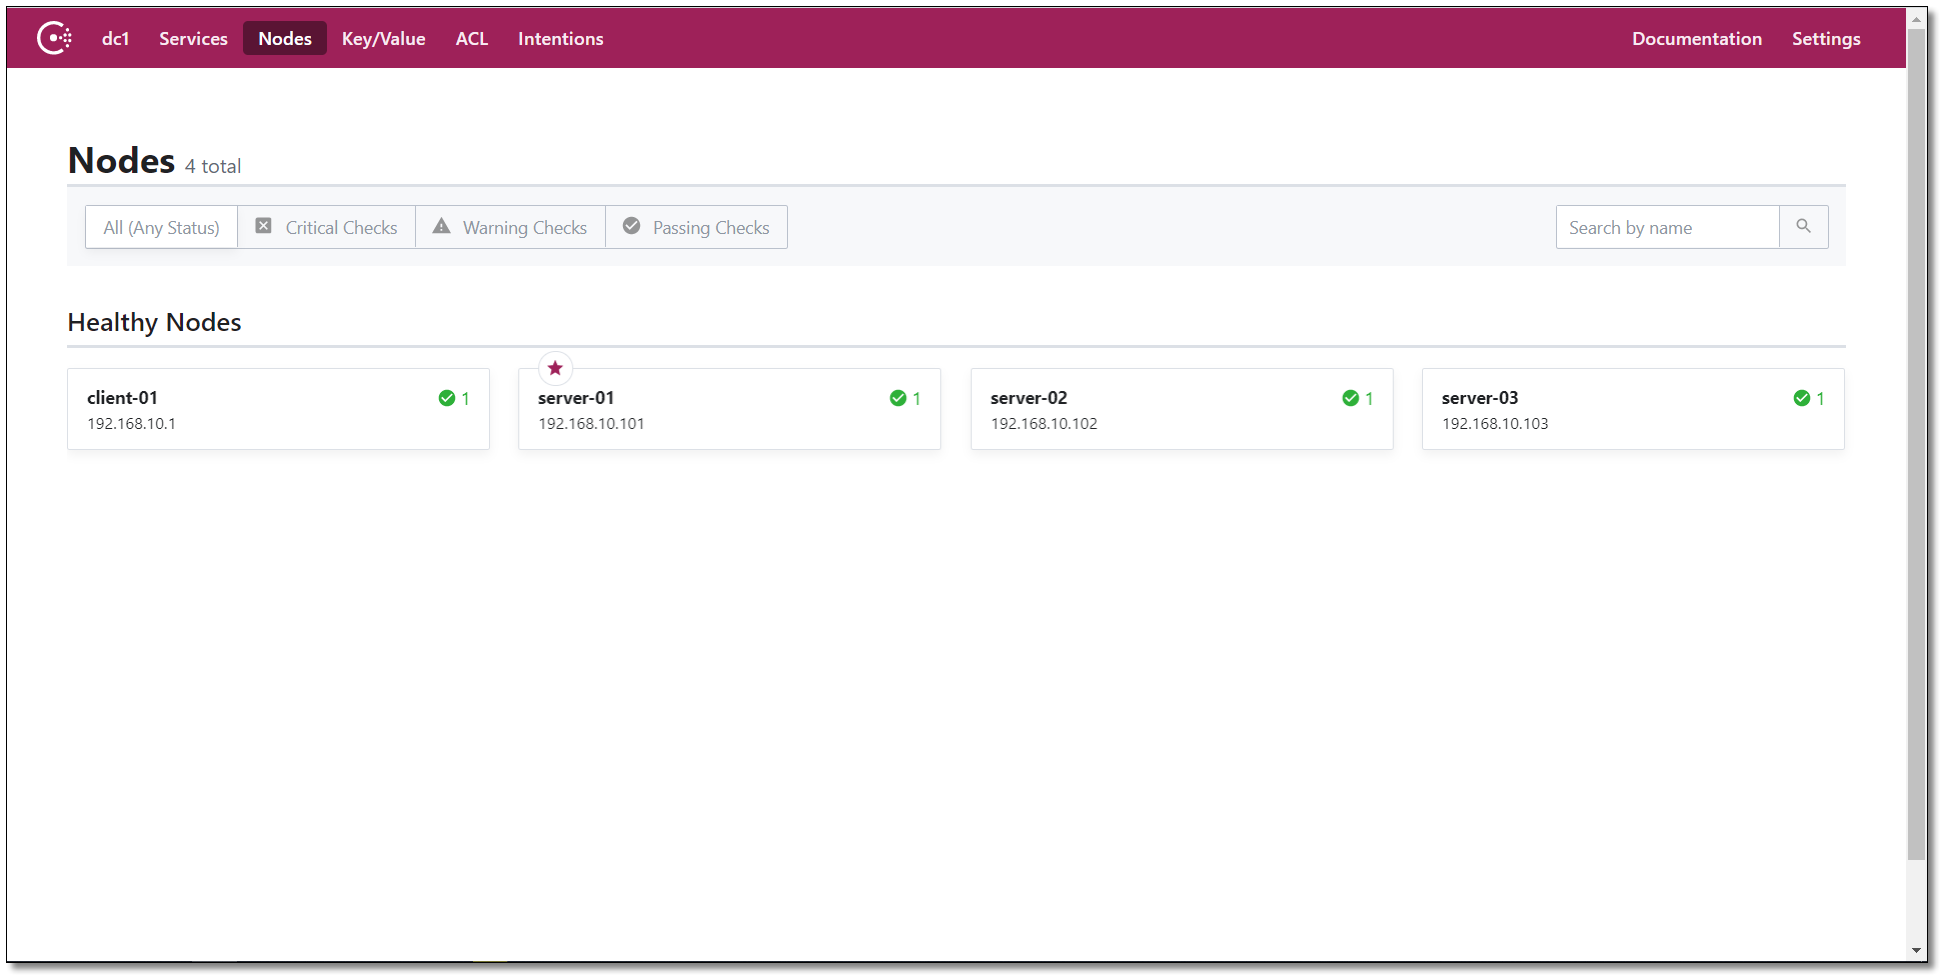
test
The configuration file and code for the service-provider and service-consumer projects do not need to be changed, so start the test directly.
Access: http://192.168.10.101:8500/, the results are as follows:
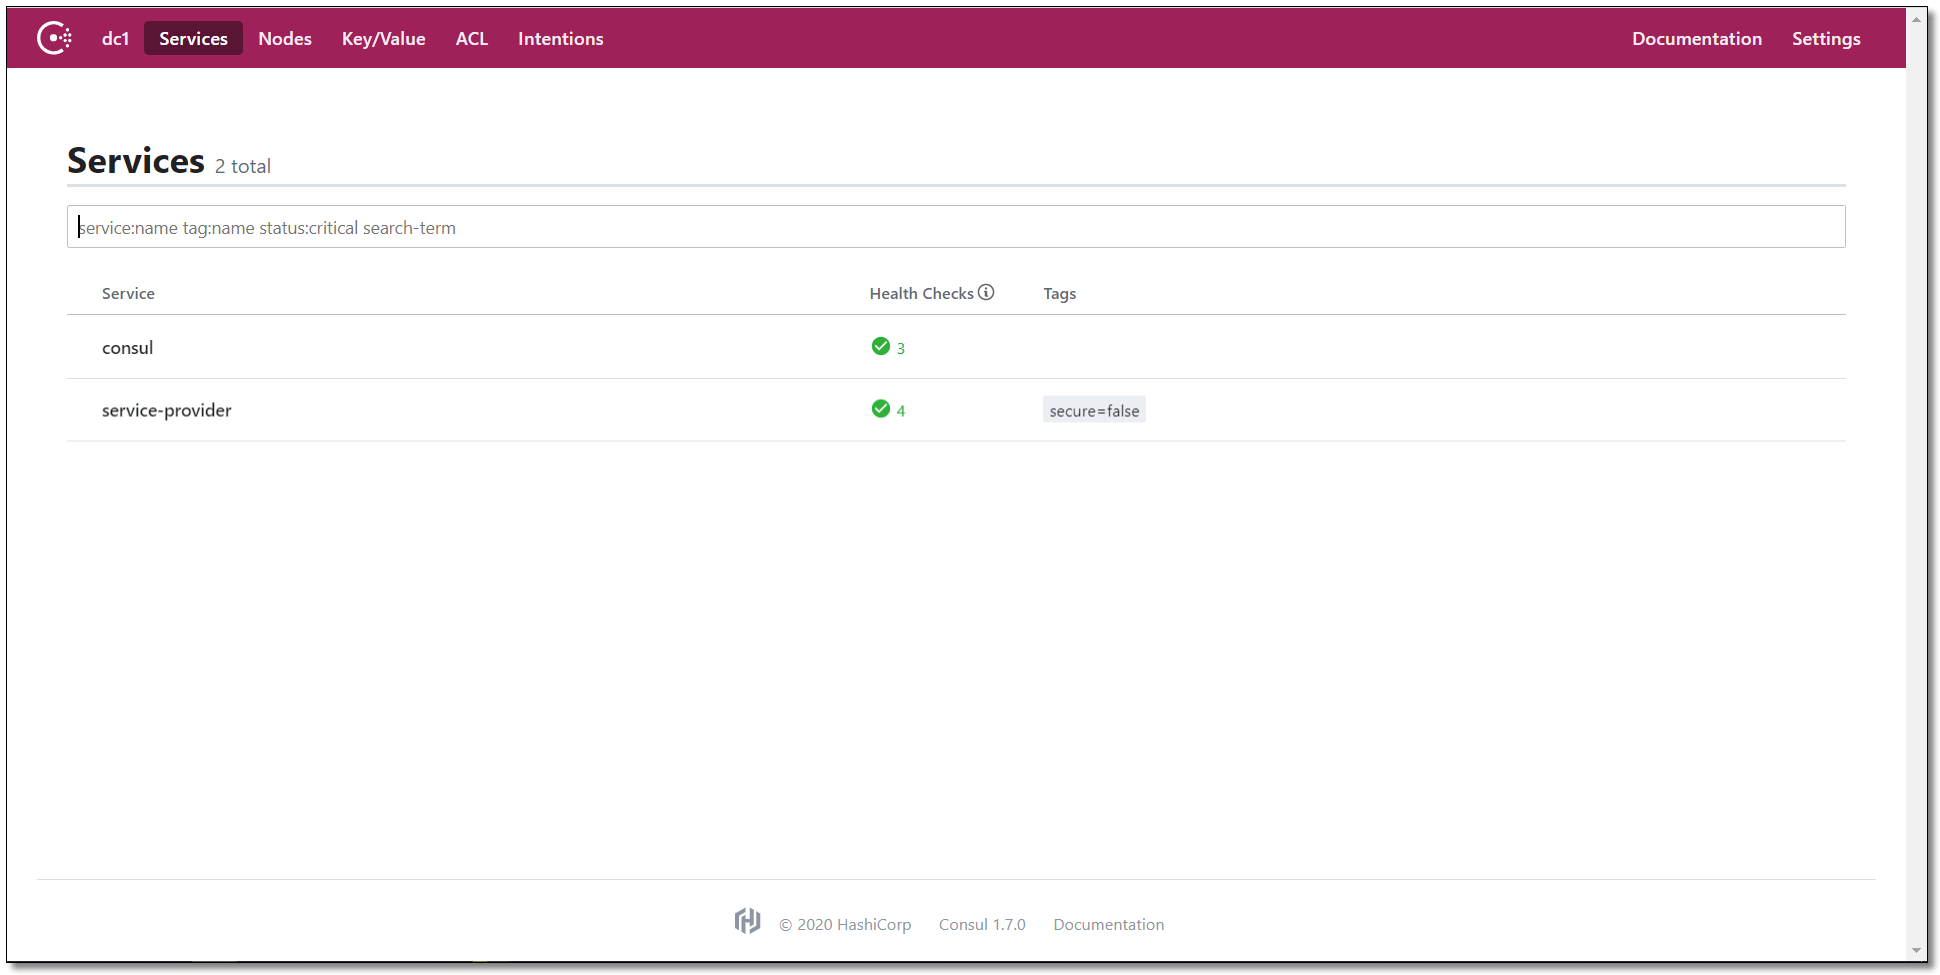
Access: http://localhost:9090/order/1 The results are as follows:

After the test service is available, all the points of knowledge in the Consul Service Registry are explained.

This paper uses Knowledge Sharing "Signature - Non-Commercial Use - No Deduction of 4.0 International" License Agreement.
You can classification See more about Spring Cloud Article.
_Your comments and forwards are my greatest support.
*_Scavenger watches. Every article in Mr. Ward's Document + Video has special video explanations. Learning is easier, oh~
