brief introduction
hello, today I share my understanding of springboot. Springboot is a one-stop framework used by many enterprise web development. On the whole, springboot is the overall re encapsulation of spring!
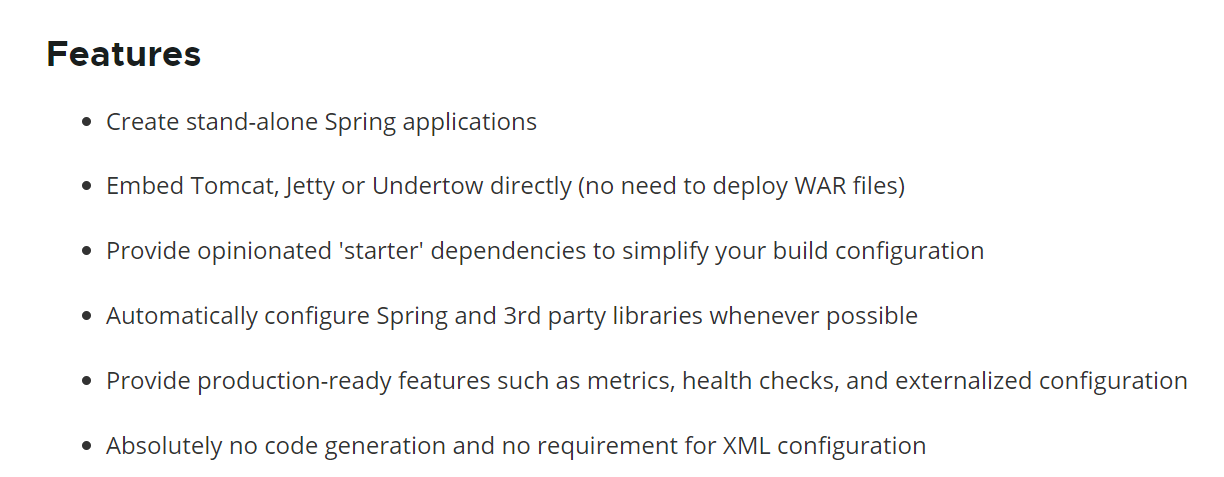
Spring officials have given many advantages of spring boot

1. It's a good time to create an independent spring application. It's very easy to create micro services with springboot
2. Embedded tomcat, jetty and other web containers
3. A series of advantages such as automatically configuring spring or third-party jar packages
Automatic assembly principle of spring boot
The core of springboot lies in its main boot class. As soon as it starts, many spring configurations will be loaded, and the most important thing is the @ SpringBootApplication annotation on the main boot class.
This is a combined note. The automatic assembly principle of springboot is bound to be asked during so many interviews. In fact, I have observed that many people will get a lot of problems when they encounter this problem during the interview. In fact, it is difficult to say it to the core.

@The bottom layer of the spring bootconfiguration annotation is actually @ Configuration in spring, which is used to mark a class as a Configuration class. Naturally, there is nothing to say. Of course, the boolean proxyBeanMethods() default true has been introduced after spring 5; Its function is that if you set micro true or do not set the current Configuration class by default, it will be a proxy object. Its function is to solve the problem of component dependency (component dependency should be understood by everyone)!
As for the @ ComponentScan annotation, there is nothing to say. It is nothing more than asking spring to load classes into the ioc container in the spring configuration file.
The real core is @ EnableAutoConfiguration. Similarly, this annotation is also a composite annotation

(1) @AutoConfigurationPackage:

The automatic configuration package translates into @ Import({Registrar.class}) at its bottom
There is a Registrar.class component imported

Here is to get the metadata of annotation information. The metadata information here is actually our main startup class. In other words, scan and load all the components in the package where our main startup class is located and its sub packages into the ioc container, so be sure to pay attention to the location of the file. Of course, if it is not written according to the regulations, you can also scan it in with the @ ComponentScan annotation!
@Import({AutoConfigurationImportSelector.class})
Here, import is used to import the corresponding components, and the configured rules are in the AutoConfigurationImportSelector class

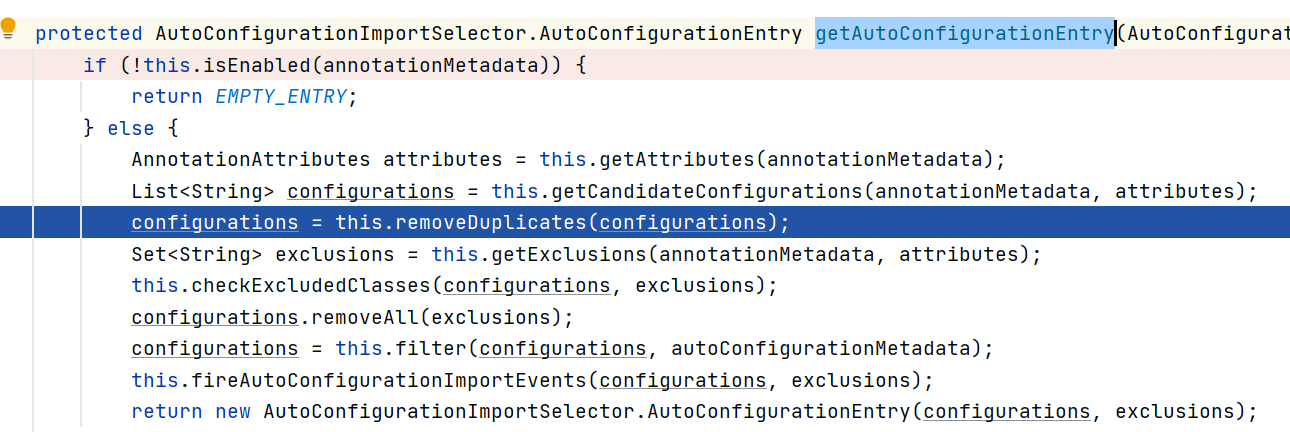
Here are the components to be loaded by springboot, and the specific method is getAutoConfigurationEntry();

First, obtain the candidate configuration
Then the breakpoint indicates that 164 items need to be loaded into the ioc container

The following is to exclude some duplicate components, and then exclude others, encapsulate the components to be imported, and then return
It's worth mentioning that this getCandidateConfigurations() method, so now we're talking about where springboot can find which classes it wants to load
 protected List<String> getCandidateConfigurations(AnnotationMetadata metadata, AnnotationAttributes attributes) {
        List<String> configurations = SpringFactoriesLoader.loadFactoryNames(this.getSpringFactoriesLoaderFactoryClass(), this.getBeanClassLoader());
        Assert.notEmpty(configurations, "No auto configuration classes found in META-INF/spring.factories. If you are using a custom packaging, make sure that file is correct.");
        return configurations;
    }
This method is to use the spring loader to find the name of the component we need
  public static List<String> loadFactoryNames(Class<?> factoryType, @Nullable ClassLoader classLoader) {
        String factoryTypeName = factoryType.getName();
        return (List)loadSpringFactories(classLoader).getOrDefault(factoryTypeName, Collections.emptyList());
    }

    private static Map<String, List<String>> loadSpringFactories(@Nullable ClassLoader classLoader) {
        MultiValueMap<String, String> result = (MultiValueMap)cache.get(classLoader);
        if (result != null) {
            return result;
        } else {
            try {
                Enumeration<URL> urls = classLoader != null ? classLoader.getResources("META-INF/spring.factories") : ClassLoader.getSystemResources("META-INF/spring.factories");
                LinkedMultiValueMap result = new LinkedMultiValueMap();

                while(urls.hasMoreElements()) {
                    URL url = (URL)urls.nextElement();
                    UrlResource resource = new UrlResource(url);
                    Properties properties = PropertiesLoaderUtils.loadProperties(resource);
                    Iterator var6 = properties.entrySet().iterator();

                    while(var6.hasNext()) {
                        Entry<?, ?> entry = (Entry)var6.next();
                        String factoryTypeName = ((String)entry.getKey()).trim();
                        String[] var9 = StringUtils.commaDelimitedListToStringArray((String)entry.getValue());
                        int var10 = var9.length;

                        for(int var11 = 0; var11 < var10; ++var11) {
                            String factoryImplementationName = var9[var11];
                            result.add(factoryTypeName, factoryImplementationName.trim());
                        }
                    }
                }

                cache.put(classLoader, result);
                return result;
            } catch (IOException var13) {
                throw new IllegalArgumentException("Unable to load factories from location [META-INF/spring.factories]", var13);
            }
        }
    }

You can see that he went to META-INF/spring.factories to find the name of the component to be loaded, that is, spring.factories under META-INF in our spring-boot-autoconfigure-2.2.4.RELEASE.jar package

This includes the components we want to load
Custom starter
To define a starter, you must be familiar with the configuration principle of spring boot to clarify the logic
Refer to the official springboot

Like this, what starter is just used to introduce our auto configuration component
1. First create an empty project

2. Then establish a maven project

This is the same as the starter in springboot for scene import
3. Create a springboot project. Here, use the initialization Wizard of idea


Just create it directly
Then let's introduce our automatic configuration into the starter

Here is a simple method to demonstrate

First, create a Hello class and a common method as we need to use
public class Hello {
     @Autowired
    HelloBean helloBean;
    public String sayHello(String name){
        return helloBean.getPre()+name+helloBean.getSuf();
    }
}
Then create a bean
@ConfigurationProperties("zengbo.hello")
public class HelloBean {
    private String pre;
    private String suf;

    public String getPre() {
        return pre;
    }

    public void setPre(String pre) {
        this.pre = pre;
    }

    public String getSuf() {
        return suf;
    }

    public void setSuf(String suf) {
        this.suf = suf;
    }
}
Here @ ConfigurationProperties("zengbo.hello") is used to dynamically bind the configuration file with zengbo.hello as the prefix.
Next, create a configuration class
@Configuration
@EnableConfigurationProperties(HelloBean.class)
@ConditionalOnMissingBean(Hello.class)
public class HelloAutoConfigure {
    @Bean
    public Hello hello(){
        return new Hello();
    }
}
First, use @ Configuration to indicate that this class is a Configuration class,
@EnableConfigurationProperties(HelloBean.class)
This annotation will open the configuration binding and load HelloBean.class into the ioc container by default
@ConditionalOnMissingBean(Hello.class)
This conditional annotation means that the @ Bean in the face will take effect only when there is no Hello.class component in our container
That's why we didn't add Hello to the container
It should be noted here that the official springboot is found in auto configuration / META-INF/spring.factories, so we also need to create

In the configuration, we only need to write the components that need to be imported automatically
org.springframework.boot.autoconfigure.EnableAutoConfiguration=\
com.zengbo.auto.HelloAutoConfigure
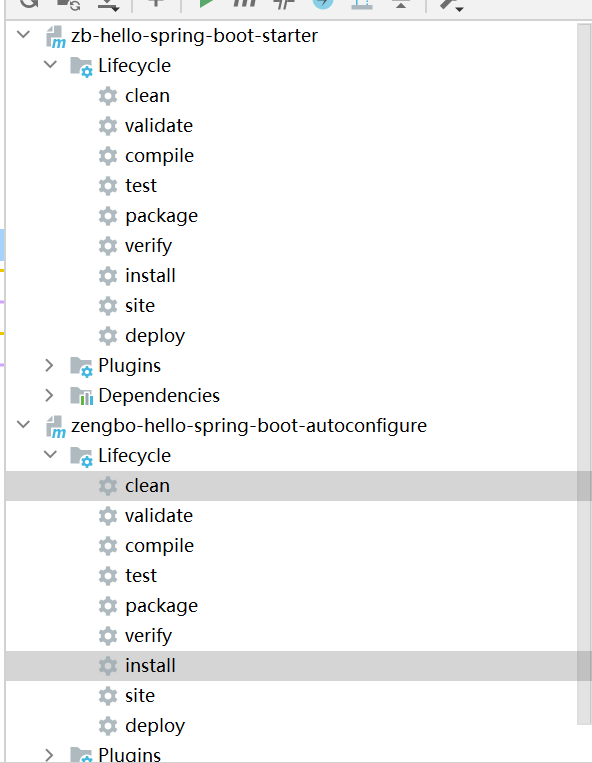
After completing this series of work, we need to load the starter into our warehouse

Click clean and install respectively to import to our warehouse

The next test is OK
Create a new springboot project and import our custom starter


This represents the import
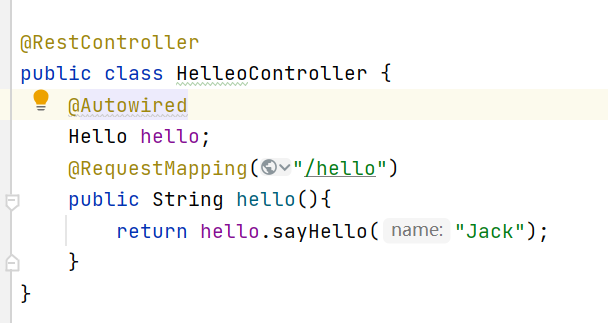
Then inject our component to be tested

Just write the value we need to get dynamically in the configuration file
zengbo.hello.pre="welcome"
zengbo.hello.suf="to home"

So far, our customized starter is completed