catalogue
First, simulate the browser's environmental preparation.
(2) Add chromedriver to environment variable
2, Example: use Selenium operation browser to obtain QQ music list data
2. Use webdriver to open qq music list page
3. Get the web page source code
5. Use Selenium to obtain data
3, Example: login to baidu account using selenium simulation browser
3. Enter user name and password
4, Example: simulate the browser to obtain the film review information of Douban
5, Summary - rational use of Selenium
6, Obtain rental information in Shenzhen
In the previous chapter, we used Chrome's "check" function to review the page elements, so that we can easily find the real web address containing asynchronous data, and then parse the content in the web address to get the target data. In this chapter, we will explore the method of crawling dynamic data using a simulated browser. Compared with the method of reviewing page elements, we no longer need to care about where the data is transmitted, and we won't be annoyed by copying or constructing those lengthy and complex real Web sites.
The method of simulating the browser is to open the browser, load the web page, automatically operate the browser to visit each page, grab the target data or save the screenshot of the operation process. From the perspective of data capture, it is crawling dynamic web pages and programming crawling static web pages.
Key contents of this chapter: preparation of simulated browser environment, using Selenium to manipulate the browser, and using Selenium to obtain data
First, simulate the browser's environmental preparation.
The simulation browser mainly relies on Selenium and realizes the communication between Selenium and Web browser with the support of WebDriver. Therefore, in addition to the basic programming language environment, the implementation of simulated browser is composed of three things: browser, WebDriver and Selenium.
1. Introduction to selenium
Selenium is a large-scale engineering project composed of a series of tools and libraries. With their support, selenium realizes the automation of web browser. It is mainly to realize the automatic test of web, and also includes the automatic task management based on Web.
Selenium can let the browser load the page, maximize and minimize the page, simulate keyboard, mouse operation, element positioning, element click, wait for the page content to load, obtain the required data, etc. according to the user's instructions.
2.Selenium installation
pip install selenium
3. Install WebDriver
Selenium currently supports firefox, chrome, edge, safari and other mainstream browsers on the market, and each browser has a specific WebDriver. In this article, we will complete the relevant operations corresponding to the Chrome browser with the support of chrome river.
(1) Installing chromedriver
Baidu search chromedriver, find chromedriver image . This web site lists all the chrome driver files corresponding to different chrome versions.
When downloading, you must pay attention to whether the version of your Chrome browser matches the chrome river.
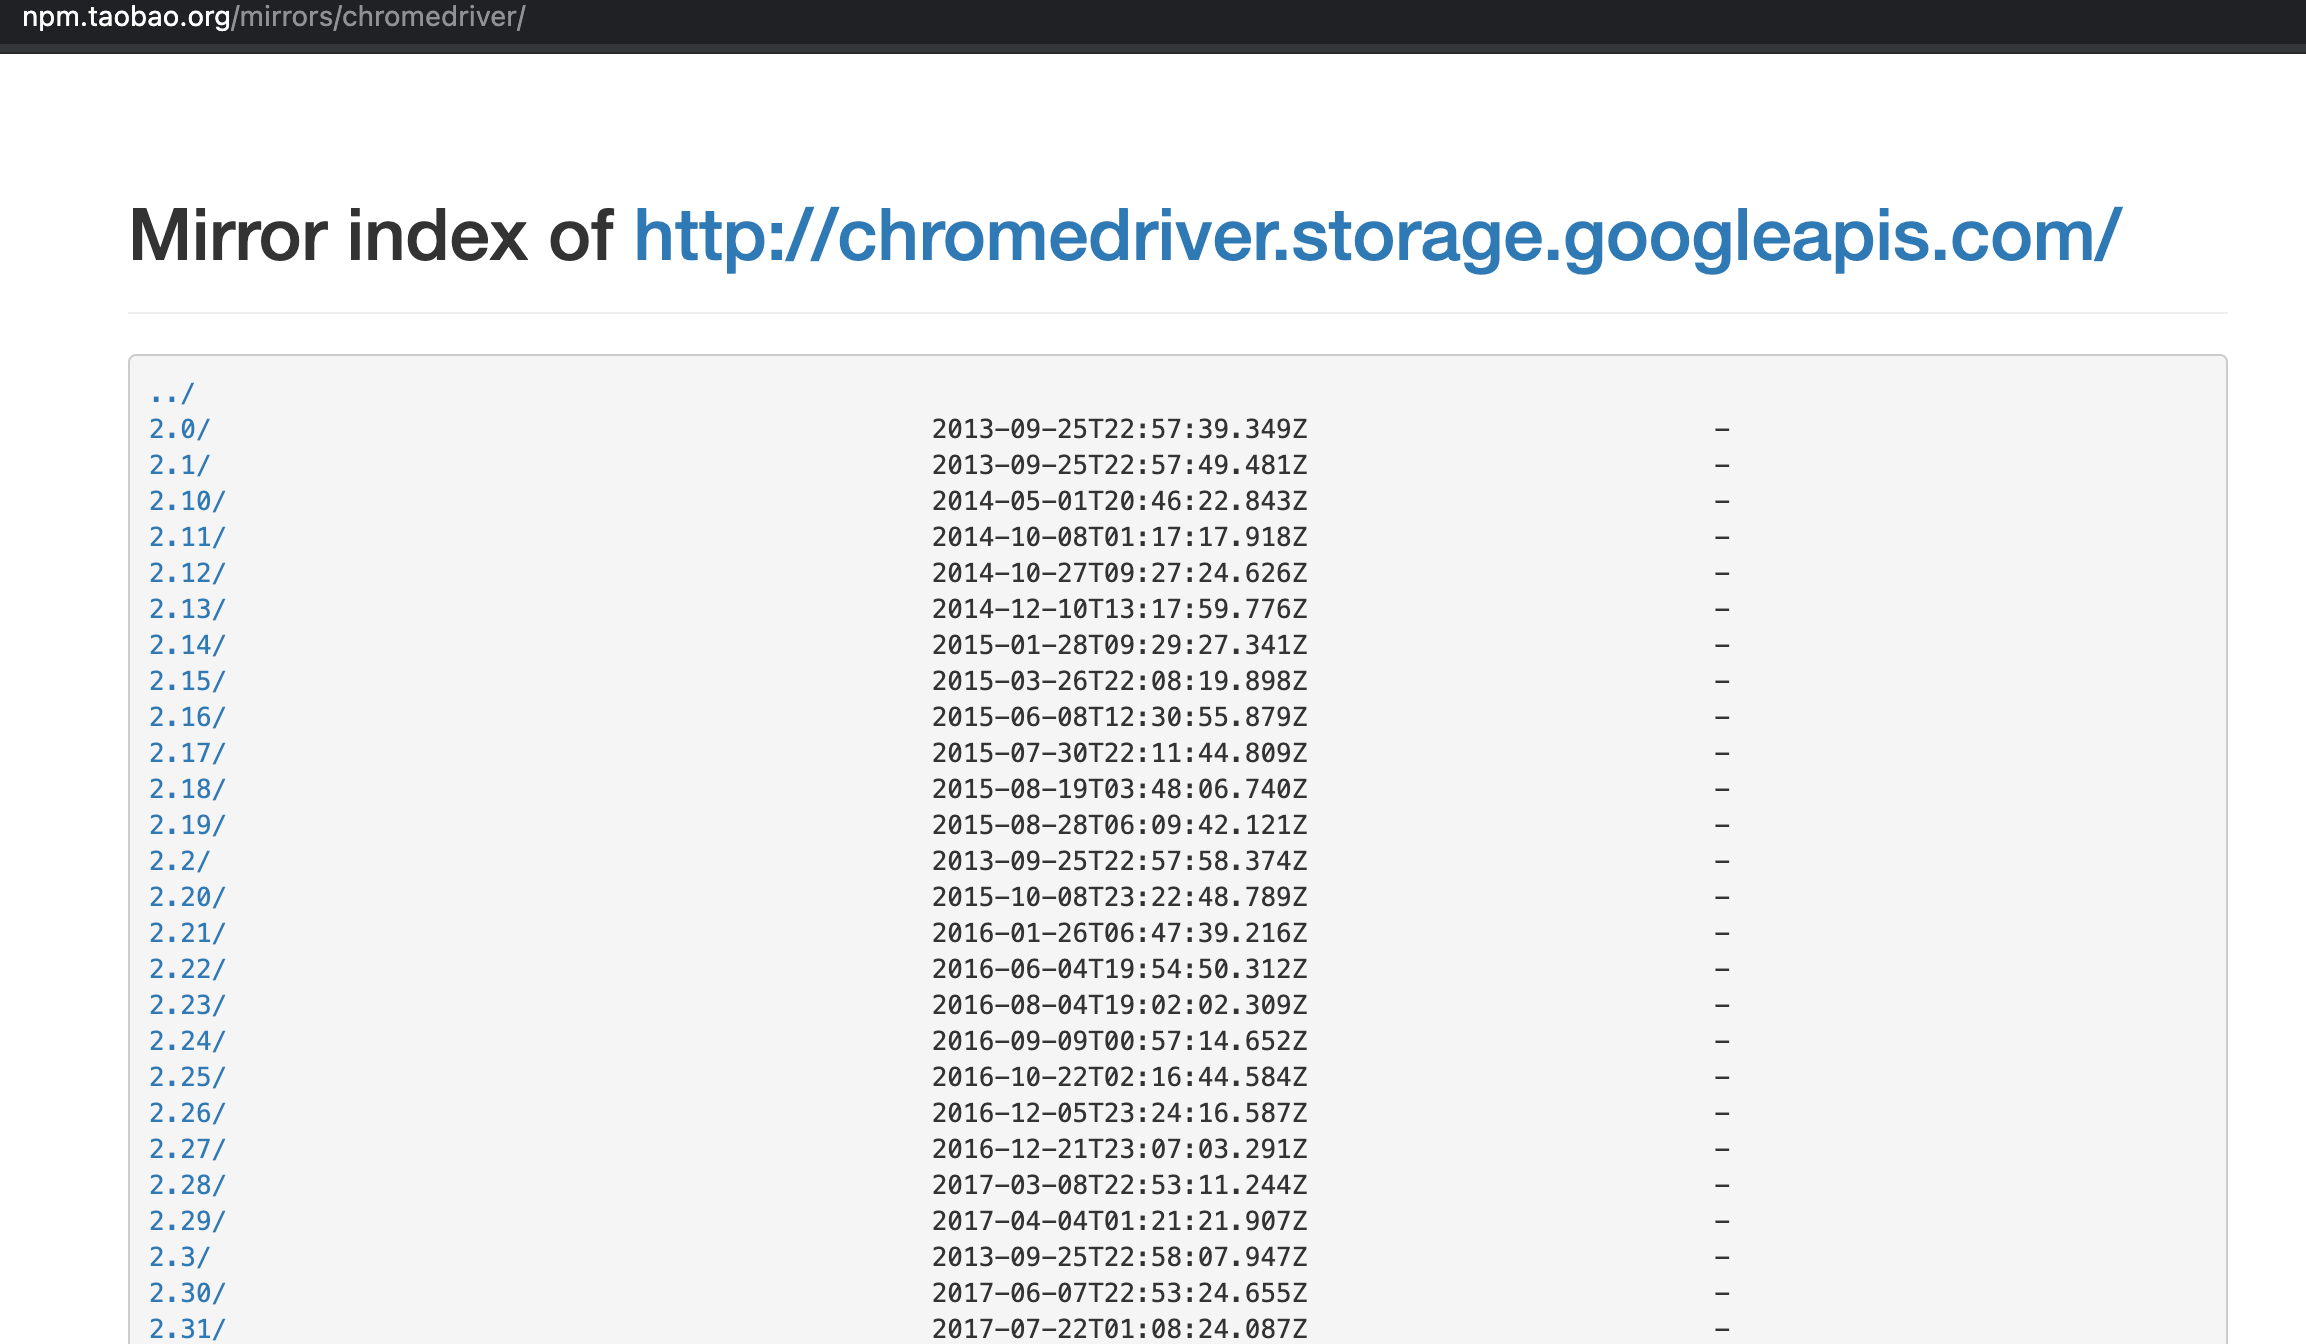 Figure 1. Chrome River image website
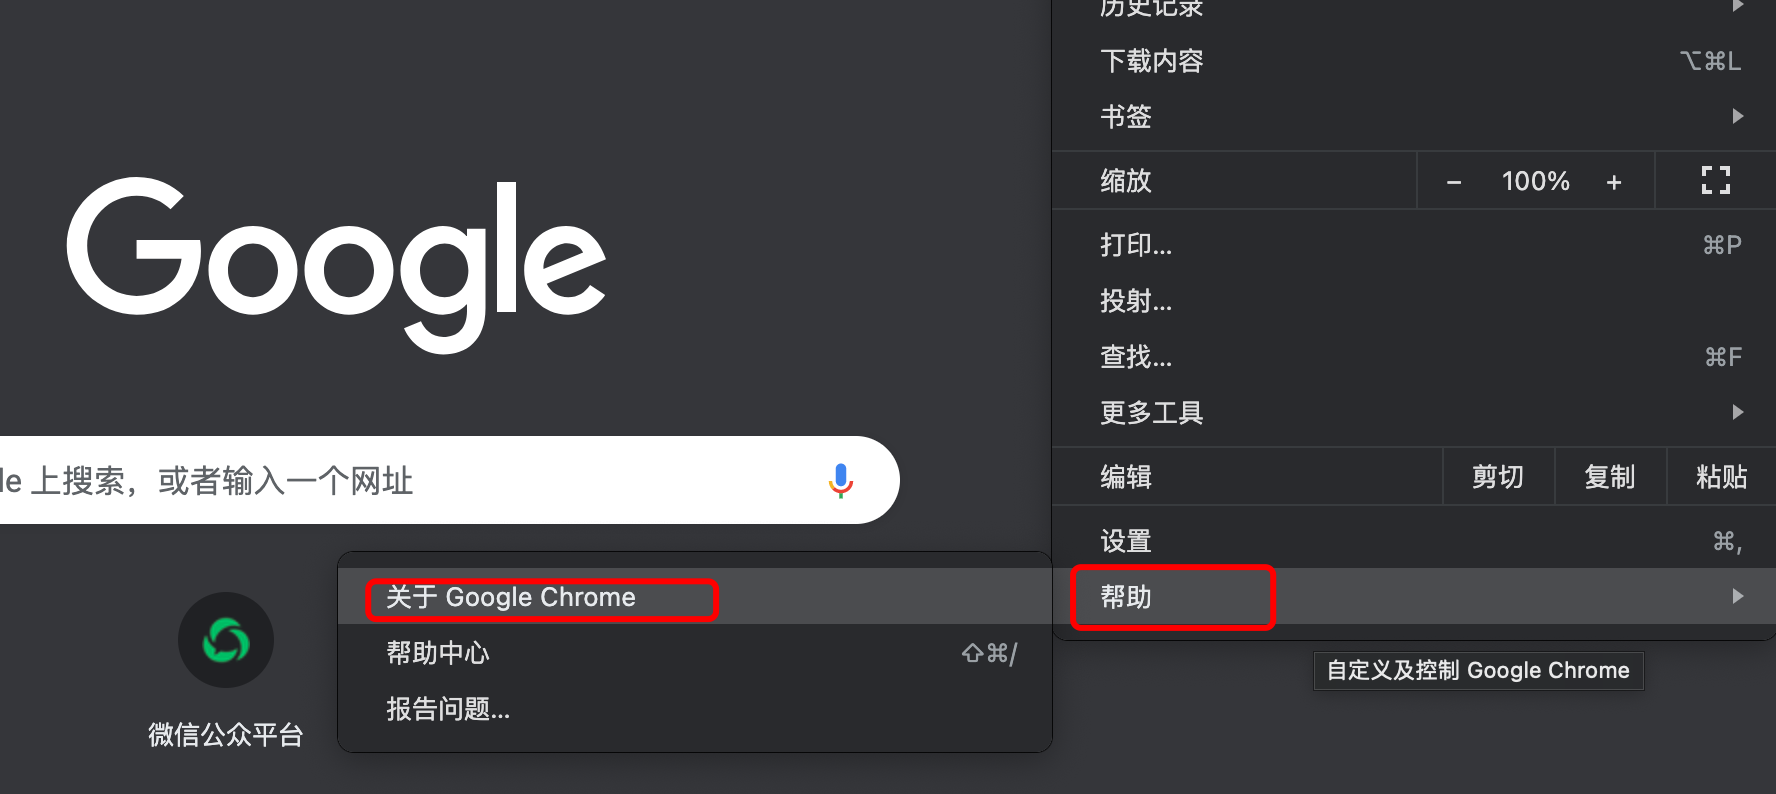 Figure 2 # view the current version in chrome help - "about Google Chrome"
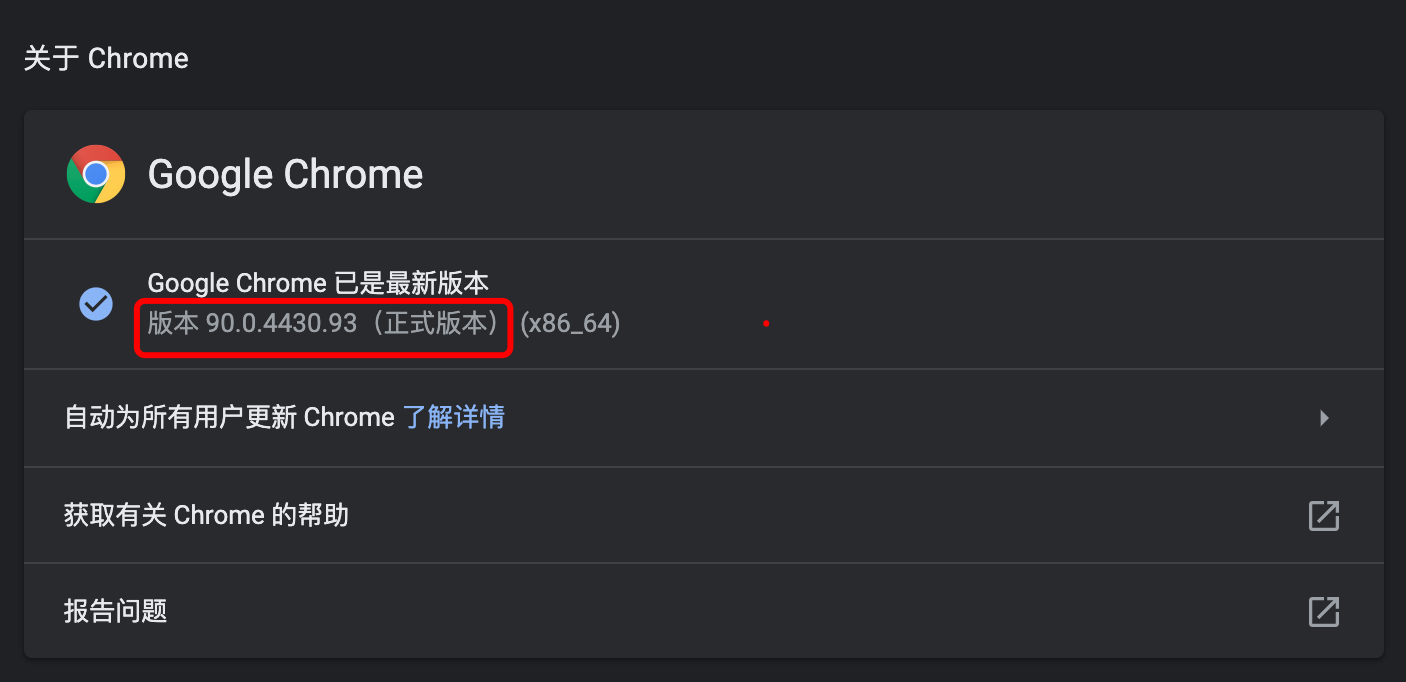 Figure 3. The version number shown in the figure is 90.0.4430.93
Find the file with the corresponding version number in the chromedriver download website, and download the corresponding compressed package file according to your own operating system. After decompression, you will get an executable file of chromedriver.

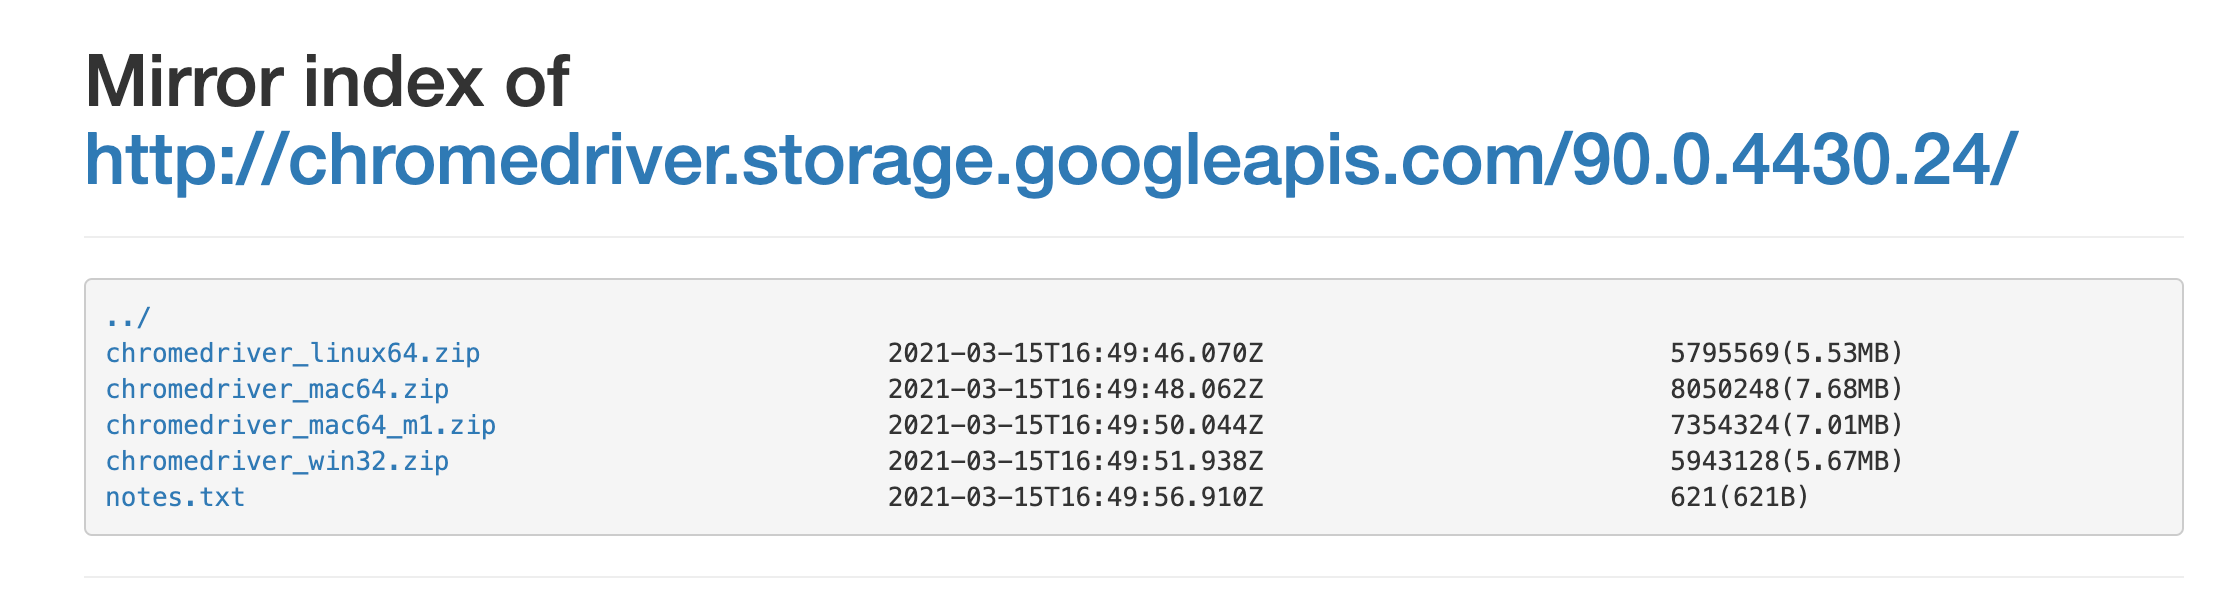 Figure 4. Downloading different files from different operating systems
(2) Add chromedriver to environment variable
If chromedriver is added to the environment variable, there is no need to specify the path in which chromedriver will be called later.
- windows system
Find chromedriver Exe after decompression, copy its path. You can also cut the chromedriver to the path of C:\Users\Administrator\AppData\Local\Google\Chrome\Application, as described in most online descriptions. AppData is hidden by default. To reach this path, you need to check "show hidden files, folders and drives" in "menu" - "tools" - "folder properties" - "view".
Copy the path to the path of the system's environment variable, as shown in Figure 5.
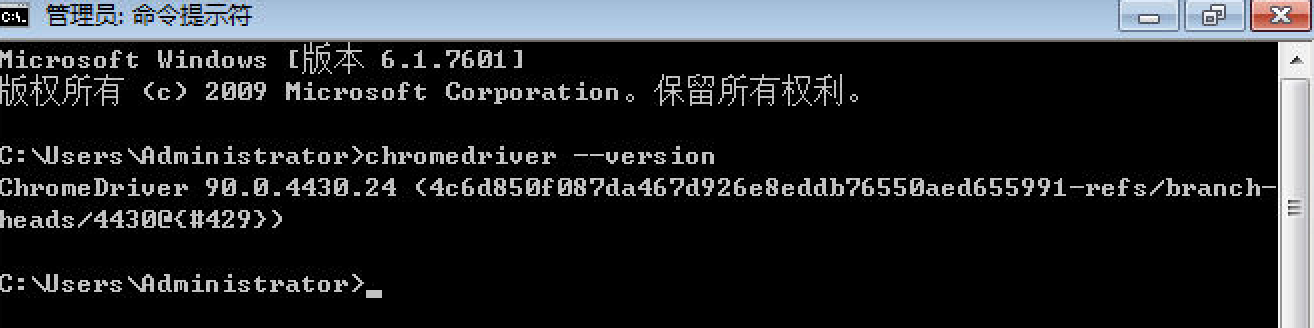
Enter the command "chromedriver --version" in the command prompt window. If the version number is not displayed normally, restart the computer.
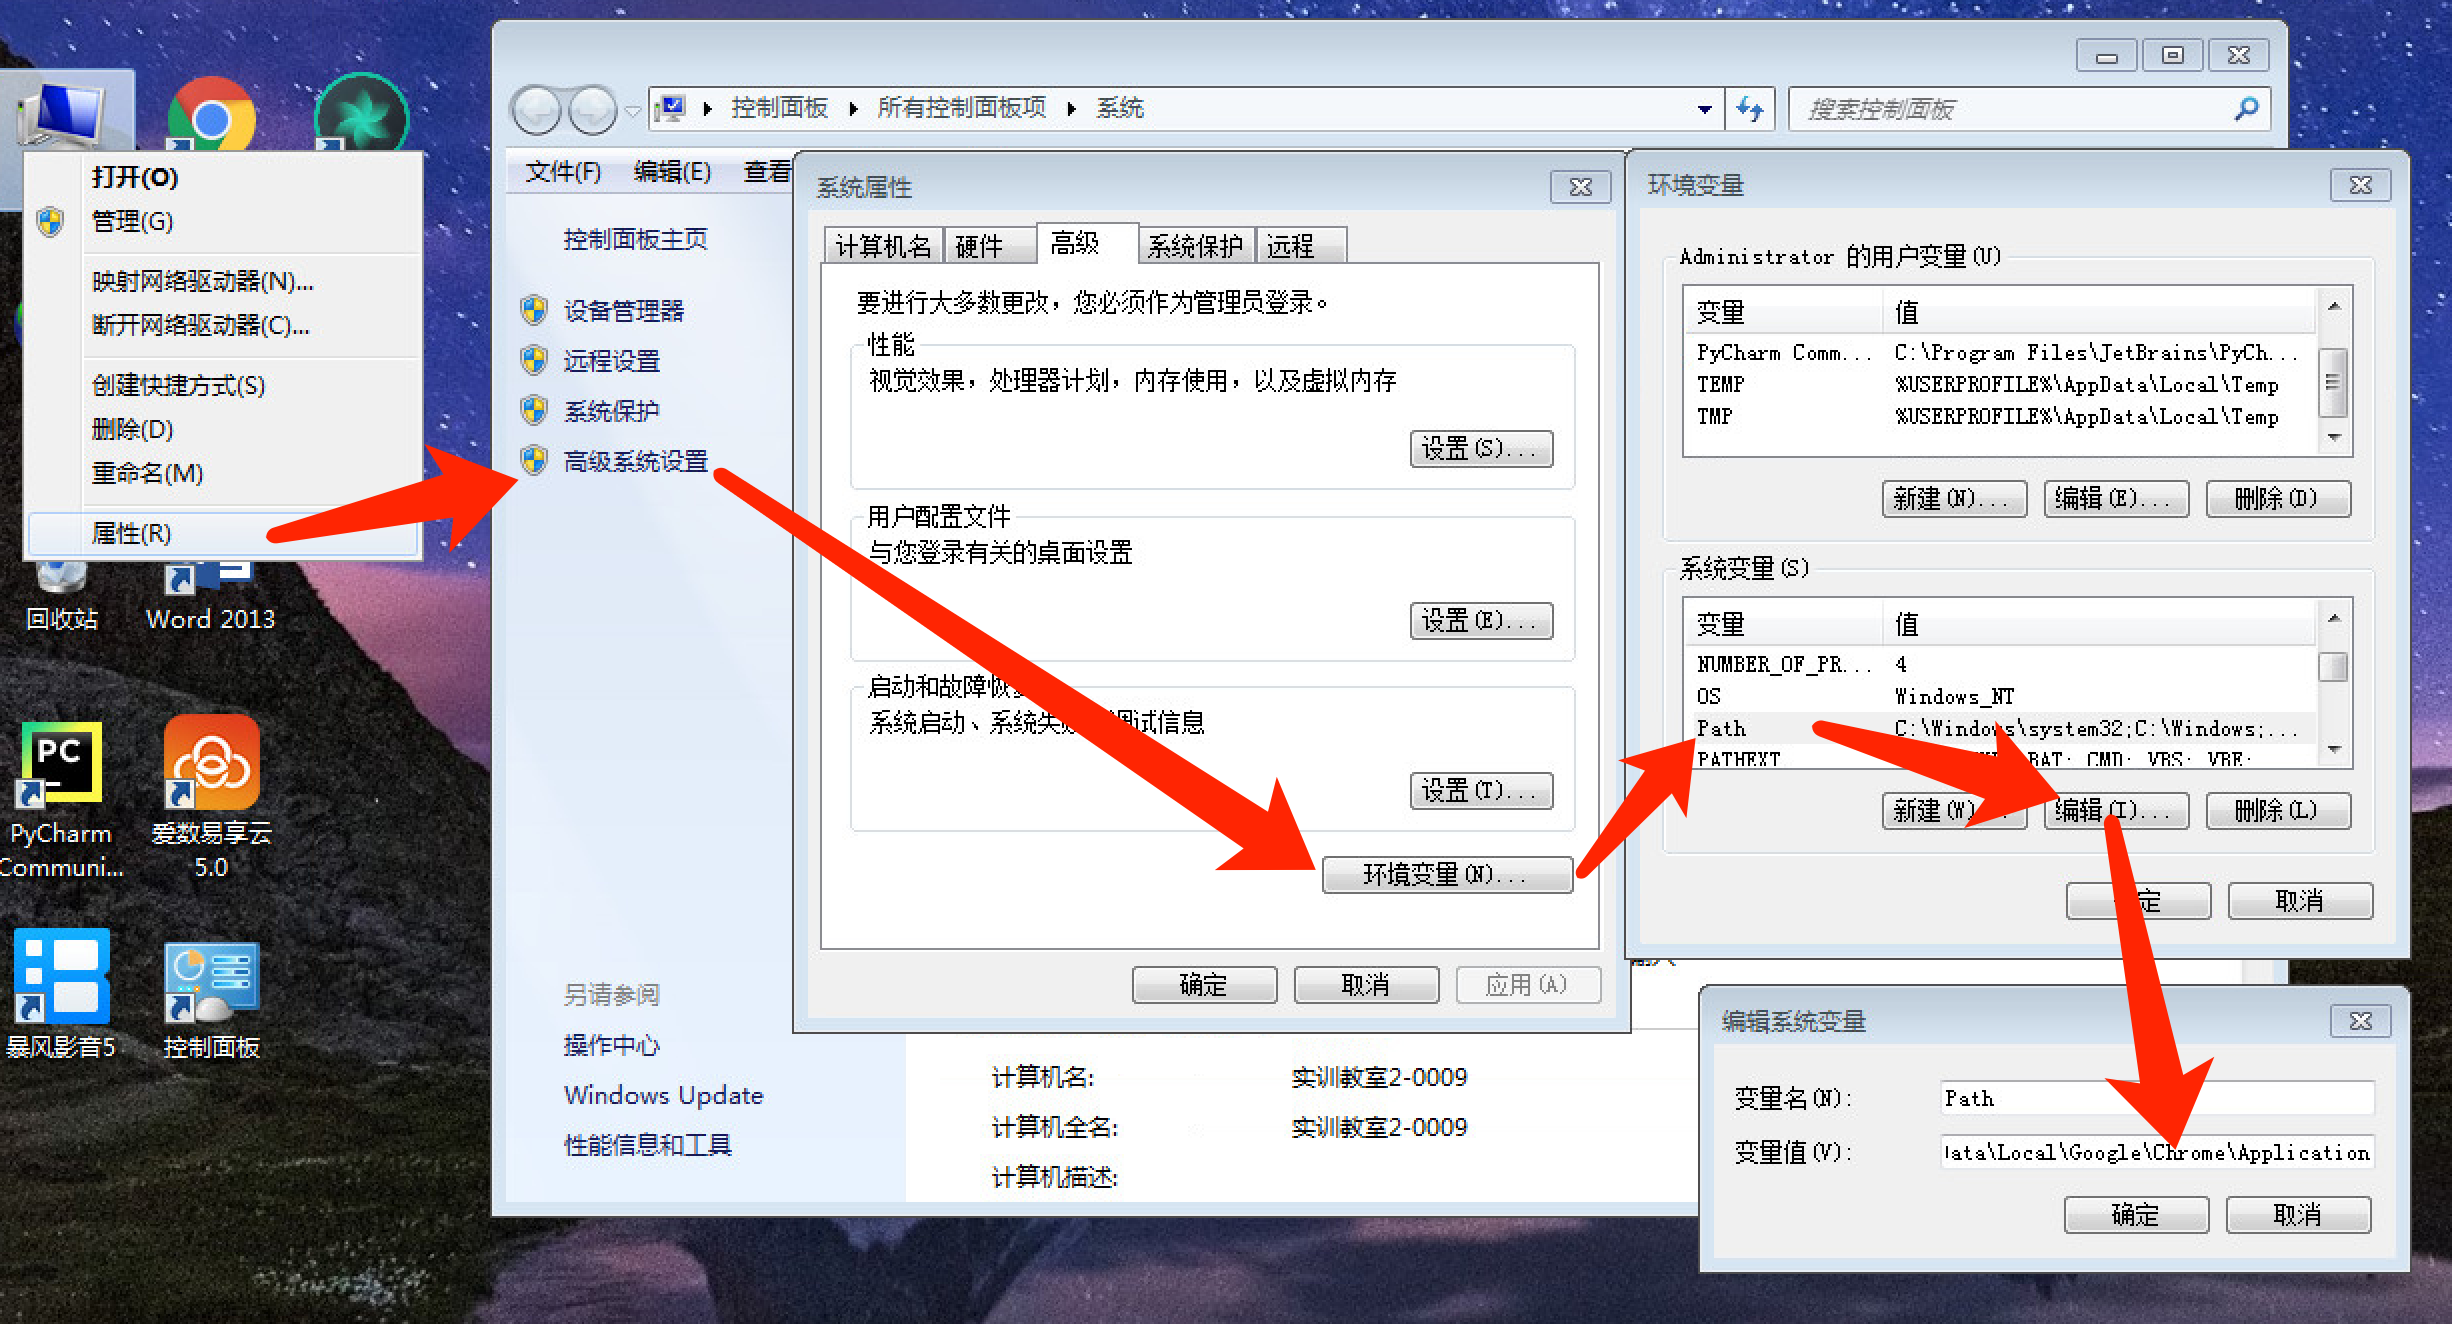 Figure 5. Method of adding environment variables in windows
- mac system
The shortcut key shift+command+G starts the quick go dialog box
Enter the path usr/local/bin
Drag the chromedriver file here
Enter "chromedriver --version" in the terminal, and the normal display of the version number indicates success.
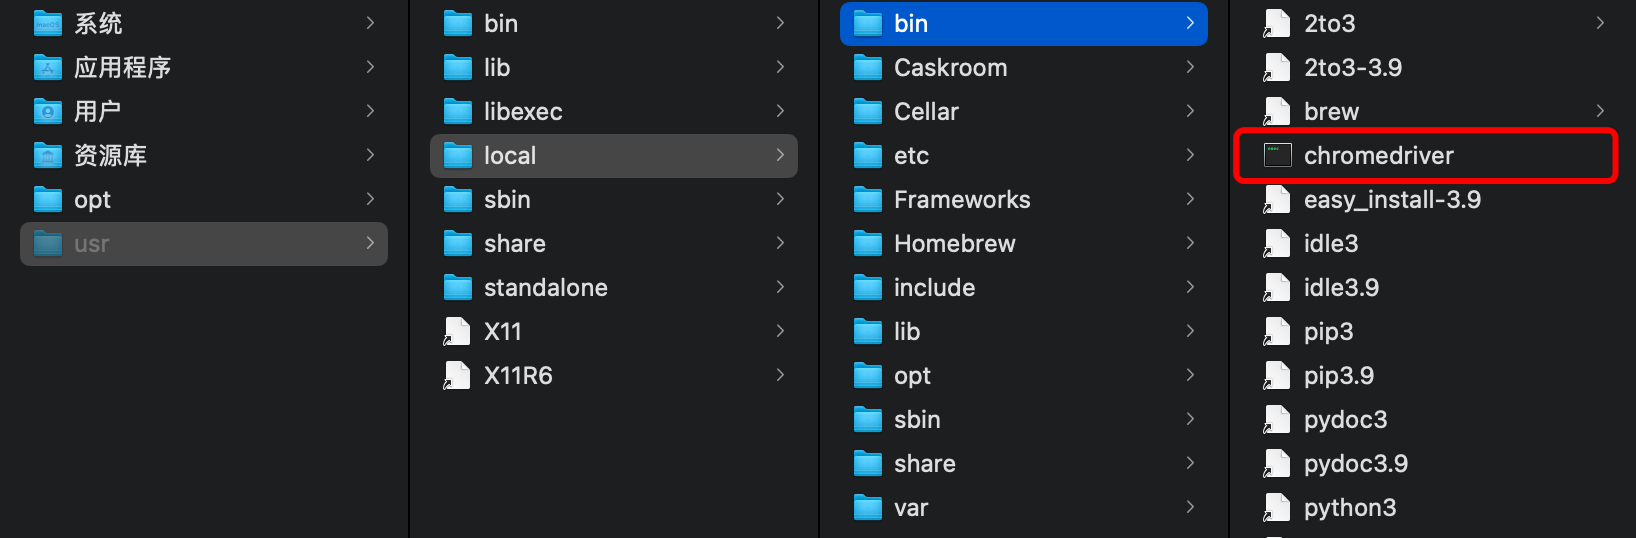 Figure 6. Method of adding environment variables in mac system

Next, we will understand how Selenium operates the browser through three examples.
2, Example: use Selenium operation browser to obtain QQ music list data
1. Start the browser
from selenium import webdriver  # Import webdriver module

driver = webdriver.Chrome()  # Call chrome browser to create browser object
After executing the above two codes, a Chrome browser will be opened, and a prompt "Chrome is under the control of automatic test software" will be displayed in the upper left corner of the browser
2. Use webdriver to open qq music list page
Use the get() method to load the contents of the page into the browser object driver.
driver.get('https://y.qq.com/n/yqq/toplist/4.html')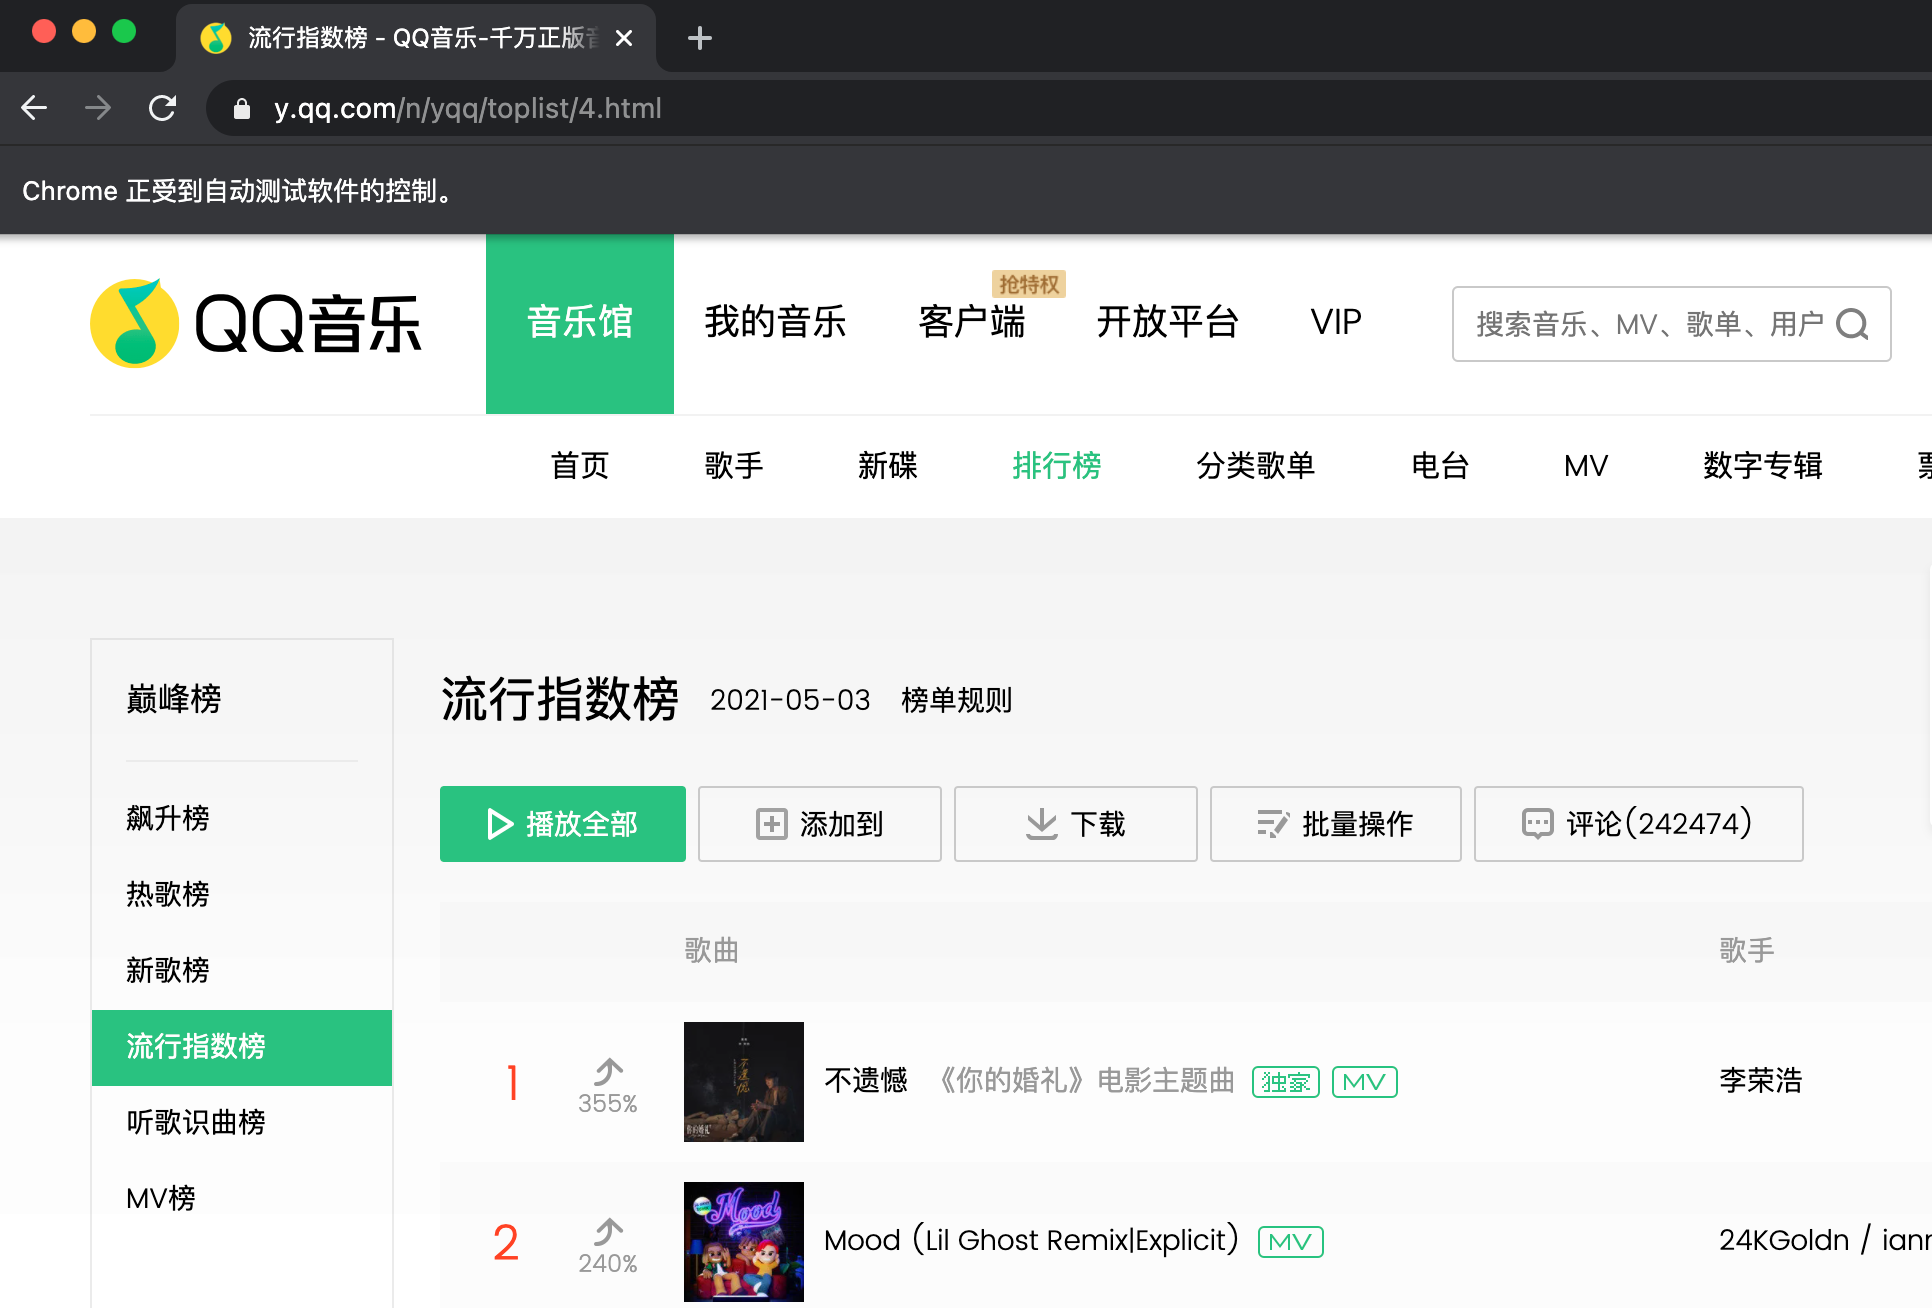
3. Get the web page source code
print(driver.page_source)
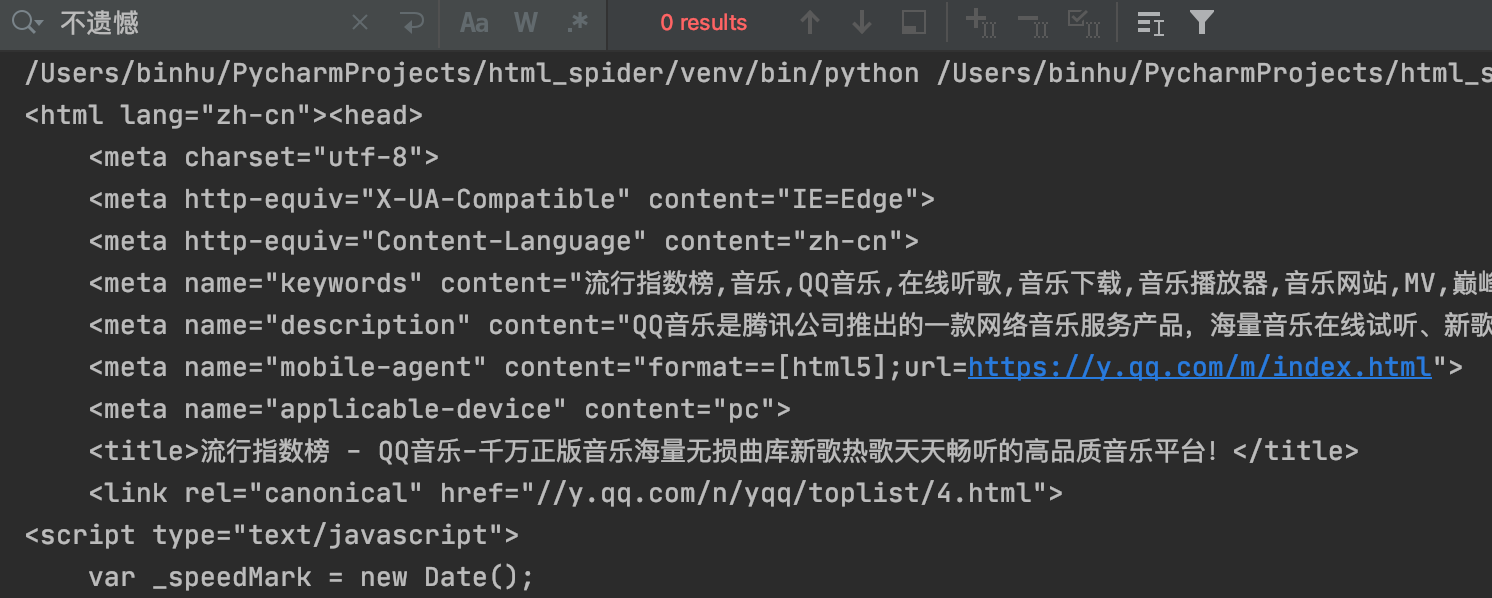 Figure 7 # obtained web page source code
The first song name "no regret" cannot be searched in the web page source code, because the song information is transmitted using AJAX technology, and the printing operation is performed before the information is fully loaded.
To solve this problem, we need to use Selenium's wait method until an element appears in the page, and then perform subsequent operations.
4. Page waiting
(1) Create a waiting object
Import waiting module
from selenium.webdriver.support.ui import WebDriverWait
Create wait object
WebDriverWait(driver,timeout,poll_frequency=0.5,ignored_exceptions=None)
driver is the browser object; Timeout is the longest timeout, and the default unit is seconds; poll_frequency is the interval of sleep time. The default is 0.5 seconds, which means to check whether the conditions are met every 0.5 seconds; ignored_exceptions is the exception information after timeout. NoSuchElementException is thrown by default.
We take the driver as the browser object and set the maximum timeout to 10 seconds.
wait = WebDriverWait(driver,10)
WebDriverWait objects are generally associated with until() or until_ The not () method is used together. Next, we use the until() method to set the waiting condition.
(2) Set waiting conditions
wait. Until (wait condition)
from selenium.webdriver.common.by import By # Specifies the positioning method of the element
from selenium.webdriver.support import expected_conditions as EC # Trigger method of responsible condition

wait.until(EC.presence_of_all_elements_located((By.CSS_SELECTOR,'.songlist__item')))
Introduce the previously defined wait object, call the until method, and pass in the expected condition to wait_ Conditions, the presence is passed in here_ of_ all_ elements_ Located means that all nodes that meet the conditions are loaded, and its parameters are conditional tuples. The CSS selector is used here to locate the class name 'songlist'__ If the node of item 'is successfully loaded within 10 seconds, continue to execute the following statements, otherwise an exception will be thrown.
| Waiting conditions | meaning |
|---|---|
| title_is | The title is something |
| title_contains | The title contains something |
| presence_of_element_located | Load the node and pass in the location tuple, such as (By.ID, 'p') |
| visibility_of_element_located | Node visible, incoming location tuple |
| visibility_of | Visible, incoming node object |
| presence_of_all_elements_located | Load all nodes |
| text_to_be_present_in_element | A node text contains a text |
| text_to_be_present_in_element_value | A node value contains a text |
| frame_to_be_available_and_switch_to_it | Load and switch |
| invisibility_of_element_located | Node not visible |
| element_to_be_clickable | Node clickable |
| staleness_of | Judge whether a node is still in the DOM, and judge whether the page has been refreshed |
| element_to_be_selected | Nodes can be selected and transferred to node objects |
| element_located_to_be_selected | The node can be selected, and the location tuple is passed in |
| element_selection_state_to_be | If the node object and status are passed in, it returns True if they are equal, otherwise it returns False |
| element_located_selection_state_to_be | If the location tuple and status are passed in, it returns True if they are equal, otherwise it returns False |
| alert_is_present | Is there a warning |
By is used to locate nodes. It can support a variety of positioning strategies.
CLASS_NAME = 'class name' # uses the value of the attribute class to locate the node
CSS_SELECTOR = 'css selector' # use css selector to locate nodes
id = 'id' # uses the value of the attribute id to locate the node
LINK_TEXT = 'link text' # uses the text content of the link to locate the node
Name = 'name' # locates the node according to the value of the attribute name
PARTIAL_LINK_TEXT = 'partial link text' # uses part of the text content of the link to locate the node
TAG_NAME = 'tag name' # uses the name of the node to locate the node
xpath = 'xpath' # use xpath to locate nodes
After setting the waiting conditions, we print the page again_ Source will find that the song information in the list has been included in the source code at this time.
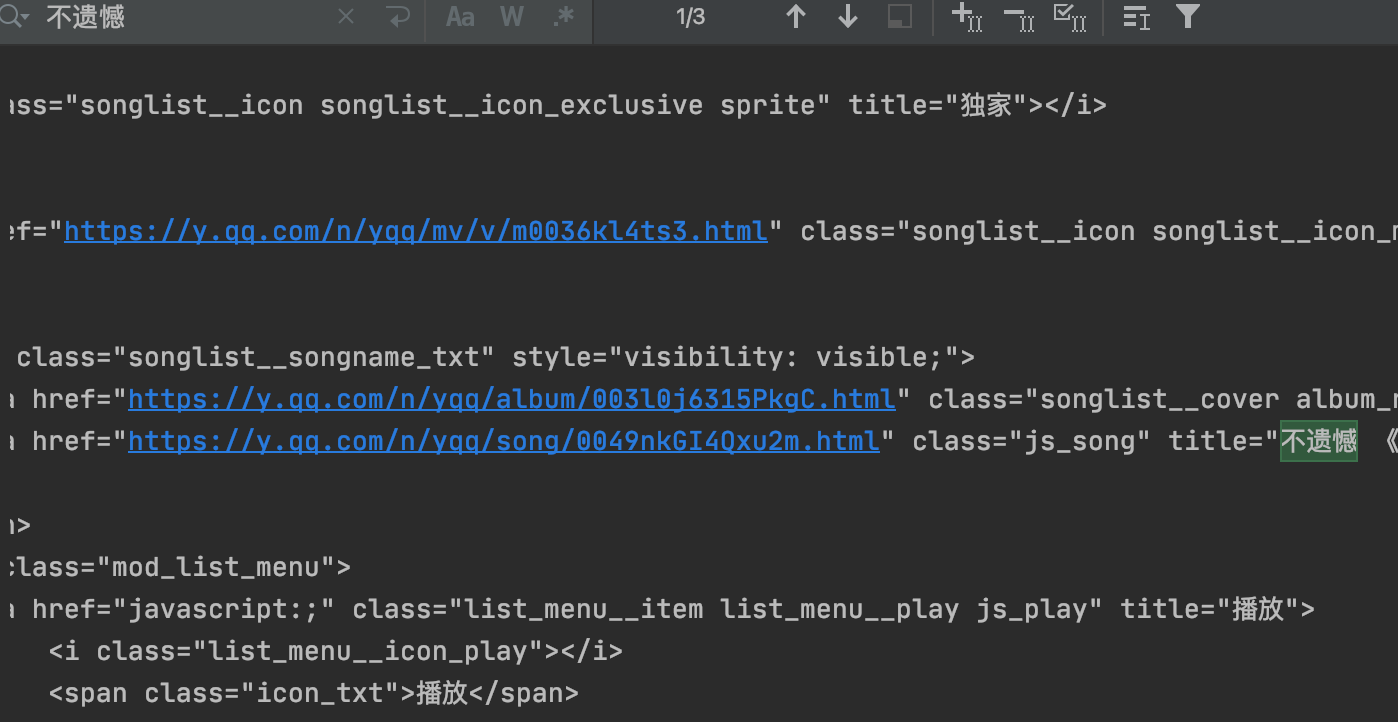 Figure 8. Successfully obtained the source code containing the target data
5. Use Selenium to obtain data
Using Selenium to obtain data is generally divided into two steps: one is to locate elements, and the other is to specify the obtained content.
Webdriver provides a series of methods to locate elements, See official documents for details:
- ID location: find_element_by_id()
- Name: find_element_by_name()
- Class positioning: find_element_by_class_name()
- Link location: find_element_by_link_text()
- partial link location: find_element_by_partial_link_text()
- Tag positioning: find_element_by_tag_name()
- XPath positioning: find_element_by_xpath()
- CSS positioning: find_element_by_css_selector()
The above method returns the first node object that meets the positioning conditions, and the type is "< class' selenium. Webdriver. Remote. Webelement. Webelement '>". If you need to get all the nodes that meet the conditions, as long as you change element to elements, the method returns a list, such as find_elements_by_id().
In this example, there are 20 songs in total. Each song is under a li node, and the name of each song is the value of the title under a node. We can use xpath to parse the path according to the principle of grasping the big first and then the small.
In addition, there are two ways to obtain node information:
- Get the text information of the node: text
- Get the attribute value of the node: get_attribute('name of attribute ')
Code to get the name of the song on the list:
data = driver.find_elements_by_xpath('//UL [@ class = "songlist # list"] / Li ') # first get the node of each song
for song in data:
 print(song.find_element_by_xpath('./div/div[4]/span/a[2]').get_attribute('title')) # Then grab the small and get the name of each song
Optimized complete code:
from selenium import webdriver
from selenium.webdriver.common.by import By
from selenium.webdriver.support.ui import WebDriverWait
from selenium.webdriver.support import expected_conditions as EC

driver = webdriver.Chrome()
wait = WebDriverWait(driver, 10)


def get_source():
    url = 'https://y.qq.com/n/yqq/toplist/4.html'
    driver.get(url)
    try:
        wait.until(EC.presence_of_all_elements_located((By.CSS_SELECTOR, '.songlist__item')))
        data = driver.find_elements_by_xpath('//ul[@class = "songlist__list"]/li')
        for song in data:
            print(song.find_element_by_xpath('./div/div[4]/span/a[2]').get_attribute('title'))
    except TimeoutError:
        get_source()


def main():
    get_source()


if __name__ == "__main__":
    main()
    driver.close()
3, Example: login to baidu account using selenium simulation browser
1. Create webdriver object
Import all libraries, create webdriver objects, and use get method to open Baidu home page
from selenium.webdriver import Chrome
from selenium.webdriver.support.ui import WebDriverWait
from selenium.webdriver.common.by import By
from selenium.webdriver.support import expected_conditions as EC
import time
driver = Chrome()
driver.get('https://www.baidu.com')
2. Open the login box
Create a webdriverwait object, use the inspection tool to find the node where the user logs in. The ID value of the user login button node is "s-top-loginbtn", and use the click() method.
wait.until(EC.presence_of_element_located((By.ID,"s-top-loginbtn"))).click()
After execution, the baidu login box will pop up. In the login box, there are two login methods: code scanning login and user name login. Use the inspection tool to find the node with user name login. The name of the node is p and the class value is "Tang pass footerbarulogin pass link".
wait.until(EC.presence_of_element_located((By.XPATH,'//p[@class = "tang-pass-footerBarULogin pass-link"]'))).click()
3. Enter user name and password
Use time here The sleep () method waits for 1 second first
Then find the nodes of the user name and password text boxes respectively, and use send_ The keys () method passes in the user name and password.
time.sleep(1)
username = driver.find_element_by_name("userName")
username.send_keys('user name')  # Enter your user name
password = driver.find_element_by_name("password")
password.send_keys('password')  # Enter your password
4. Click the login button
Use the inspection tool to find the node of the login button. The ID value of this node is "tangram_psp_11_submit". Use the wait method to locate the login button and call click().
wait.until(EC.presence_of_element_located((By.ID,"TANGRAM__PSP_11__submit")))
submit.click()
After clicking login, image authentication may appear. Here, we set to wait for 5 seconds, and the user manually completes image authentication. Next, we can use get_ The cookie method gets the cookies after login The complete code is as follows:
from selenium.webdriver import Chrome
from selenium.webdriver.support.ui import WebDriverWait
from selenium.webdriver.common.by import By
from selenium.webdriver.support import expected_conditions as EC
import time
driver = Chrome()
driver.get('https://www.baidu.com')
wait = WebDriverWait(driver,10)

wait.until(EC.presence_of_element_located((By.ID,"s-top-loginbtn"))).click()
wait.until(EC.presence_of_element_located((By.XPATH,'//p[@class = "tang-pass-footerBarULogin pass-link"]'))).click()
time.sleep(1)
username = driver.find_element_by_name("userName")
username.send_keys('user name')  # Enter your user name
password = driver.find_element_by_name("password")
password.send_keys('password')  # Enter your password
submit = wait.until(EC.presence_of_element_located((By.ID,"TANGRAM__PSP_11__submit")))
submit.click()
print('Waiting for the user to authenticate the image')
time.sleep(5)
cookies = driver.get_cookies()
print(cookies)
print('Login successful')
4, Example: simulate the browser to obtain the film review information of Douban
from selenium.webdriver import Chrome
from selenium.webdriver.support.ui import WebDriverWait
from selenium.webdriver.common.by import By
from selenium.webdriver.support import expected_conditions as EC
from selenium.webdriver.common.keys import Keys
import csv
import time

# Create WebDriver object
driver = Chrome()
# Create WebDriverWait object
wait = WebDriverWait(driver, 30)


def get_data():
    url = 'https://movie.douban.com/'
    driver.get(url)  # Open Douban movie website
    driver.implicitly_wait(10)
    search_input = driver.find_element_by_tag_name("input")  # Find search box
    search_input.send_keys("Gladiatus")  # Analog keyboard input search content
    search_input.send_keys(Keys.RETURN)  # Analog keyboard enter
    wait.until(EC.presence_of_element_located((By.XPATH,'//Div [@ class = "Paginator SC htodjs eszztj"]))) # wait for the page turning bar to appear, that is, the page is loaded
    driver.find_element_by_xpath('//div[@id="root"]/div/div[2]/div[1]/div[1]/div[1]/div[1]/div/div[1]/a').click() # navigate to the name of the first movie on this page through xpath and click this node
    time.sleep(1)  # Rest for one second and wait for the page to load
    button = wait.until(EC.presence_of_element_located((By.XPATH,'//a[@href="reviews"])) # wait for the "all movie reviews" node
    button.click()  # Click to open the all movie reviews page
    time.sleep(1)  # Rest for one second and wait for the page to load
    comment_list = []  # Create an empty list to hold all the movie reviews

    for i in range(10):  # Cycle through 10 pages
        wait.until(EC.presence_of_element_located((By.XPATH,'//Div [starts with (@ class, "review list")])) # wait for the movie review list to load
        data = driver.find_elements_by_xpath('//Div [starts with (@ class, "review list")] / div ') # install the principle of grasping the big first and then the small, and use xpath to grab each floor
        for item in data:  # Cycle to capture the content, author and submission time of film reviews on each floor
            comment = {}
            comment['content'] = item.find_element_by_class_name('short-content').text
            comment['author'] = item.find_element_by_xpath('./div/header/a[2]').text
            comment['comment_time'] = item.find_element_by_class_name('main-meta').text
            comment_list.append(comment)
        wait.until(EC.presence_of_element_located((By.CLASS_NAME,"next"))).click()  # Realize page turning function
        time.sleep(1)  # Rest for 1 second after turning the page
    return comment_list


def writer_csv(data):  # Write list to csv
    with open('douban_reviews.csv','w',encoding='utf-8-sig') as f:
        writer = csv.DictWriter(f,fieldnames=['content','author','comment_time'])
        writer.writeheader()
        writer.writerows(data)


def main():
    result = get_data()
    writer_csv(result)


if __name__ == '__main__':
    main()
    driver.quit()
5, Summary - rational use of Selenium
Selenium can simulate any operation, such as click, right-click, drag, scroll, copy and paste, or text input. The operation modes can be roughly divided into routine operation, mouse event operation and keyboard event operation.
The advantages of using Selenium are obvious. With a small amount of code, we can obtain asynchronous data or realize the simulated Login of the website. But its disadvantage is also very prominent, that is, the running speed is slow, because it will not run the following code until the page content is loaded. If there are many pictures in the page and many asynchronous loads, it will take a long time. At this time, we need to turn off loading pictures, CSS or JS in the option setting of WebDriver to shorten the waiting time.
The flexible use of selenium will help to improve the efficiency of crawler development. In actual development, selenium will be used as an auxiliary tool. Selenium may have a glimmer of hope for some data that are difficult to find JS or XHR sources. For the data with clear data source, the efficiency of requesting directly by request will be particularly advantageous.
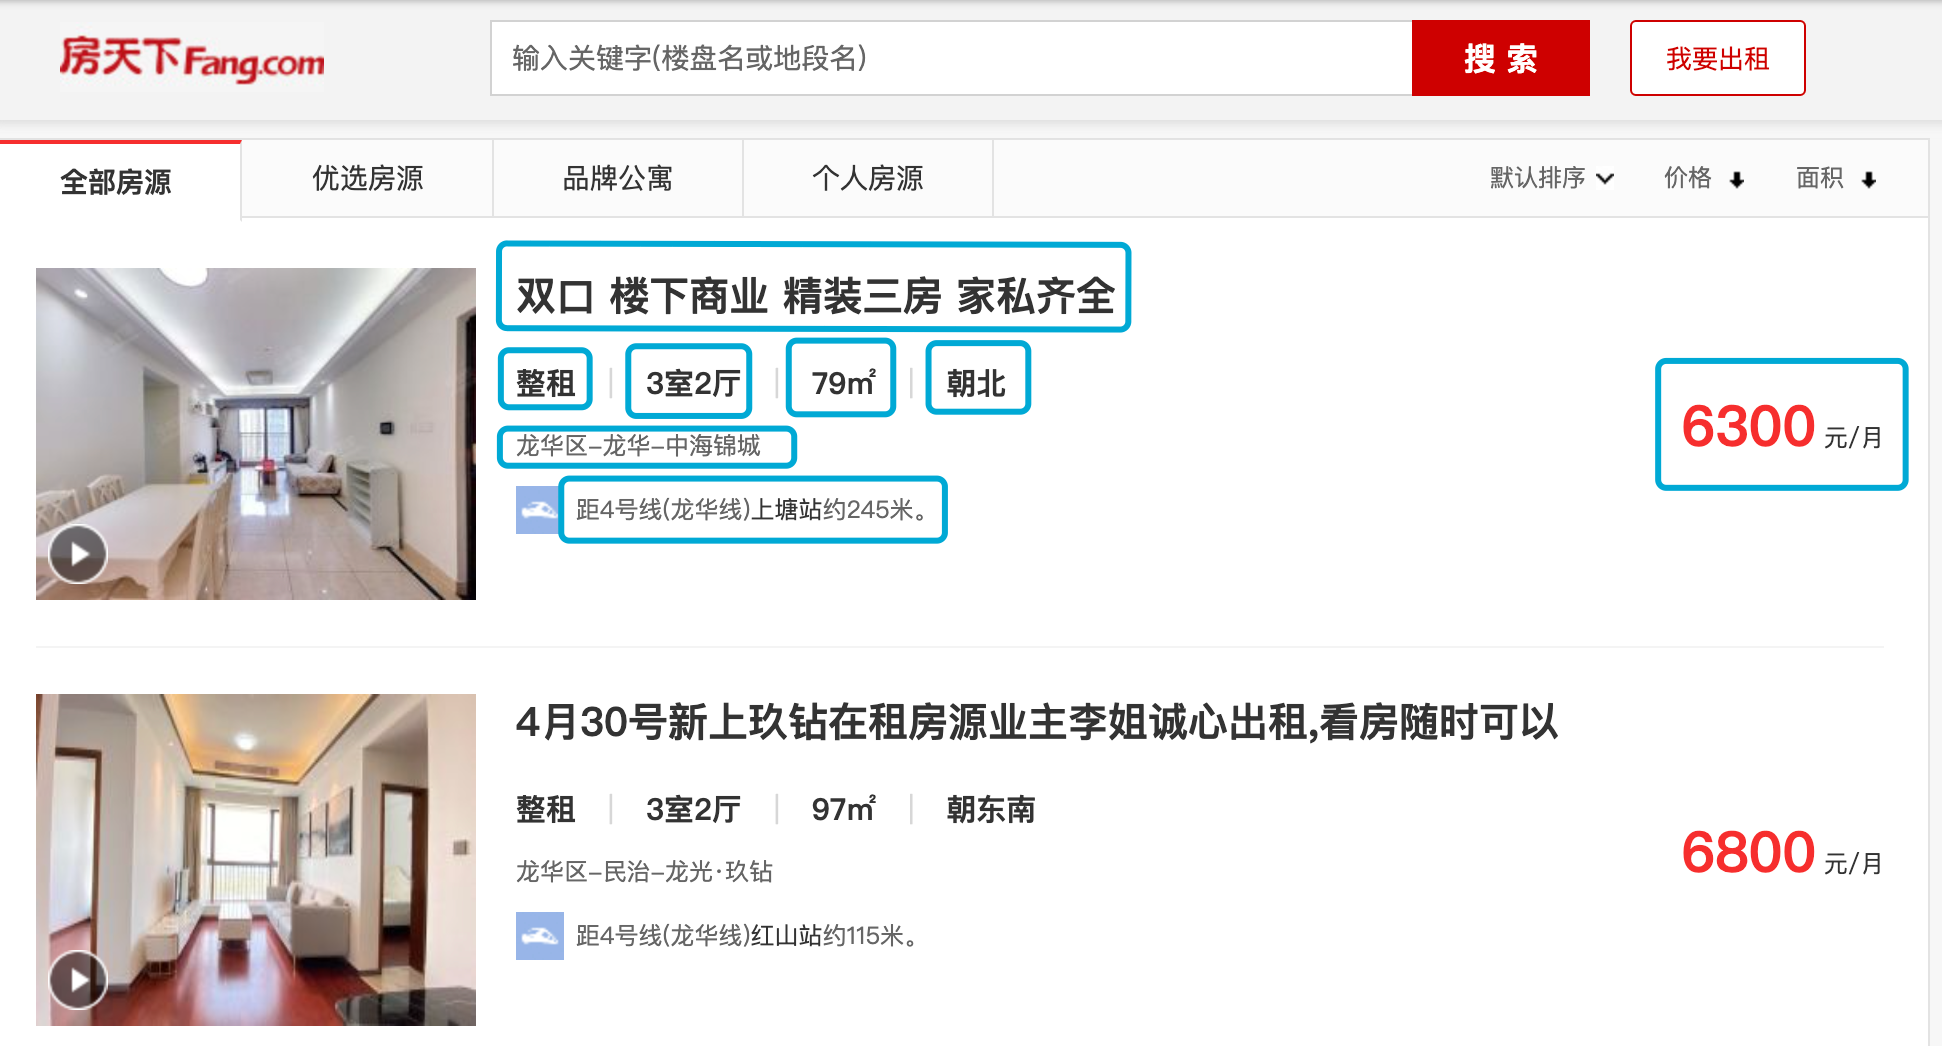
6, Obtain rental information in Shenzhen
Target website: fangtianxia
website: https://sz.zu.fang.com/
Target data: climb 100 pieces of rental information, including title, monthly rent, rent_out_mode, house_type, area, orientation, District, neighborhood_name, distance_from_subway_station, etc.
The main technologies used are selenium and xpath.
Technical tips: 1 When you first open fangtianxia, there will be a cover page, which needs to be set to wait for the closecover node to be found and click to close the cover page;
2. There are two ways to turn the page. One is to click the link of the specified page, and the other is to click the link of the next page. Please observe and test. Which way is more stable?
When you want to access 100 pieces of information, you only need to access 3 pieces of information when you want to climb the page;
4. After turning the page, it is best to set a one second rest and wait for the data to load.
Job content to be submitted: py,. csv.