1, Data binding of forms
1. Add: model="form" to El form for data binding.
2. Bind each text input box in the El form to a specific attribute on the data object.
<el-form :model="loginForm" label-width="0px" class="login_form">
<el-input v-model="loginForm.username" prefix-icon="iconfont icon-user"></el-input>
<el-input v-model="loginForm.password" prefix-icon="iconfont icon-3702mima" type="password"></el-input>
<script>
export default {
    data(){
        return {
            //This is the data binding object for the login form
            loginForm: {
                username: 'zs',
                password: '123'
            }
        }
    }
}
</script>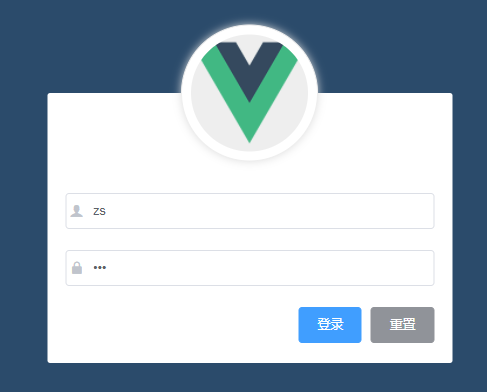
2, Data validation of login component form
1. Specify a rule for El form through attribute binding.
<el-form :model="loginForm" :rules="loginFormRules" label-width="0px" class="login_form">
2. Define this verification object in data, and each attribute is a verification rule.
//This is the validation rule object for the form
      loginFormRules: {
                //Verify that the user name is legal
                username: [],
                //Verify that the password is valid
                password: []
            }
Authentication rules for user names:
{ required: true, message: 'Please enter login name', trigger: 'blur' },
{ min: 3, max: 10, message: 'The length is between 3 and 5 characters', trigger: 'blur' }
3. Specify different validation rules for different form item items through prop.
<!-- user name -->
<el-form-item prop="username">
<!-- password -->
<el-form-item prop="password">
2, The login component resets the form
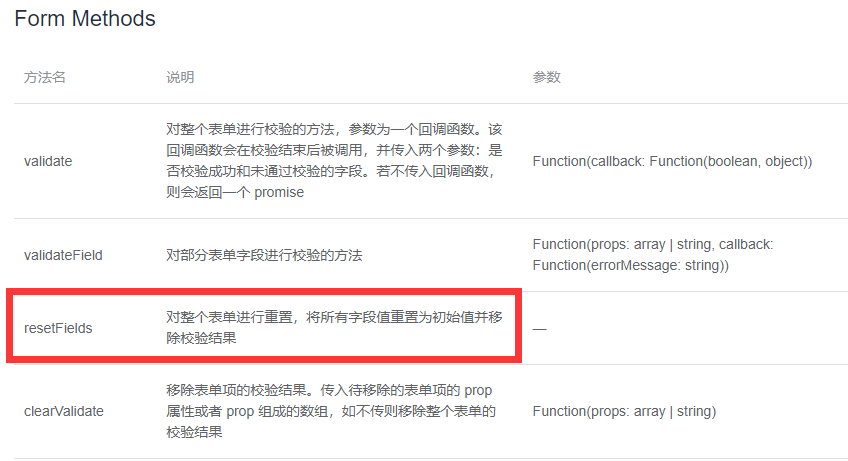
You can get the instance object of the form and call resetFields, and the reset method is el-form.
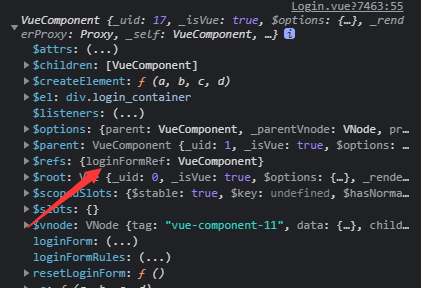
So how to get the instance object of the form?
<!-- Login form area -->
<el-form ref="loginFormRef">
You only need to add a ref reference to the El form, so as long as you get the loginFormRef, you can get the instance object of the form.
resetFields can be called directly through loginfomref.
Bind a click event to the reset button
<el-button type="info" @click="resetLoginForm">Reset</el-button>
In js
methods: {
    //Click the reset button to reset the login form
    resetLoginForm() {
        console.log(this)
    }
}
Press the reset button, and the console can output
resetLoginForm() {
            // console.log(this);
            this.$refs.loginFormRef.resetFields();
        }
III. pre verification before login of login component
Add a click event @ click="login" to the login button
login() {
            this.$refs.loginFormRef.validate(valid => {
                console.log(valid);
            })
        }
4, Initiate request based on pre verification
Import axios globally and mount the axios package on the prototype object
In this way, each vue component can directly access $http through this to initiate axios requests.
import axios from 'axios'
//Set the root path of the request
axios.defaults.baseURL = 'http://127.0.0.1:8888/api/private/v1/'
Vue.prototype.$http = axios
this.$refs.loginFormRef.validate(async valid => {
// console.log(valid);
if(!valid) return;
const {data: res } = await this.$http.post("login", this.loginForm);
//this.$http.post("login", this.loginForm) will output a Promise
//You can add an await before this to simplify the Promise
//Note, however, that await can only be used in methods modified by async
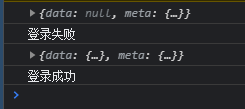
console.log(res);
})if(res.meta.status !== 200) return console.log('Login failed');
console.log('Login succeeded');Final console effect:
5, Pop up prompt for login component configuration
Prompt with the message message in the element ui


First, in element JS. Note that this component is different from the previous imported components and needs to be globally mounted on Vue. In this way, each component can access $message through this.
//Import pop-up prompt component
import { Message } from 'element-ui'
Vue.prototype.$message = Message
In login Modify output in Vue
if(res.meta.status !== 200) return this.$message.error('Login failed!');;
this.$message.success('Login succeeded');
So far, the login function has been basically realized.