This article comes from Alibaba cloud official mirror: Alibaba open source mirror - OPSX mirror - Alibaba cloud developer community ]
Original link: Create a Java project template using Maven Archetype - alicloud developer community
1, Overview
Archetype is a maven project template toolkit. Prototype is defined as an original pattern or model from which all other similar things are generated. This name is appropriate when we try to provide a system that provides a consistent way to generate Maven projects. Archetype will help authors create Maven project templates for users and provide users with methods to generate parametric versions of these project templates.
Using prototypes provides a good way to quickly benefit developers in a manner consistent with the best practices adopted by your project or organization. You may want to standardize J2EE development within your organization, so you may want to provide a prototype of EJB, WAR, or Web services. Once these prototypes are created and deployed in the organization's repository, they are available to all developers in the organization.
2, Operation steps
We will use the springboot project to demonstrate how to generate a maven archetype (prototype). In this article, the (template) and (prototype) are used alternately, which have the same meaning.
We have a ready-made example project, which is structured as follows:
.
├── Dockerfile
├── README.md
├── last-demo.iml
├── mvnw
├── mvnw.cmd
├── pom.xml
├── src
    ├── main
    │   ├── java
    │   │   └── com
    │   │       └── demo
    │   │           └── data
    │   │               ├── Application.java
    │   │               └── your_business_package
    │   │                   ├── client
    │   │                   │   └── DemoClient.java
    │   │                   ├── constants
    │   │                   │   └── YourBusinessConstants.java
    │   │                   ├── enumerate
    │   │                   │   └── DemoStatus.java
    │   │                   ├── presistence
    │   │                   │   ├── DemoRepository.java
    │   │                   │   └── entity
    │   │                   │       └── DemoDO.java
    │   │                   ├── service
    │   │                   │   └── DemoService.java
    │   │                   └── web
    │   │                       ├── dto
    │   │                       │   └── DemoDTO.java
    │   │                       └── rest
    │   │                           └── DemoController.java
    │   └── resources
    │       ├── application.yml
    │       └── logback-spring.xml
    └── test
        ├── java
        │   └── com
        │       └── demo
        │           └── data
        │               └── ApplicationTests.java
        └── resources
            └── application.yml
Next, we will use maven archetype to create a template based on the project.
1. Generate template folder
Execute the following maven command:
mvn archetype:create-from-project
At this time, the target / generated sources / archetype folder will be generated in the project, where our template related files are stored.
2. User defined template
Explore target / generated sources / archetype to learn:
generated-sources
    └── archetype
        ├── pom.xml
        ├── src
        │   ├── main
        │   │   └── resources
        │   │       ├── META-INF
        │   │       │   └── maven
        │   │       │       └── archetype-metadata.xml ##⚠️ The prototype descriptor describes the structure of our prototype
        │   │       └── archetype-resources ##⚠️ maven converted project package
        │   └── test
        │       └── resources
        │           └── projects
        │               └── basic
        └── target
            ├── classes
            │   └── archetype-resources
            ├── your_project_name.jar
            └── test-classes
                └── projects
                    └── basic
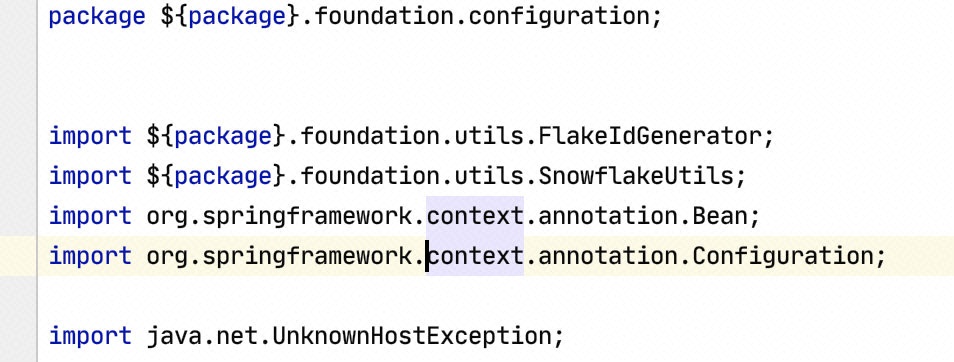
We randomly open a source file in archetype resources, as shown below:

The ${package} placeholders we see in the figure above are the result of automatic processing by maven prototype plug-in. When we generate a project based on the prototype, these placeholders will become the relevant values of our newly generated project. Similarly, maven also provides keywords such as groupId,artifactId, version, etc. If this customization is also needed elsewhere in our project, we can change it manually.
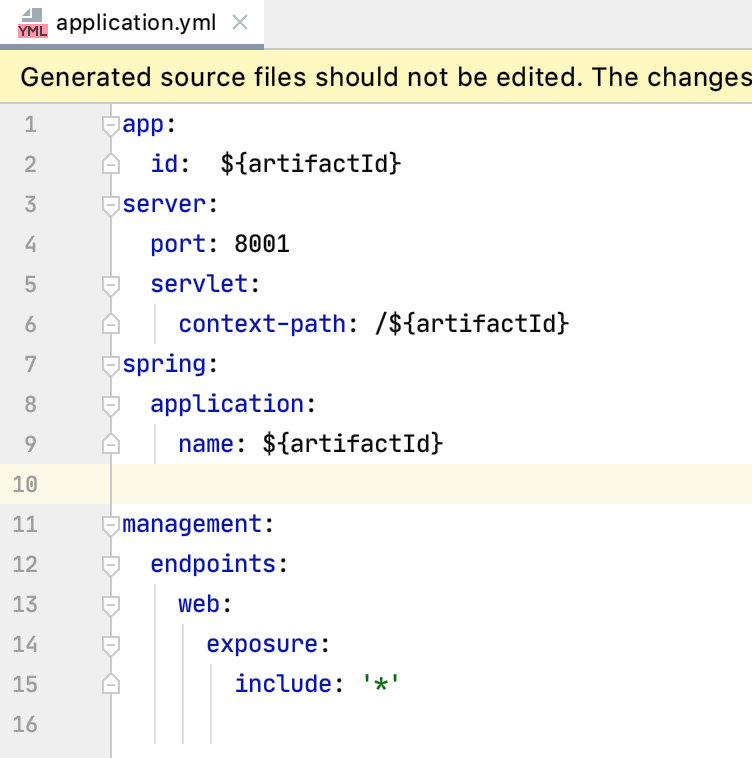
For example, we change the project configuration file as follows (the application name is replaced by a placeholder) in order to change the name of the project with the new project.

Next, let's analyze Archetype - metadata XML, which is the prototype description symbol. We can specify which files enter the prototype, which files need to be excluded, and whether the placeholder mentioned above needs to be replaced, etc.
The following is archetype metadata XML example:
<?xml version="1.0" encoding="UTF-8"?>
<archetype-descriptor xsi:schemaLocation="https://maven.apache.org/plugins/maven-archetype-plugin/archetype-descriptor/1.1.0">
  <fileSets>
    <fileSet filtered="true" packaged="true" encoding="UTF-8">
      <directory>src/main/java</directory>
      <includes>
        <include>**/*.java</include>
      </includes>
    </fileSet>
    <fileSet filtered="true" encoding="UTF-8">
      <directory>src/main/resources</directory>
      <includes>
        <include>**/*.xml</include>
      </includes>
    </fileSet>
    <fileSet filtered="true" encoding="UTF-8">
      <directory>src/main/resources</directory>
      <includes>
        <include>**/*.yml</include>
      </includes>
    </fileSet>
    <!--There are more items below-->
explain:
The files specified in the fileSet # attribute tag need to be included in the prototype, and we delete those that are not needed.
The filtered attribute tag indicates whether to replace the placeholder in the file. If it is true, it will be replaced, otherwise it will not be replaced. Therefore, if we want the placeholder to be finally replaced with project related information, we need to specify it through this tag.
The packaged attribute tag specifies whether the file is in the package of the project, true or false.
3. Generate template (prototype)
Enter the target / generated sources / archetype directory and execute the following command:
mvn install
The template will be generated locally.
4. Generate new projects using templates (prototypes)
We use the following command:
mvn archetype:generate  \
-DarchetypeCatalog=local \
-DgroupId=New project groupId \
-DartifactId=New project artifactId \
-DarchetypeGroupId=Your prototype group \
-DarchetypeArtifactId=Your prototype project name-archetype \
-DarchetypeVersion=Your prototype version \
-DinteractiveMode=false
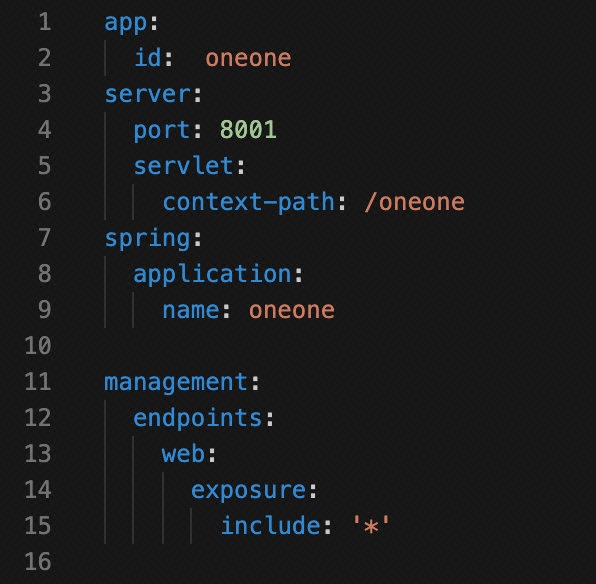
After that, we will generate a new project. The structure of the project conforms to our prototype structure. View the application. That we manually specified yml

At this point, you can see that our placeholder has been replaced by the relevant information of our project.
5. Upload the template to maven warehouse
We go to the target / generated sources / archetype directory and open POM xml
Add warehouse information:
<distributionManagement>
    <repository>
        <id>my-releases</id>
        <url>Your warehouse address</url>
    </repository>
    <snapshotRepository>
        <id>my-snapshots</id>
        <url>Your warehouse address</url>
    </snapshotRepository>
</distributionManagement>
<servers>
<server>
<id>my-snapshots</id>
<username>Corresponding warehouse username</username>
<password>Corresponding warehouse password</password>
</server>
<server>
<id>my-releases</id>
<username>Corresponding warehouse username</username>
<password>Corresponding warehouse password</password>
</server>
</servers>Then specify the following command:
mvn deploy
The prototype will then be uploaded to your mavne repository.