1, Create container
1. Download template
Here, choose openwrt-21.02.0-rc3, rootfs package official download address
2. Upload template to PVE
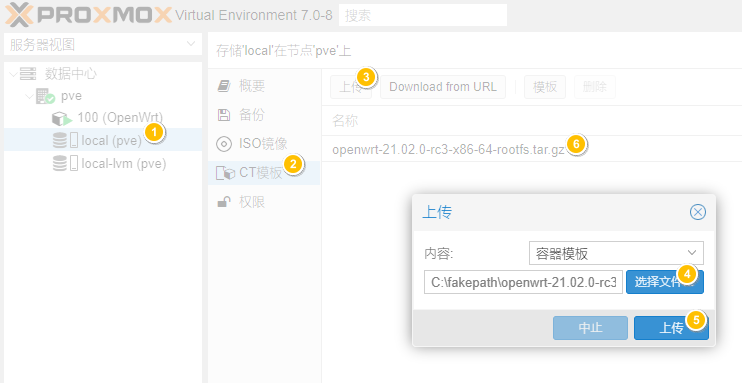
3. New LXC container
Open the PVE terminal through SSH or web page, and execute the following command to create a new container
pct create 100 local:vztmpl/openwrt-21.02.0-rc3-x86-64-rootfs.tar.gz --rootfs local-lvm:4 --ostype unmanaged --hostname OpenWrt --arch amd64 --cores 2 --memory 2048 --swap 0 -net0 bridge=vmbr0,name=eth0
Description of each parameter:
vmid:100
	The container number can be set according to needs. It is set to 100 here. This number will be used in subsequent related settings.
local:vztmpl/openwrt-21.02.0-rc3-x86-64-rootfs.tar.gz
	Container template, local:vztmpl/ point /var/lib/vz/template/cache/Directory, yes pve The default template storage directory, webUI The uploaded template exists in this location and can be changed to other directories as needed, openwrt-21.02.0-rc3-x86-64-rootfs.tar.gz Is the template file name.
--rootfs local-lvm:4
	Root disk location, local-lvm It can be modified to other storage locations according to the actual situation. 4 means that the space size is 4 G.
--ostype unmanaged
	System type, which can be modified later in the settings file.
--hostname OpenWrt
	Container name, which can be modified later in the settings file.
--arch amd64
	System architecture, amd64 | arm64 | armhf | i386.
--cores 2
	The number of cores assigned to the container.
--memory 2048
	The size of memory allocated to the container, here 2 G.
--swap 0
	The swap size assigned to the container, here is 0.
-net0 bridge=vmbr0,name=eth0
	Container network settings. Here, set network 0 to add a network card to the container eth0,Bridge to host vmbr0 Interface.
2, Modify container settings
1. Modify container configuration file
vim /etc/pve/lxc/100.conf
Add the following
# openwrt.common.conf is an example of the openwrt configuration file that comes with PVE and contains some basic settings
lxc.include: /usr/share/lxc/config/openwrt.common.conf
# /Dev / PPP PPPoE dialing and other functions need to be used
lxc.cgroup.devices.allow: c 108:0 rwm
# Hook script for adding devices such as / dev/ppp
hookscript: local:snippets/hookscript.pl
# Assign the network card enp4s0 of the host to the container and change it according to your actual situation
lxc.net.1.type: phys
lxc.net.1.link: enp4s0
lxc.net.1.flags: up
2. Create hook script
Here is the official example guest - example - hookscript PL, you can modify it yourself as needed
mkdir /var/lib/vz/snippets
cp /usr/share/pve-docs/examples/guest-example-hookscript.pl /var/lib/vz/snippets/hookscript.pl
vim /var/lib/vz/snippets/hookscript.pl
You can find the following on line 36
    # Second phase 'post-start' will be executed after the guest
    # successfully started.

    print "$vmid started successfully.\n";
Change to
    # Second phase 'post-start' will be executed after the guest
    # successfully started.
    system("lxc-device add -n $vmid /dev/ppp");
    system("lxc-device add -n $vmid /dev/net/tun");
    print "$vmid started successfully.\n";
3, Start container
Execute the following instructions
pct start 100
Due to pve7 0 uses cgroupv2 by default. It lacks support for unmanaged containers. The following error will occur
run_buffer: 316 Script exited with status 1
lxc_init: 816 Failed to run lxc.hook.pre-start for container "100"
__lxc_start: 2007 Failed to initialize container "100"
startup for container '100' failed
The solution is to modify / usr / share / perl5 / PVE / LxC / setup PM file
vim /usr/share/perl5/PVE/LXC/Setup.pm
At the end, you can see the following
sub unified_cgroupv2_support {
    my ($self) = @_;
    $self->protected_call(sub {
    $self->{plugin}->unified_cgroupv2_support();
    });
}
Change to
sub unified_cgroupv2_support {
    my ($self) = @_;
    return if !$self->{plugin}; # unmanaged
    $self->protected_call(sub {
    $self->{plugin}->unified_cgroupv2_support();
    });
}
Continue to execute the pct start 100 command to start the container, and a warning: old system D (< v232) detected, container won't run in a pure cgroupv2 environment will appear! Please see documentation -> container -> cgroup version. Just ignore the warning.
If you still cannot start normally, you can view the error message through the following command (the log is saved in the debug file)
lxc-start -n 100 --logfile debug --logpriority TRACE
4, OpenWrt basic settings
After the container is started, enter the container terminal
lxc-attach 100
1. Modify the root password
passwd
2. Network settings
vi /etc/config/network
Modify the following contents (according to your actual situation)
config device
        option name 'br-lan'
        option type 'bridge'
        list ports 'eth0'

config interface 'lan'
        option device 'br-lan'
        option proto 'static'
        option ipaddr '192.168.1.1'
        option netmask '255.255.255.0'
        option ip6assign '60'

config interface 'wan'
        option device 'enp4s0'
        option proto 'pppoe'
        option username '1234567890'
        option password 'abcdefghijk'
Restart network and firewall
/etc/init.d/network restart
/etc/init.d/firewall restart
● now you should be able to surf the Internet and pass https://192.168.1.1 Open the OpenWrt page
5, Install common software (select according to personal preference)
To avoid some exceptions, modify / etc/hosts and add the following
185.199.108.133 raw.githubusercontent.com
140.82.112.4 github.com
Install some basic software and Chinese language packs
opkg update
opkg install vim luci-i18n-base-zh-cn luci-i18n-firewall-zh-cn luci-i18n-opkg-zh-cn
1. Oh my Zsh installation
Source: https://github.com/felix-fly/openwrt-ohmyzsh
Installation dependency
opkg install unzip zsh ca-certificates
install
sh -c "$(wget -O- https://raw.githubusercontent.com/felix-fly/openwrt-ohmyzsh/master/install.sh)"
Set as default shell
which zsh && sed -i -- 's:/bin/ash:'`which zsh`':g' /etc/passwd
Uninstall when you don't want to use it
sh -c "$(wget -O- https://raw.githubusercontent.com/felix-fly/openwrt-ohmyzsh/master/uninstall.sh)"
2. Alicloud ddns setup
Install ddns Chinese package and dependency
opkg install luci-i18n-ddns-zh-cn wget-ssl openssl-util
Download update_aliyun_com.sh script
wget -O /usr/lib/ddns/update_aliyun_com.sh https://raw.githubusercontent.com/sensec/ddns-scripts_aliyun/master/update_aliyun_com.sh
3. zerotier setup
Install zerotier package
opkg install zerotier
set up
uci set zerotier.sample_config.enabled='1'
# 0123456789ABCDE1 replace with its own network ID
uci set zerotier.sample_config.join='0123456789ABCDE1'
Start zerotier
/etc/init.d/zerotier start
View status
zerotier-cli listnetworks
The display information is similar to the following format
200 listnetworks <nwid> <name> <mac> <status> <type> <dev> <ZT assigned ips>
200 listnetworks 0123456789ABCDE1  XX:XX:XX:XX:XX:XX ACCESS_DENIED PRIVATE ztqu1d2mhx -
The status displayed is ACCESS_DENIED, you need to go to ZeroTier Central to set it. After that, execute zerotier cli listnetworks. If the status is OK, the setting is successful
Modify firewall settings
vim /etc/firewall.user
Add the following, where ztxxxxxxxx x is changed to the dev item displayed by zerotier cli listnetworks
iptables -I FORWARD -i ztxxxxxxxx -j ACCEPT
iptables -I FORWARD -o ztxxxxxxxx -j ACCEPT
iptables -t nat -I POSTROUTING -o ztxxxxxxxx -j MASQUERADE
service iptables restart
/etc/init.d/firewall restart
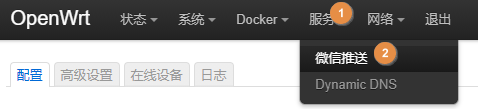
4. Server installation settings
instructions: https://github.com/tty228/luci-app-serverchan/
Install dependencies because the author did not add Luci compat to the dependency library, so it needs to be installed manually (the installed ones can be ignored. For example, Luci compat will be installed automatically when installing dockerman)
opkg install luci-compat
Download installation package
wget https://github.com/tty228/luci-app-serverchan/releases/download/v1.86/luci-app-serverchan_1.86-9_all.ipk
opkg install luci-app-serverchan_1.86-9_all.ipk
set up
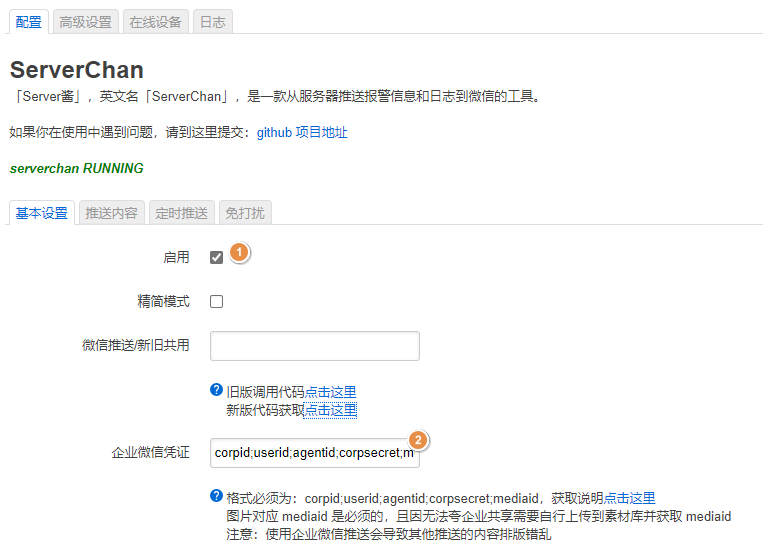
Fill in the "enterprise wechat voucher" according to the prompts and format requirements
Click here for the official configuration description document of Server
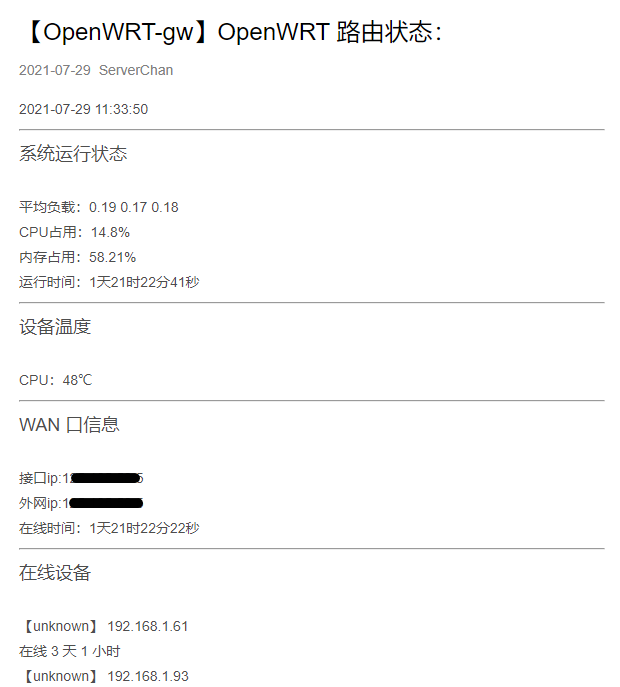
After setting, click "scheduled push" – > "send"
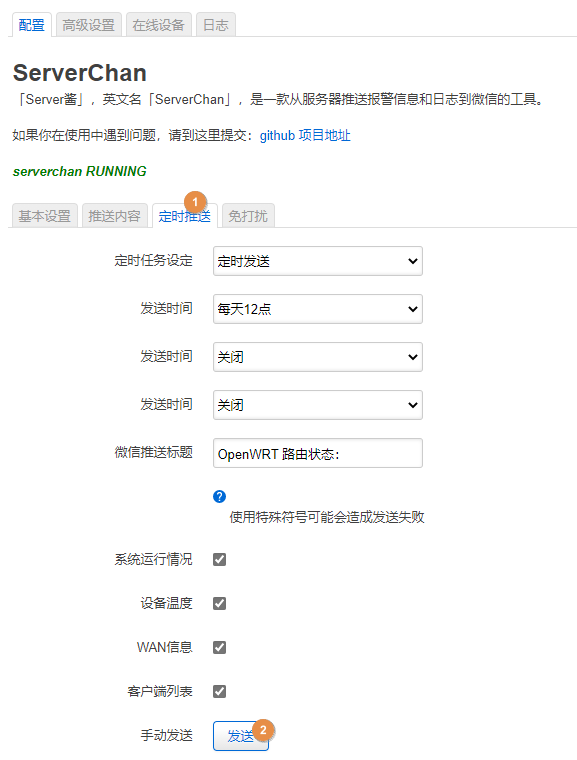
You can receive information in the following format
Other settings can be explored by yourself