Learning objectives
- Understand what CSS is
- Master the simple use of CSS
- Master the methods and key points of CSS style creation and introduction
- Master the key points of CSS background
- Master the style and key points of CSS text
- Master the style and key points of CSS connection
CSS introduction
What is CSS
- CSS refers to cascading style sheets
- Defines how HTML elements are displayed
- Multiple style definitions can be cascaded into one
CSS syntax
CSS rules consist of two main parts: selectors and one or more declarations:

- Selectors are usually HTML elements that you need to change the style.
- Each declaration consists of a property and a value.
- property is the style attribute you want to set.
- Each attribute has a value. Attributes and values are separated by colons.
CSS creation (introduction method)
There are three ways to insert a style sheet:
- External style sheet
- Internal style sheet
- Inline style
External style sheet
The external style needs to create an independent css file and be introduced with the link tag. It is recommended
<head>
	<link rel="stylesheet" type="text/css" href="style.css">
</head>
Internal style sheet
The internal style is directly introduced in the html file using the style tag, which is usually placed in the head tag
<head>
	<style>
 		hr {color:sienna;}
		p {margin-left:20px;}
		body {background-image:url("images/back40.gif");}
	</style>
</head>
inline style
Inline style is directly introduced on a label through the style attribute. It must depend on a label. It is not common, but has the highest priority
<p style="color:sienna;margin-left:20px">This is a paragraph.</p>
Multiple style priority
(inline style) > (internal style) > (external style) > browser default style
Note: if the external style is placed after the internal style, the external style overrides the internal style.
CSS simple selector
Selectors are used to select which elements
Element selector (select an element)
p {
    text-align:center;
}
Center and align the text of all p tags in the HTML document.
d selector (select one)
The id selector can specify a specific style for HTML elements marked with a specific id.
The HTML element sets the id selector with the id attribute. The id selector in CSS is defined by # the.
#abc {
   text-align:center;
}
The ID attribute should not start with a number. An ID starting with a number does not work in Mozilla/Firefox browsers.
class selector (select multiple)
class selectors are used to describe the style of a group of elements. class selectors are different from id selectors. class can be used in multiple elements.
The class selector is represented by the class attribute in HTML and a point in CSS Number display:
In the following example, all HTML elements with the center class are centered.
Three selector priorities
id selector (select one) > class selector (select multiple) > element selector (select one element)
CSS size
Dimensions mainly refer to width and height attributes
| attribute | describe |
|---|---|
| height | Sets the height of the element. |
| max-height | Sets the maximum height of the element. |
| max-width | Sets the maximum width of the element. |
| min-height | Sets the minimum height of the element. |
| min-width | Sets the minimum width of the element. |
| width | Sets the width of the element. |
Note: width: 200px; margin: auto; You can center block elements.
Note: adding the text align: Center attribute to the parent element can center the inline element, because the inline element is equivalent to word processing.
CSS background color
| attribute | describe |
|---|---|
| background-color | Set the background color (red, #00aaff, #0af, RGB (0255,0), RGBA (0255,0,1), hsl(360,10%,1%)) |
rgb
RGB is designed based on the principle of color luminescence. Generally speaking, its color mixing method is like three lights: red, green and blue. When their lights overlap with each other, the colors are mixed, but the brightness is equal to the sum of the three brightness. The more mixed, the higher the brightness is, that is, additive mixing.
- R ed
- Green (G)
- Blue (B)
hsl
HSL is hue, saturation and brightness.
- Hue (H) is the basic attribute of color, which is usually called color name, such as red, yellow, etc.
- Saturation (S) refers to the purity of color. The higher the color is, the purer the color is, and the lower it is, it will gradually turn gray, taking the value of 0-100%.
- Brightness (L), take 0-100%, increase the brightness, and the color will change to white; Reduce the brightness and the color will change to black.
| value | describe |
|---|---|
| hue - hue | Define hue (0 to 360) - 0 (or 360) is red, 120 is green, and 240 is blue |
| Saturation - saturation | Define saturation; 0% gray, 100% full color |
| lightness - brightness | The brightness is defined as 0% dark, 50% normal and 100% white |

Case 05
<!DOCTYPE html>
<html>
	<head>
		<meta charset="UTF-8">
		<title></title>
		<style type="text/css">
			#bg{
                height: 200px;
                /* 1.Color words */
                background-color: red;
                /* 2.Three digit hexadecimal */
                background-color: #F56;
                /* 3.Six digit hexadecimal */
                background-color: #0000FF;
                /* 4.rgb(255,255,255) */
                background-color: rgb(10,255,125);
                /* 5.rgba(255,255,255,1) */
                background-color: rgba(10,255,125,1);
                /* 6.hsl(360,100%,100%) */
                background-color: hsl(0,100%,50%);
                /* 7.hsla(360,100%,100%,1) */
                background-color: hsla(0,100%,50%,0.1);
			}
		</style>
	</head>
	<body>
		<div id="bg"></div>
	</body>
</html>
Effect display

CSS background image
The background picture includes multiple attributes, which can be set separately or combined
| attribute | describe |
|---|---|
| background-color | Set the background color (red, #00aaff, #0af, RGB (0255,0), RGBA (0255,0,1), hsl(360,10%,1%)) |
| background-image | Set background picture (url(img/logo.png)) |
| background-repeat | Set whether the background picture is repeated (no repeat, repeat) |
| background-attachment | Set whether the background picture is fixed (scroll, fixed) |
| background-position | Set the position of the background picture (left, right, top, bottom, center,%, px) |
| Background size (cannot be merged) | Set the size of the background (px,%, cover, contain) |
Note: when setting multiple backgrounds with the background property, they are separated by commas.
Background size attribute
| value | describe |
|---|---|
| pixel | Set the height and width of the background picture. The first value sets the width and the second value sets the height of the. If only one value is given, the second is set to auto |
| percentage | The percentage of the positioning area relative to the background is calculated. The first value sets the width and the second value sets the height of the. If only one value is given, the second is set to "auto" |
| cover | The aspect ratio of the image is maintained and the image is scaled to the minimum size that will completely cover the background positioning area. |
| contain | The aspect ratio of the image is maintained and the image is scaled to the maximum size that will fit the background positioning area. |

CSS text
There are many text attributes. The common ones are as follows. The contents in brackets need to be remembered
| attribute | describe |
|---|---|
| color | Set text color (plain text) |
| direction | Set text direction (ltr: [left to right]; rtl) |
| unicode-bidi | Set whether text is overwritten (bidi override) |
| letter-spacing | Set character spacing (pixel px, percentage) |
| word-spacing | Set word (space between words) spacing (pixel unit px, percentage unit) |
| white-space | Set the processing method of whitespace in elements (pre: keep spaces and line breaks; pre line: keep only line breaks; nowrap: do not keep spaces and line breaks; normal: default) |
| vertical-align | Set vertical alignment of elements (table, picture, inline element) (top, middle, bottom) |
| text-align | Align text in elements horizontally (inline child elements) (left, right, center) |
| text-decoration | Add top, middle, and underline (overline, line through, underline, none) to the text |
| text-indent | Indents the first line of text in an element (pixel px, percentage) |
| text-transform | Letters in control elements (lowercase, uppercase) |
CSS3 text shadow
Syntax:
text-shadow: h-shadow v-shadow blur color;
Note: the text shadow property sets multiple shadow text separated by commas.
| Attribute value | describe |
|---|---|
| h-shadow | Required. The location of the horizontal shadow. Negative values are allowed. |
| v-shadow | Required. The position of the vertical shadow. Negative values are allowed. |
| blur | Optional. Fuzzy distance. |
| color | Optional. The color of the shadow. |
CSS fonts
CSS font properties define font, bold, size, and text style.
| Property | describe |
|---|---|
| font | Set all font properties in a declaration |
| font-family | Specifies the font family of the text |
| font-size/line-height | Specifies the font size of the text |
| font-style | Specifies the font of the text (italic) |
| font-weight | Specifies the font thickness (100: no bold; 900: BOLD). |
| font-variant | Displays text in small uppercase or normal font. (small-caps) |
font order of attribute consolidation:
- font-style
- font-variant
- font-weight
- font-size/line-height
- font-family
If the row height is the same as the height, you can simply center the single line text vertically.
height:50px;
line-height:50px;
font family
Font family attribute should set several font names as a "backup" mechanism. If the browser does not support the first font, it will try the next font.
Note: if the name of the Font Family exceeds one word, it must be quoted, such as Font Family: "Arial". Multiple font families are separated by a comma to indicate:
p{
	font-family:"Regular script","Microsoft YaHei ";
}
CSS units
Absolute units: (pixel units)
Set a text of a specified size. Users are not allowed to change the text size in all browsers. The absolute size is very useful when determining the physical size of the output
h1 {font-size:40px;}
h2 {font-size:30px;}
p {font-size:14px;} pixel
p {font-size:14pt;} Pixel point
Relative size: (variable units)
- Em: set the size relative to the font size of the immediate parent element
- Rem: sets the size relative to the element font size of html
- Percentage: sets the size relative to the size of the element itself
- VW: 1vw is equal to 1% of the viewport width
- VH: 1vh is equal to 1% of the viewport height
- vmin: select the smallest of vw and vh
- vmax: select the largest of vw and vh
The default size of the browser is 16 pixels (16px=1em), which is the same as that of ordinary text paragraphs.
If the font size of the parent element is 20px (20px=1em).
h1 {font-size:2.5em;} /* 40px/16=2.5em */
h2 {font-size:1.875em;} /* 30px/16=1.875em */
p {font-size:0.875em;} /* 14px/16=0.875em */
In the above example, the text size of em is the same as the pixels in the previous example.
However, if you use em units, you can adjust the text size in all browsers.
CSS hyperlink properties
The linked style can use any CSS attribute (such as color, font, background, etc.). Special links can have different styles, depending on their status.
The four link states are:
- a:link - normal, not visited link: Blue
- a:visited - links the user has visited: Purple
- a:hover - when the user mouse over the link: mouse hover
- a:active - the moment the link is clicked: Red
Note: a:hover must be written after a:link and a:visited. The effect can be seen only in strict order.
Note: a:active must be after a:hover.

CSS descendant selector
A descendant selector is also called an include selector. Use matching spaces
The descendant selector selects the elements that are descendants of an element.
For example, if you want to apply styles only to the li element in the ul element and not to the li element in the ol element, you can write this:
task
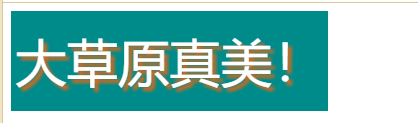
Make the following WordArt effect
code
<!DOCTYPE html>
<html>
	<head>
		<meta charset="utf-8">
		<title>Homework 1: making art words</title>
		<link rel="stylesheet" type="text/css" href="../css/work1.css"/>
	</head>
	<body>
		<div id="div1">
			<span id="">
				How beautiful the prairie is!
			</span>
		</div>
	</body>
</html>
#div1{
	height: 100px;
	width: 25%;
	background-color: darkcyan;
	line-height: 6.25rem;
	text-align: center;
	font-size: 4vw;
	color: white;]
	-ms-text-autospace: ;
	text-shadow: 4px 4px 4px #D2691E ;
}
Effect display
Make the following button effect
<!DOCTYPE html>
<html>
	<head>
		<meta charset="utf-8">
		<title>Job 2 make button</title>
		<link rel="stylesheet" type="text/css" href="../css/work2.css"/>
	</head>
	<body>
		<div id="content">
			<div id="top" class="c1">
			</div>
			<div id="button">
				Button
			</div>
			<div id="bottom" class="c1">
			</div>
		</div>
	</body>
</html>
#content{
	width: 200px;
	-webkit-user-select: none;
	cursor: pointer;
	background-color: #DCDCDC;
}
#top{
	height: 5px;
	background-color: aqua;
}
#button{
	height:80px;
	line-height: 80px;
	text-align: center;
	font-size: 40px;
	letter-spacing: 20px;
	text-indent: 10px;
	text-shadow: 2px 2px 2px #D2691E;
	color: red;
}
#bottom{
	height:5px;
	background-color:#D2691E;
}
#content:hover .c1{
	background-color: #DC143C;
	font-size: 40px;
}
#content:active{
	background-color: #00FFFF;
	font-size: 20px;
}
Effect display

Make the following button effect
<!DOCTYPE html>
<html>
	<head>
		<meta charset="utf-8">
		<title>Job 3 button</title>
		<link rel="stylesheet" type="text/css" href="../css/work3.css"/>
	</head>
	<body>
		<div id="content">
			<button type="button" id="button1">Red button</button>
			<button type="button" id="button2">Green button</button>
			<button type="button" id="button3">Blue button</button>
		</div>
	</body>
</html>
#content{
	height: 6.25rem;
	width: 100%;
	text-align: center;

}
#button1{
	height: 50px;
	width: 200px;
	background-color: red;
	color: white;
	font-size: 20px;
	-webkit-user-select: none;
	cursor: pointer;
}

#button2{
	height: 50px;
	width: 200px;
	background-color: green;
	color: white;
	font-size: 20px;
	-webkit-user-select: none;
	cursor: pointer;
}
#button3{
	height: 50px;
	width: 200px;
	background-color: blue;
	color: white;
	font-size: 20px;
	-webkit-user-select: none;
	cursor: pointer;
}
#button1:hover{
	background-color: #D2691E;
	color: #0000FF;
}
#button1:active{
	background-color: #DCDCDC;
	font-size: 10px;
	color: #808080;
}
#button2:hover{
	background-color: #D2691E;
	color: #0000FF;
}
#button2:active{
	background-color: #DCDCDC;
	font-size: 10px;
	color: #808080;
}
#button3:hover{
	background-color: aquamarine;
	color: antiquewhite;
}
#button3:active{
	background-color: #00FFFF;
	font-size: 10px;
	color: #008B8B;
}
Effect display

Achieve the following menu effects
<!DOCTYPE html>
<html>
	<head>
		<meta charset="utf-8">
		<title>Job 4 catalog bar</title>
		<link rel="stylesheet" type="text/css" href="../css/work4.css" />
	</head>
	<body>
		<div id="content">
			<dl>
				<dt class="dt">|System settings</dt>
				<dd class="dd"><sup><b>L</b></sup>Version settings</dd>
				<dd class="dd"><sup><b>L</b></sup>Title Setting</dd>
				<dd class="dd"><sup><b>L</b></sup>Head setting</dd>
				<dd class="dd"><sup><b>L</b></sup>Bottom setting</dd>
				<dt class="dt">user management </dt>
				<dd class="dd"><sup><b>L</b></sup>User list</dd>
				<dd class="dd"><sup><b>L</b></sup>User classification</dd>
			</dl>
		</div>
	</body>
</html>
#content{
	width: 25%;
	background-color: #DCDCDC;
	font-size: 2vw;
	-webkit-user-select: none;
	cursor: pointer;
}

.dt{
	font-weight: bold;
	background-color: #A9A9A9;
}
.dt:hover{
	background-color: #DC143C;
	font-size: 2vw;
	color: #008B8B;
}
.dt:active{
	background-color: #0000FF;
	font-size: 2vw;
	color: #7FFFD4;
}

.dd{
	border: #00008B 1;
}
.dd:hover{
	background-color: #00008B;
	font-size: 2.2vw;
	color: #008B8B;
}
.dd:active{
	background-color: #00FFFF;
	font-size: 2vw;
	color: #DC143C;
}
Effect display

Achieve the following progress bar
<!DOCTYPE html>
<html>
	<head>
		<meta charset="utf-8">
		<title>Operation 5 color bar</title>
		<link rel="stylesheet" type="text/css" href="../css/work5.css"/>
	</head>
	<body>
		<div id="div1">
			<div class="div11">
					50%
			</div>
		</div>
		<br>
		<div id="div2">
			<div class="div11">
				50%
			</div>
		</div>
		<br>
		<div id="div3">
			<div class="div11">
				50%
			</div>
		</div>
	</body>
</html>
#div1{
	background-color:rgb(0,0,360);
	height: 20px;
}

#div2{
	height: 20px;
	background-color: red;
}

#div3{
	height: 1.25rem;
	background-color: green;
}
.div11{
	background-color:rgba(0,0,0,0.5) ;
	width: 50%;
	text-align: right;
	color: white;
}
Effect display

Achieve the following effects
<!DOCTYPE html>
<html>
	<head>
		<meta charset="utf-8">
		<title>Assignment 6</title>
		<link rel="stylesheet" type="text/css" href="../css/work6.css"/>
	</head>
	<body>
		<div id="div">
			<div id="div1">
				<span id="">
					High paid talent
				</span>
			</div>
			<div id="div2">
				<img src="../image/1.webp" width="100%" height="100%">
			</div>
			<div id="div3">
				<span id="">
					After the monthly salary, eat on your face
				</span>
			</div>
		</div>
	</body>
</html>
#div{
	height: 360px;
	width: 30%;
	background-color: blue;
	-webkit-user-select: none;
	cursor: pointer;
}

#div1{
	height: 20px;
	text-align: center;
}
#div2{
	width: 100%;
	height: 320px;

}
#div3{
	height: 20px;
	text-align: center;
}

#div:hover{
	background-color: red;
	font-size: 16px;
}
#div:active{
	background-color: #008B8B;
	font-size: 13px;
}
Effect display

Realize the following address book interface
<!DOCTYPE html>
<html>
	<head>
		<meta charset="utf-8">
		<title>Job 7 address book</title>
		<link rel="stylesheet" type="text/css" href="../css/work7.css" />
	</head>
	<body>
		<div id="content">
			<div id="top">
				mail list
			</div>
			<div id="search">
				<input type="text" name="search1" id="search1" value="search" />
			</div>
			<img src="../image/1.webp" class="image1">
			<span class="span1">
				New friends
			</span>
			<br>
			<div id="div1">
			</div>
			<img src="../image/1.webp" class="image1">
			<span class="span1">
				New friends
			</span>
			<div id="div2">
				<span id="span2">
					my friend
				</span>
			</div>
			</div>
			<img src="../image/1.webp" class="image1">
			<span class="span1">
				New friends
			</span>
			</div>
			<div id="div3">
				<span id="span3">
					Use here br Empty out
				</span>
			</div>
			<div class="div4">
				<div id="">
					<img src="../../image/7.png" class="image2">
					<p>WeChat</p>
				</div>
				<div id="">
					<img src="../../image/2.png" class="image2" >
					<p>communication</p>
				</div>
				<div id="">
					<img src="../../image/6.png" class="image2" >
					<p>find</p>
				</div>
				<div id="">
					<img src="../../image/3.png" class="image2">
					<p>I</p>
				</div>
			</div>
		</div>
	</body>
</html>
#content{
	width: 50%;
}
#top{
	height: 50px;
	background-color: darkblue;
	line-height:50px;
	text-align: center;
	color: white;
	font-size: 20px;
}

#search{
	height: 50px;
	line-height: 50px;
	background-color: #DCDCDC;
	padding-top: 2px;
	padding-bottom: 2px;
	padding-left: 15px;
	padding-right: 15px;
	margin-bottom: 5px;
}
#search1{
	text-align: center;
	width: 100%;
	height: 25px;
	color:#808080 ;
}

.image1{
	height: 30px;
	vertical-align:middle;
	margin-bottom: 5px;
	margin-top: 5px;
}
#div1{
	height: 1px;
	background-color:#DCDCDC ;
}
#div2{
	height: 20px;
	background-color: #A9A9A9;
	text-indent: 20px;
	margin-bottom: 5px;
}
#div3{
	height: 31.25rem;
	width: 50%;
	background-color: #DCDCDC;
	text-align: center;
}
.div4{
	width: 50%;
	align-content: center;
	text-align: center;
}
.image2{
	text-align: center;
}
.div4>div{
	display: inline-block;
	margin: 0 10%;
}
Effect display

)]