
Traefik has implemented many middleware by default, which can meet most of our daily needs. However, in practice, users still have the need to customize middleware. In order to solve this problem, a function of Traefik Pilot[1] has been officially launched. In addition, in traefik v2 Version 5 also introduces the function of supporting local private plug-ins.
Traefik Pilot
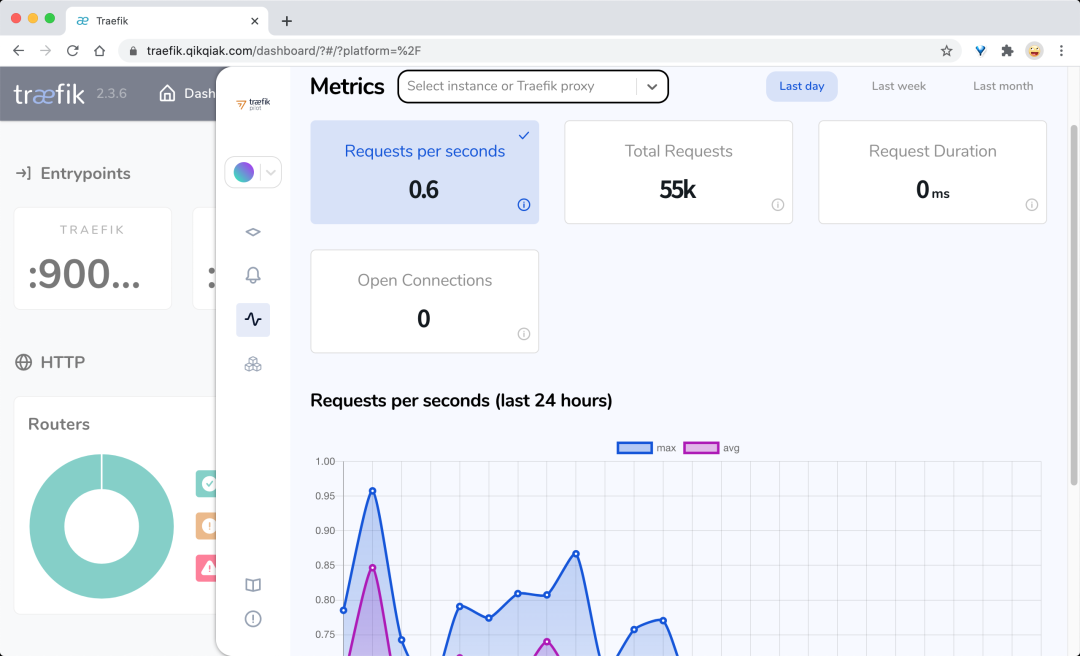
Traefik Pilot is a SaaS platform that links with traefik to expand its functions. It provides many functions to enhance the observation and control of traefik through a global control panel and Dashboard:
- Indicators of network activity of traifik agents and agent groups
- Service health issues and security vulnerability alerts
- A plug-in that extends the functionality of traifik
Before Traefik can use the functions of Traefik Pilot, we must connect them first. We only need to make a few changes to the static configuration of Traefik.

The traifik agent must be able to access the Internet to connect to the traifik pilot and establish a connection on port 443 through HTTPS.
First, we need to be on the traifik pilot home page( https://pilot.traefik.io/ )Create an account, register a new traifik instance and start using the traifik pilot. After logging in, you can create a new instance by selecting register new traifik instance.
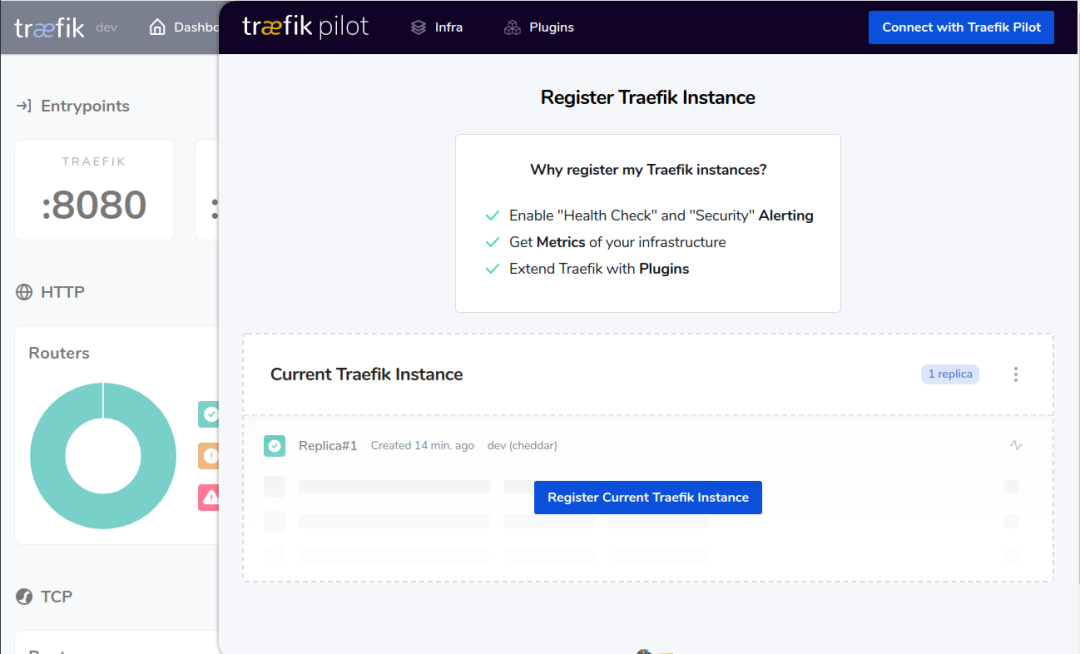
In addition, when our traifik is not connected to the traifik pilot, a ring icon will appear in the traifik Web UI. We can select connect with traifik pilot to navigate to the traifik pilot UI for operation.
After logging in, the traifik pilot will generate a Token for a new instance. We need to add this Token to the traifik static configuration.
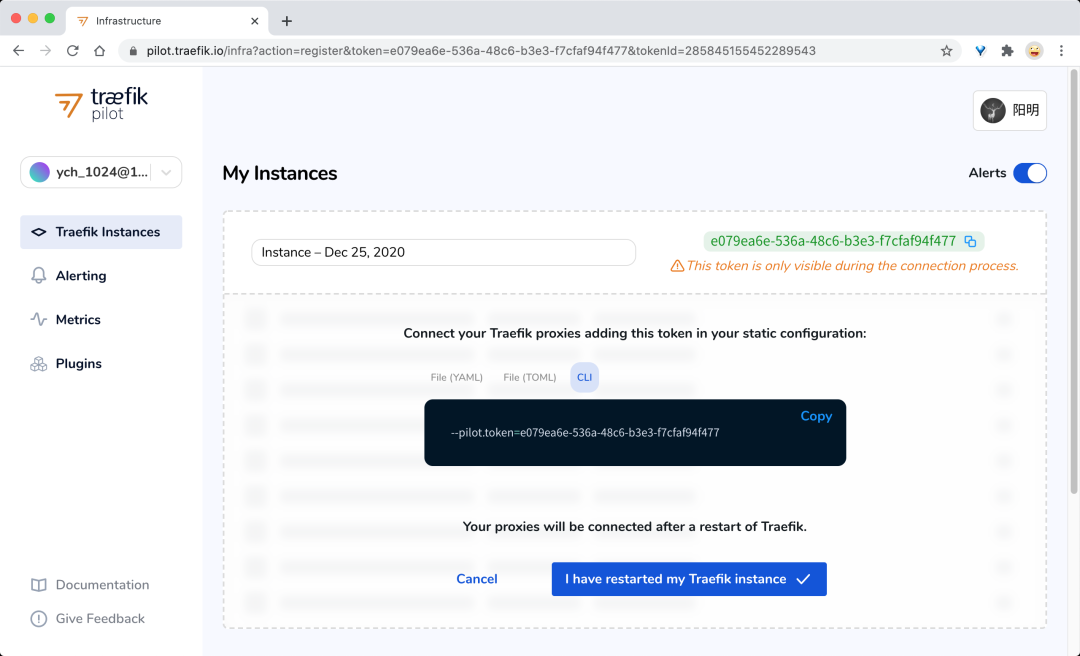
Enable the configuration of Pilot in the traifik installation profile:
# Activate Pilot integration
pilot:
  enabled: true
  token: "e079ea6e-536a-48c6-b3e3-f7cfaf94f477"
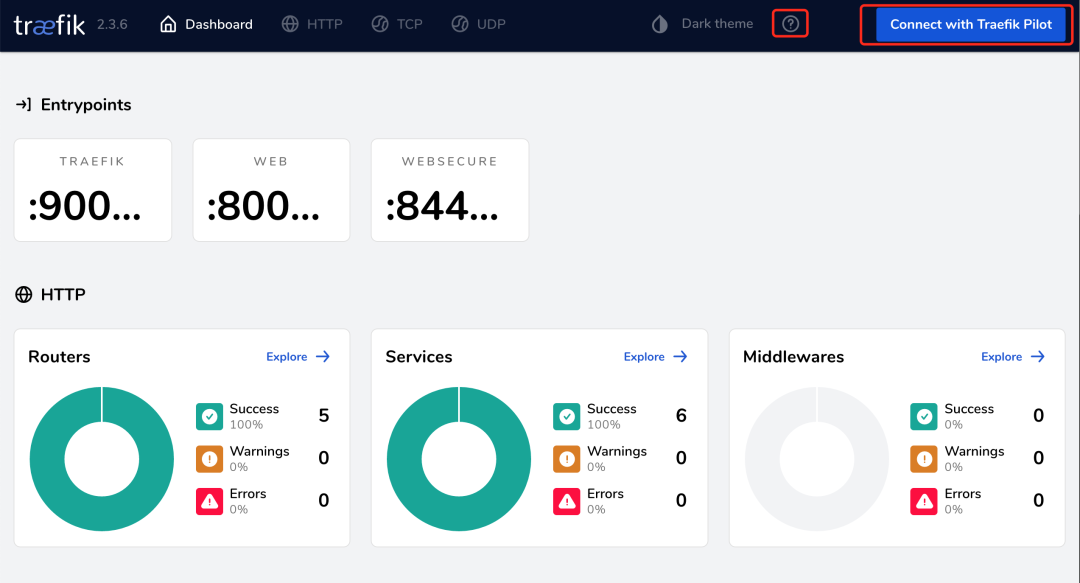
After the update is completed, we can see the information related to Traefik Pilot UI in Traefik's Web UI.
Next, we can select the plug-in we want to use on the plug-in page of Traefik Pilot. For example, we use Demo Plugin[2] here.

Click the Install Plugin button in the upper right corner to install the plug-in. A dialog box will pop up to prompt us how to install it.

First, we need to register the current traifik with the traifik pilot (completed), then add the plug-in to traifik in the way of static configuration, and then add the plug-in startup parameters:
# Activate Pilot integration
pilot:
  enabled: true
  token: "e079ea6e-536a-48c6-b3e3-f7cfaf94f477"

additionalArguments:
# Add support for demo plugin
- --experimental.plugins.plugindemo.modulename=github.com/traefik/plugindemo
- --experimental.plugins.plugindemo.version=v0.2.1
# Other configurations
After the update, create a Middleware object as follows:
➜ cat <<EOF | kubectl apply -f -
apiVersion: traefik.containo.us/v1alpha1
kind: Middleware
metadata:
name: myplugin
spec:
plugin:
plugindemo: # Plug in name
Headers:
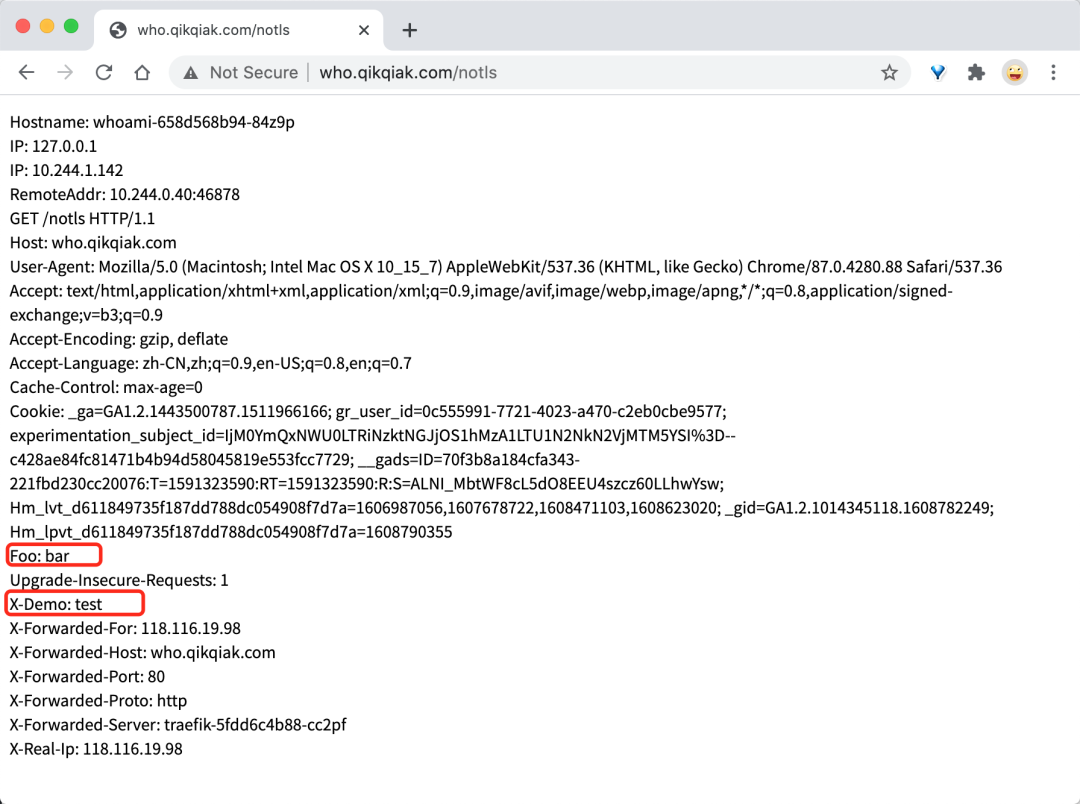
X-Demo: test
Foo: bar
EOF
Then add it to the IngressRoute object of the whoami application above:
apiVersion: traefik.containo.us/v1alpha1
kind: IngressRoute
metadata:
  name: ingressroute-demo
  namespace: default
spec:
  entryPoints:
  - web
  routes:
  - match: Host(`who.qikqiak.com`) && PathPrefix(`/notls`)
    kind: Rule
    services:
    - name: whoami  # K8s Service
      port: 80
    middlewares:
    - name: myplugin  # Use the middleware created above
After the update, when we go to visit http://who.qikqiak.com/notls You can see that two headers defined in the plug-in above have been added.
Of course, in addition to using the plug-ins provided by developers on traifik pilot, we can also develop our own plug-ins according to our own needs, and we can refer to the plug-in development documents [3].
Local private plug-in
We mentioned above that you can use the traifik pilot to use plug-ins, but this is a SaaS service platform, which is not very applicable to most enterprise scenarios. In more scenarios, you need to load plug-ins in the local environment. To solve this problem, click traifik v2 After version 5, it provides a new method to load plug-ins directly from the local storage directory. It does not need to enable Traefik Pilot. Instead, it only needs to put the plug-in source code into a new directory named / plugins local and create this directory relative to the current working directory. For example, if we directly use the docker image of traefik, the entry point is the root directory /, Traefik itself will build your plug-in, so all we have to do is write the source code, put it in the correct directory, and let traefik load it.
It should be noted that the plug-in is only loaded once each time, so if we want to reload your plug-in source code, we need to restart traifik.
Let's use a simple custom plug-in example to illustrate how to use a private plug-in. First, we define a file named Dockerfile For the Dockerfile file of demo, first clone the plug-in source code from git warehouse, and then use traefik: v2 5 as the basic image, copy the plug-in source code to the / plugins local directory, as shown below:
FROM alpine:3
ARG PLUGIN_MODULE=github.com/traefik/plugindemo
ARG PLUGIN_GIT_REPO=https://github.com/traefik/plugindemo.git
ARG PLUGIN_GIT_BRANCH=master
RUN apk add --update git && \
    git clone ${PLUGIN_GIT_REPO} /plugins-local/src/${PLUGIN_MODULE} \
      --depth 1 --single-branch --branch ${PLUGIN_GIT_BRANCH}

FROM traefik:v2.5
COPY --from=0 /plugins-local /plugins-local
The demo plug-in we use here is the same as the one demonstrated in Pilot above. We can customize the request header information through this plug-in.
Then in dockerfile Under the demo directory, build the image:
➜ docker build -f Dockerfile.demo -t cnych/traefik-private-demo-plugin:2.5.4 .
# Push to image warehouse
➜ docker push cnych/traefik-private-demo-plugin:2.5.4
After the image is built, you can use this image to test the demo plug-in. Change the image to the image address defined above:
image:
  name: cnych/traefik-private-demo-plugin
  tag: 2.5.4

# Other omissions

# You don't need to start the pilot
pilot:
  enabled: false

additionalArguments:
# Add local support for demo plugin
- --experimental.localPlugins.plugindemo.moduleName=github.com/traefik/plugindemo
# Other omissions
Note that we used -- experimental. When adding the startup parameters of Traefik above localPlugins. After the update, you can use our private plug-in to create a Middleware object:
➜ cat <<EOF | kubectl apply -f -
apiVersion: traefik.containo.us/v1alpha1
kind: Middleware
metadata:
name: my-private-plugin
spec:
plugin:
plugindemo: # Plug in name
Headers:
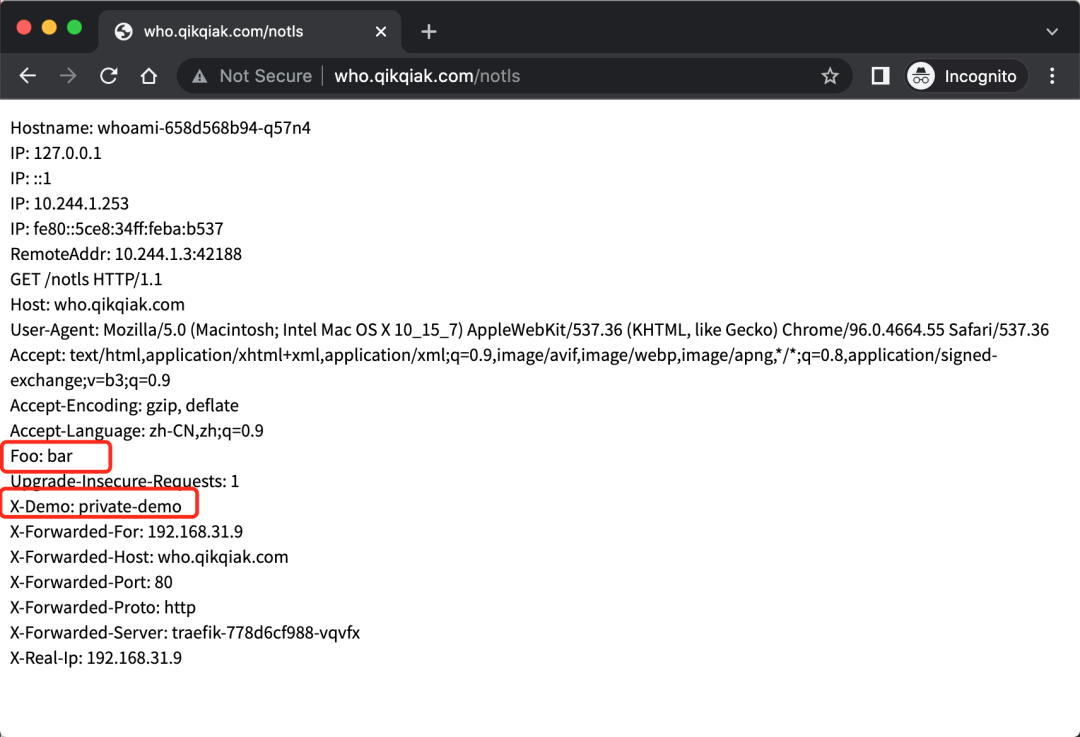
X-Demo: private-demo
Foo: bar
EOF
Then add it to the IngressRoute object of the whoami application above:
apiVersion: traefik.containo.us/v1alpha1
kind: IngressRoute
metadata:
  name: ingressroute-demo
  namespace: default
spec:
  entryPoints:
  - web
  routes:
  - match: Host(`who.qikqiak.com`) && PathPrefix(`/notls`)
    kind: Rule
    services:
    - name: whoami  # K8s Service
      port: 80
    middlewares:
    - name: my-private-plugin  # Use the middleware created above
After updating the above resource object, we can access it again http://who.qikqiak.com/notls You can see that two headers defined in the above plug-ins are added, which proves that our private plug-in configuration is successful:
With the support of local private plug-ins, does Traefik really start to take off?
reference material
[1]Traefik Pilot: https://pilot.traefik.io/
[2]Demo Plugin: https://github.com/traefik/plugindemo
[3]Plugin dev doc: https://doc.traefik.io/traefik-pilot/plugins/plugin-dev/