1. Overview
MVVM is short for Model-View-ViewModel.Microsoft's WPF brings new technological experiences such as Silverlight, Audio, Video, 3D, Animation...This results in a more detailed and customizable software UI layer.At the technical level, WPF also brings new features such as Binding, DependencyProperty, RoutedEvents, Command, DataTemplate, ControlTemplate, etc.The origin of MVVM (Model-View-ViewModel) framework is a new architecture framework evolved from the combination of MVP (Model-View-Presenter) mode and WPF.It is based on the original MVP framework and incorporates the new features of WPF to meet the increasingly complex changes in customer demand.
The above is from Encyclopedia Sogou
MVVM has these advantages in general.
- Low coupling.Views can be changed and modified independently of Models. A ViewModel can be bound to a different View. Models can be unchanged when Views change, and Views can be unchanged when Models change.
- Reusability.You can put some view logic inside a ViewModel and let many views reuse this view logic.
- Independent development.Developers can focus on business logic and data development (ViewModel), and designers can focus on page design.
- Testable.Interfaces have always been difficult to test, but now tests can be written for ViewModel.
The rise of MVVM on Android came after Google launched DataBinding. Applying MVVM on Android really starts with understanding how DataBinding is used. This article focuses on several basic uses of DataBinding.
The content display of an application is nothing more than text, picture and video.Videos are typically implemented separately, and pictures and text can exist independently or in lists such as ListView or RecyclerView.
Next, implement DataBinding for a single text and image
2. Display of single text
Here's the basis Official Google example Change the implementation slightly.First, change the project's build.gradle to turn on DataBinding
android {
    compileSdkVersion 26
    //...
    dataBinding{
        enabled = true
    }
}
Second, to write a User's Bean in the same way as a normal Bean file, you only need two attributes: name and avatar.
public class User {
    private String name;
    private String headerUrl;

    public User(String name, String headerUrl){
        this.name = name;
        this.headerUrl = headerUrl;
    }

    public User(){}

    public String getName() {
        return name;
    }

    public void setName(String name) {
        this.name = name;
    }

    public String getHeaderUrl() {
        return headerUrl;
    }

    public void setHeaderUrl(String headerUrl) {
        this.headerUrl = headerUrl;
    }
}
Then, it is very helpless to define our activity_main.xml file. Since ImageView can not be accessed directly with a network path, we first display the text, after all, MVVM is so good, adding an ImageView after that should not require much change.
<?xml version="1.0" encoding="utf-8"?>
<layout
    xmlns:android="http://schemas.android.com/apk/res/android"
    xmlns:tools="http://schemas.android.com/tools"
    xmlns:app="http://schemas.android.com/apk/res-auto"
    tools:context=".MainActivity">
    <data>
        <variable name="user" type="me.leo.mvvm.bean.User"/>
    </data>
    <LinearLayout
        android:orientation="vertical"
        android:layout_width="match_parent"
        android:layout_height="match_parent">
        <TextView
            android:layout_width="wrap_content"
            android:layout_height="wrap_content"
            android:textSize="30sp"
            android:text="@{user.name}"/>
    </LinearLayout>
</layout>
One of the most obvious differences you can see from previous layout file writings is that the root of the xml file becomes a layout.The next step is to add a data node in which the name of the xml file and the class are declared.
That is, a variable is defined in xml format in the layout file. The type of the variable is type, the name of the variable is user. If necessary, we should also define user1, user2...Wait.
After defining the variable, you can use the variable, you can find that the use of the variable is very simple, just use attribute access in xml. In fact, Google has done a lot in it, such as when the user is empty, to find the getter of the corresponding Bean based on the attribute, and so on.Then there's activity.
public class MainActivity extends AppCompatActivity {

    @Override
    protected void onCreate(Bundle savedInstanceState) {
        super.onCreate(savedInstanceState);
        ActivityMainBinding binding = DataBindingUtil.setContentView(this, R.layout.activity_main);
        User user = new User("Leo", "http://img03.sogoucdn.com/app/a/100520076/8dbd2058c0a3923fd77ddf4162819296");
        binding.setUser(user);
    }
}
As you can see, instead of setting content as setContent, we use a DataBindingUtil, which returns the value ActivitiMainBinding. In fact, this class is automatically generated, and its name comes from the name activity_main of the xml file, with the two words capitalized and Binding added together.Then when we use it, we can see that there is a function called binding.setUser (me.leo.mvm.bean.User user), which is generated from the variable name that we defined.
Let's run it first and see how it works: 
A basic binding
3. Display of a single picture: Custom adapter
We need to show the content of the picture, but the source of the picture may be many, drawable, local, network.How to match, and cache, Google offers a solution.Google itself can't solve it. Let's just customize the implementation.
That corresponds to the loading of ImageView, where Glide is used.First, add Glide support to gradle
compile 'com.github.bumptech.glide:glide:4.0.0'We need to define a custom BindingAdapter, which Google officially looks like:
public class ImageViewBindingAdapter {

    @BindingAdapter({"base:path", "base:error", "base:placeholder"})
    public static void loadImg(ImageView imageView, String path, Drawable error, Drawable placeholder){
        RequestOptions options = new RequestOptions()
                .centerCrop()
                .placeholder(placeholder)
                .error(error);
        Glide.with(imageView.getContext()).load(path).apply(options).into(imageView);
    }
}
Then change the activity_main.xml to add an ImageView
        <ImageView
            android:layout_width="100dp"
            android:layout_height="100dp"
            app:path="@{user.headerUrl}"
            app:error="@{@drawable/err}"
            app:placeholder="@{@drawable/placeholder}"
            />
Compile, OK, fail, no success, but with the scarlet letter.The picture is also shown, but there are red letters!


Look at the red letter tip:
Error:(15, 24) Warning: Application namespace for attribute base:path will be ignored.
Namespaces are ignored, so that means no namespaces are needed here?Change it, try it.
@BindingAdapter({"path", "error", "placeholder"})Namespace removed, compiled, normal, no such prompt.The result is the same as before, OK. 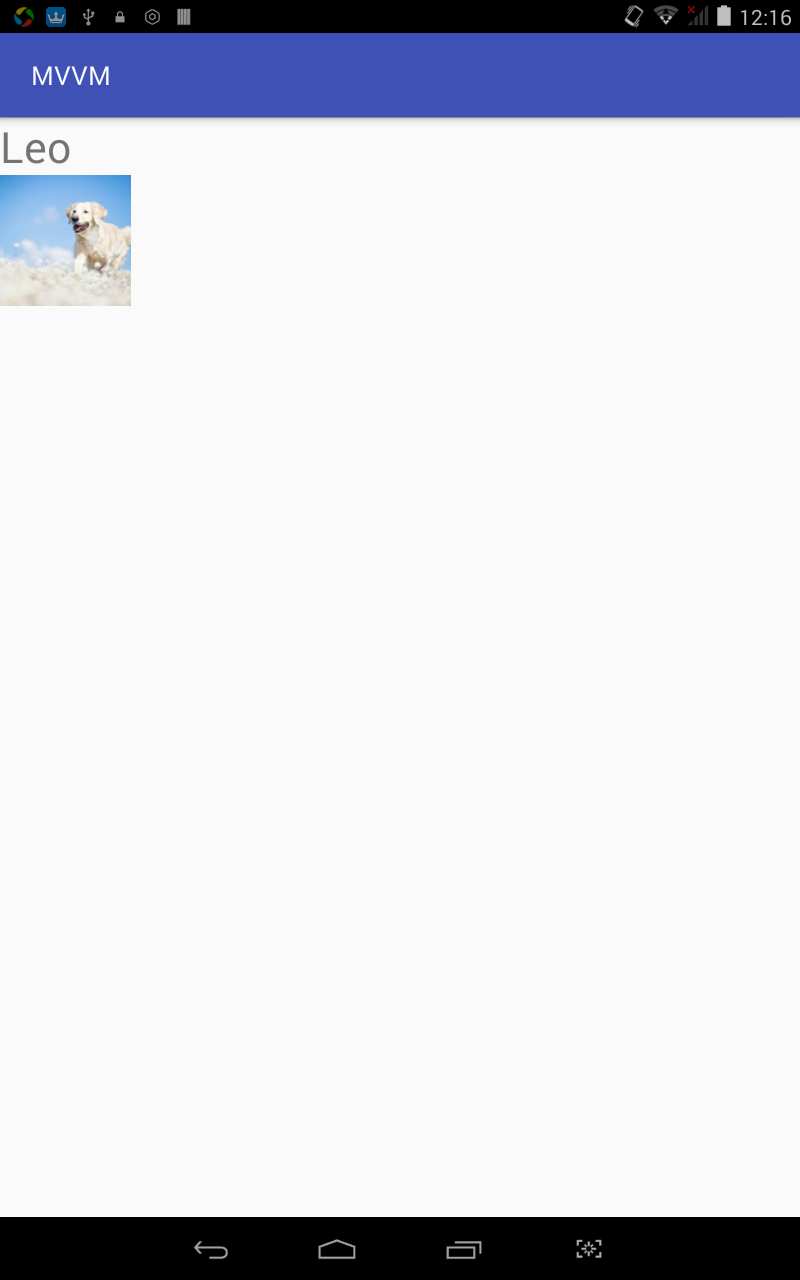
Did Google update Android Studio without updating that website?Can make nothing of it.In this way, our individual pictures and text have been achieved.Next, implement the Binding effect of ListView.
Fourth, list display
According to Google:
If you are using data binding items inside a ListView or RecyclerView adapter, you may prefer to use:
    ListItemBinding binding = ListItemBinding.inflate(layoutInflater, viewGroup, false);
    //or
    ListItemBinding binding = DataBindingUtil.inflate(layoutInflater, R.layout.list_item, viewGroup, false);
It doesn't seem like you need a caching strategy like ViewHolder. Write a user_item.xml first
<?xml version="1.0" encoding="utf-8"?>
<layout xmlns:android="http://schemas.android.com/apk/res/android"
    xmlns:app="http://schemas.android.com/apk/res-auto">
    <data>
        <variable name="user" type="me.leo.mvvm.bean.User" />
    </data>

    <LinearLayout
        android:layout_width="match_parent"
        android:layout_height="wrap_content"
        android:orientation="horizontal">
        <ImageView
            android:layout_width="100dp"
            android:layout_height="100dp"
            app:path="@{user.headerUrl}"
            app:error="@{@drawable/err}"
            app:placeholder="@{@drawable/placeholder}"
            />
        <TextView
            android:text="@{user.name}"
            android:textSize="24sp"
            android:layout_width="match_parent"
            android:layout_height="wrap_content" />
    </LinearLayout>
</layout>
Add a button to the activity_main.xml
<Button
            android:layout_width="match_parent"
            android:layout_height="wrap_content"
            android:text="@string/to_list"
            android:onClick="toList"/>
Corresponds to
    public void toList(View view){
        startActivity(new Intent(this, UserListActivity.class));
    }
Next, activity_users.xml
<?xml version="1.0" encoding="utf-8"?>
<layout
    xmlns:android="http://schemas.android.com/apk/res/android"
    xmlns:app="http://schemas.android.com/apk/res-auto"
    >
    <data>
        <variable
            name="adapter"
            type="android.widget.BaseAdapter" />
    </data>

    <LinearLayout
        android:orientation="vertical"
        android:layout_width="match_parent"
        android:layout_height="match_parent">
        <ListView
            android:layout_width="match_parent"
            android:layout_height="wrap_content"
            app:adapter= "@{adapter}"/>
    </LinearLayout>
</layout>
Yes, just like text, namespace is an app.Because there is no android in it, this is imported directly as res_auto content and can be used directly.That's good to say, the corresponding adapter and activity are naturally very good to write.
First adapter
public class UserAdapter extends BaseAdapter{
    private Context context;
    private List<User> list;

    public UserAdapter(Context context, List<User> list) {
        this.context = context;
        this.list = list;
    }

    @Override
    public int getCount() {
        return list.size();
    }

    @Override
    public Object getItem(int position) {
        return list.get(position);
    }

    @Override
    public long getItemId(int position) {
        return position;
    }

    @Override
    public View getView(int position, View convertView, ViewGroup parent) {
        UserItemBinding binding;
        if (convertView == null){
            binding = UserItemBinding.inflate(LayoutInflater.from(context), parent, false);
        } else {
            binding = DataBindingUtil.getBinding(convertView);
        }
        binding.setUser(list.get(position));
        return binding.getRoot();
    }
}
Then activity
public class UserListActivity extends AppCompatActivity {

    private static final String[] PATHS = new String[]{
            "http://img.mp.itc.cn/upload/20160513/13c1fa815cd844d9a8467144047210db.jpg",
            "http://img.mp.itc.cn/upload/20160513/6dc24bc8872e40c9b3149ceab552a7db_th.jpg",
            "http://img.mp.itc.cn/upload/20160513/20cdc22cc13e431bafa7163162082a4d.jpg",
            "http://img.mp.itc.cn/upload/20160513/f71babb02dfd47b09c323693d54ecbb0.jpg",
            "http://img.mp.itc.cn/upload/20160513/8a45df4b5f994c77a84b709a430c41fc.jpg",
            "http://img.mp.itc.cn/upload/20160513/4ca7313611b04834abf7b94d11cb0a37.jpg",
            "http://img.mp.itc.cn/upload/20160513/eb1d2db31dab43eab77d487a68f29fee.jpg",
            "http://img.mp.itc.cn/upload/20160513/f01c739f00034be5a2c02d03db2f349e.jpg",
            "http://img.mp.itc.cn/upload/20160513/a5c3a769fa0b4559b40eaa135d9a5c19_th.jpg",
            "http://img.mp.itc.cn/upload/20160513/a5c3a769fa0b4559b40eaa135d9a5c19_th.jpg",
            "http://img.mp.itc.cn/upload/20160513/a5c3a769fa0b4559b40eaa135d9a5c19_th.jpg",
            "http://img.mp.itc.cn/upload/20160513/a5c3a769fa0b4559b40eaa135d9a5c19_th.jpg",
            "http://img.mp.itc.cn/upload/20160513/a5c3a769fa0b4559b40eaa135d9a5c19_th.jpg",
            "http://img.mp.itc.cn/upload/20160513/a5c3a769fa0b4559b40eaa135d9a5c19_th.jpg",
            "http://img.mp.itc.cn/upload/20160513/a5c3a769fa0b4559b40eaa135d9a5c19_th.jpg",
            "http://img.mp.itc.cn/upload/20160513/a5c3a769fa0b4559b40eaa135d9a5c19_th.jpg",
            "http://img.mp.itc.cn/upload/20160513/a5c3a769fa0b4559b40eaa135d9a5c19_th.jpg",
            "http://img.mp.itc.cn/upload/20160513/a5c3a769fa0b4559b40eaa135d9a5c19_th.jpg",
            "http://img.mp.itc.cn/upload/20160513/a5c3a769fa0b4559b40eaa135d9a5c19_th.jpg",
            "http://img.mp.itc.cn/upload/20160513/a5c3a769fa0b4559b40eaa135d9a5c19_th.jpg",
            "http://img.mp.itc.cn/upload/20160513/a5c3a769fa0b4559b40eaa135d9a5c19_th.jpg",
            "http://img.mp.itc.cn/upload/20160513/a5c3a769fa0b4559b40eaa135d9a5c19_th.jpg",
            "http://img.mp.itc.cn/upload/20160513/a5c3a769fa0b4559b40eaa135d9a5c19_th.jpg",
            "http://img.mp.itc.cn/upload/20160513/a5c3a769fa0b4559b40eaa135d9a5c19_th.jpg",
    };

    @Override
    protected void onCreate(Bundle savedInstanceState) {
        super.onCreate(savedInstanceState);
        ActivityUsersBinding binding = DataBindingUtil.setContentView(this, R.layout.activity_users);
        UserAdapter adapter = new UserAdapter(this, getUsers());
        binding.setAdapter(adapter);
    }

    private User getUser(String path){return new User(path, path);}

    private List<User> getUsers(){
        List<User> list = new ArrayList<>(10);
        for(String path:PATHS){
            list.add(getUser(path));
        }
        return list;
    }
}
Function: 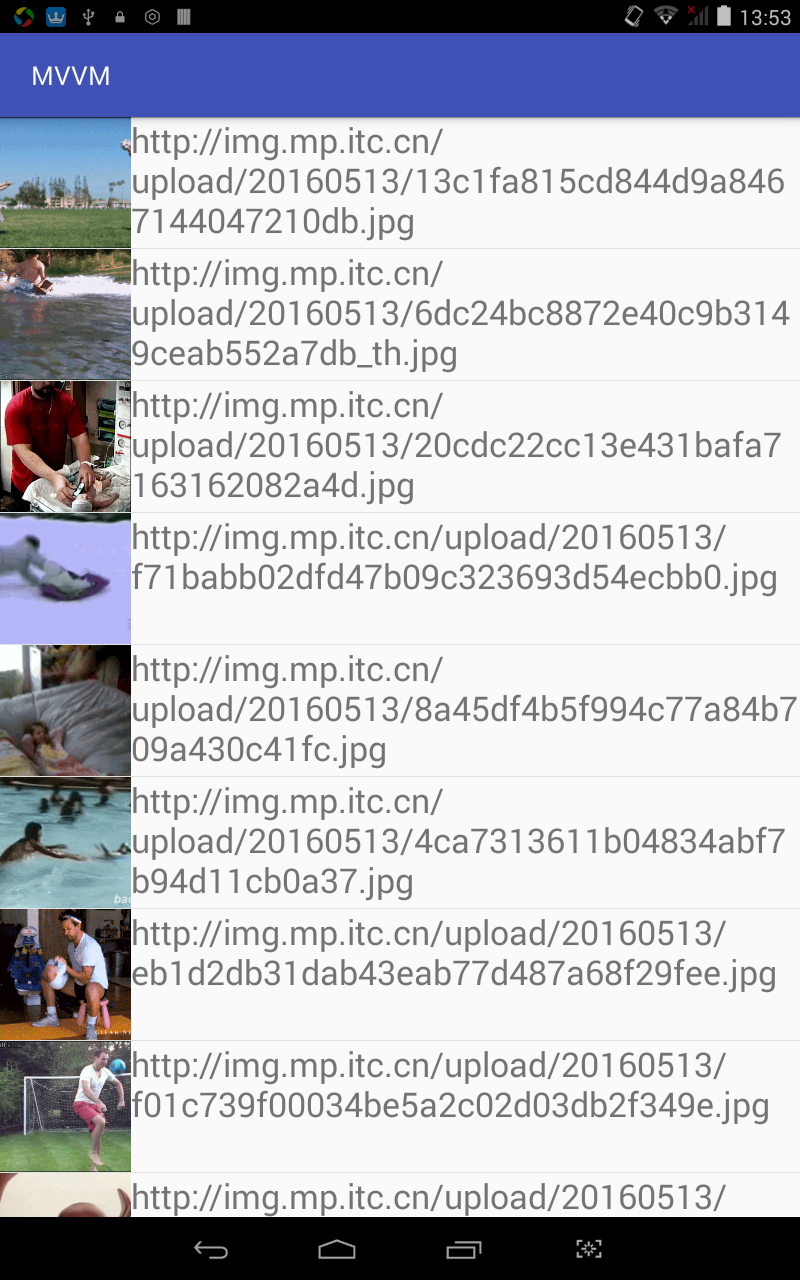
That's it, but looking at the code, we can see that this adapter is abstract.
Add layoutId at the time of construction, then variableId can be directly multiplexed.Say it, do it:
public class ListAdapter<T> extends BaseAdapter{
    private LayoutInflater mInflater;
    private List<T> mList;
    private int mLayoutId;
    private int mVariableId;

    public ListAdapter(Context context, List<T> list, int layoutId, int variableId) {
        this.mInflater = LayoutInflater.from(context);
        this.mList = list;
        this.mLayoutId = layoutId;
        this.mVariableId = variableId;
    }

    public void add(List<T> list){
        this.mList.addAll(list);
    }

    @Override
    public int getCount() {
        return mList.size();
    }

    @Override
    public Object getItem(int position) {
        return mList.get(position);
    }

    @Override
    public long getItemId(int position) {
        return position;
    }

    @Override
    public View getView(int position, View convertView, ViewGroup parent) {
        ViewDataBinding binding;
        if (convertView == null){
            binding = DataBindingUtil.inflate(mInflater, mLayoutId, parent, false);
        } else {
            binding = DataBindingUtil.getBinding(convertView);
        }
        binding.setVariable(mVariableId, mList.get(position));
        return binding.getRoot();
    }
}
Then modify the UserListActivity:
    @Override
    protected void onCreate(Bundle savedInstanceState) {
        super.onCreate(savedInstanceState);
        ActivityUsersBinding binding = DataBindingUtil.setContentView(this, R.layout.activity_users);
        binding.setAdapter(new ListAdapter<>(this, getUsers(), R.layout.user_item, BR.user));
    }
Compile, run, succeed.Generally speaking, this ListAdapter can cover most cases, naturally with special needs.
5. References, Articles, Blogs