Well, on the first day of the formal rebuilding, there are many kinds of css selectors. Really, I used to know how to use them without knowing what they are called or how to weigh them. In short, I know there is such a thing, but what it means, why not clean it up. So, start from scratch.
1. Selector
The selector has label selector, class selector, id selector, pseudo class selector, and what offspring, offspring, multiple elements, juxtaposition, in my sense, are the four combinations.
Class 1.1 selector
There is class on the label, and the expression in the css style is a point. For example:.span
1.2id selector
The label has an id in the css style, which is #. For example: # div1
1.3 Label Selector
In the css style, you can write directly with the label name. For example:p
1.4 Pseudo Class Selector
Hover means to select the elements on which the mouse pointer floats and set its style. When the mouse moves over the corresponding element, the style of the element will change, and the pseudo-Class selector will be used. For example: a:hover
2. Weight sum!
The selector, which has to be mentioned, is weight, which is a representation of importance.
The weight of the label is 1, the weight of the class selector is 10, and the weight of the id selector is 100. Here's a special thing.
!important
For instance
  <!DOCTYPE html>
<html>
    <head>
        <meta charset="UTF-8">
        <title></title>
        <style type="text/css">
            #div1{
                width:200px;
                height:200px;
                background: red;
                font-size:50px;
            }

            #div2{
                border: 1px solid #000;
                font-size: 30px !important;
            }
        </style>
    </head>
    <body>
        <div id="div1">
            //I'm div1.
                <div id="div2">
                    //I'm div2.
                </div>
        </div>

    </body>
</html>
That's it! The important display results show that the font size of div2 is first mentioned as the highest, so that the font size style of div2 will not change with the font size of div1. 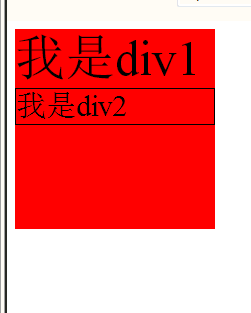
Back to the weight, the style shows the priority of getting closer to the label and having the highest priority, so that you can sort the three ways of writing css
Inline Style > Outline Style Written on Label
Weight, in my opinion, is more clearly reflected in the inline style and the outbound style. In the outbound style, we have two a's style writing. The first a is global a, representing the style of all a labels in the body, and the second a is a label in the id selector and a label in the class selector. The code is as follows:
a{
font-size:30px;
}
#div1 .span1 a{
font-size:50px;
}
The font style in the second a tag will be 50px instead of 30px, meaning that it will not change with the style in the first a tag.
Here is a weight. At the beginning, we said that the weight of the label is 1, the weight of the class selector is 10, and the weight of the id selector is 100. Well, the first a mentioned above is a label selector. That weight is 1, the second a. He is a label of the class selector under the id selector. The weight is 100+10+1=111. It's like a game. Other people's 111 level, you only have 1 level. When others choose who to play copies together, they will definitely choose someone else instead of you, because others have a high level. In other words, weight means that weight is a measure of priority.
Ps: The weight of important equals infinite.
3. Layout
(1) float-float
Understanding the floating principle can better understand the layout. Floating refers to the corresponding elements floating upward, with a three-dimensional feeling in mind. In a box that can only put down two boxes, the first box is lifted upward, so is there room for the second box to move upward? In the same way, as we all know, div is a block element. He is very domineering and monopolistic. When there are two divs on the page, the two divs are arranged up and down.
<!DOCTYPE html>
<html>
    <head>
        <meta charset="UTF-8">
        <title></title>
        <style>
            #div1, #div2, #div3{
                /*float: left;*/
            }
        </style>
    </head>
    <body>
        <div id="div1">Container 1;</div>
        <div id="div2">Container 2;</div>
        <div id="div3">Container 3;</div>
    </body>
</html>
Then I set them to float.
<!DOCTYPE html>
<html>
    <head>
        <meta charset="UTF-8">
        <title></title>
        <style>
            #div1, #div2, #div3{
                float: left;
            }
        </style>
    </head>
    <body>
        <div id="div1">Container 1;</div>
        <div id="div2">Container 2;</div>
        <div id="div3">Container 3;</div>
    </body>
</html>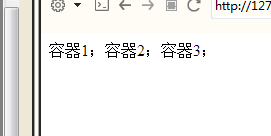
So the three div s can be displayed in a row.
(2) clear - clear floats
Clearing float is a little more elevated on the basis of float. When we want to keep container 1 and container 3 in the first row when we want container 2 to row 2, we need to use clearing float. The specific methods are as follows:
  <!DOCTYPE html>
<html>
    <head>
        <meta charset="UTF-8">
        <title></title>
        <style>
            #div1{
             float:left;
            }
            #div2{
            float:left;
            clear:both;
            }
        </style>
    </head>
    <body>
        <div id="div1">Container 1;</div>
        <div id="div2">Container 2;</div>
        <div id="div3">Container 3;</div>
    </body>
</html> 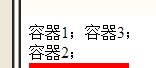
(3) overflow - overflow Control
Controlling its size with the overflow property is always within 100 PX in length and width
Display effect;
    <div style="width: 100px;height:100px; overflow:hidden;background: red;">
            weqweqeqeqeqeqweqweqweqweqweqweqweqweqw
            weqweqeqeqeqeqweqweqweqweqweqweqweqweqw
            weqweqeqeqeqeqweqweqweqweqweqweqweqweqw
            weqweqeqeqeqeqweqweqweqweqweqweqweqweqw
            weqweqeqeqeqeqweqweqweqweqweqweqweqweqw
            weqweqeqeqeqeqweqweqweqweqweqweqweqweqw
            weqweqeqeqeqeqweqweqweqweqweqweqweqweqw
            weqweqeqeqeqeqweqweqweqweqweqweqweqweqw
            weqweqeqeqeqeqweqweqweqweqweqweqweqweqw
            weqweqeqeqeqeqweqweqweqweqweqweqweqweqw
            weqweqeqeqeqeqweqweqweqweqweqweqweqweqw
            weqweqeqeqeqeqweqweqweqweqweqweqweqweqw
            weqweqeqeqeqeqweqweqweqweqweqweqweqweqw
            weqweqeqeqeqeqweqweqweqweqweqweqweqweqw
        </div>
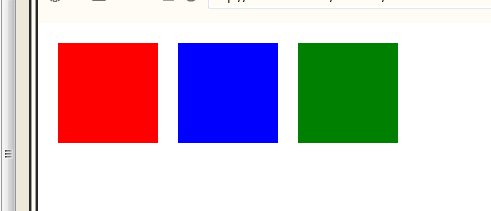
(4) position - Location
Absolute positioning: absolute
Simple and rude direct code:
<!DOCTYPE html>
<html>
    <head>
        <meta charset="UTF-8">
        <title></title>
    </head>
    <style>
        #div1{
            width:100px;
            height:100px;
            position:absolute;
            top:20px;
            left:20px;
            background: red;
        }
        #div2{
            width:100px;
            height:100px;
            position:absolute;
            top:20px;
            left:140px;
            background: blue;
        }
        #div3{
            width:100px;
            height:100px;
            position:absolute;
            top:20px;
            left:260px;
            background: green;
        }
    </style>
    <body>
        <div id="div1"></div>
        <div id="div2"></div>
        <div id="div3"></div>
    </body>
</html>
Relative positioning:
<!DOCTYPE html>
<html>
    <head>
        <meta charset="UTF-8">
        <title></title>
        <style>
            #div1{
                width:100px;
                height:100px;
                position: relative;
                top:20px;
                left:20px;
                background: red;
            }
            #div2{
               width:100px;
               height: 100px;
               position:relative;
               top:-80px;
               left:140px;
               background: green;
            }
            #div3{
                width:100px;
                height:100px;
                position:relative;
                top:-180px;
                left:260px;
                background:blue;
            }
        </style>
    </head>
    <body style="border:1px solid #aaa">
        <div id="div1"></div>
        <div id="div2"></div>
        <div id="div3"></div>
    </body>
</html>

Explain later, a little tired...
Here's the same presentation, written in different ways.