keepalived overview
The function of Keepalived is to detect the state of the server. If a web server goes down or fails to work, Keepalived will detect it and remove the failed server from the system. At the same time, other servers will be used to replace the server's work. When the server works normally, Keepalived will automatically add the server to the server group, and all these work will be completed automatically No need for human intervention. All you need to do is repair the failed server.
How keepalived works
1. keepalived is based on the VRRP protocol. The full name of VRRP is virtual route redundancy protocol, that is, virtual route redundancy protocol.

2. The virtual route redundancy protocol can be considered as a protocol to achieve high availability of routers, that is, N routers providing the same function form a router group, in which there is a master and multiple backups, and on the master there is a vip to provide external services (the default route of other machines in the LAN where the router is located is the vip), and the master will send multicast, when the backup When the VRRP package is not received, the master is considered to be down. In this case, you need to select a backup as the master according to the priority of VRRP. In this way, the high availability of the router can be guaranteed.

3. Keepalived has three modules: core, check and VRRP. The core module is the core of keepalived, which is responsible for the start-up and maintenance of the main process as well as the loading and parsing of the global configuration file. Check is responsible for health inspection, including various common inspection methods. VRRP module is to implement VRRP protocol.
Experimental environment
Dispatch server DR1 (primary): 192.168.100.66 centos7-1
 Dispatch server DR2 (standby): 192.168.100.77 centos7-2

Node server web1: 192.168.100.88 centos7-3
 Node server web2: 192.168.100.99 centos7-4

Drift address vip: 192.168.100.100

client: 192.168.100.200 windows7
Step 1: configure centos7-1 - DR1 scheduling server
1. Install ipvsadm and maintained software packages
[root@dr1 ~]# yum install ipvsadm keepalived -y
2. Modify the network card mode to host only and fix IP: 192.168.100.66
[root@dr1 ~]# vim /etc/sysconfig/network-scripts/ifcfg-ens33

BOOTPROTO=static

IPADDR=192.168.100.66
NETMASK=255.255.255.0
GATEWAY=192.168.100.1

[root@dr1 ~]# service network restart
Restarting network (via systemctl):                        [  Determine  ]

[root@dr1 ~]# vim /etc/sysctl.conf
#Add route forwarding function
net.ipv4.ip_forward=1
#proc response turns off redirection
net.ipv4.conf.all.send_redirects=0
net.ipv4.conf.default.send_redirects=0
net.ipv4.conf.ens33.send_redirects=0

#Effective route forwarding function
[root@dr1 ~]# sysctl -p
3. Build a virtual network card
[root@dr1 ~]# cd /etc/sysconfig/network-scripts/

[root@dr1 network-scripts]# cp ifcfg-ens33 ifcfg-ens33:0

[root@dr1 network-scripts]# vim ifcfg-ens33:0
#Delete original content
DEVICE=ens33:0
ONBOOT=yes
IPADDR=192.168.100.100
NETWASK=255.255.255.0

  #Enable virtual network card
[root@dr1 network-scripts]# ifup ens33:0
4. Add service startup script
[root@dr1 ~]# cd /etc/init.d/

[root@dr1 init.d]# vim dr.sh
#!/bin/bash
GW=192.168.100.1
VIP=192.168.100.100
RIP1=192.168.100.88
RIP2=192.168.100.99
case "$1" in
start)
        /sbin/ipvsadm --save > /etc/sysconfig/ipvsadm
        systemctl start ipvsadm
        /sbin/ifconfig ens33:0 $VIP broadcast $VIP netmask 255.255.255.255 broadcast $VIP up
        /sbin/route add -host $VIP dev ens33:0
        /sbin/ipvsadm -A -t $VIP:80 -s rr
        /sbin/ipvsadm -a -t $VIP:80 -r $RIP1:80 -g
        /sbin/ipvsadm -a -t $VIP:80 -r $RIP2:80 -g
        echo "ipvsadm starting------------------[ok]"
        ;;
        stop)
        /sbin/ipvsadm -C
        systemctl stop ipvsadm
        ifconfig ens33:0 down
        route del $VIP
        echo "ipvsamd stoped--------------------[ok]"
        ;;
        status)
        if [ ! -e ar/lock/subsys/ipvsadm ];then
        echo "ipvsadm stoped--------------------"
        exit 1
                else
                echo "ipvsamd Runing-------------[ok]"
        fi
        ;;
        *)
        echo "Usage: $0 {start|stop|status}"
        exit 1
        esac
        exit 0

#Grant script execution permission
[root@dr1 init.d]# chmod +x dr.sh

#Startup script
[root@dr1 init.d]# service dr.sh start

#View ipvsadm status
[root@dr1 init.d]# systemctl status ipvsadm             #View service on status

#Turn off firewall and security functions
[root@dr1 init.d]# systemctl stop firewalld.service
[root@dr1 init.d]# setenforce 0
Step 2: configure centos7-2 - DR2 scheduling server
1. Install ipvsdam and keepalived software package
[root@dr2 ~]# yum install ipvsdam keepalived -y
2. Modify the network card mode to host only and fix IP: 192.168.100.77
[root@dr2 ~]# vim /etc/sysconfig/network-scripts/ifcfg-ens33

BOOTPROTO=static

IPADDR=192.168.100.77
NETMASK=255.255.255.0
GATEWAY=192.168.100.1

[root@dr2 ~]# service network restart
Restarting network (via systemctl):                        [  Determine  ]

[root@dr2 ~]# vim /etc/sysctl.conf
#Add route forwarding function
net.ipv4.ip_forward=1
#proc response turns off redirection
net.ipv4.conf.all.send_redirects=0
net.ipv4.conf.default.send_redirects=0
net.ipv4.conf.ens33.send_redirects=0

#Effective route forwarding function
[root@dr1 ~]# sysctl -p
3. Build a virtual network card
[root@dr1 ~]# cd /etc/sysconfig/network-scripts/

[root@dr1 network-scripts]# cp ifcfg-ens33 ifcfg-ens33:0

[root@dr1 network-scripts]# vim ifcfg-ens33:0
#Delete original content
DEVICE=ens33:0
ONBOOT=yes
IPADDR=192.168.100.100
NETWASK=255.255.255.0

#Enable virtual network card
[root@dr2 ~]# ifup ens33:0
4. Add service startup script
[root@dr2 ~]# cd /etc/init.d/

[root@dr2 ~]# vim dr.sh
#!/bin/bash
GW=192.168.100.1
VIP=192.168.100.100
RIP1=192.168.100.88
RIP2=192.168.100.99
case "$1" in
start)
        /sbin/ipvsadm --save > /etc/sysconfig/ipvsadm
        systemctl start ipvsadm
        /sbin/ifconfig ens33:0 $VIP broadcast $VIP netmask 255.255.255.255 broadcast $VIP up
        /sbin/route add -host $VIP dev ens33:0
        /sbin/ipvsadm -A -t $VIP:80 -s rr
        /sbin/ipvsadm -a -t $VIP:80 -r $RIP1:80 -g
        /sbin/ipvsadm -a -t $VIP:80 -r $RIP2:80 -g
        echo "ipvsadm starting------------------[ok]"
        ;;
        stop)
        /sbin/ipvsadm -C
        systemctl stop ipvsadm
        ifconfig ens33:0 down
        route del $VIP
        echo "ipvsamd stoped--------------------[ok]"
        ;;
stop)
       /sbin/ipvsadm -C
        systemctl stop ipvsadm
        ifconfig ens33:0 down
        route del $VIP
        echo "ipvsamd stoped--------------------[ok]"
        ;;
        status)
        if [ ! -e ar/lock/subsys/ipvsadm ];then
        echo "ipvsadm stoped--------------------"
        exit 1
                else
                echo "ipvsamd Runing-------------[ok]"
        fi
        ;;
        *)
        echo "Usage: $0 {start|stop|status}"
        exit 1
        esac
        exit 0

[root@dr2 ~]# chmod +x dr.sh

[root@dr2 ~]# service dr.sh start

[root@dr2 ~]# systemctl status ipvsadm             #View service on status

[root@dr2 ~]# systemctl stop firewalld.service
[root@dr2 ~]# setenforce 0
Step 3: configure centos7-3 - web1 node server
1. Install httpd package
[root@web-1 ~]# yum install httpd -y
2. Modify network card mode: host only and fixed IP: 192.168.100.88
[root@web-1 ~]# vim /etc/sysconfig/network-scripts/ifcfg-ens33

BOOTPROTO=static

IPADDR=192.168.100.88
NETMASK=255.255.255.0
GATEWAY=192.168.100.1

[root@web-1 ~]# service network restart                    #Restart NIC
[root@web-1 ~]# systemctl stop firewalld.service        #Turn off firewall
[root@web-1 ~]# setenforce 0

[root@web-1 ~]# systemctl start httpd.service       #Start Web Services
3. Create website homepage
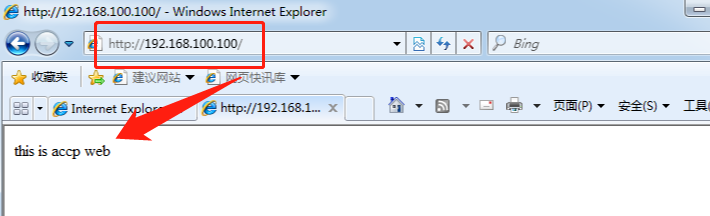
[root@web-1 ~]# cd /var/www/html/
[root@web-1 ~]# echo "this is accp web" > index.html
4. Create a virtual network card
[root@web-1 ~]# cd /etc/sysconfig/network-scripts/
[root@web-1 ~]# cp ifcfg-lo ifcfg-lo:0
[root@web-1 ~]# vim ifcfg-lo:0

#Delete all original information and add the following:
DEVICE=Lo:0
IPADDR=192.168.100.100
NETMASK=255.255.255.0
ONBOOT=yes
5. Write service startup script
[root@web-1 ~]# cd /etc/init.d/
[root@web-1 ~]# vim web.sh               #Control service startup script

#!/bin/bash
VIP=192.168.100.100
        case "$1" in
        start)
                ifconfig lo:0 $VIP netmask 255.255.255.255 broadcast $VIP
                /sbin/route add -host $VIP dev lo:0
        echo "1" > /proc/sys/net/ipv4/conf/lo/arp_ignore
        echo "2" > /proc/sys/net/ipv4/conf/lo/arp_announce
        echo "1" > /proc/sys/net/ipv4/conf/lo/arp_ignore
        echo "2" > /proc/sys/net/ipv4/conf/lo/arp_announce
        sysctl -p > /dev/null 2>&1
        echo "RealServer Start OK "
        ;;
        stop)
                ifconfig lo:0 down
                route del $VIP /dev/null 2>&1
                echo "0" > /proc/sys/net/ipv4/conf/lo/arp_ignore
                echo "0" > /proc/sys/net/ipv4/conf/lo/arp_announce
                echo "0" > /proc/sys/net/ipv4/conf/all/arp_ignore
                echo "0" > /proc/sys/net/ipv4/conf/all/arp_announce
    echo "RealServer Stoped"
                ;;
        *)
                echo "Usage: $0 {start|stop}"
                exit 1
        esac
        exit 0

[root@web-1 ~]# chmod +x web.sh

[root@web-1 ~]# service web.sh start

[root@web-1 ~]# ifup lo:0

//When viewing the IP address on the web2 node server, you can see that the virtual IP address is OK: ifconfig

firefox "http://127.0.0.1 / "&

[root@web-1 ~]# service web.sh stop

[root@web-1 ~]# service web.sh start                #It is recommended to restart the service
Step 4: configure centos7-4 - web2 node server
1. Install httpd package
[root@web-2 ~]# yum install httpd -y
2. Adjust the network card mode to host only and fix IP: 192.168.100.99
[root@web-2 ~]# vim /etc/sysconfig/network-scripts/ifcfg-ens33
BOOTPROTO=static
IPADDR=192.168.100.99
NETMASK=255.255.255.0
GATEWAY=192.168.100.1
[root@web-2 ~]# service network restart #Restart NIC
[root@web-2 ~]# systemctl stop firewalld.service #Turn off firewall
[root@web-2 ~]# setenforce 0
[root@web-2 ~]# systemctl start httpd.service
[root@web-2 ~]# systemctl status httpd.service
[root@web-2 ~]# cd /var/www/html/
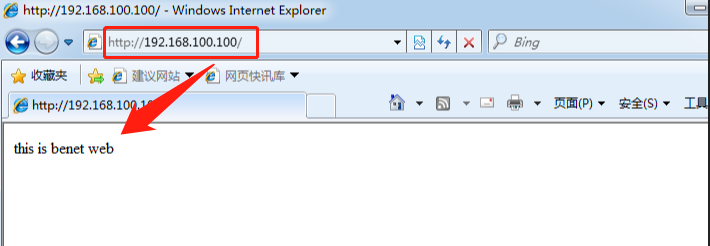
[root@web-2 ~]# echo "this is benet web" > index.html
[root@web-2 ~]# cd /etc/sysconfig/network-scripts/
[root@web-2 ~]# cp ifcfg-lo ifcfg-lo:0
[root@web-2 ~]# vim ifcfg-lo:0
DEVICE=Lo:0
IPADDR=192.168.100.100
NETMASK=255.255.255.0
ONBOOT=yes
[root@web-2 ~]# cd /etc/init.d/
[root@web-2 ~]# vim web.sh #Control service startup script
#!/bin/bash
VIP=192.168.100.100
case "$1" in
start)
ifconfig lo:0 $VIP netmask 255.255.255.255 broadcast $VIP
/sbin/route add -host $VIP dev lo:0
echo "1" > /proc/sys/net/ipv4/conf/lo/arp_ignore
echo "2" > /proc/sys/net/ipv4/conf/lo/arp_announce
echo "1" > /proc/sys/net/ipv4/conf/lo/arp_ignore
echo "2" > /proc/sys/net/ipv4/conf/lo/arp_announce
sysctl -p > /dev/null 2>&1
echo "RealServer Start OK "
;;
stop)
ifconfig lo:0 down
route del $VIP /dev/null 2>&1
echo "0" > /proc/sys/net/ipv4/conf/lo/arp_ignore
echo "0" > /proc/sys/net/ipv4/conf/lo/arp_announce
echo "0" > /proc/sys/net/ipv4/conf/all/arp_ignore
echo "0" > /proc/sys/net/ipv4/conf/all/arp_announce
echo "RealServer Stoped"
;;
*)
echo "Usage: $0 {start|stop}"
exit 1
esac
exit 0
[root@web-2 ~]# chmod +x web.sh
[root@web-2 ~]# service web.sh start
#Open virtual network card
[root@web-2 ~]# ifup lo:0
firefox "http://127.0.0.1 / "&
#Shut down and restart the service
[root@web-2 ~]# service web.sh stop
[root@web-2 ~]# service web.sh start Step 5: test with Win7 client
1. Use win7 to adjust the network card to host only mode
2. Use the client to try to connect to the server
C:\Users\czt>ping 192.168.100.100

Ping 192.168.100.100 with 32 bytes of data:
Reply from 192.168.100.100: byte = 32 time < 1ms TTL = 64
 Reply from 192.168.100.100: byte = 32 time < 1ms TTL = 64
 Reply from 192.168.100.100: byte = 32 time < 1ms TTL = 64
 Reply from 192.168.100.100: byte = 32 time < 1ms TTL = 64

Ping statistics of 192.168.100.100:
    Packet: sent = 4, received = 4, lost = 0 (0% lost),
Estimated time of round trip in milliseconds:
    Min = 0ms, max = 0ms, average = 0ms
3. Use the client to browse the web page, and enter http://192.168.100.100/
Step 6: keepalived deployment (the configuration of the two scheduling servers is the same)
[root@dr1 ~]# cd /etc/keepalived/

[root@dr1 ~]# vim keepalived.conf

global_defs {
   notification_email {
     acassen@firewall.loc
     failover@firewall.loc
     sysadmin@firewall.loc
   }
   notification_email_from Alexandre.Cassen@firewall.loc
   smtp_server 127.0.0.1                         #Pointing to the local
   smtp_connect_timeout 30
   router_id LVS_01                    #Specify a name. The backup server has a different name. The other is 02
   vrrp_skip_check_adv_addr
   vrrp_strict
   vrrp_garp_interval 0
   vrrp_gna_interval 0
}

vrrp_instance VI_1 {
    state MASTER                     #BACKUP server changes MASTER to BACKUP
    interface eth0
    virtual_router_id 10              #Group number is the same.
    priority 100                          #Priority, standby less than primary
    advert_int 1
    authentication {
        auth_type PASS
        auth_pass abc123              #Verify password
    }
    virtual_ipaddress {
        192.168.100.100               #Virtual IP
    }
}

virtual_server 192.168.100.100 80 {          #Virtual IP and port number
    delay_loop 6
    lb_algo rr
    lb_kind DR                   #Change to DR
    persistence_timeout 50
    protocol TCP

    real_server 192.168.100.88 80 {              #Node server 1
        weight 1
        TCP_CHECK {
            connect_port 80
            connect_timeout 3
            nb_get_retry 3
            delay_before_retry 3
        }
    }

    real_server 192.168.100.99 80 {              #Node server 2
        weight 1
        TCP_CHECK {                     #Change to TCP "check
            connect_port 80              #Add port
            connect_timeout 3
            nb_get_retry 3
            delay_before_retry 3
        }
    }
}

#Start the keepalived service
[root@dr1 ~]# systemctl start keepalived.service
Step 7: use client test
1. Simulate the down ing of a scheduling server
[root@dr1 init.d]# ifdown ens33:0
2. Try to connect the server on win7. If you can ping the server on win7, it means that another scheduling server has taken over and started to work
C:\Users\czt>ping 192.168.100.100

Ping 192.168.100.66 with 32 bytes of data:
Reply from 192.168.100.100: byte = 32 time < 1ms TTL = 64
 Reply from 192.168.100.100: byte = 32 time < 1ms TTL = 64
 Reply from 192.168.100.100: byte = 32 time < 1ms TTL = 64
 Reply from 192.168.100.100: byte = 32 time < 1ms TTL = 64

Ping statistics of 192.168.100.100:
    Packet: sent = 4, received = 4, lost = 0 (0% lost),
Estimated time of round trip in milliseconds:
    Min = 0ms, max = 0ms, average = 0ms