Since using the m1 computer, the local development environment occasionally encounters compatibility problems. Like trying before Using Colima to run container runtime and Kubernetes in virtual machine , the aarch64 virtual machine is actually used, and the actual use is still somewhat different.
I have a small black apple host used before. I've been eating ash for months. It's a waste. It's just new year's Day holiday. I have time to toss around.
CPU: Intel 8700 6C12T
MEM: 64G DDR4
DISK: 1T SSD
Purpose of tossing:
- Virtualize the platform
- Provide multiple sets of experimental environment
- Quickly create and destroy experimental environment
- Experience infrastructure code IaaS
Main tools used:
- Virtualization tools Proxmox VE
- Terraform : open source infrastructure, i.e. code tools
- terraform-provider-proxmox : terrain proxmox provider, which creates virtual machines through the REST API of Proxmox VE.
Install Proxmox virtualization tools
from Official website Download the ISO image and write it to the U SB flash disk. Balena etcher is recommended for writing disks on macOS.
Insert the USB flash disk into the computer and start it from the USB flash disk. Follow the steps to complete the settings step by step.
Official wiki Installation steps Very detailed.
After the installation is completed, you can create the virtual machine with the command line qm create or https://localhost:8006 Web UI to create.
After all, it's still a little troublesome. You have to perform a lot of operations every time. Although you can write scripts, the general type is not good enough. Therefore, we chose Terraform to implement the infrastructure, that is, code.
Create Ubuntu cloud init template
Here, cloud init is used to clone virtual machines from cloud init template. Cloud init virtual machine can complete some advanced customization initialization. Interested references Cloud Init documentation.
Log in to the Proxmox VE host and use Ubuntu 20.04 cloud init image to create a template. Download it from the official website:
wget https://cloud-images.ubuntu.com/releases/focal/release/ubuntu-20.04-server-cloudimg-amd64.img
Execute the following command to create a virtual machine:
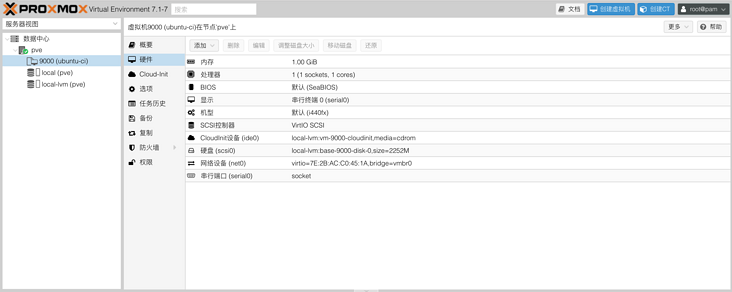
qm create 9000 --name "ubuntu-2004-cloudinit-template" --memory 1024 --cores 1 --net0 virtio,bridge=vmbr0
qm importdisk 9000 ubuntu-20.04-server-cloudimg-amd64.img local-lvm
qm set 9000 --scsihw virtio-scsi-pci --scsi0 local-lvm:vm-9000-disk-0
qm set 9000 --boot c --bootdisk scsi0
qm set 9000 --ide2 local-lvm:cloudinit
qm set 9000 --serial0 socket --vga serial0
qm set 9000 --agent enabled=1
Convert the newly created virtual machine into a template:
qm template 9000
Templates are slightly different from ordinary virtual opportunities. Using templates, we can quickly create virtual machines. We won't use the UI to create it here.

Create Proxmox user and API Token
The REST API using Proxmox VE requires permission verification. There are two methods: user name, password or API Token. We choose the latter, log in to the Proxmox host, and execute the following commands to create roles, users and API Tokens:
pveum role add TerraformProv -privs "VM.Allocate VM.Clone VM.Config.CDROM VM.Config.CPU VM.Config.Cloudinit VM.Config.Disk VM.Config.HWType VM.Config.Memory VM.Config.Network VM.Config.Options VM.Monitor VM.Audit VM.PowerMgmt Datastore.AllocateSpace Datastore.Audit"
pveum user add terraform-prov@pve
pveum aclmod / -user terraform-prov@pve -role TerraformProv
pveum user token add terraform-prov@pve terraform-token --privsep=0

┌──────────────┬──────────────────────────────────────┐
│ key          │ value                                │
╞══════════════╪══════════════════════════════════════╡
│ full-tokenid │ terraform-prov@pve!terraform-token   │
├──────────────┼──────────────────────────────────────┤
│ info         │ {"privsep":"0"}                      │
├──────────────┼──────────────────────────────────────┤
│ value        │ 9748c040-a283-4c72-a48b-9ce784778eed │
└──────────────┴──────────────────────────────────────┘
Here we will use the full token ID and value of token.
Terraform
With the token and cloud init templates, the virtual machine is defined.
Install the latest version of terrain.
brew install terraform
Create ubuntu.exe in an empty directory TF file and configure it according to the steps:
Configure the provider to use:
terraform {
  required_providers {
    proxmox = {
      source = "telmate/proxmox"
    }
  }
}
Configure provider
PM required_ api_ url,pm_api_token_id and pm_api_token_secret:
provider "proxmox" {
  pm_tls_insecure     = true
  pm_api_url          = "https://192.168.1.4:8006/api2/json"
  pm_api_token_id     = "terraform-prov@pve!terraform-token"
  pm_api_token_secret = "9748c040-a283-4c72-a48b-9ce784778eed"
}
Configure virtual machine resources
Can refer to Configuration description of provider:
resource "proxmox_vm_qemu" "proxmox-ubuntu" {
  count = 1
  name  = "ubuntu-${count.index + 1}"
  desc  = "Ubuntu develop environment"

  # Node name
  target_node = "pve"

  # cloud-init template
  clone = "ubuntu-2004-cloudinit-template"

  # Shut down the guest agent
  agent   = 0
  os_type = "ubuntu"
  onboot  = true
  # CPU
  cores    = 4
  sockets  = 1
  cpu      = "host"
  # Memory
  memory   = 16384
  scsihw   = "virtio-scsi-pci"
  bootdisk = "scsi0"

  # Hard disk setting, 101580M replaces 100G due to the calculation method
  disk {
    slot     = 0
    size     = "101580M"
    type     = "scsi"
    storage  = "local-lvm"
    iothread = 1
  }

  # network
  network {
    model  = "virtio"
    bridge = "vmbr0"
  }

  lifecycle {
    ignore_changes = [
      network,
    ]
  }
  # Remember to use IP CIDR here. Because only one virtual machine is created, the IP of the virtual machine is 192.168.1.91. If you want to create multiple virtual machines, the IP will be. 91,. 92,. 93.
  ipconfig0 = "ip=192.168.1.9${count.index + 1}/24,gw=192.168.1.2"

  # User name and SSH key
  ciuser  = "addo"
  sshkeys = <<EOF
  SSH KEYS HERE
  EOF
}
Create virtual machine
For the first time, execute the init command to initialize:
terraform init
The configuration file can be formatted and validated using terrain FMT and terrain validate.
Then execute terrain apply and enter yes to start creating the virtual machine,
proxmox_vm_qemu.proxmox-ubuntu[0]: Creating...
proxmox_vm_qemu.proxmox-ubuntu[0]: Still creating... [10s elapsed]
proxmox_vm_qemu.proxmox-ubuntu[0]: Still creating... [20s elapsed]
proxmox_vm_qemu.proxmox-ubuntu[0]: Still creating... [30s elapsed]
proxmox_vm_qemu.proxmox-ubuntu[0]: Still creating... [40s elapsed]
proxmox_vm_qemu.proxmox-ubuntu[0]: Creation complete after 42s [id=pve/qemu/100]
In this way, the virtual machine is created successfully. You can ssh to the virtual machine using the previously configured private key and IP address.
Destroy virtual machine
The destruction of the virtual machine is also very simple. Execute terrain destruction and enter yes.
summary
With Terraform and Proxmox VE, you can happily use a clean experimental environment. However, it is so clean that there are no commonly used software in some development, and it is not convenient to use.
In the future, we will consider making advanced customization of virtual machines through cloud init, such as container environment and K3s.
The article is unified in the official account of the cloud.
