1, SpringBoot project environment
- IntelliJ IDEA 2018.3.2
- Mysql 5.1
2, Tencent cloud CentOS 7.6 image server
Students can apply for Tencent cloud student exclusive, 27 yuan for three months
3, Attention
(1) XShell
- Modify host name
hostnamectl set-hostname master #Set to master name
- View current hostname
hostname
- After modifying the host name, you need to reconnect to see the modified host name explicitly

- Turn off the firewall
systemctl stop firewalld.service  #Stop firewall
systemctl disable firewalld.service   #Disable firewall startup
firewall-cmd --state #Check the running status of firewall. If not running is displayed, the configuration is successful
(2) CentOS
1. Remote connection using XShell
2. The following steps are completed in sequence in XShell
- Install jdk
Download the tar package of JDK on the official website and use jdk1 Version 8. Use FileZilla to transfer the tar package from Windows system to the directory you want to store under Linux system.
Unzip the tar package
Modify jdk nametar -xvf jdk-8***.tar.gz
Configuring java environment variablesmv jdk1.8.0.xxx/ jdk1.8
Add the following code to the open file:vim /etc/prifile
Effective documentJAVA_HOME=/software/jdk1.8 #Your jdk address PATH=$JAVA_HOME/bin:$PATH
Check whether java is successfully configuredsource /etc/profile
java -version
#The following prompt indicates that the java environment configuration is successful
java version "1.8.0_181"
Java(TM) SE Runtime Environment (build 1.8.0_181-b13)
Java HotSpot(TM) 64-Bit Server VM (build 25.181-b13, mixed mode)
- Install MariaDB (you can also install mysql, almost)
MariaDB and Mysql belong to the same development team and are compatible with Mysql
Install MariaDB
The first use of MariaDB requires initializationyum install mariadb-server #Online installation; Is this ok? Choose y from the questions; Display complete after installation
Using MariaDB# Start MariaDB systemctl start mariadb # Set startup systemctl enable mariadb # MariaDB initialization mysql_secure_installation # Password verification. There is no password for the initial installation, so just press enter # Set root password? [Y/n] press enter, and the default value is Y # New password: ****** enter your new password # Re enter new password: ****** enter again # Show Success after completion! # Remove anonymous users? [Y/n] hit enter # Disallow root login remotely? [Y/n] enter # Remove test database and access to it? [Y/n] enter # Reload privilege tables now? [Y/n] enter # Thanks for using MariaDB!
Import data tablemysql -uroot -p****** #******Is the password you set; If it is root, write - proot; If it's 123456, write - p123456
Transfer the sql table creation file under Windows directly to Linux through FileZilla, and use the following statement to execute in MariaDBsource /software/mysql/tablename.sql
- SpringBoot integrates TomCat, so there is no need to install additional TomCat. If you use Eclipse, you need to install TomCat
Download the tar package of tomcat. After decompression:vim /etc/profile # Add the following code at the bottom export CATALINA_HOME=/software/*** # Your tomcat path export PATH =$CATALINA_HOME/bin:$PATH:$HOME/bin
- FileZilla can be used for file transfer on Windows and Linux systems
(3) SpringBoot
- If the WebSocket function is used in SpringBoot, it needs to be in test / Java / com xxx/xxxTests. Add the following comments in Java:
@RunWith(SpringRunner.class)
@SpringBootTest(webEnvironment = SpringBootTest.WebEnvironment.RANDOM_PORT)
- All links in SpringBoot do not need the previous ones/
Change to@GetMapping("/") public String index(){ return "/index"; }@GetMapping("/") public String index(){ return "index"; } - Package SpringBoot project
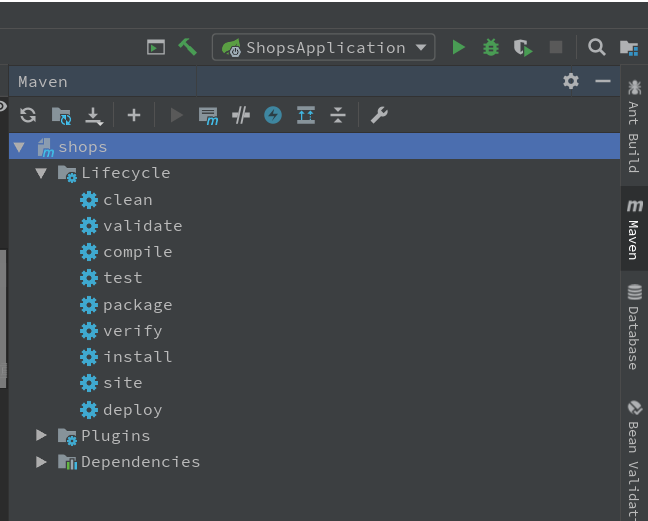
Click Maven on the right and double-click package in Lifecycle.

After success, find the packaged jar package according to the prompted path. Upload the jar to the CentOS system. In Xshell, under the file path where the file is located, enter the following command to execute:
After successful startup, the SpringBoot project flag will be displayed. After that, you can use the ECS public IP to access the project. Don't forget to add your own port number.java -jar ***.jar #Your jar package name