I use Alibaba cloud server, the selected student machine, and the system image CentOS 7.2 64 bit.
preparation:
1. Open ports for the project on Alibaba cloud console, including 80 (for website) and 22 (for remote connection)

2. Download the terminal artifact MobaXterm for remote connection to ECs. Download MobaXterm
3. Download the jdk of Linux version and select the suffix is tar.gz. Download JDK
4. Download Tomcat installation package. Download tomcat
5. Open MobaXterm and connect to ECs.

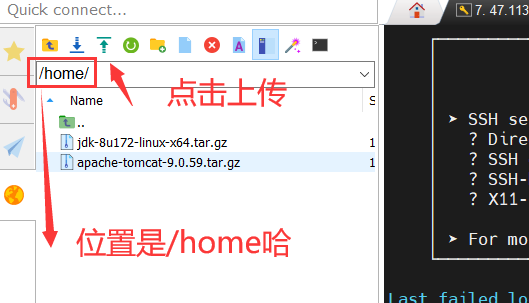
6. Upload the installation packages of jdk and tomcat to the / home directory.
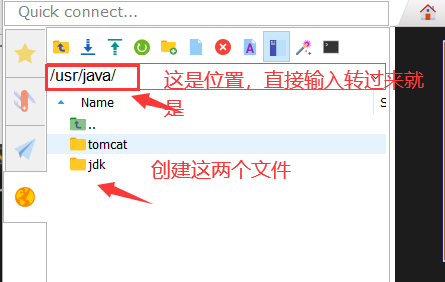
7. Create java under usr directory, and then create the following two directories under java.
be careful! be careful! be careful! Now let's get to the point
1. Configure Java environment
(1) Run the decompression command in the command line window: tar - xzf / home / jdk-8u181-linux-x64 tar. gz -C /usr/java/jdk
(2) Configure the environment variable with the command: vi /etc/profile, then add the following content at the end of the file and save it:
#set java environment
export JAVA_HOME=/usr/java/jdk/jdk1.8.0_172
export JRE_HOME=/usr/java/jdk/jdk1.8.0_172/jre
export CLASSPATH=.:$JAVA_HOME/lib:$JRE_HOME/lib:$CLASSPATH
export PATH=$JAVA_HOME/bin:$JRE_HOME/bin:$JAVA_HOME:$PATH
Save command: source /etc/profile
(3) Verify that the - Java command is successfully installed.

2. Install Tomcat
(1) Run the decompression command: tar -xzf / home / apache-tomcat-9.0.59 tar. gz -C /usr/java/tomcat
(2) Configure the environment and open setclasspath.com in / usr/java/tomcat/apache-tomcat-9.0.59/bin/directory SH file
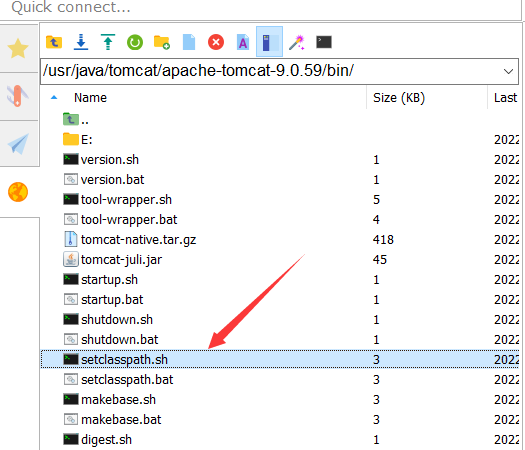
Add the following at the end of the file and save:
export JAVA_HOME=/usr/java/jdk/jdk1.8.0_172
export JRE_HOME=/usr/java/jdk/jdk1.8.0_172/jre
3. Deploy the project to tomcat server
(1) Upload the war package of the project to the webapps directory of Tomcat

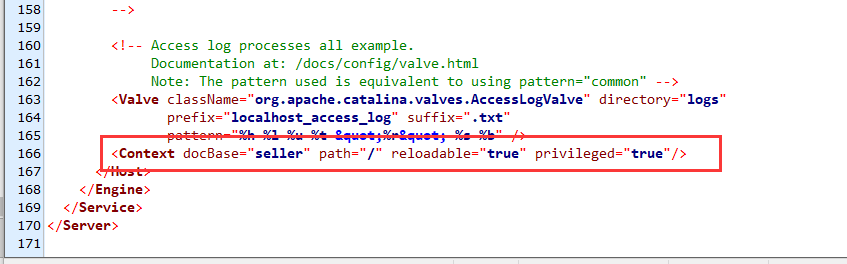
(2) Find the server in the directory / usr/java/tomcat/apache-tomcat-9.0.59/conf / Open the XML file and add the following code at the end of the file:
<Context docBase="seller" path="/" reloadable="true" privileged="true"/>
(3) Go to / usr/java/tomcat/apache-tomcat-9.0.59/bin/ and run startup SH file
Command: CD / usr / Java / Tomcat / apache-tomcat-9.0.59/bin// startup. sh
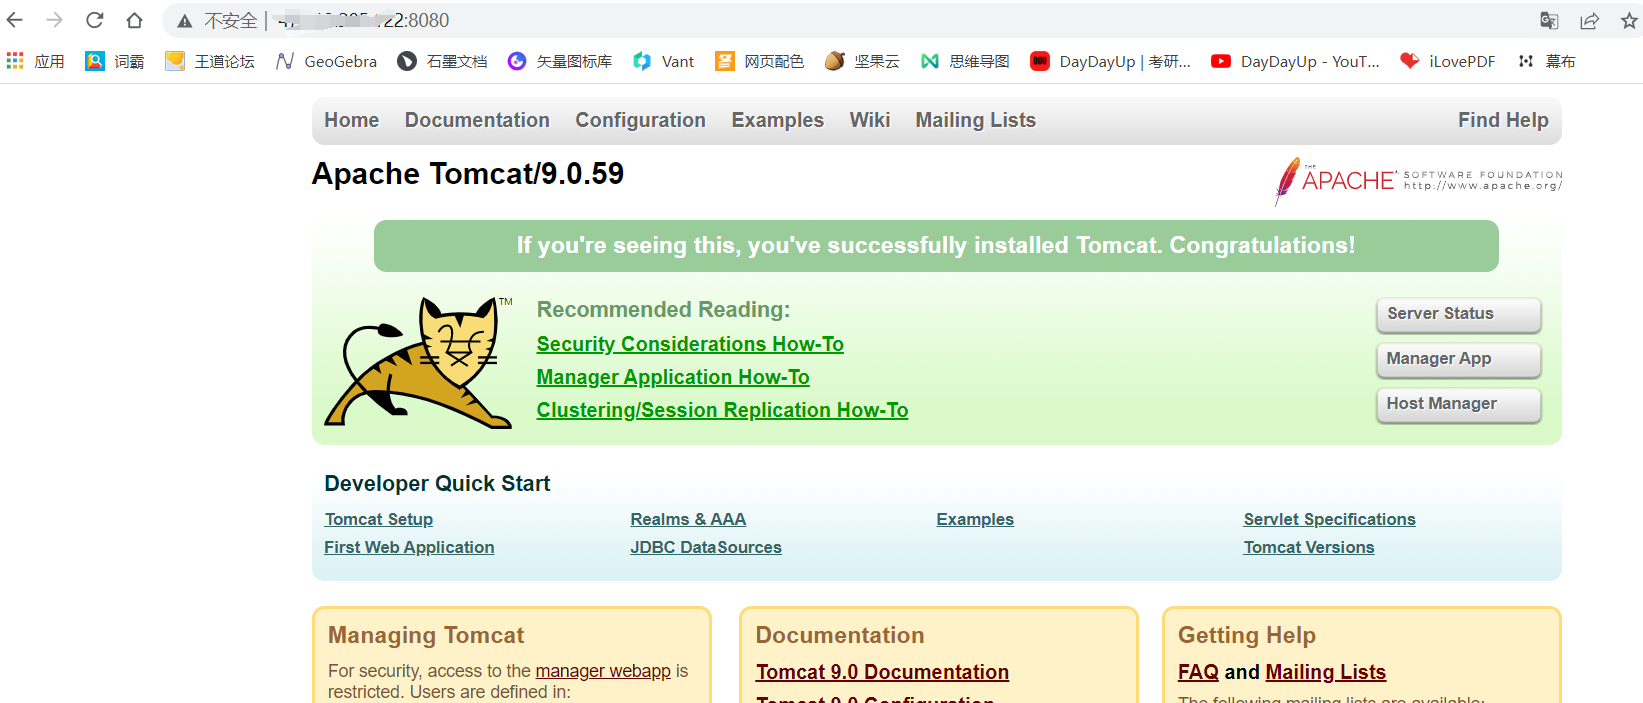
(4) The browser inputs Alibaba cloud public IP address plus port 8080. The page is shown in the following figure, indicating success:
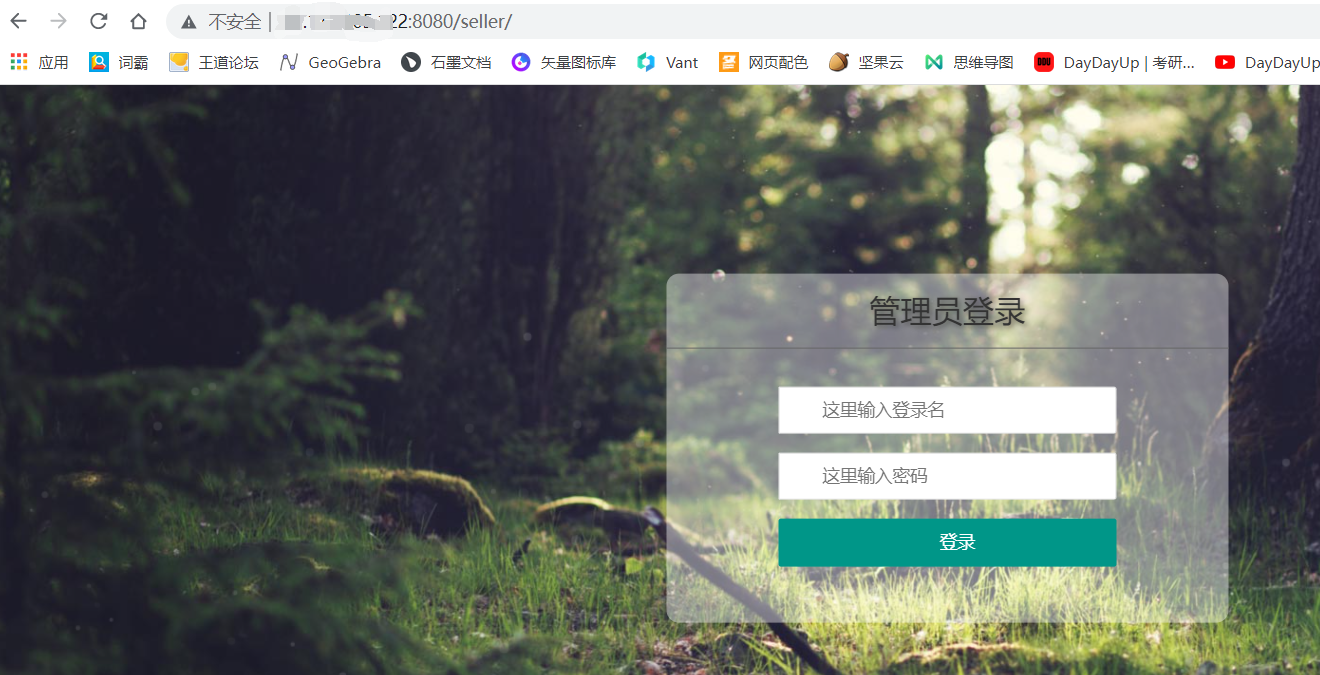
Add the project name after port 8080 to run this project, as shown in the figure below
4. Install yum
(1) Delete the original yum
rpm -aq|grep yum|xargs rpm -e --nodeps
(2) Download yum using wget
wget http://mirrors.163.com/centos/7/os/x86_64/Packages/yum-3.4.3-168.el7.centos.noarch.rpm
wget http://mirrors.163.com/centos/7/os/x86_64/Packages/yum-metadata-parser-1.1.4-10.el7.x86_64.rpm
wget http://mirrors.163.com/centos/7/os/x86_64/Packages/yum-plugin-fastestmirror-1.1.31-54.el7_8.noarch.rpm
wget http://mirrors.163.com/centos/7/os/x86_64/Packages/python-iniparse-0.4-9.el7.noarch.rpm
(3) Install the package that yum depends on after downloading
rpm -ivh python-iniparse-0.4-9.el7.noarch.rpm
rpm -ivh yum-3.4.3-168.el7.centos.noarch.rpm yum-metadata-parser-1.1.4-10.el7.x86_64.rpm yum-plugin-fastestmirror-1.1.31-54.el7_8.noarch.rpm --nodeps --force
(4) Download yum-3.4.3
wget http://yum.baseurl.org/download/3.4/yum-3.4.3.tar.gz
tar -zxvf yum-3.4.3.tar.gz
cd yum-3.4.3
 Execution:./yummain.py update
choice y
(5) Modify yum source
Enter the system yum Source directory: cd /etc/yum.repos.d
download yum Source: wget http://mirrors.163.com/.help/CentOS7-Base-163.repo
Modify source file name: mv CentOS7-Base-163.repo CentOS-Base.repo
function makecache Generate cache to make configuration effective: yum makecache
verification yum Source: yum repolist
 Check whether there is 163 identification. If yes, it proves that the configuration of domestic 163 image source is successful
function: yum clean all
to update YUM File: yum update
5. Install MariaDB
(1) Quick install using yum or up2date
yum install -y mariadb-server
(2) mariadb related commands
yum install mariadb mariadb-server
systemctl start mariadb   #Start mariadb
systemctl enable mariadb  #Set startup and self startup
systemctl stop mariadb    #Stop MariaDB
systemctl restart mariadb #Restart MariaDB
mysql_secure_installation #Setting the root password
mysql -uroot -p           #Test login
(3) Configure remote login and refresh system permissions:
GRANT ALL PRIVILEGES ON *.* TO 'root'@'%' IDENTIFIED BY '1234' WITH GRANT OPTION;
flush privileges;
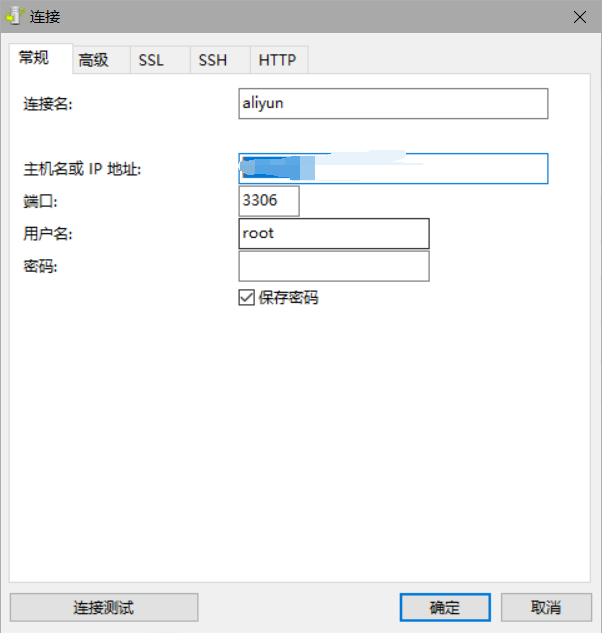
(4) Connect to Alibaba cloud database using Navicat database management tool
Special thanks to:
https://www.cnblogs.com/yijialong/p/9606265.html
https://www.icode9.com/content-3-585589.html
https://www.cnblogs.com/ricklz/p/12269102.html