1, Virtual environment
1. Download conda (skip if conda already exists)
wget -c https://repo.continuum.io/miniconda/Miniconda3-latest-Linux-x86_64.sh
2. Add permissions
chmod 777 Miniconda3-latest-Linux-x86_64.sh
3. Operation
sh Miniconda3-latest-Linux-x86_64.sh
(1) There will be two prompts in the middle. Press enter for the first one, and enter yes for the second one
(2) After the word installation finished appears, you will be prompted to ask whether you want the installer to initialize miniconda3 by running CONDA init? [yes | no])
Enter no
4. Editing bashrc file
vim ~/.bashrc
Add export PATH = "your minicanda3 path / bin:"$PATH at the end
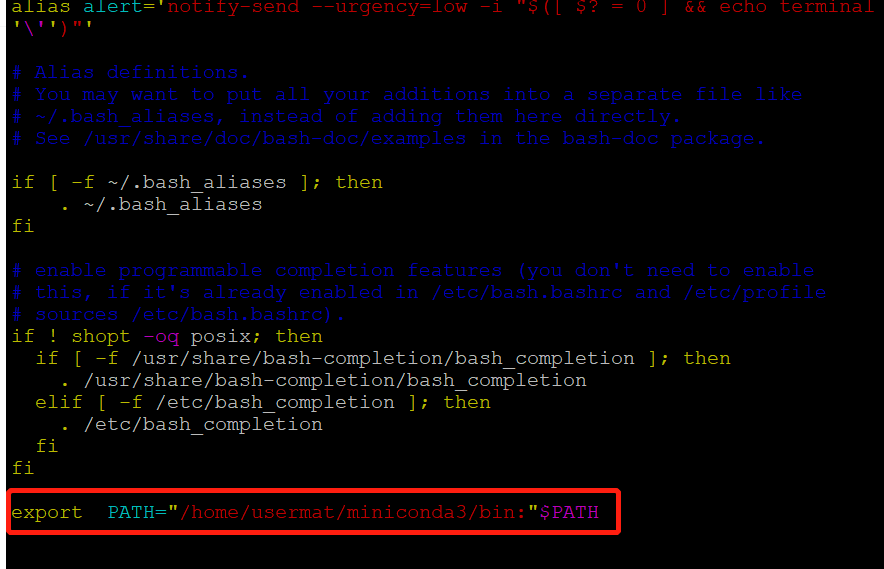
5. Start bashrc
source ~/.bashrc
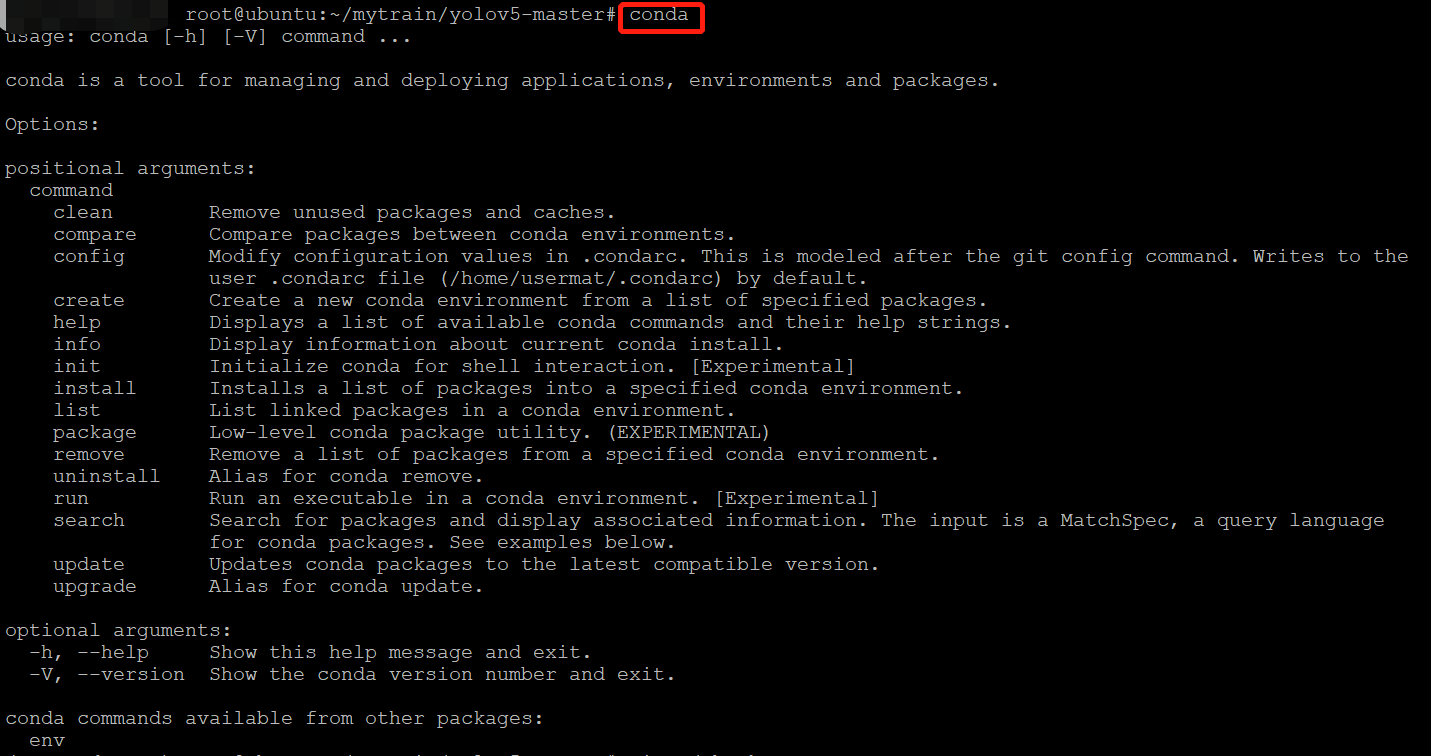
6. Verification
conda
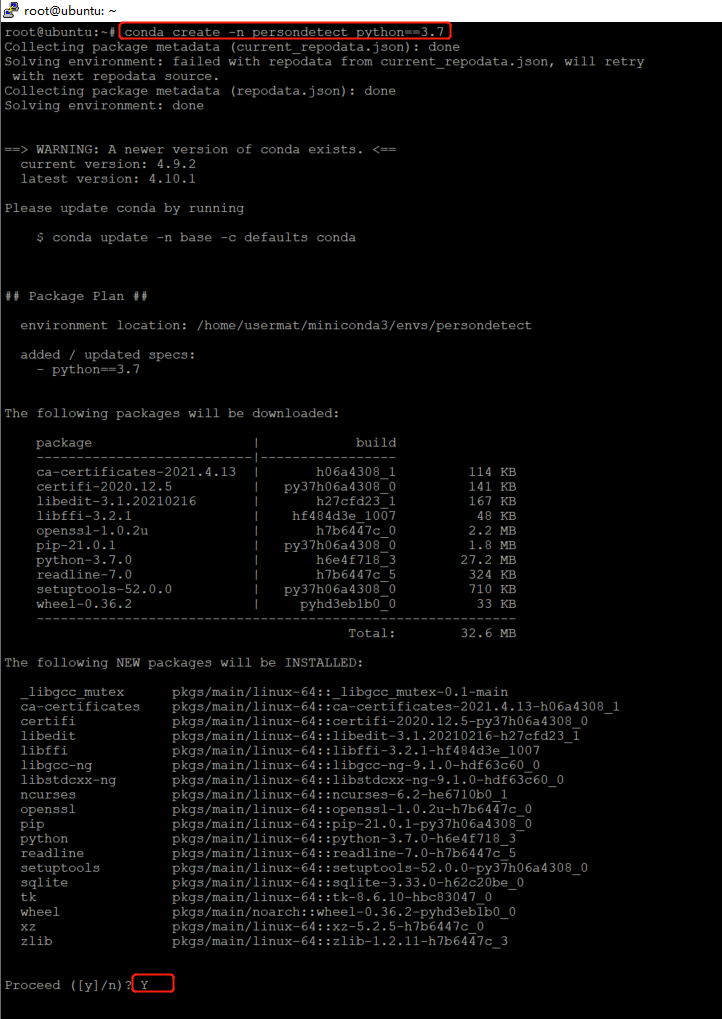
7. Create Python 3 7 virtual environment
conda create -n virtual environment name python==3.7
Some common commands for virtual environments:
The next time you want to enter this virtual environment: conda activate virtual environment name
Switch to another virtual environment: conda source activate other virtual environment names
Exit (end) virtual environment: conda deactivate
Check which virtual environments are available: conda env list
Done!
2, yolov5 configuration
1.github download yolob5 project
git clone https://github.com/ultralytics/yolov5
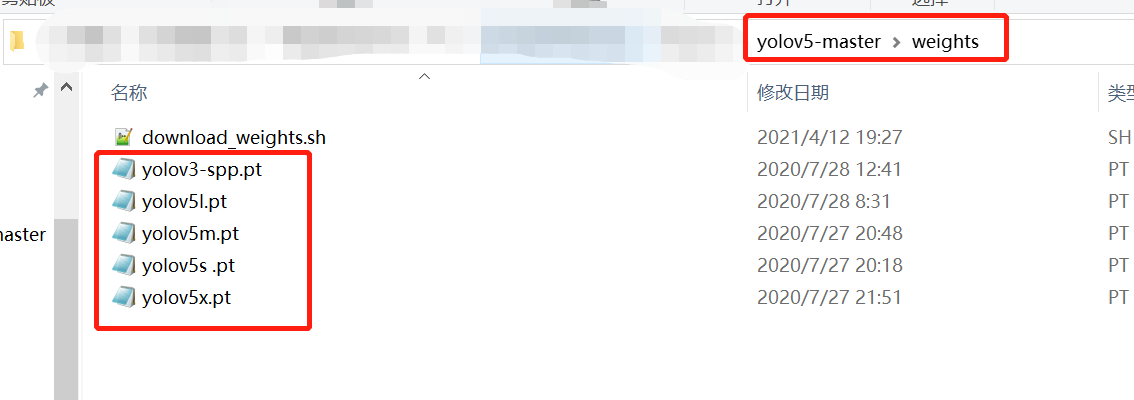
2. Download pt file
Run download_weights.sh download or download it yourself and put it in the weights path (for convenience, the figure below shows what it looks like in windows)
3. Run yolov5
(1) (in virtual environment) enter the directory of yolov5 and execute
pip install -r requirements.txt
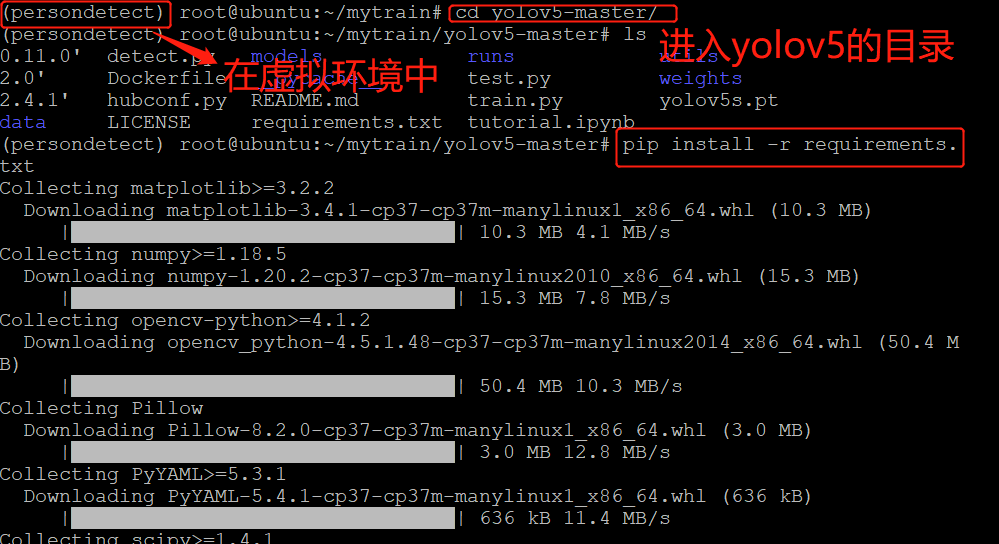
(2) Execute
python detect.py
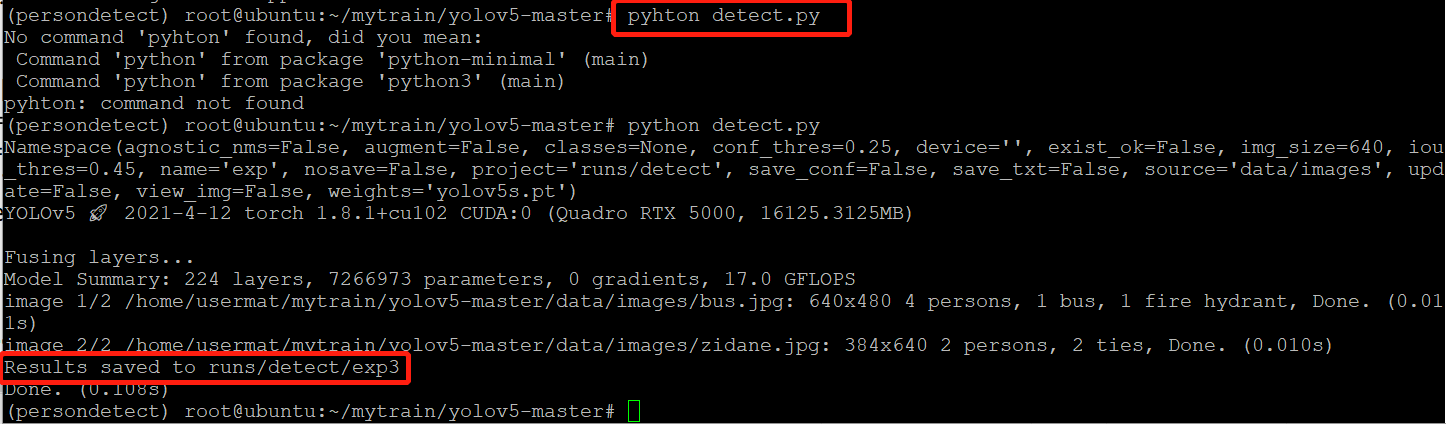
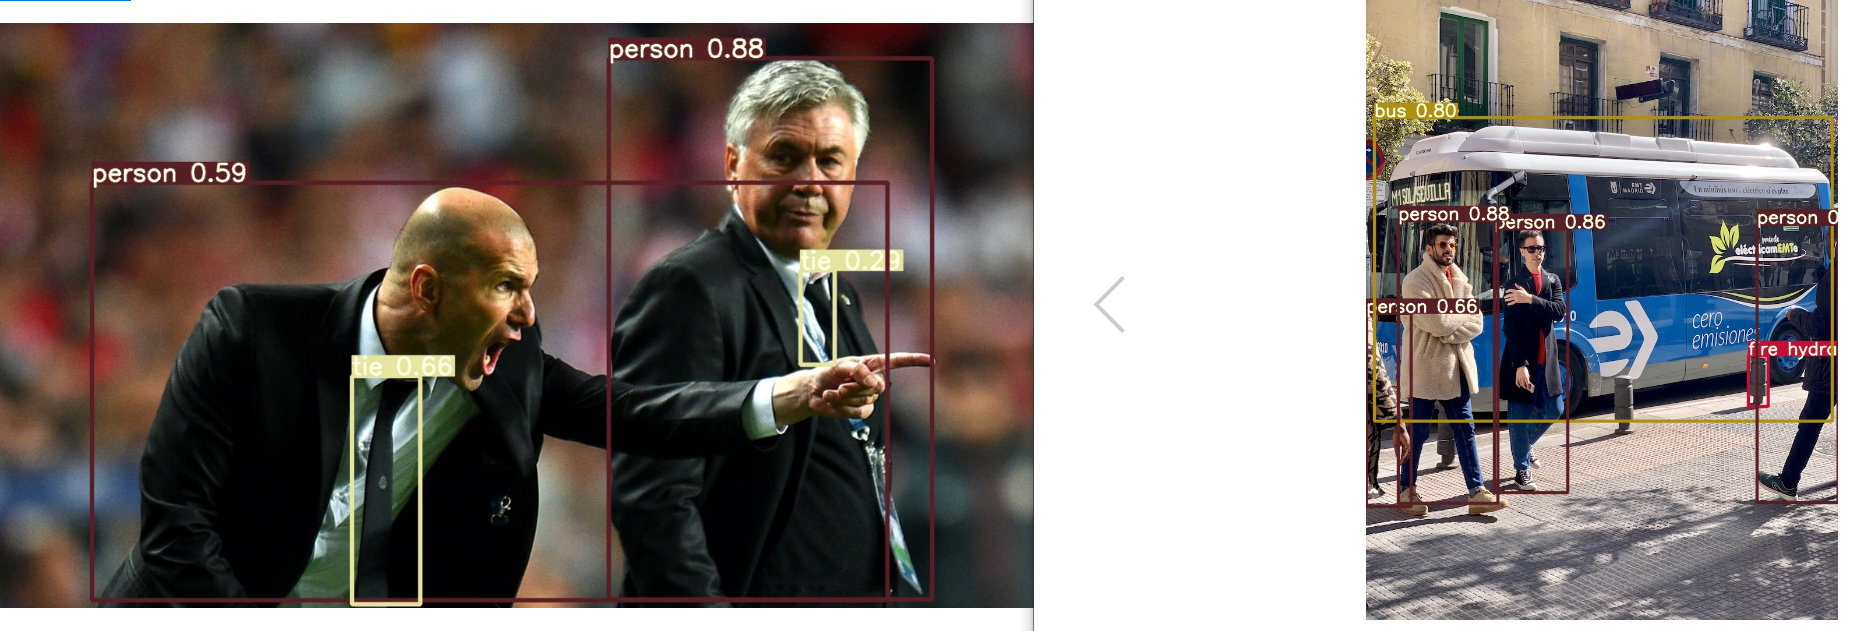
(3) You can see two result pictures in the path (figure in the previous step). Finish
Done!
3, Train your own dataset
What I need to do is train a person only (not the kind that changes the configuration file to actually recognize 80 but only show one)
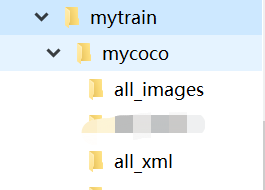
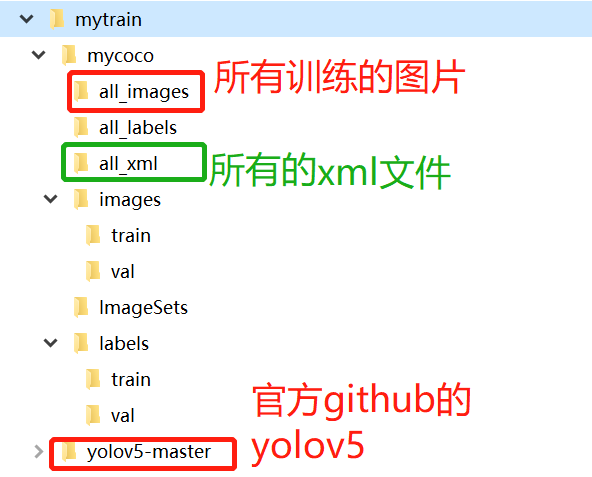
- Create the following folder in mytrain folder, all_images put all pictures, all_xml to all xml files. Then put the official code of yolov5 downloaded by GitHub in the mytrain folder
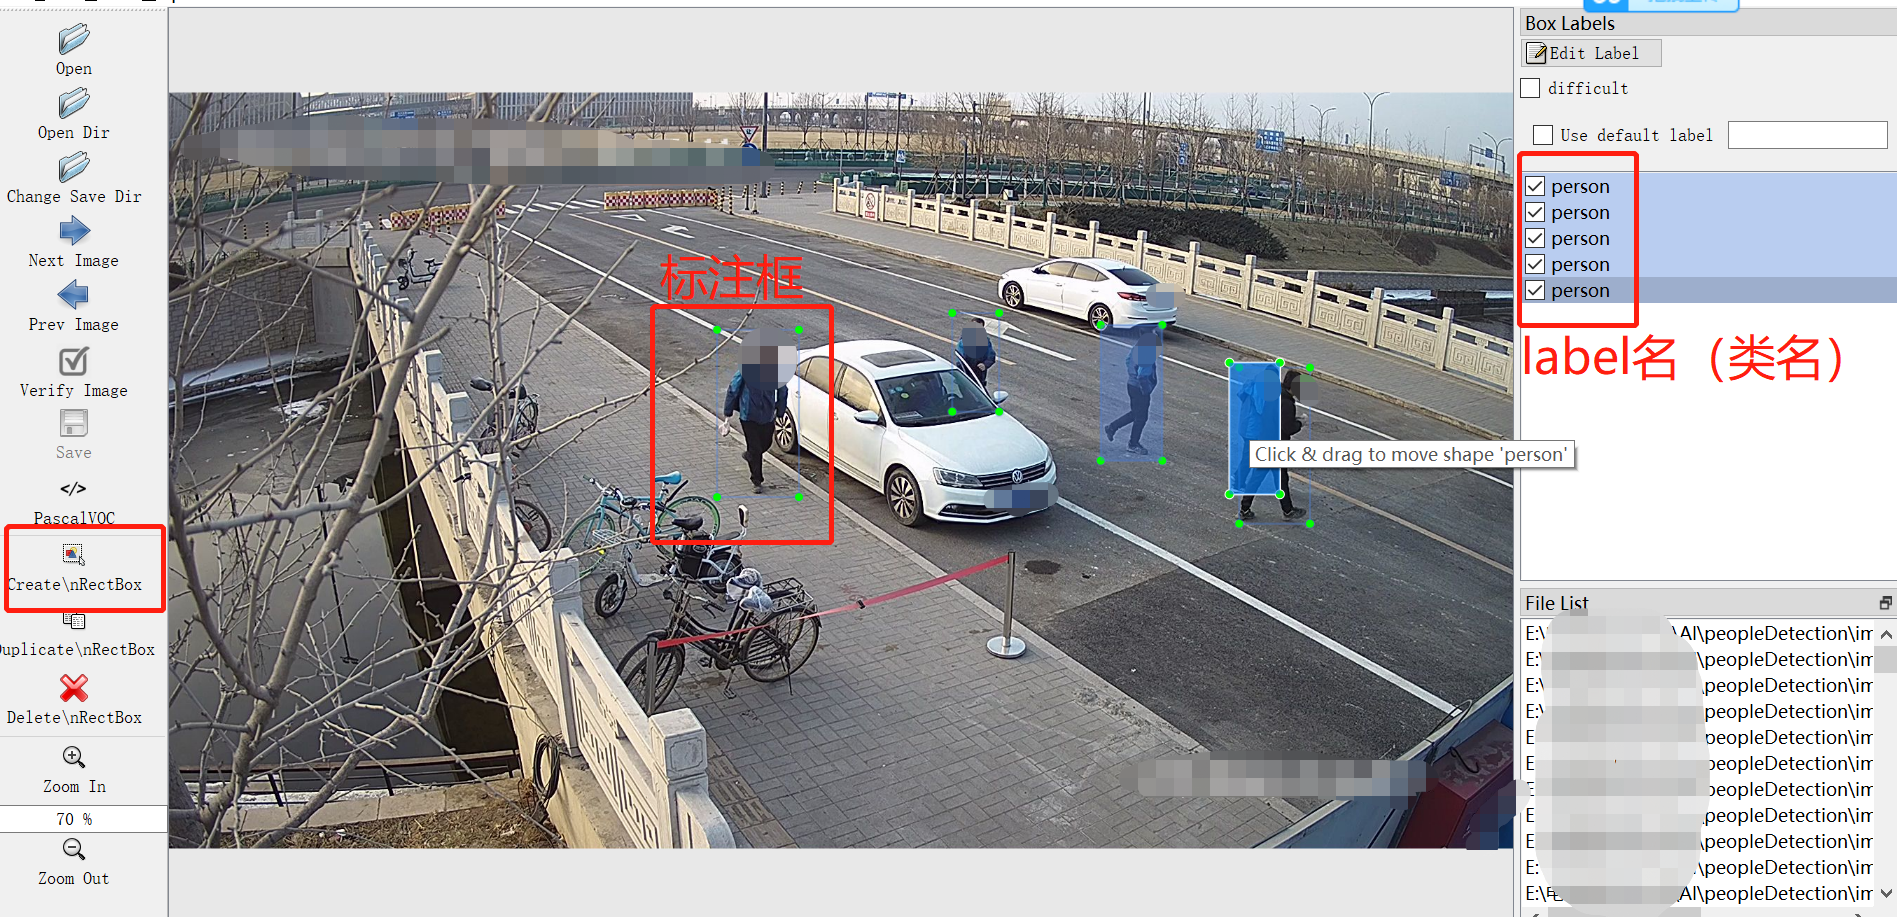
- Label the picture with labelImg. If you already have labelImg, you can skip this step
(1) windows+r open cmd
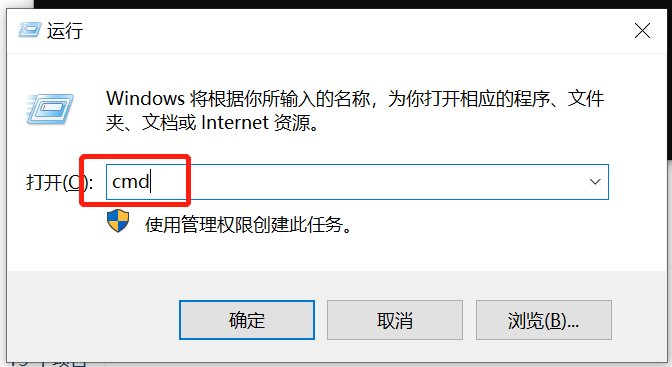
(2) Download labelImg
pip install -i https://pypi.tuna.tsinghua.edu.cn/simple labelImg
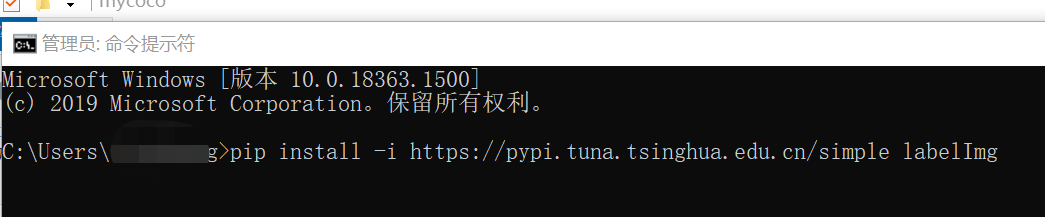
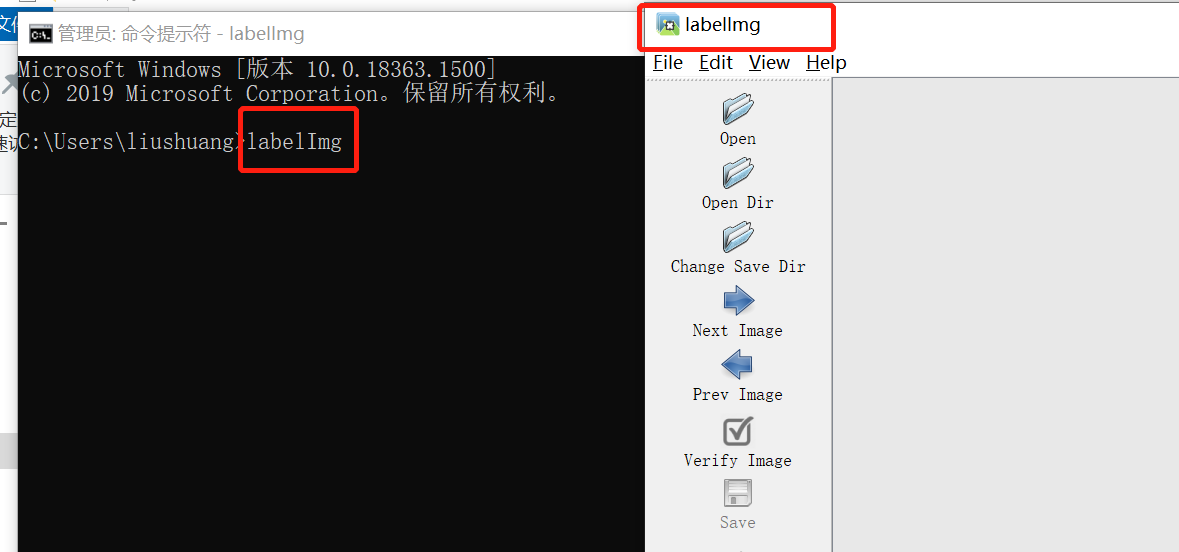
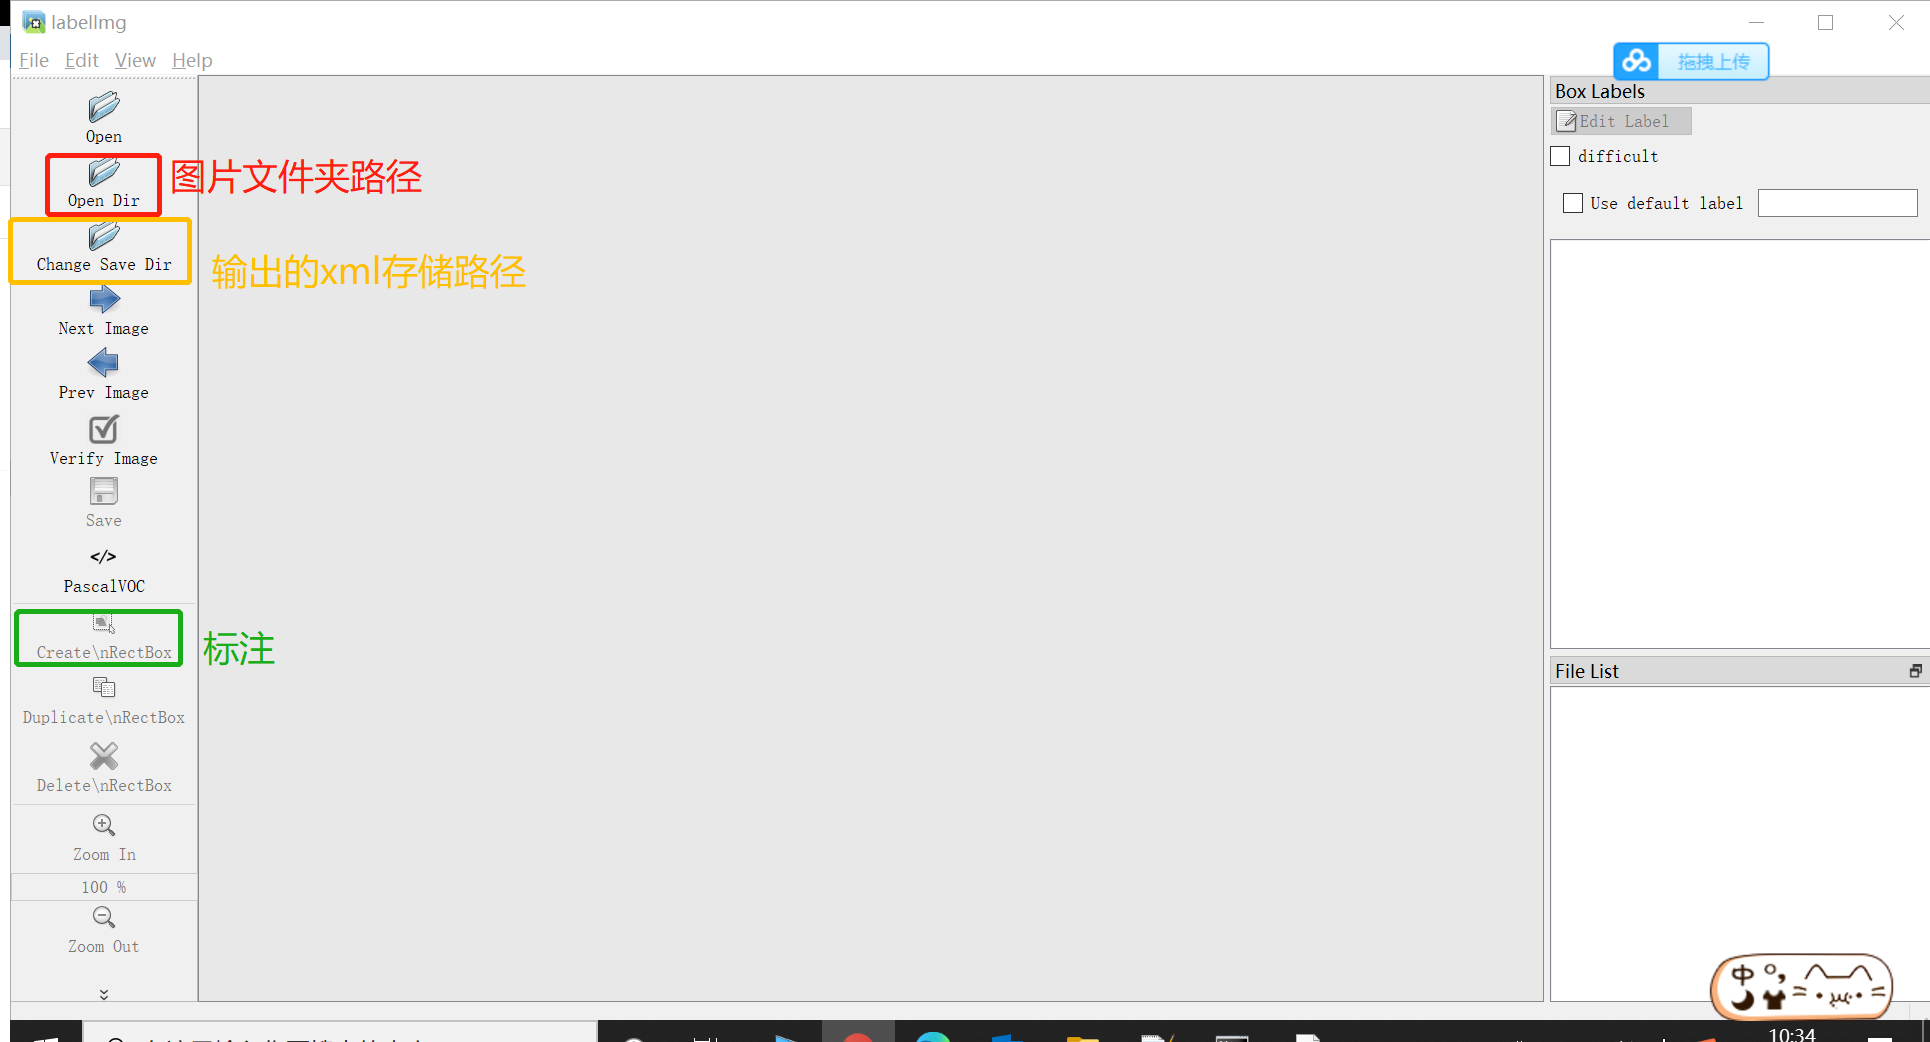
(3) Open labelImg
- Open labelImg and mark the picture (open dir is all_images, save dir is all_xml)
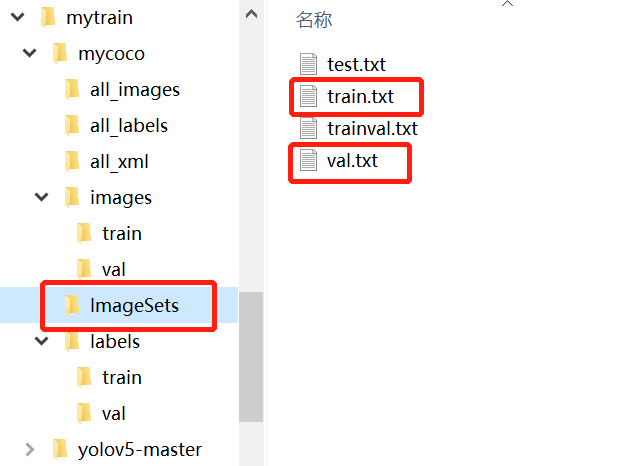
4. Create python file make_txt.py (used to turn the xml just generated into txt) code is as follows, and run
import os
import random
trainval_percent = 0.1
train_percent = 0.9
xmlfilepath = 'all_images'
txtsavepath = 'ImageSets'
total_xml = os.listdir(xmlfilepath)
num = len(total_xml)
list = range(num)
tv = int(num * trainval_percent)
tr = int(tv * train_percent)
trainval = random.sample(list, tv) #Returns tv a number of items from all list s
train = random.sample(trainval, tr)
if not os.path.exists('ImageSets/'):
    os.makedirs('ImageSets/')
ftrainval = open('ImageSets/trainval.txt', 'w')
ftest = open('ImageSets/test.txt', 'w')
ftrain = open('ImageSets/train.txt', 'w')
fval = open('ImageSets/val.txt', 'w')
for i in list:
    name = total_xml[i][:-4] + '\n'
    if i in trainval:
        ftrainval.write(name)
        if i in train:
            ftest.write(name)
        else:
            fval.write(name)
    else:
        ftrain.write(name)
ftrainval.close()
ftrain.close()
fval.close()
ftest.close()
5. The structure of the document is as follows
6. Create a train_voc.py file, the code is as follows. And run
import xml.etree.ElementTree as ET
import pickle
import os
import shutil
from os import listdir, getcwd
from os.path import join
sets = ['train', 'trainval']
classes = ['person']#Change to your own category
def convert(size, box):
    dw = 1. / size[0]
    dh = 1. / size[1]
    x = (box[0] + box[1]) / 2.0
    y = (box[2] + box[3]) / 2.0
    w = box[1] - box[0]
    h = box[3] - box[2]
    x = x * dw
    w = w * dw
    y = y * dh
    h = h * dh
    return (x, y, w, h)
def convert_annotation(image_id):
    in_file = open('E:/mytrain/mycoco/all_xml/%s.xml' % (image_id),encoding='utf-8',errors='replace')#Change to your own path
    out_file = open('E:/mytrain/mycoco/all_labels/%s.txt' % (image_id), 'w' )#Change to your own path
    tree = ET.parse(in_file)
    root = tree.getroot()
    size = root.find('size')
    w = int(size.find('width').text)
    h = int(size.find('height').text)
    for obj in root.iter('object'):
        difficult = obj.find('difficult').text
        cls = obj.find('name').text
        if cls not in classes or int(difficult) == 1:
            continue
        cls_id = classes.index(cls)
        xmlbox = obj.find('bndbox')
        b = (float(xmlbox.find('xmin').text), float(xmlbox.find('xmax').text), float(xmlbox.find('ymin').text),
             float(xmlbox.find('ymax').text))
        bb = convert((w, h), b)
        out_file.write(str(cls_id) + " " + " ".join([str(a) for a in bb]) + '\n')
wd = getcwd()
print(wd)
for image_set in sets:
    if not os.path.exists('all_labels/'):
        os.makedirs('all_labels/')
    image_ids = open('ImageSets/%s.txt' % (image_set)).read().strip().split()
    image_list_file = open('images_%s.txt' % (image_set), 'w')
    labels_list_file=open('labels_%s.txt'%(image_set),'w')
    for image_id in image_ids:
        image_list_file.write('%s.jpg\n' % (image_id))
        labels_list_file.write('%s.txt\n'%(image_id))
        #convert_annotation(image_id)
#If the label is already in txt format, comment out this line and store all txt in all_labels folder.
    image_list_file.close()
    labels_list_file.close()


def copy_file(new_path,path_txt,search_path):#Parameter 1: the location where the new file is stored parameter 2: the path of the train and val training data established in the previous step txt file parameter 3: the location of the searched file
    if not os.path.exists(new_path):
        os.makedirs(new_path)
    with open(path_txt, 'r') as lines:
        filenames_to_copy = set(line.rstrip() for line in lines)
        # print('filenames_to_copy:',filenames_to_copy)
        # print(len(filenames_to_copy))
    for root, _, filenames in os.walk(search_path):
        # print('root',root)
        # print(_)
        # print(filenames)
        for filename in filenames:
            if filename in filenames_to_copy:
                shutil.copy(os.path.join(root, filename), new_path)

#Divide the path to the new training file and copy it to yolo according to the training format
copy_file('E:/mytrain/mycoco/images/train/','E:/mytrain/mycoco/images_train.txt','E:/mytrain/mycoco/all_image')#Change to your own path
copy_file('E:/mytrain/mycoco/images/val/','E:/AI/peopleDetection/mytrain/mycoco/images_trainval.txt','E:/mytrain/mycoco/all_image')#Change to your own path
copy_file('E:/mytrain/mycoco/labels/train/','E:/mytrain/mycoco/labels_train.txt','E:/mytrain/mycoco/all_labels')#Change to your own path
copy_file('E:/mytrain/mycoco/labels/val/','E:/mytrain/mycoco/labels_trainval.txt','E:/mytrain/mycoco/all_labels')#Change to your own path
Check whether there are pictures in the train and val folders of the images folder.
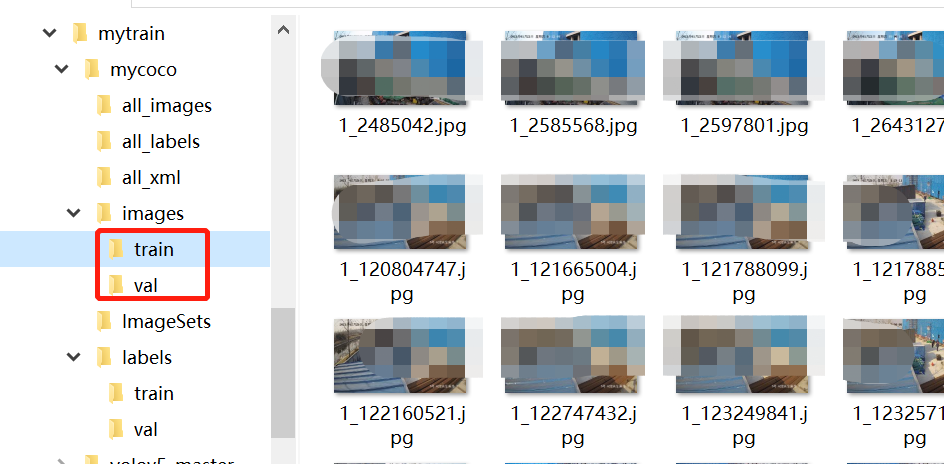
If not, you can refer to train in ImageSets Txt and val.txt put the corresponding pictures into the folder
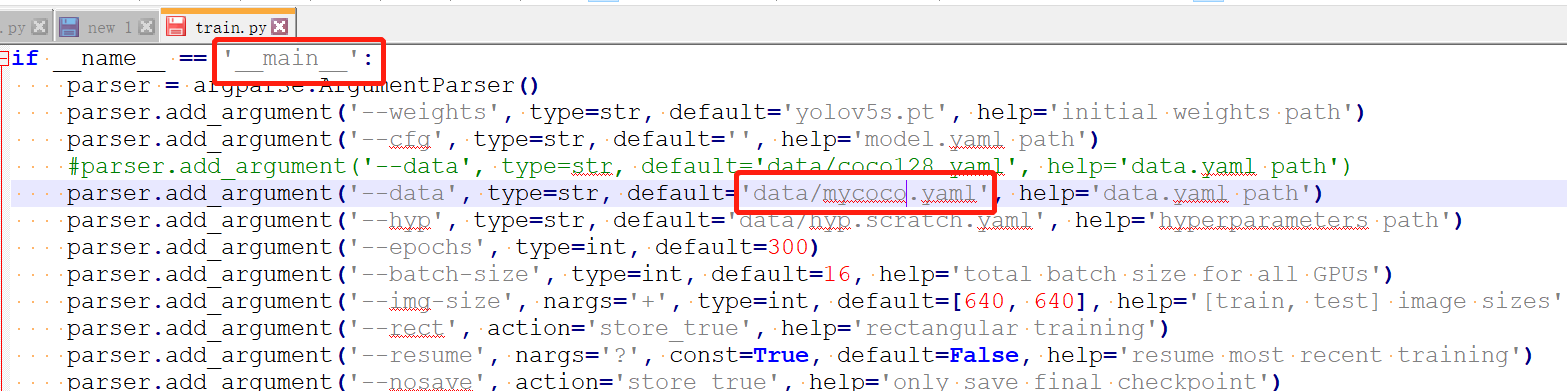
7. Change train yaml file used in PY
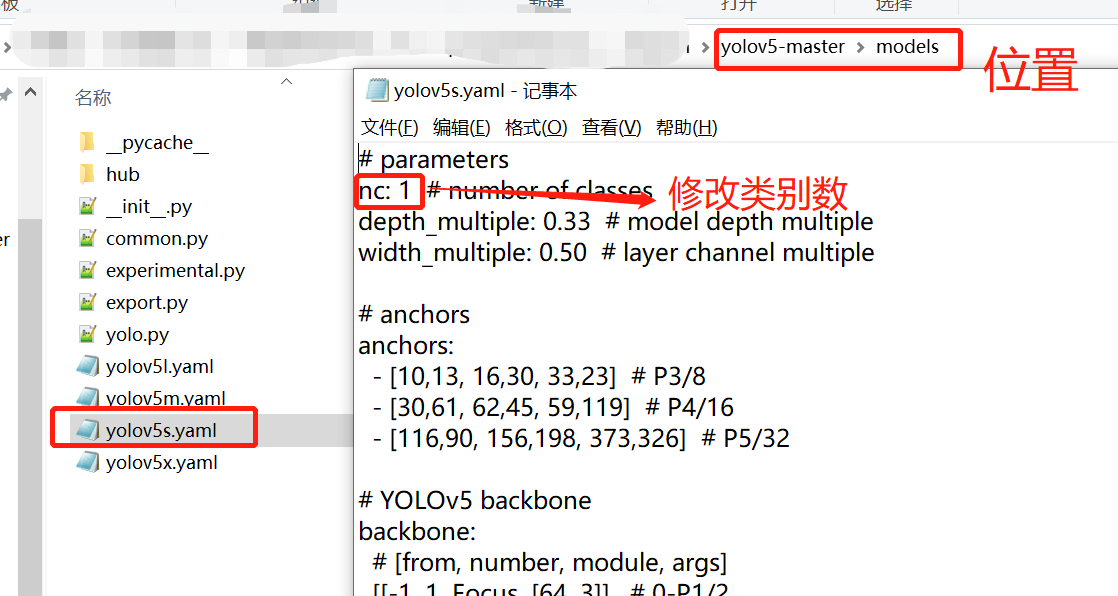
8. Modify yolov5s In the category of person, I only recognize 1:1
9. Run train py
python train.py
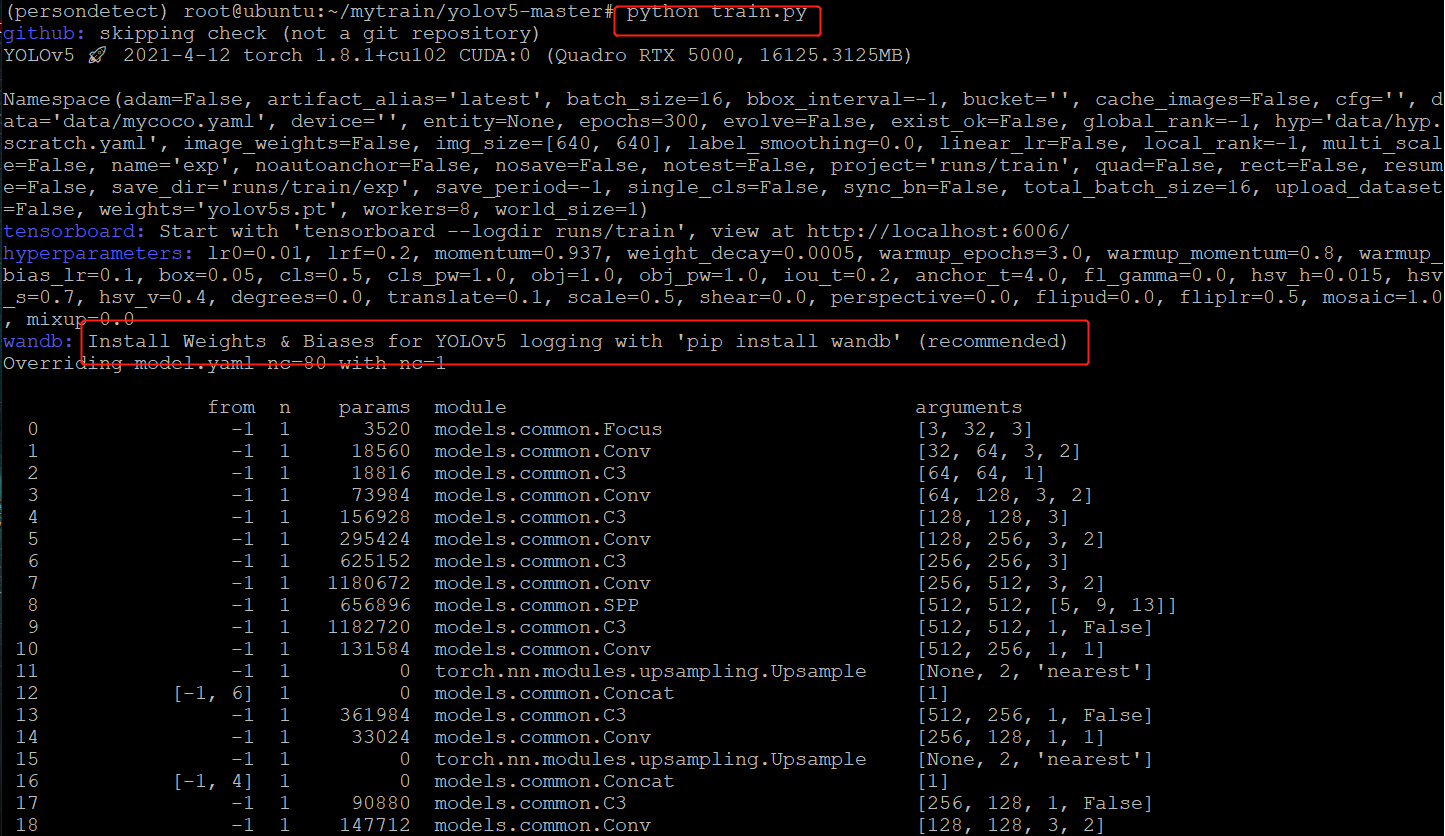
There will be an error of wandb here. Operate according to the prompt or comment out the part of wandb in the code. The following is the solution to not annotate wandb:
pip install wandb
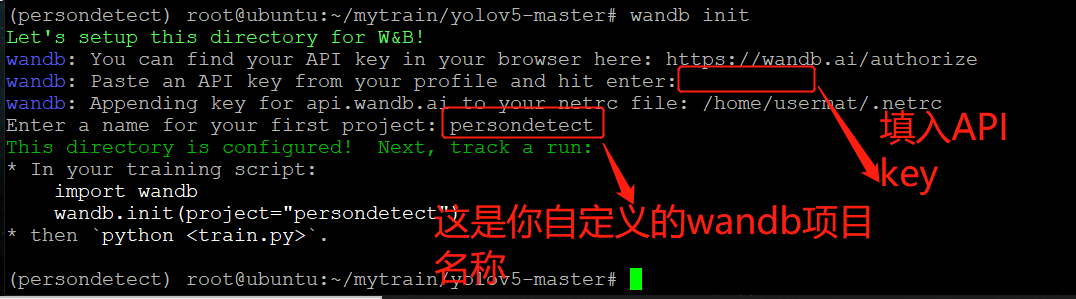
wandb init

Open browser login https://wandb.ai/authorize , complete the registration (scientific Internet access may be required)
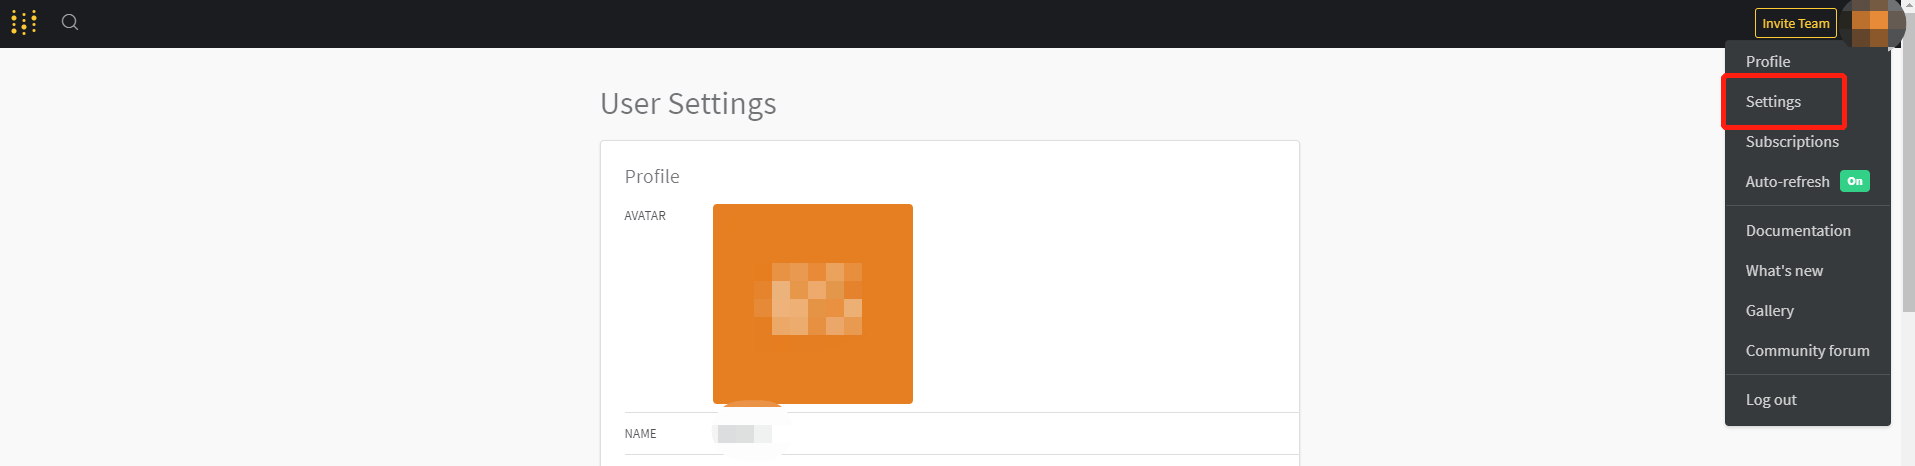
After registration, it looks like this
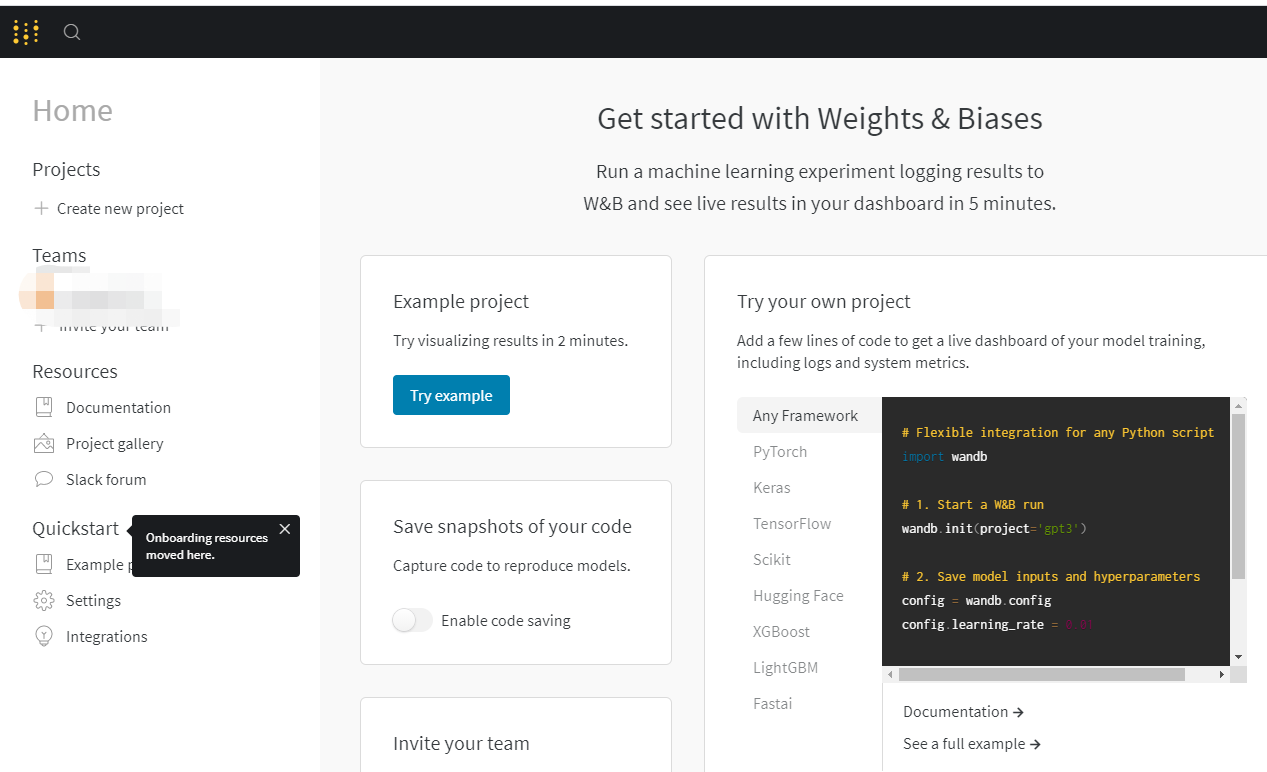
APIkey is in the setting in the upper right corner
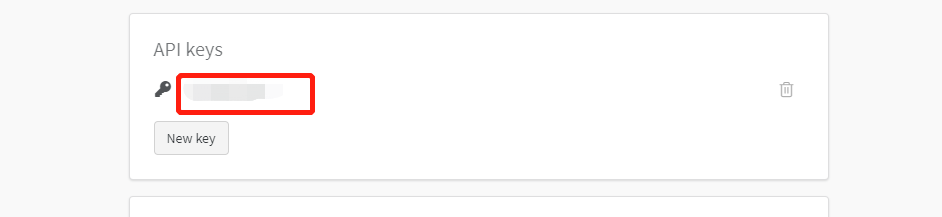
Go back to linux, fill in the APIkey, and enter the user-defined wandb project name (just choose one, no other operation is required)
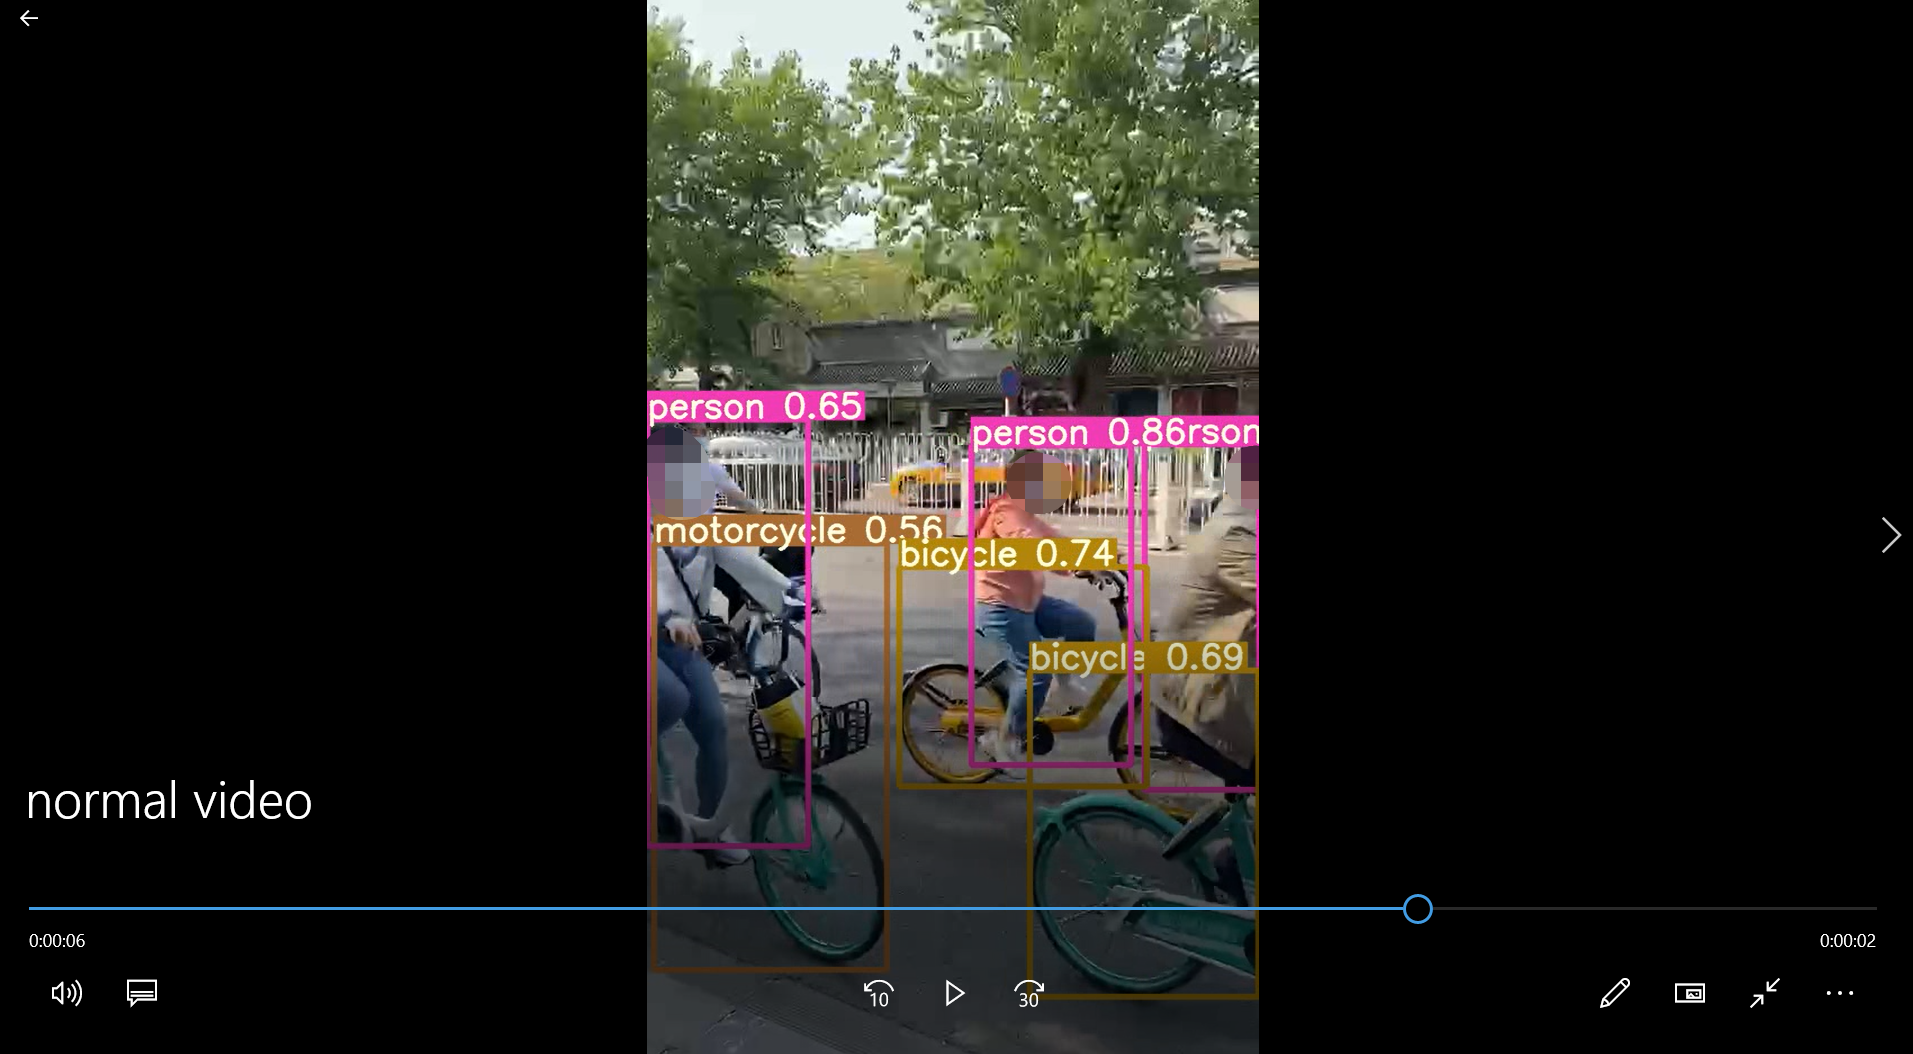
10. If you want to detect your own video (pictures also apply), the video is called normal video MP4, the weight file uses yolov5 pt
python detect.py --source normal video.mp4 --weights yolov5s.pt --conf 0.4
According to the prompt, look for the detected file in runs/detect/exp5 (everyone's results may be different)

Done!
Virtual environment reference: https://blog.csdn.net/weixin_43840215/article/details/89599559
Training reference: https://blog.csdn.net/weixin_48994268/article/details/115282688